In this tutorial, we’ll guide you through OmniChat’s department management features. We’ll cover setting up departments, customizing display options, and automating department assignments using JavaScript and API.
Departments give you the power to distribute conversations and assign various agents to specific departments. For example, you can create a department entitled “Sales” and assign specific conversations to that department. To start using departments, follow the steps below:
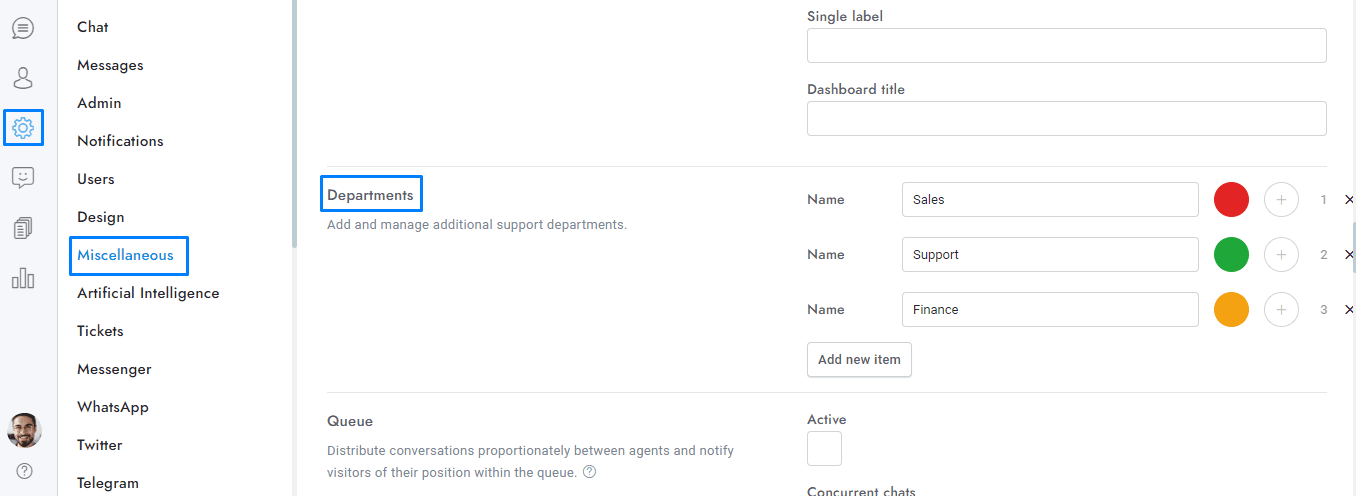
- Go to Settings > Miscellaneous and add, delete and manage the departments. After saving, reload the page.
- Go to Users > Agents and edit an agent, you will see a new field where you can set the department of the agent.
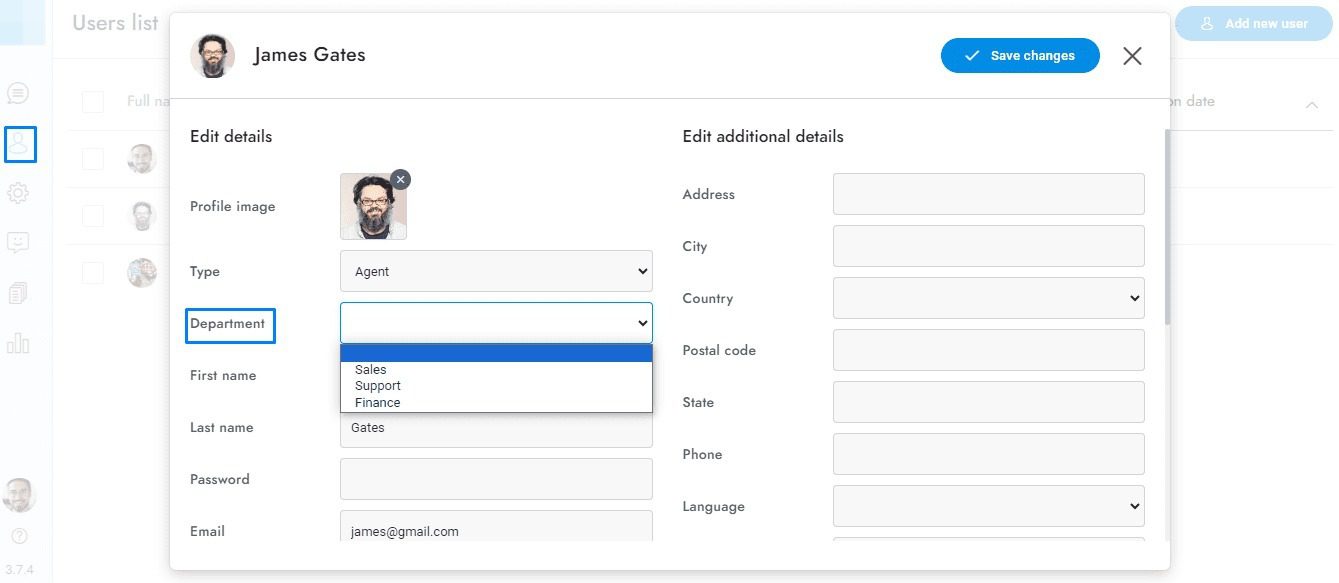
- Reload the page and you’re done! In the Conversations area, you will now see an option to set the department.
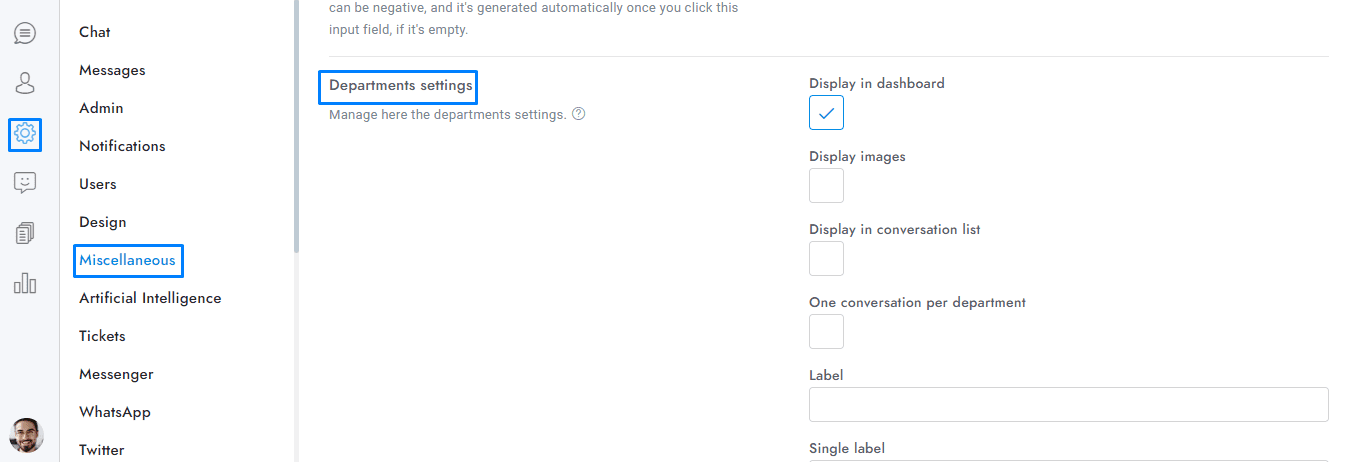
Settings
- Display in dashboard Displays the departments’ list in the chat dashboard and force users to choose a department before starting a conversation.
- Display images Displays the department image instead of the department color.
- Display in conversation list Displays the department color in the conversation list of the admin area.
- One conversation per department Restrict users from opening multiple conversations within the same department, allowing only one conversation to be active per department.
- Label Replace the label Departments (plural) with another text. The name is displayed in the admin and tickets area.
- Label single Replace the label Department (singular) with another text. The name is displayed in the admin and tickets area.
- Dashboard title Set the title of the chat dashboard list. Default: Departments.
How it works
- Agents and admins can only access conversations, users, and agents that have been assigned to their specific department.
- When an agent is assigned to a new department, an email notification is sent to all of the agents assigned to the new department.
- The General department is global and gives agents access to all of the conversations within all departments. Also, all agents without a department are automatically assigned to the General department.
- To automatically assign a department to the user conversations you can Enter the JavaScript variable var SB_DEFAULT_DEPARTMENT = ID; into the pages where the chat is displayed, replace ID with the department ID.
For more details, you can ask the AI here.
- Admins with no assigned department always see the conversations of all departments.
- The chatbot can assign a department to the active conversation via Dialogflow actions.
How to assign a department
You can assign a department to a conversation in several ways:
- Via Settings > Miscellaneous > Departments settings > Display in dashboard. This setting will force the user to choose a department when starting a new conversation.
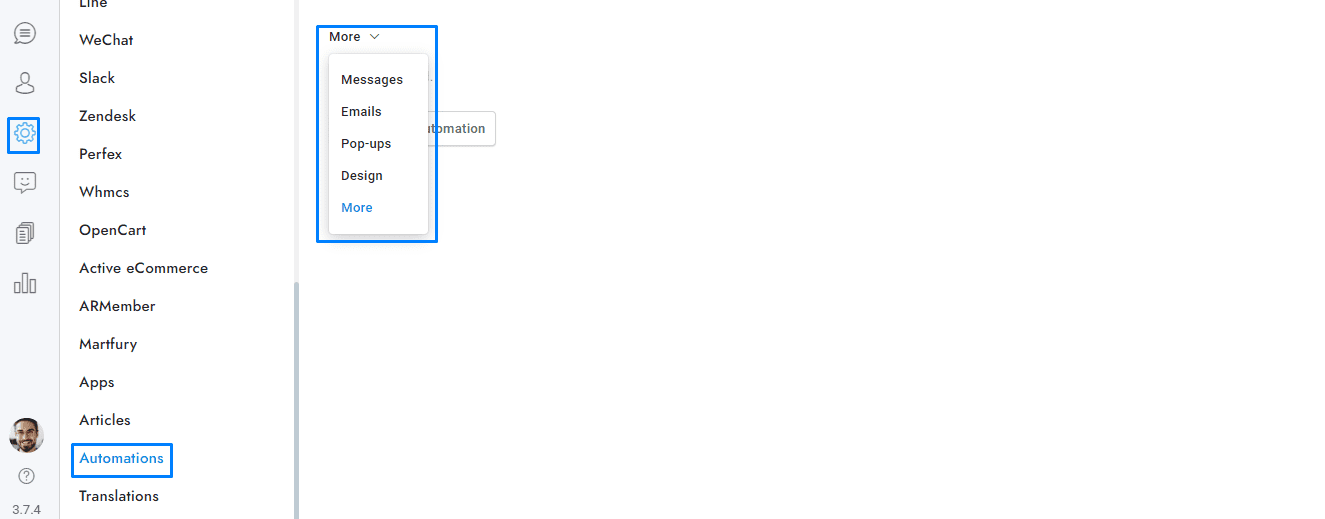
- Via Settings > Automations > More.
- Via JavaScript the variable var SB_DEFAULT_DEPARTMENT = ID;. Enter the code into the pages where the chat is displayed and replace ID with the department ID.
For more details, you can ask the AI here.
If you have additional doubts, remember that you can always contact us.
