Enhance your WhatsApp conversations with BotCommerce’s interactive chatbots! With our chatbots, you can add navigation buttons, create various user pathways, and even take orders using the User Interface Flow feature to collect information. In this article, we’ll guide you through the step-by-step process of creating a chatbot with these features.
Getting Started
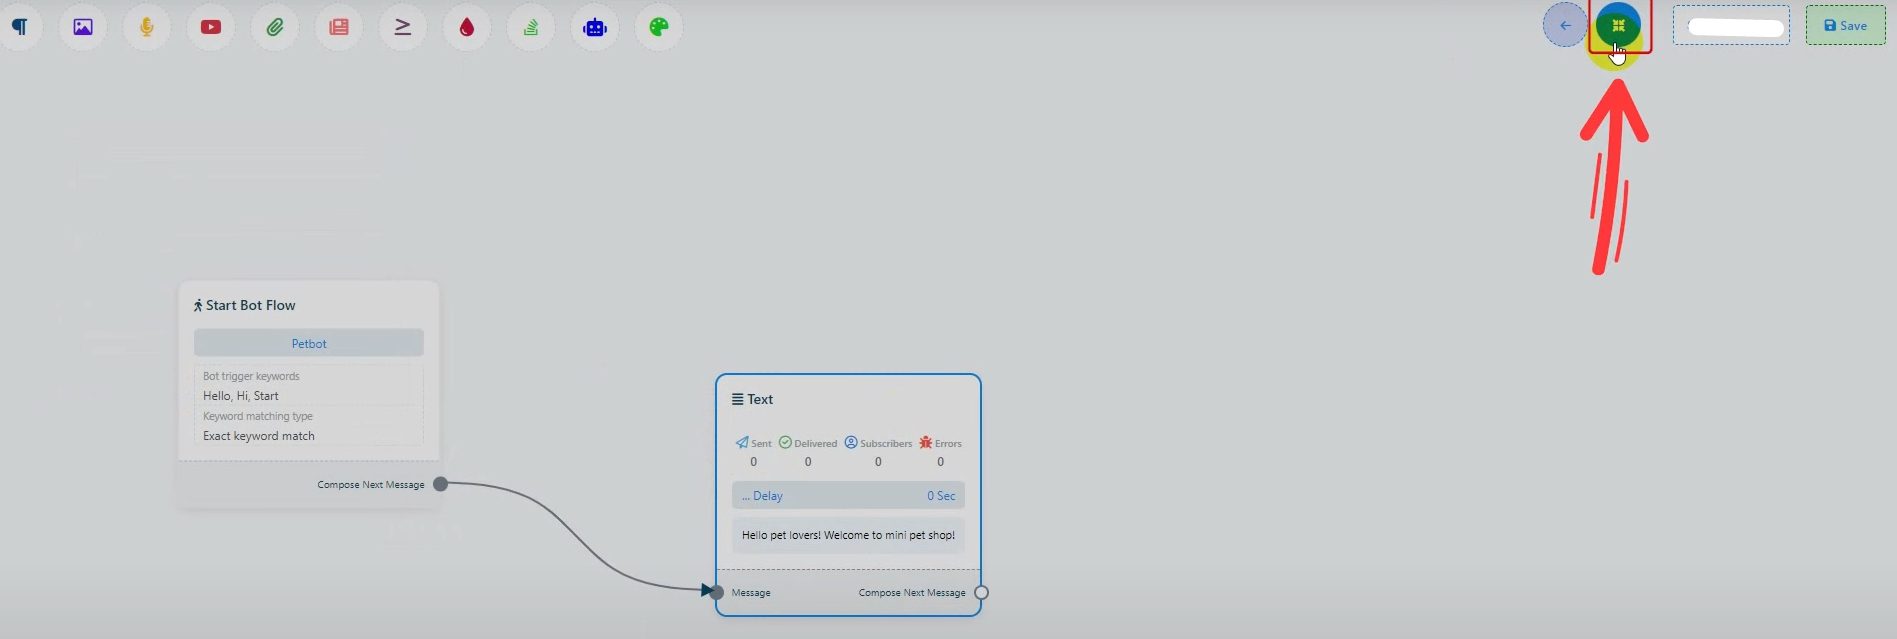
Log in to BotCommerce and head over to the dashboard.
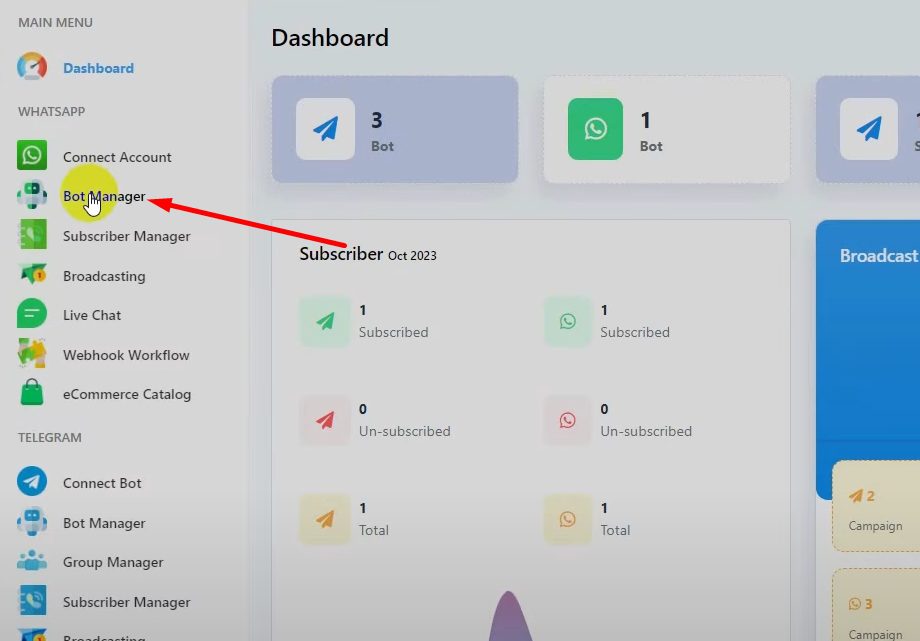
Navigate to “Bot Manager” and click “Create”. This will redirect you to the visual drag-and-drop Flow Builder.
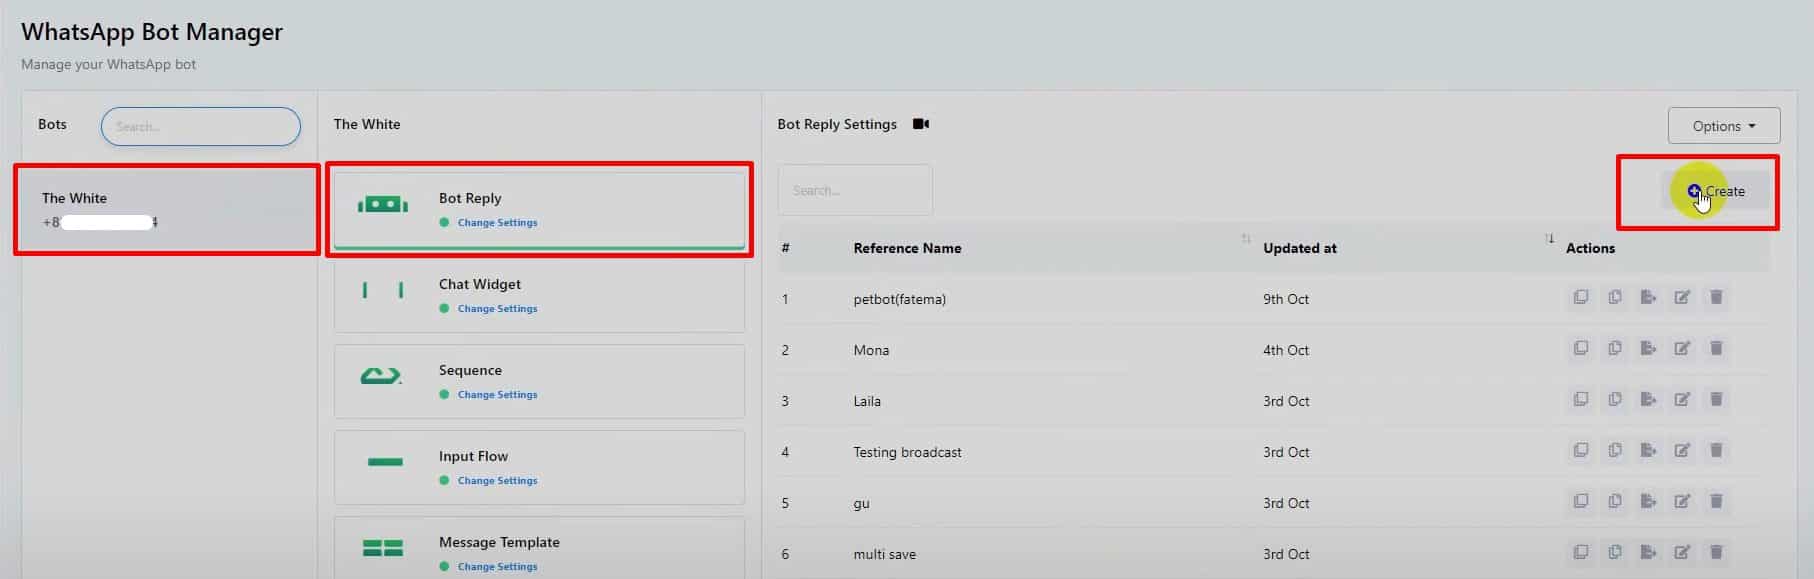
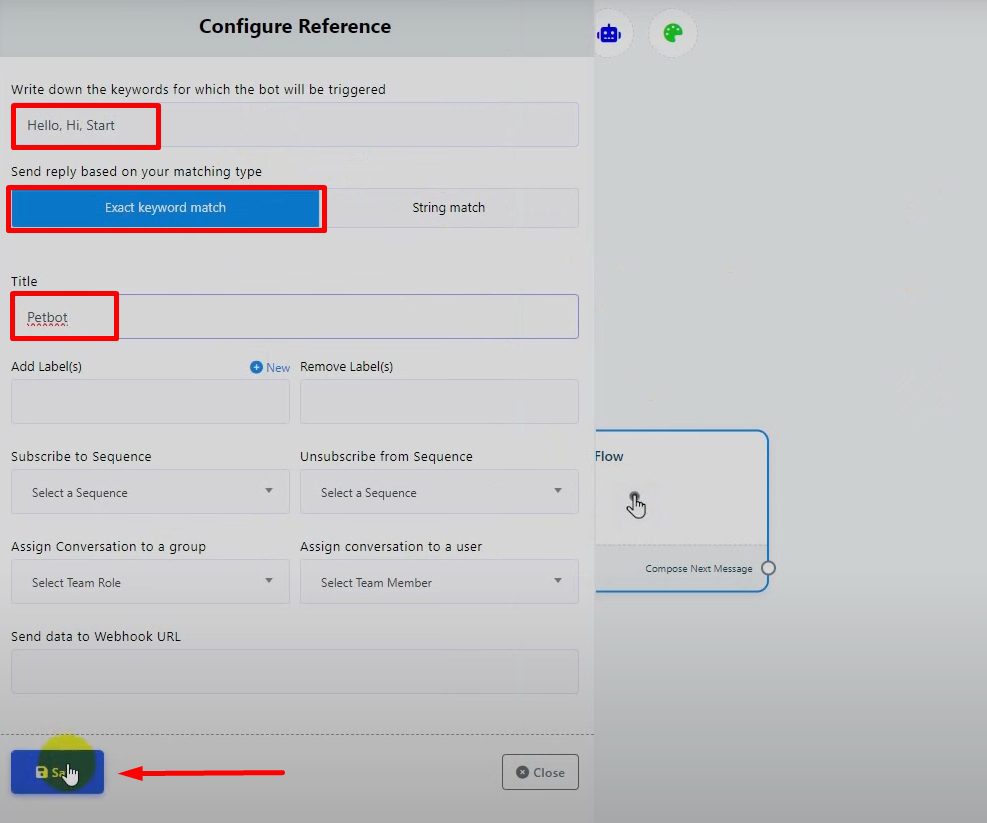
Double-click the chatbot flow to add trigger words like “hello”, “hi”, or “start”. Add a title for your chatbot. For example, if it’s a pet shop bot, name it “Pet Bot”.
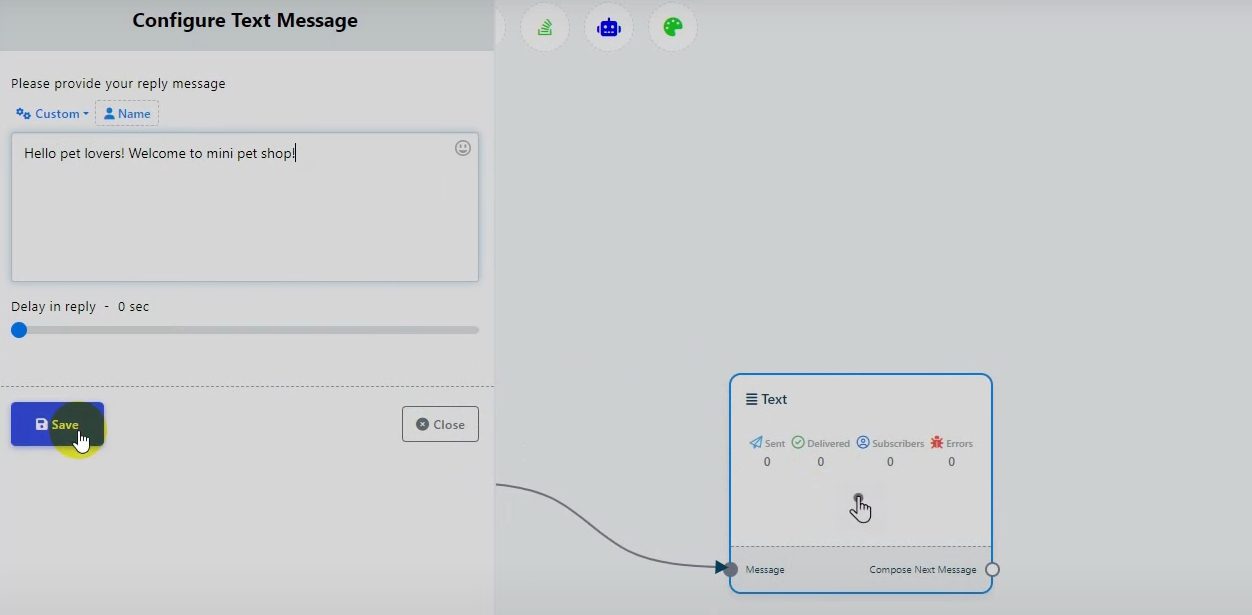
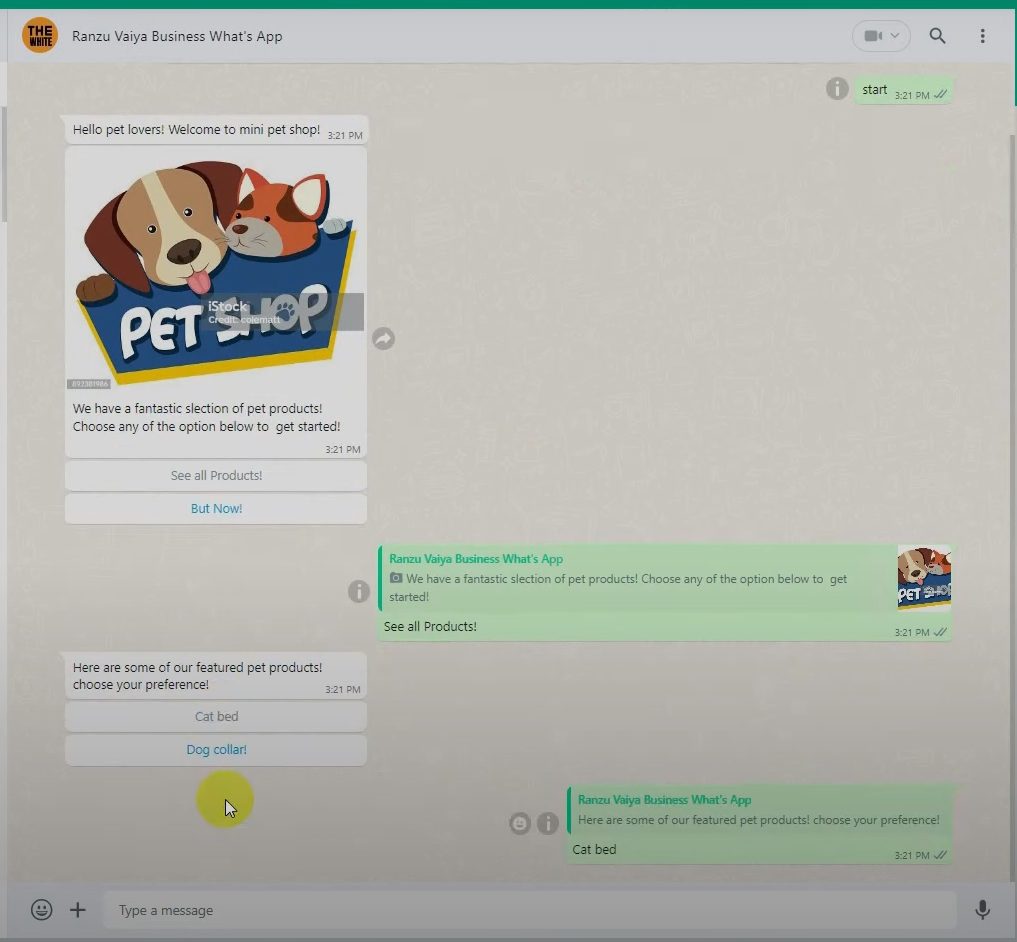
Add a welcome text. Click the text button and write a greeting, such as “Hello pet lovers, and welcome to Mini Pet Shop”.
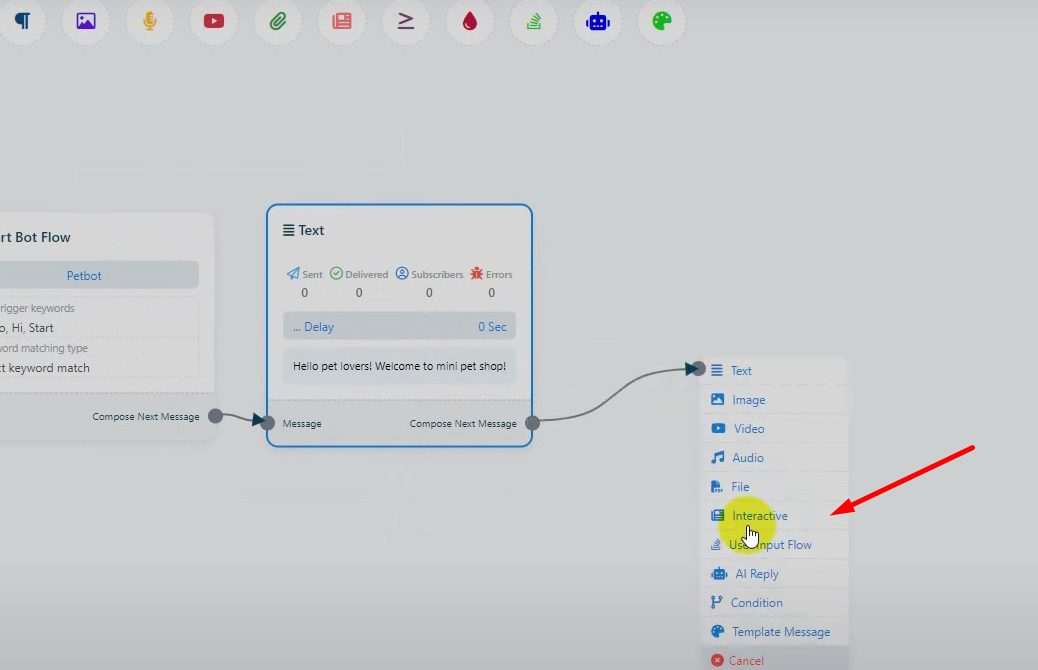
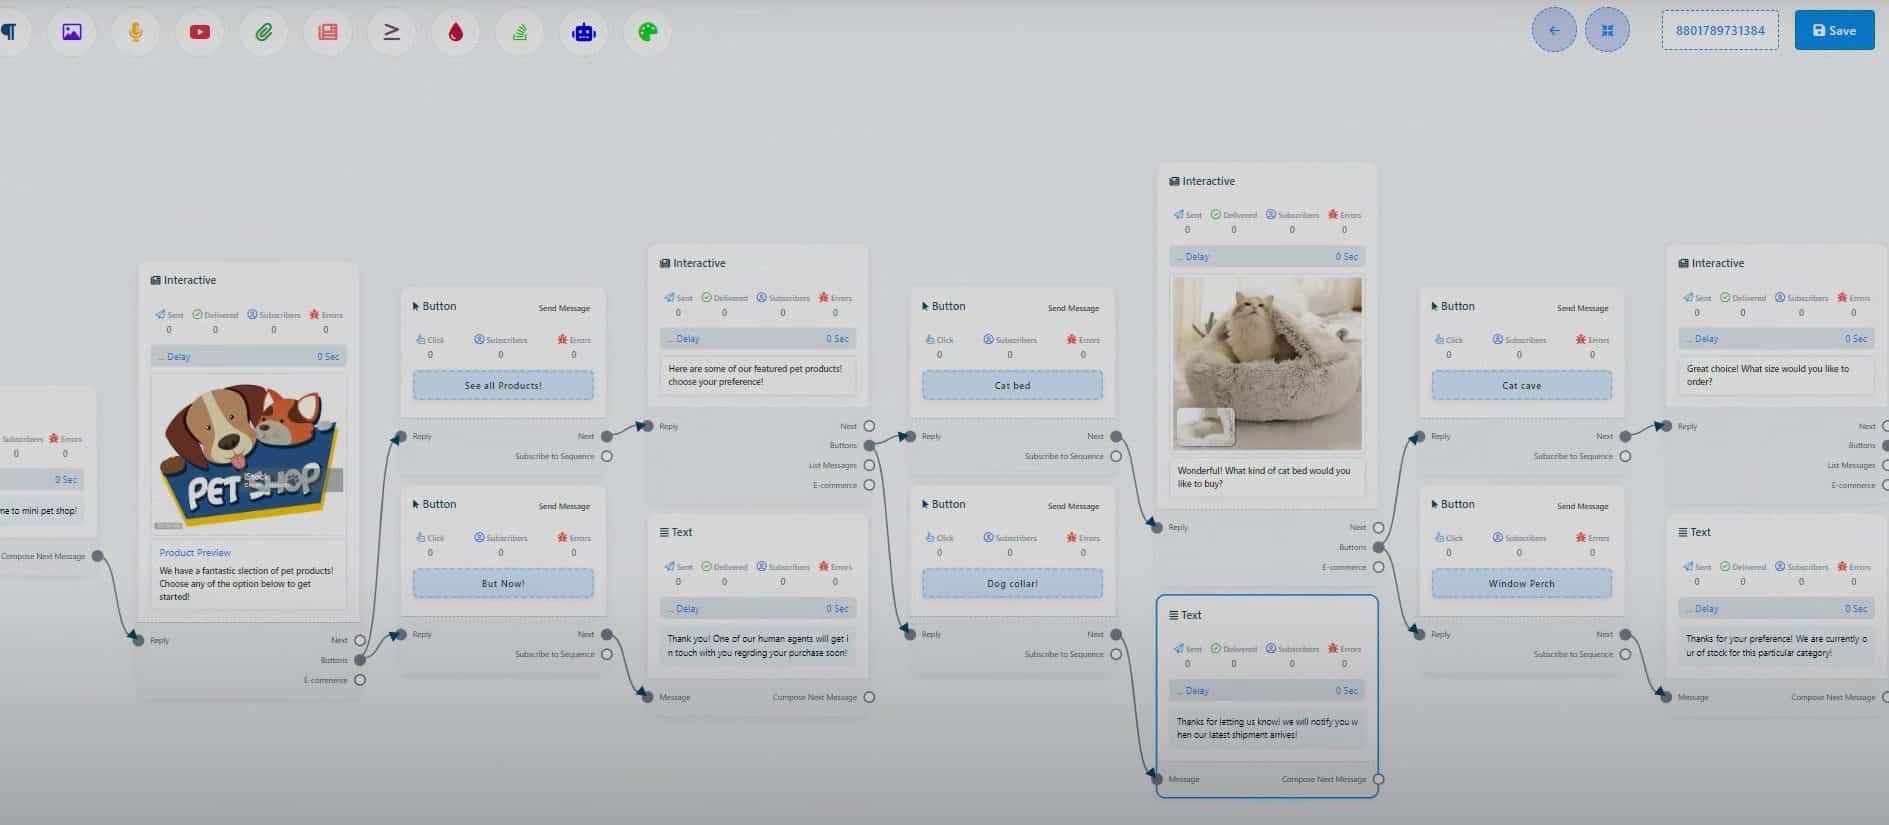
Organize your chatbot’s interface by adding interactive elements to collect user input.
Use interactive elements to provide options for the user, such as buttons. Double click on the element to edit it.
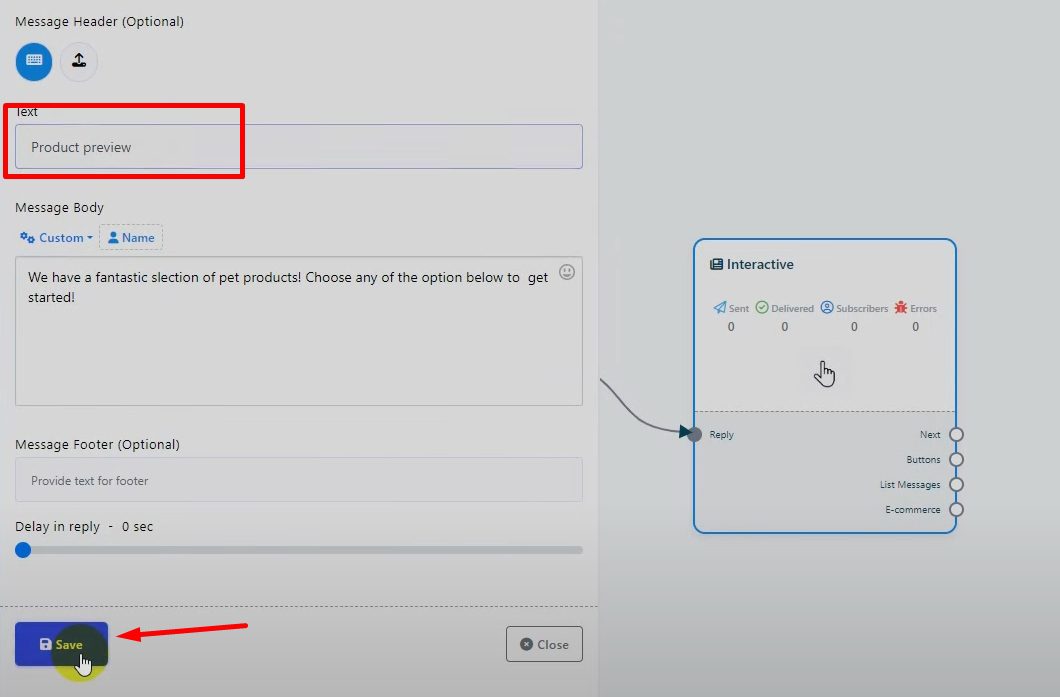
Write the message body. For example, “We have a fantastic selection of pet products. Choose any option below to get started”.
Add buttons for user interaction. For example, “See All Products” or “Buy Now”.
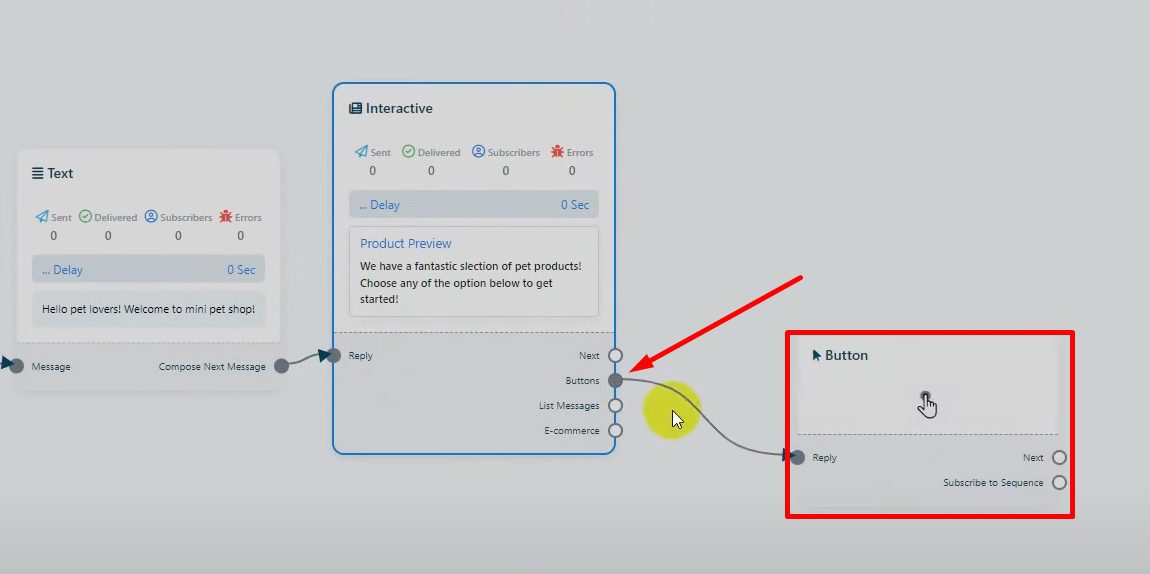
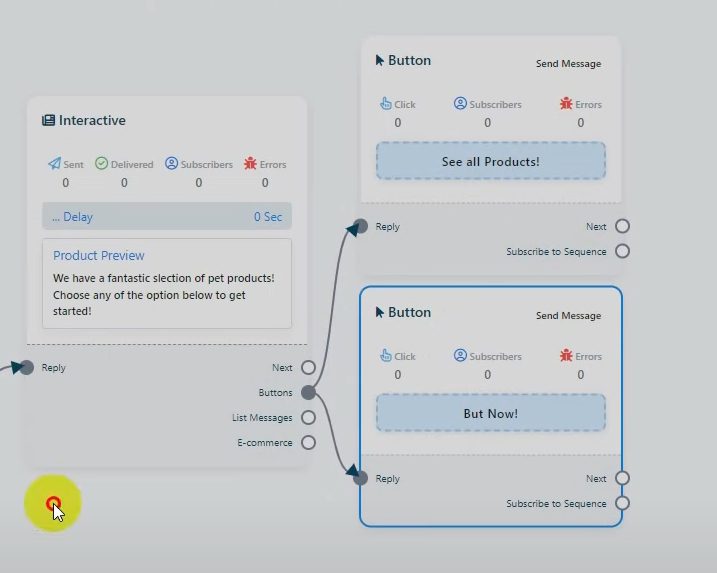
Set up responses for each button. For example, if the user clicks “See All Products”, respond with a list of featured products.
Add interactive elements to allow users to make further selections.

Create flows for each product choice, such as asking for size or type preferences.
Collecting User Information
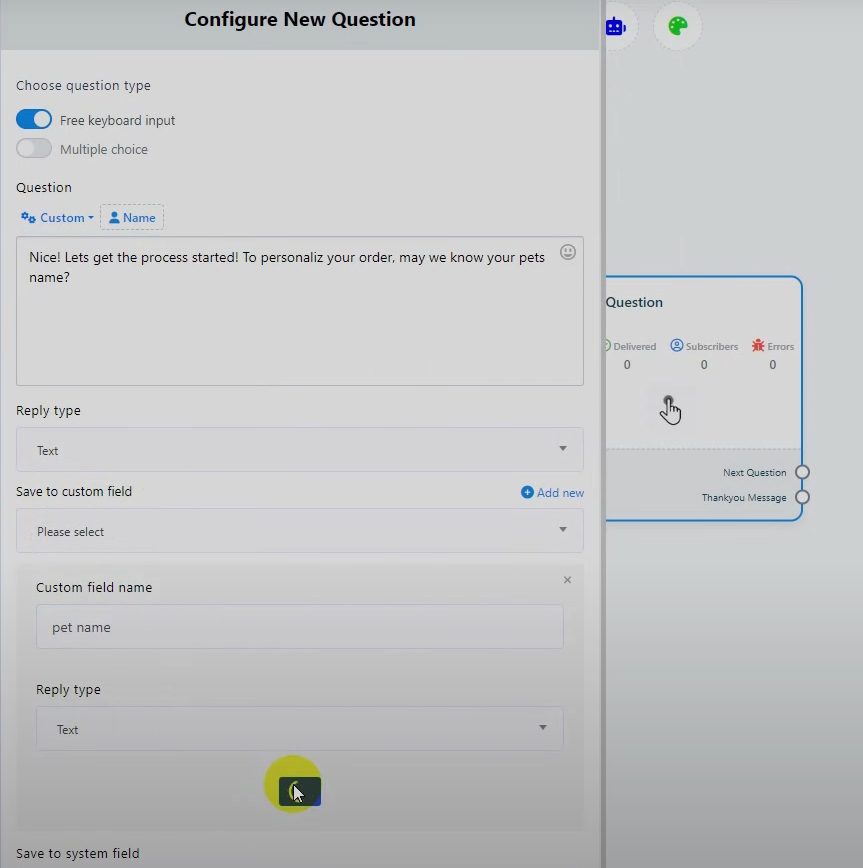
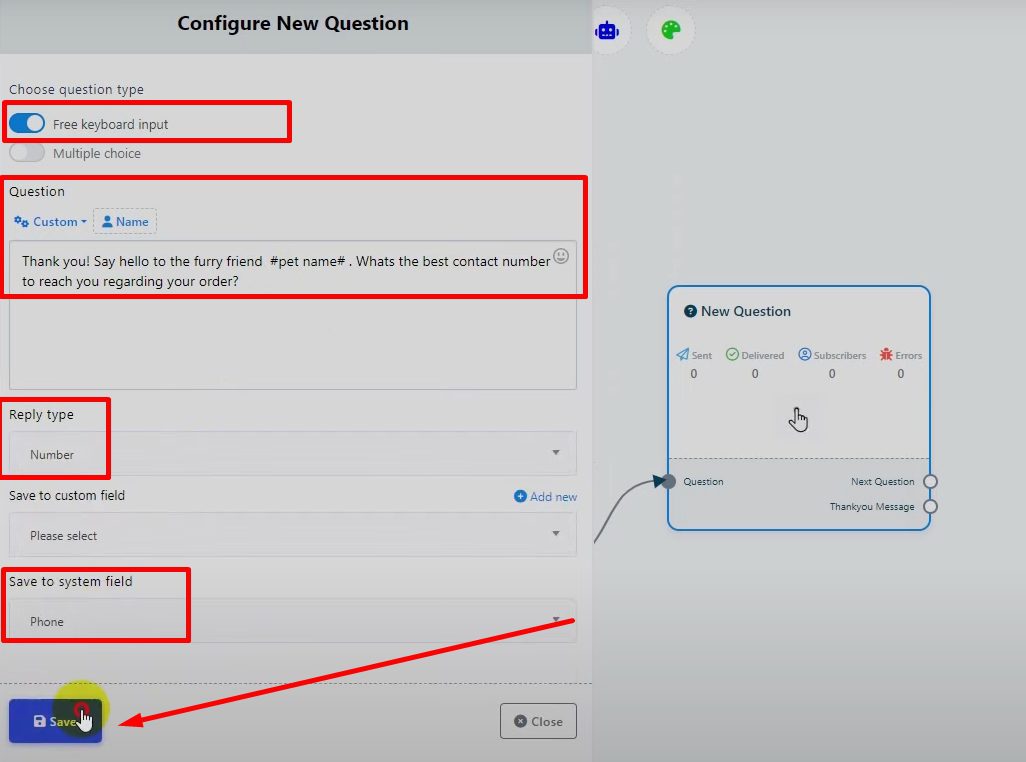
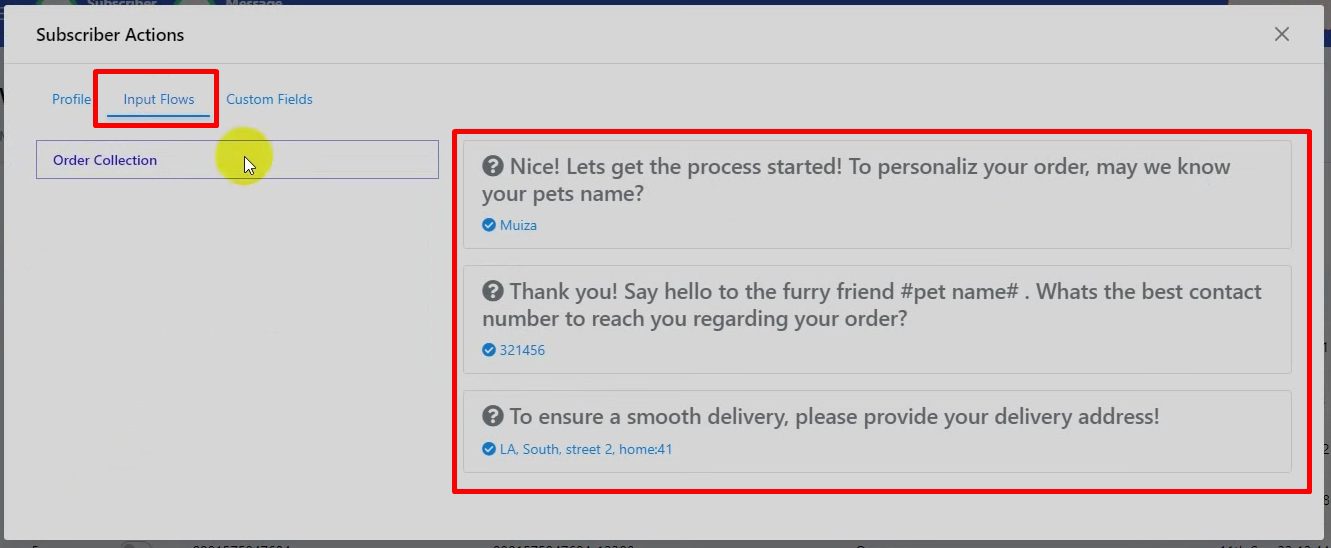
Enable the User Input Flow button to collect and save subscriber data. Drag it into the dashboard and double click on it to configure it. Create a campaign name, such as “Order Collection”.
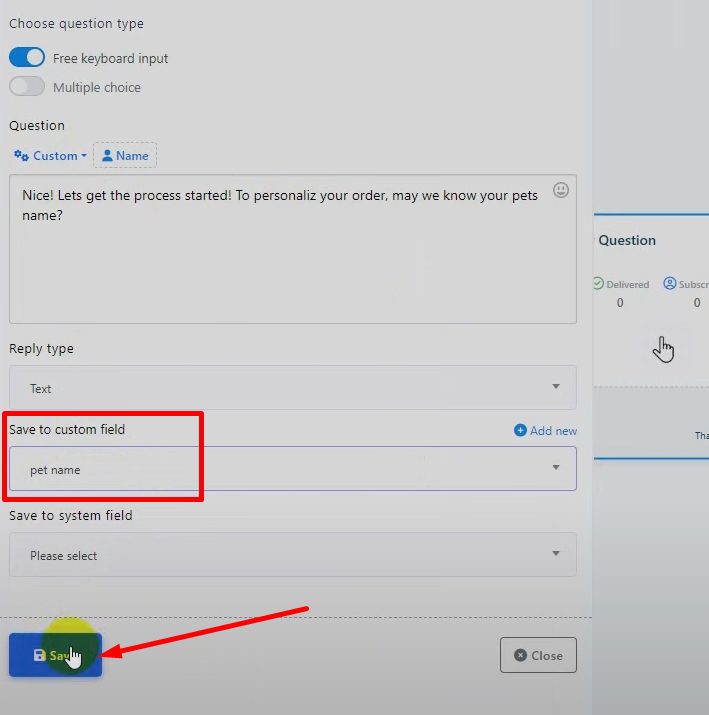
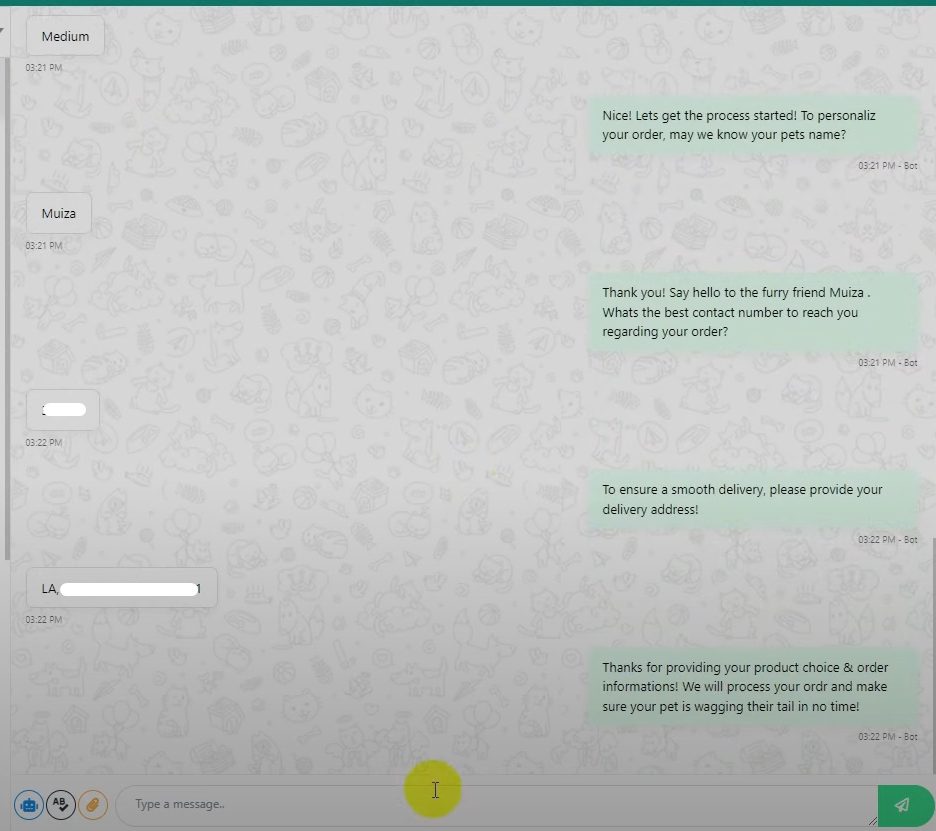
Add personalized questions to gather information. For example, “May we know your pet’s name?”. Drag them into the dashboard and double click on them to configure them. Create a custom field named “Pet Name” to save the response and select it.
Keep adding questions. For example, “What’s the best contact number to reach you regarding your order?”. Set the reply type to number to make sure they give you valid information.
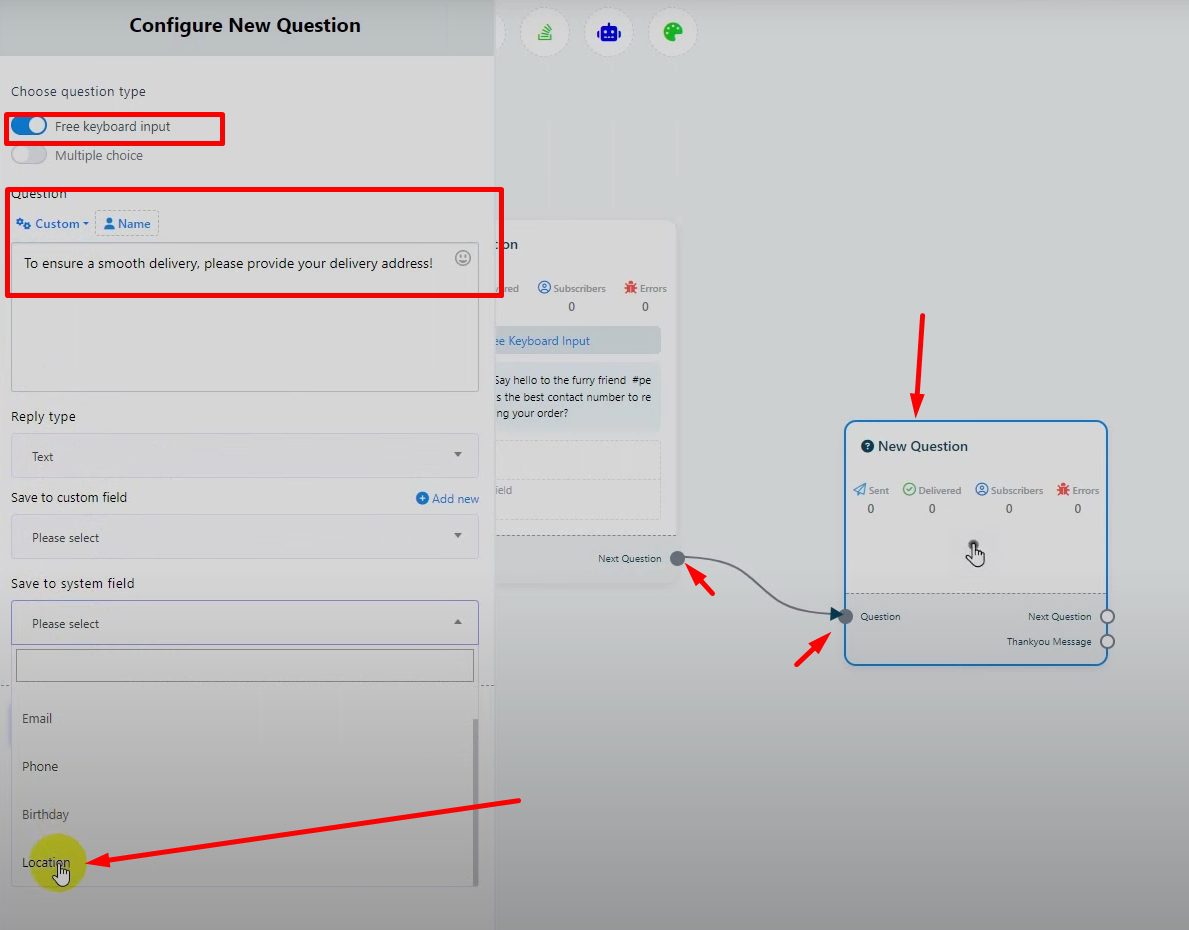
Here’s another example. Write “Please provide your delivery address” and use the system field for location.
Thank the user for providing their product choices and information.
Make the interaction fun by adding a message like “We will process your order and ensure your pet is happy in no time”.
Add responses to all interactive buttons to ensure the bot remains functional.
Use placeholder text if needed to fill in any unattended buttons.
Save your work and test the chatbot using your own WhatsApp account. Verify the responses by interacting with the bot and ensuring it collects and saves data correctly.
Managing and Reviewing Data
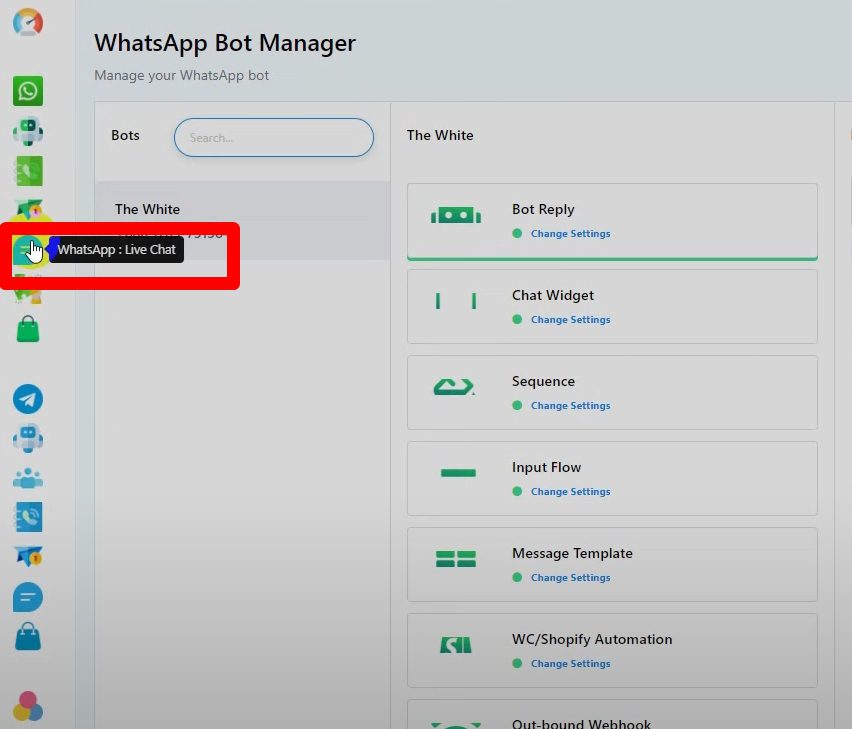
Check the live chat section to view all conversations and collected information.
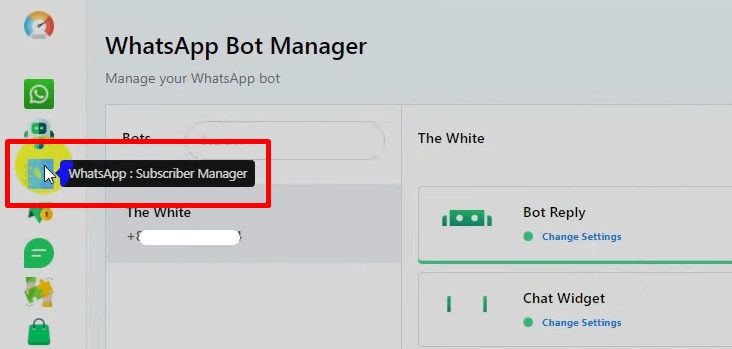
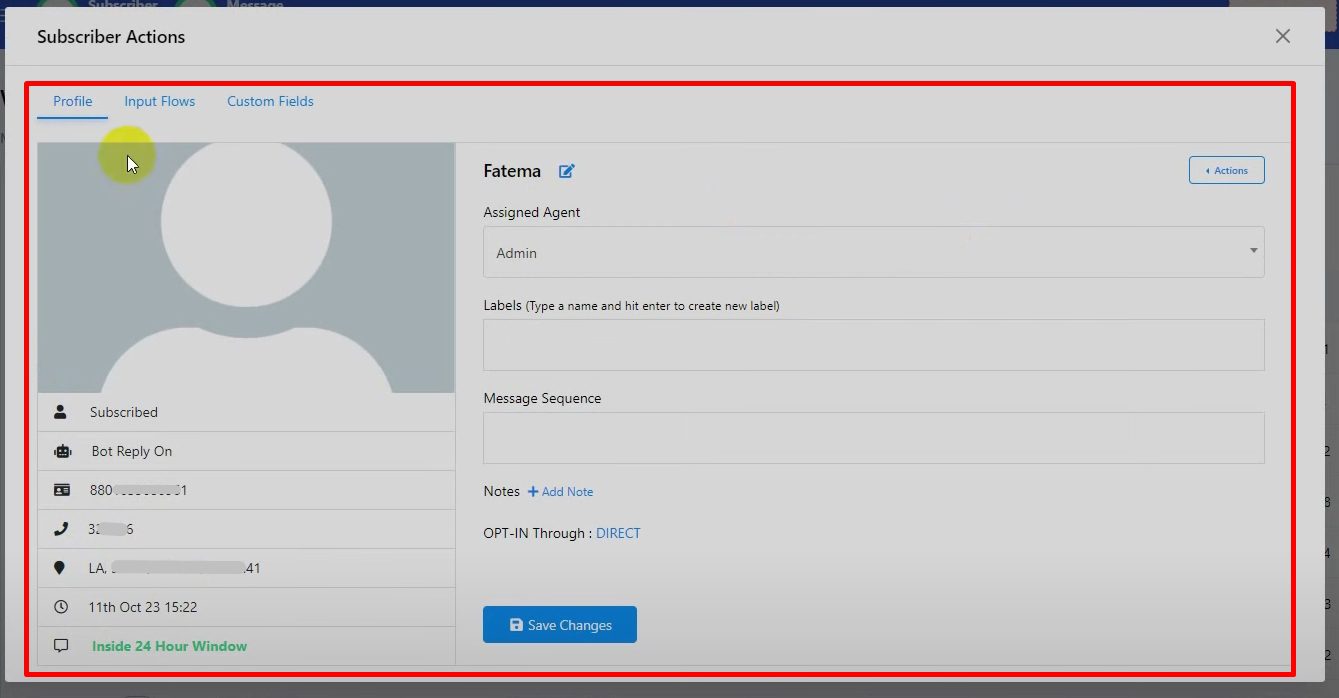
Go to the Subscriber Manager to see the saved data for each user, including custom fields and user input flows.
Utilize the saved information to create customized bots that send specific messages to subscribers.
Stay tuned for the next tutorial on how to use this information to create more advanced, personalized interactions.
