In this tutorial, you’ll learn how to effectively use the customer management tool in ScheduleMeet by following the next steps:
In the main menu, select the “Customers” option to access the customer management section.
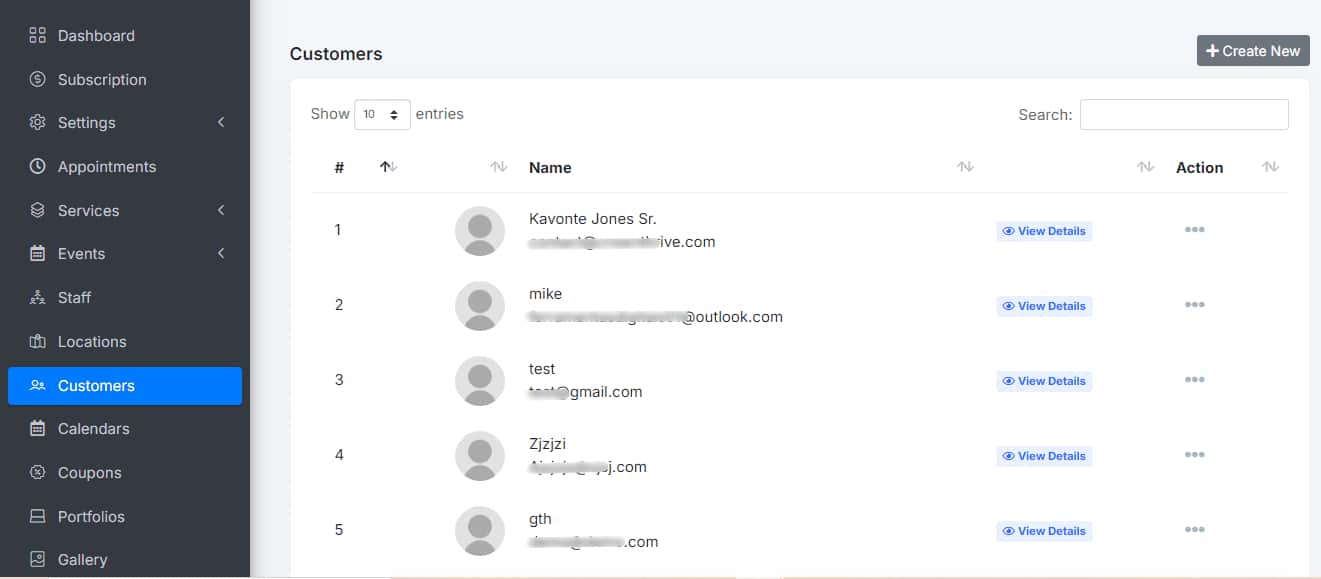
Within the “Customers” section, find and click the “Create New” button.
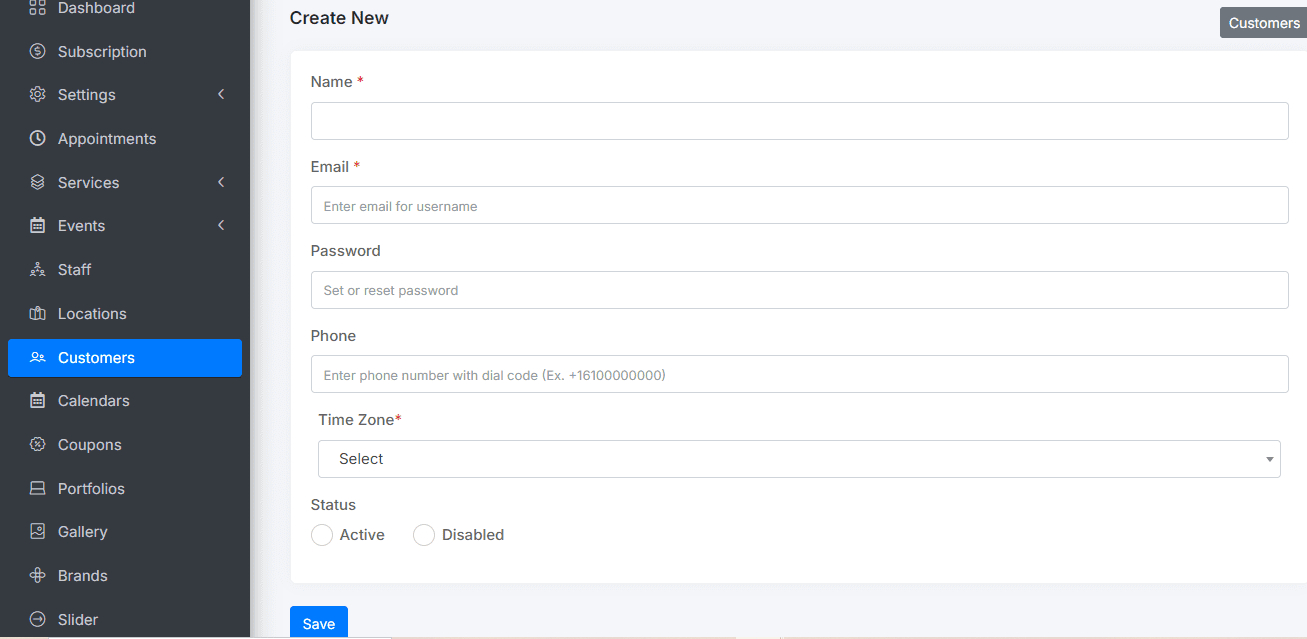
A form will open for you to enter customer details. Fill in Customer Information
- Name: Enter the customer’s full name.
- Email: Provide the customer’s email address.
- Password: Set a secure password for the customer’s access (if applicable).
- Phones: Enter the customer’s phone numbers.
- Timezone: Select the appropriate timezone for the customer’s location.
- Status: Mark the customer’s status as “Available” or “Busy” as appropriate.
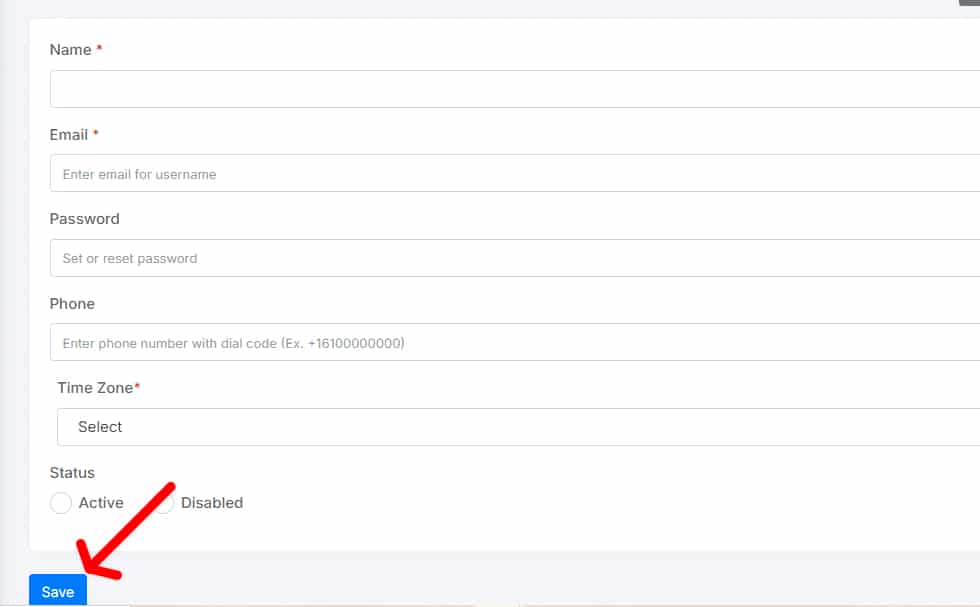
Review the entered information to ensure its accuracy. Click the “Save” button to store the customer record.
If you have any questions or need further assistance, don’t hesitate to contact our support team. We are here to help.