In this tutorial, we’ll guide you through the process of integrating Google AI services and Dialogflow with OmniChat. You’ll learn how to set up both automatic and manual synchronization modes, activate the Dialogflow chatbot, and configure essential API settings.
To start using the Google AI services and Dialogflow follow the steps below.
Automatic sync mode
- Click Synchronize now and complete the procedure.
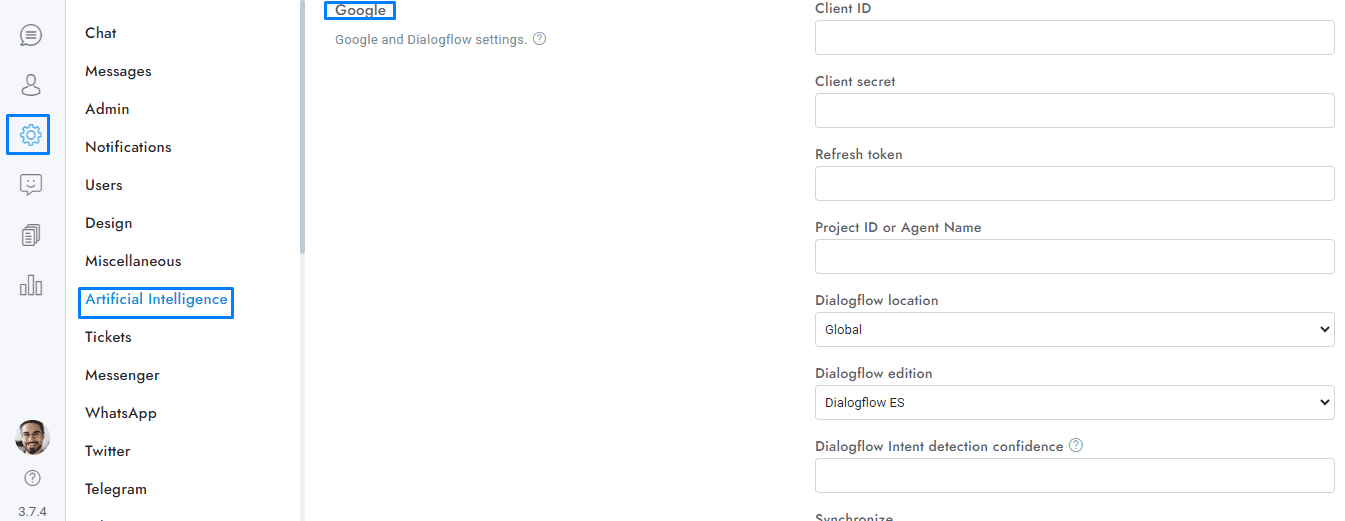
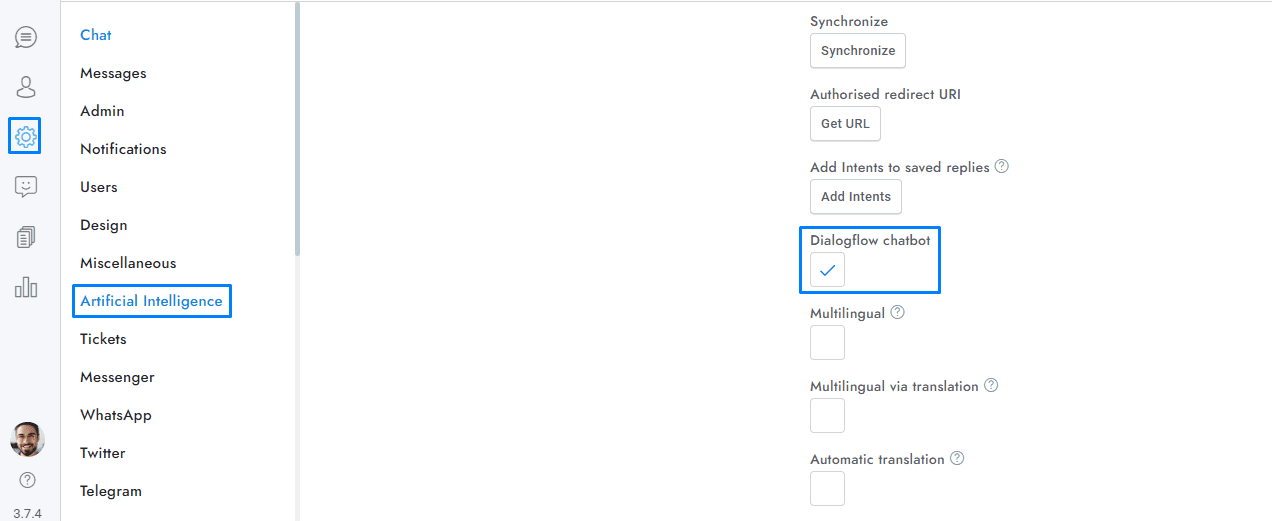
- If you want to activate the Dialogflow chatbot, check Settings > Artificial Intelligence > Google > Dialogflow chatbot. Also, you have to enter your chatbot Project ID or Agent Name, to get it follow the steps below.
- You need to purchase credits to use this option.
Manual sync mode
- Enable the setting OmniChat > Settings > Artificial Intelligence > Google > Dialogflow Chatbot and save the changes.

- Go to console.cloud.google.com and sign in.
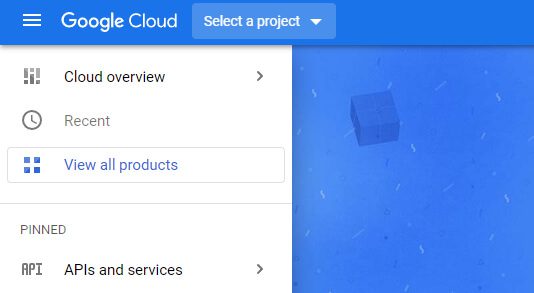
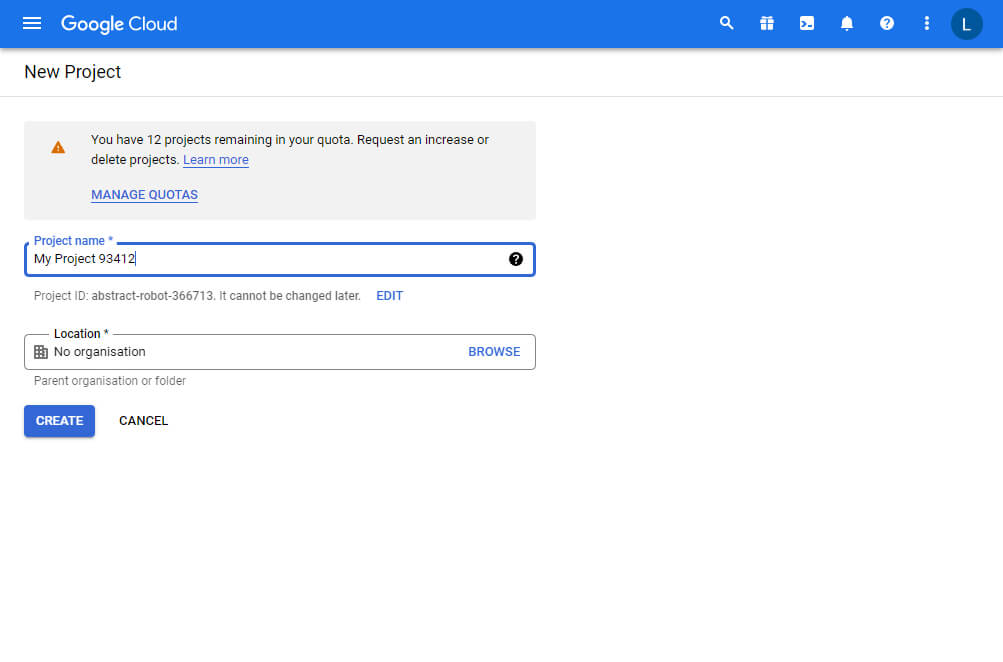
- Select or create a project by clicking the Select a project button on top-left.
Name the project as you want.
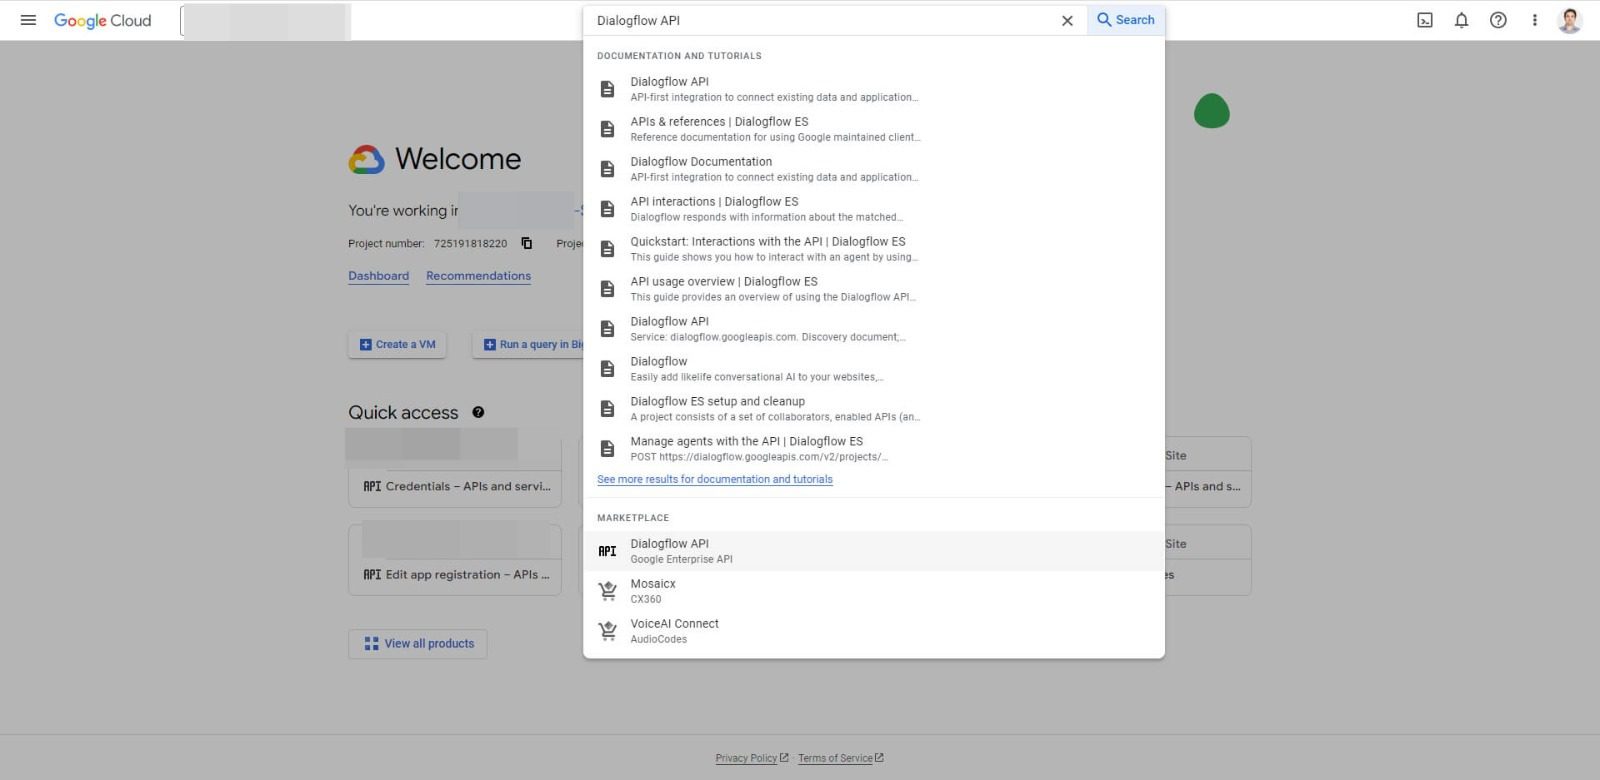
- Activate the Dialogflow API by entering Dialogflow API on the top search bar. Click Dialogflow API and then click Enable.
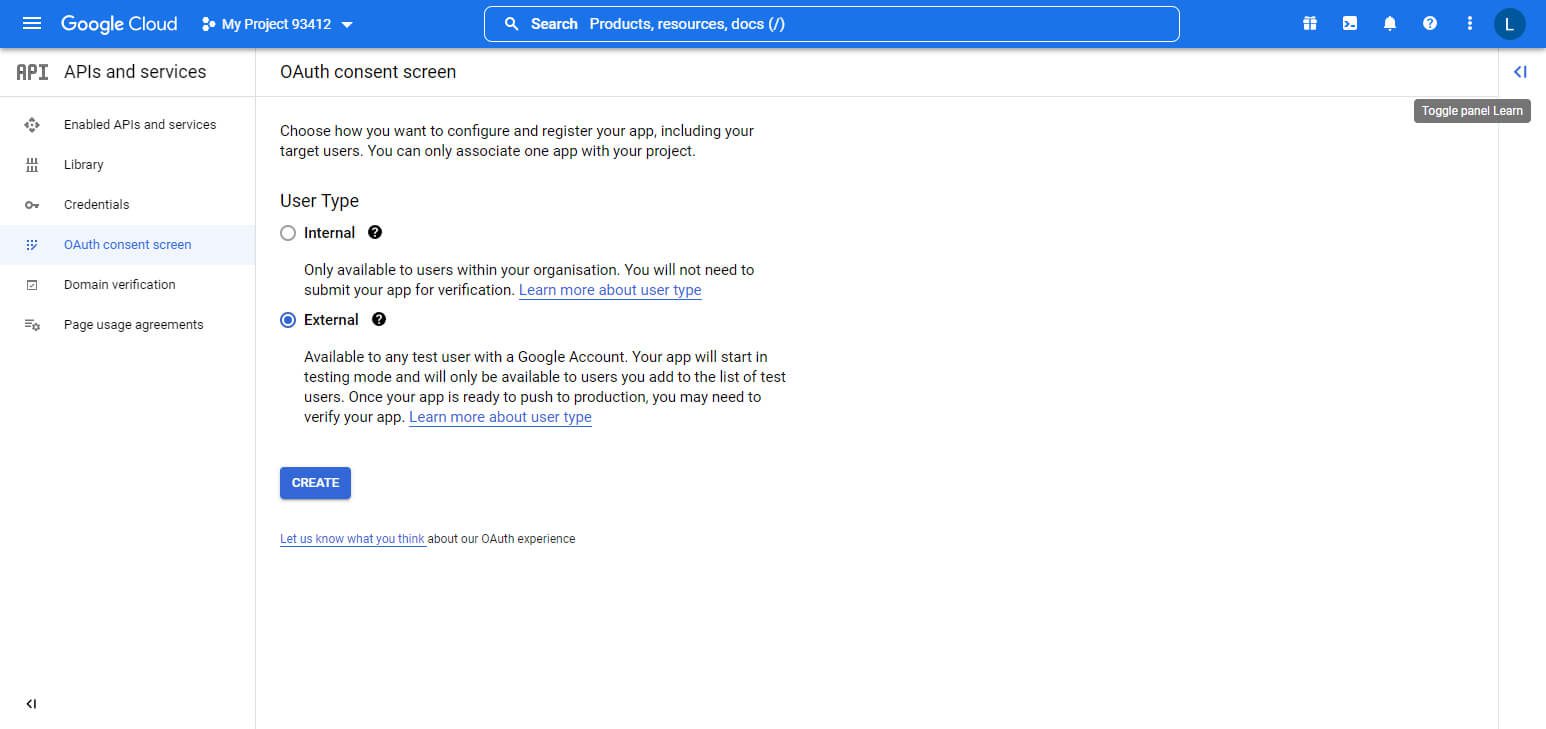
- Select the project and the go to Left menu > APIs and services > OAuth consent screen. Select External and click Create.
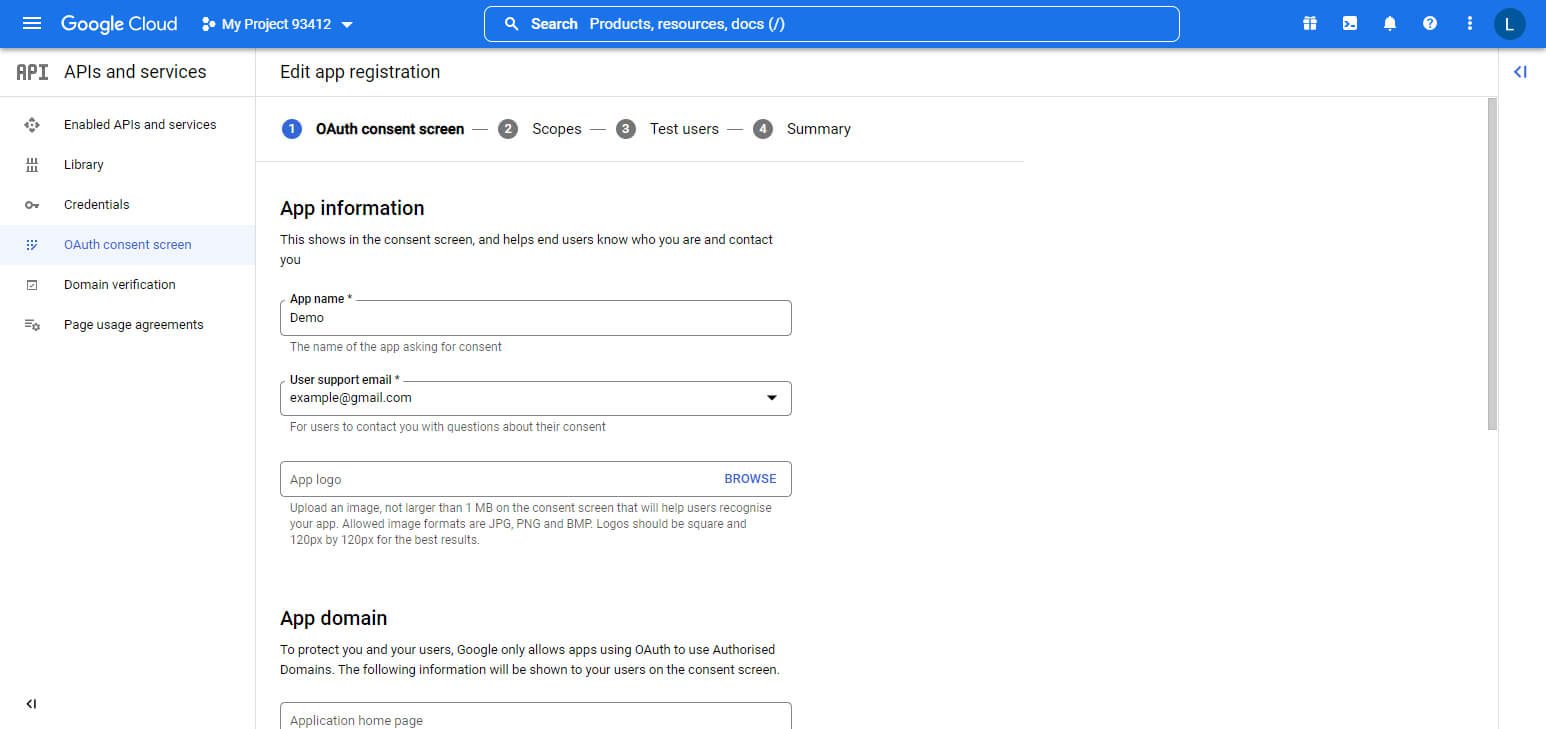
In App name enter what you want, in User support email and Developer contact information enter your email. Click Save and continue.
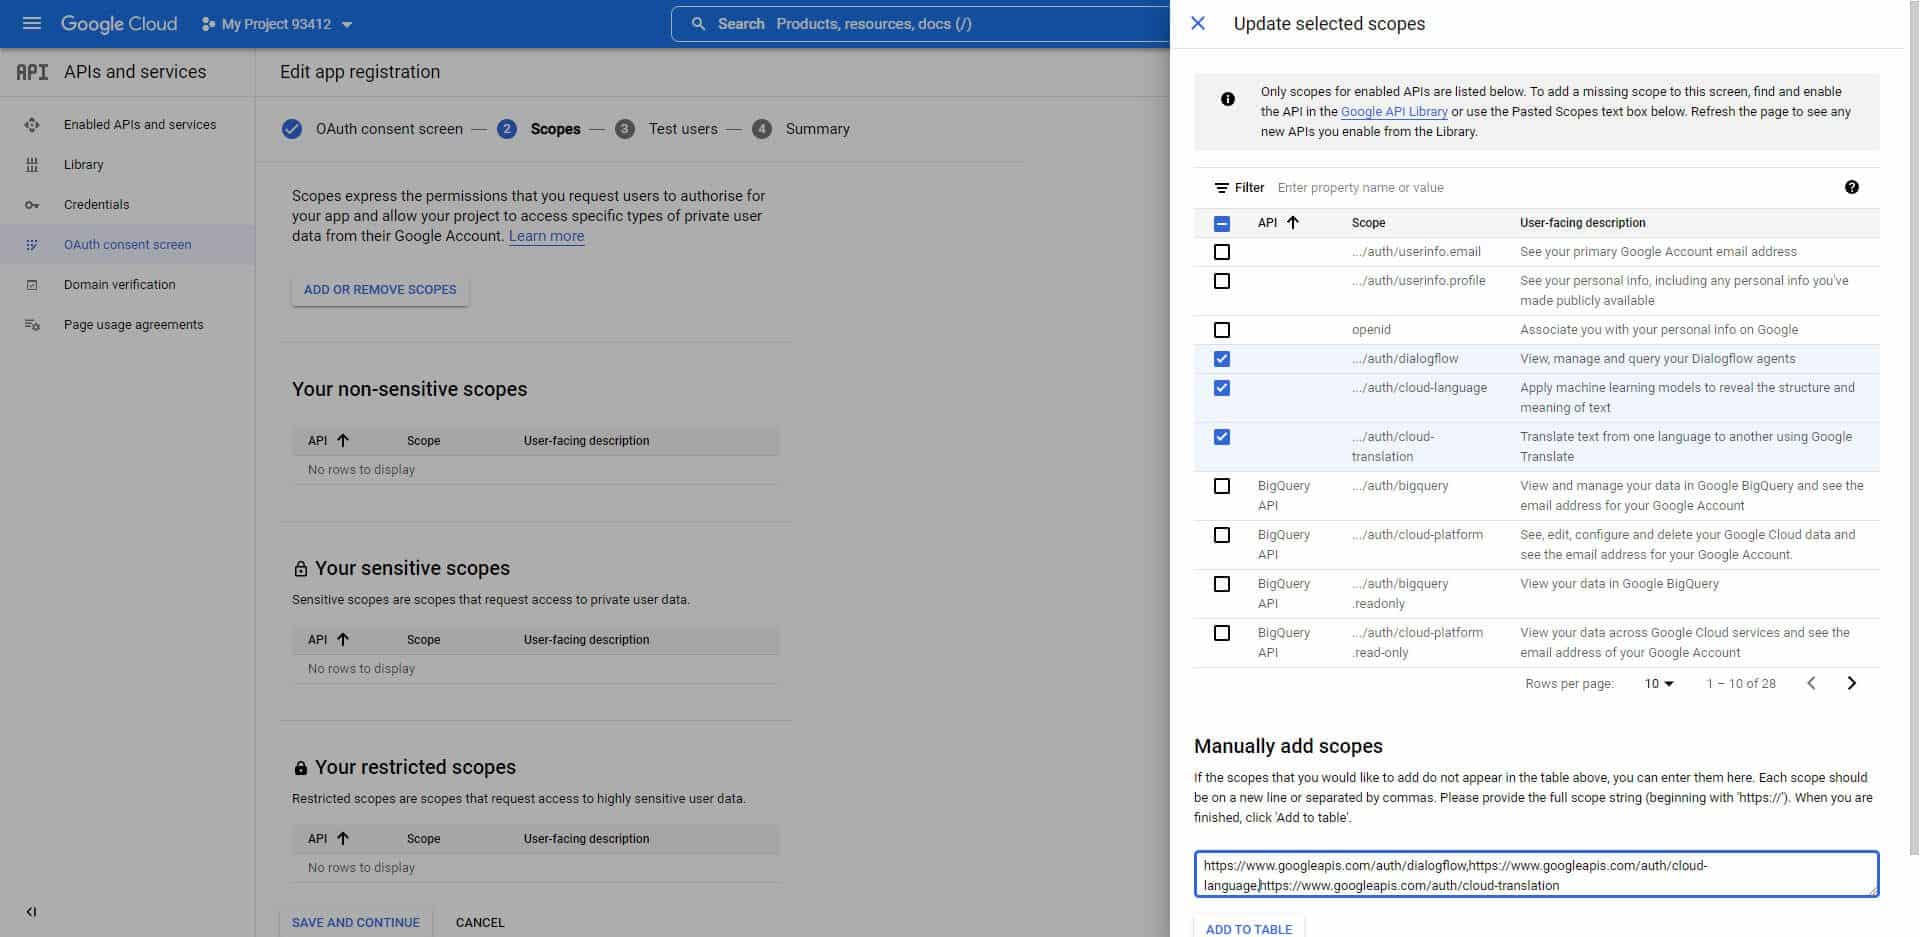
- In the scopes area, click Add or remove scopes, scroll bottom and into the Manually add scopes area enter https://www.googleapis.com/auth/dialogflow,https://www.googleapis.com/auth/cloud-language,https://www.googleapis.com/auth/cloud-translation. Click Add to table and then Update and Save and continue.
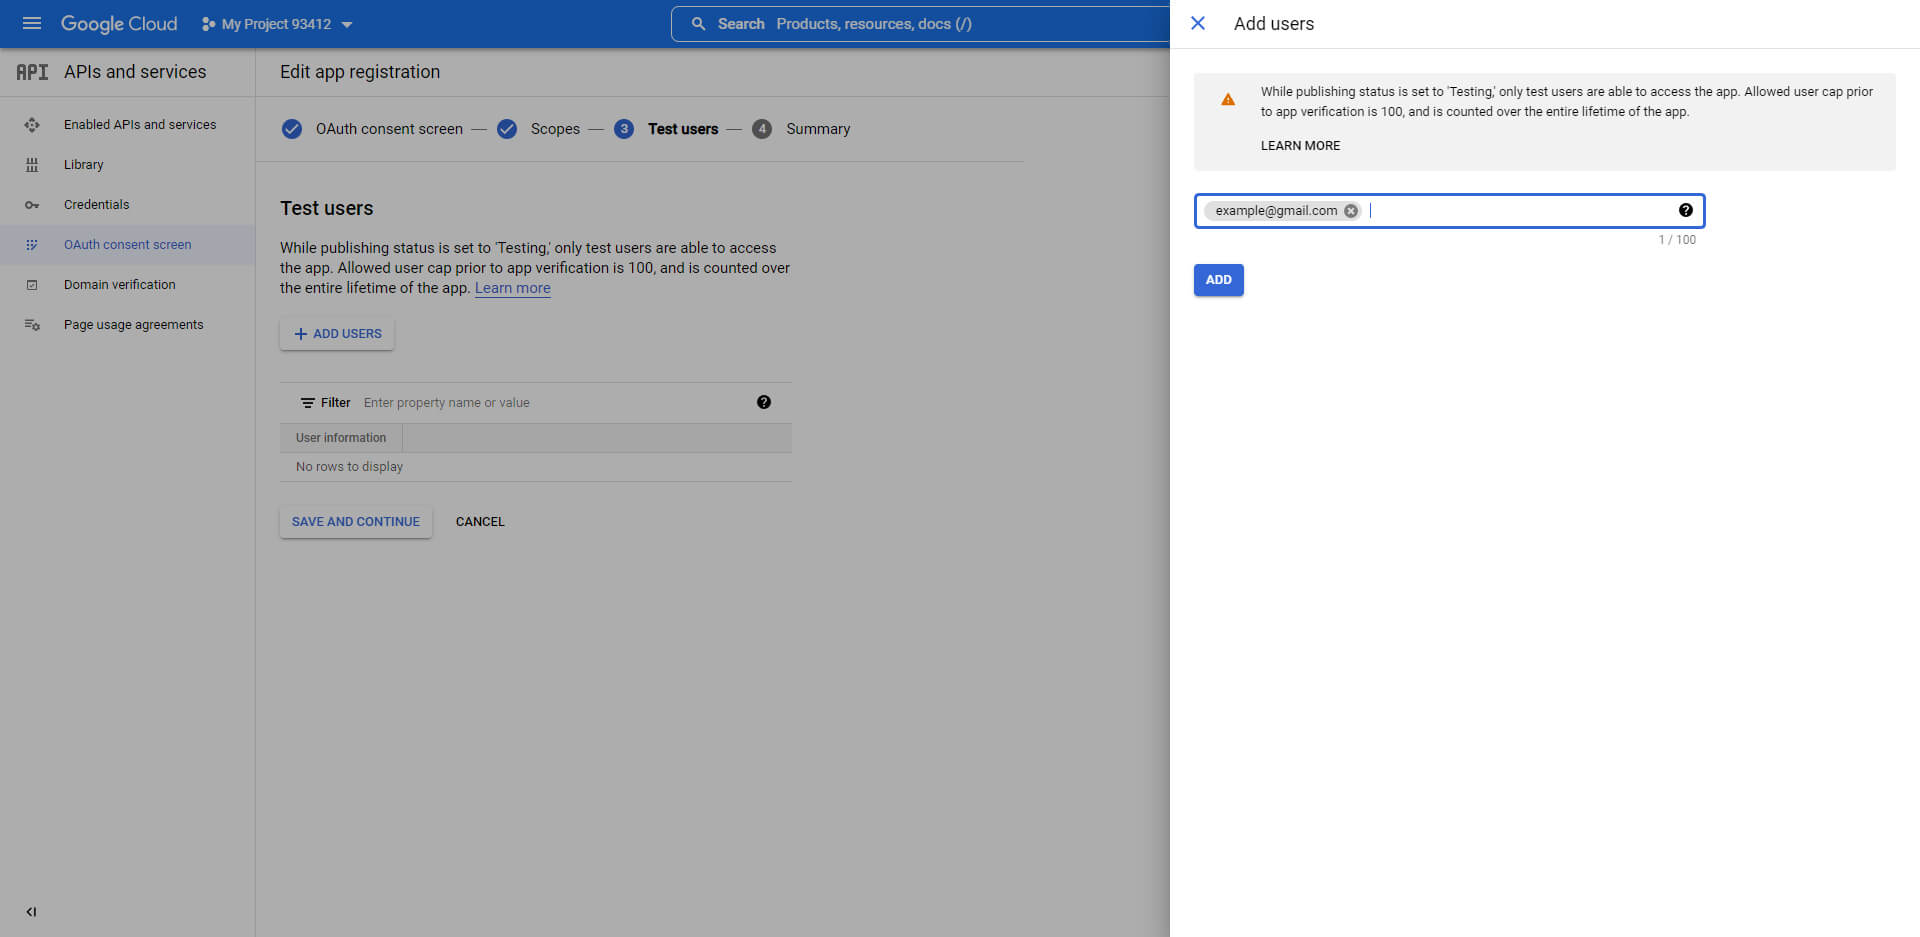
- In the test users area, click Add users and add your Google email, use the same email as the currently logged in account. Click Save and continue.
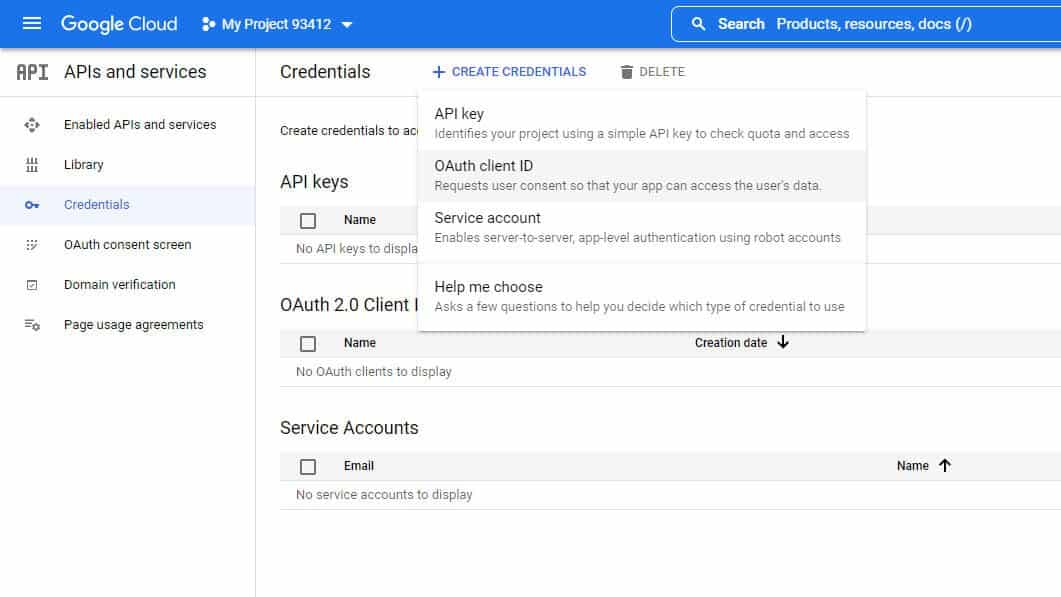
- Go to Left menu > APIs and services > Credentials and click Create credentials, select OAuth client ID.
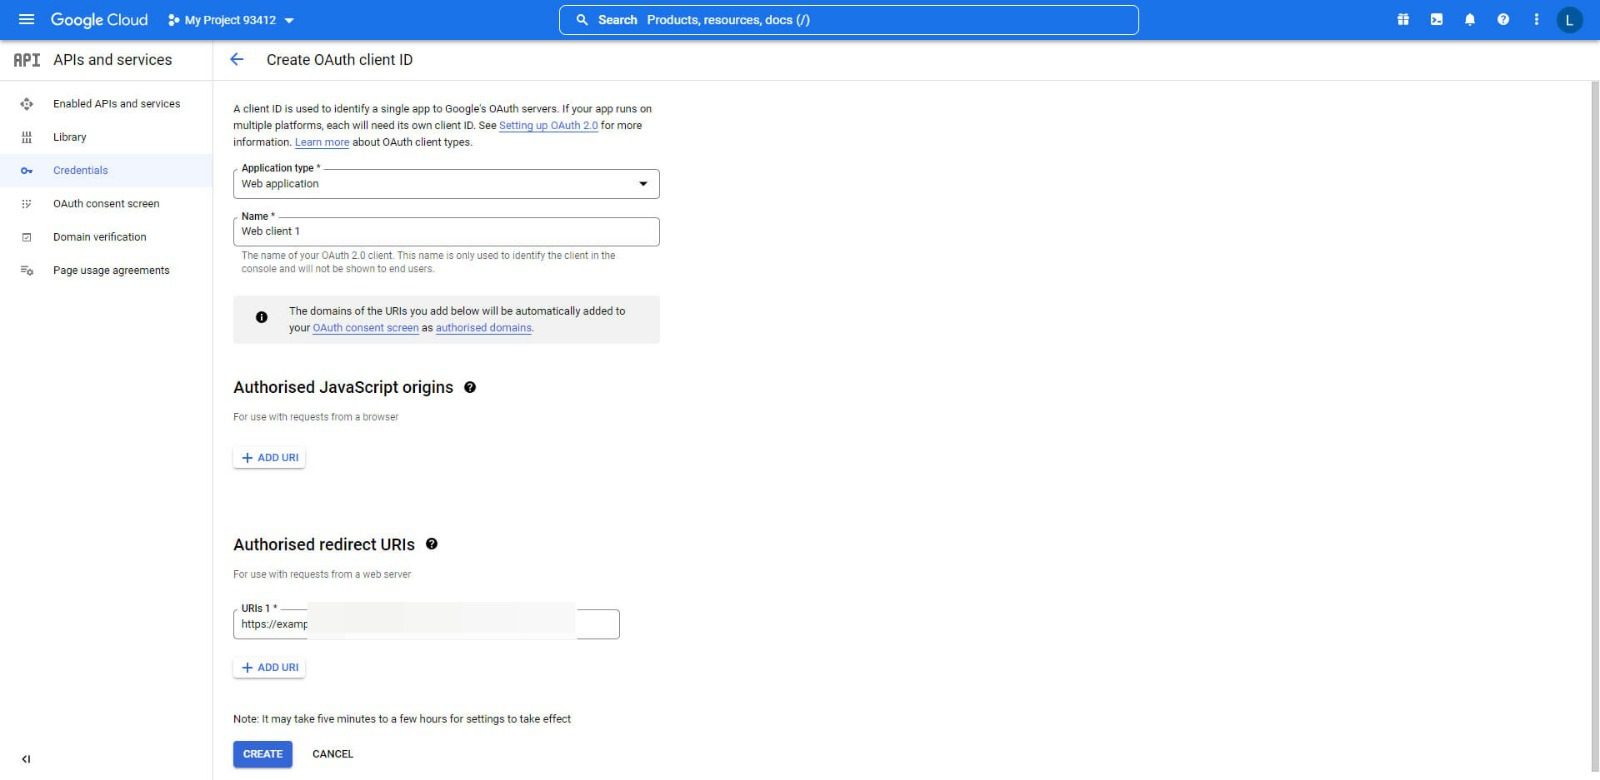
As Application type select Web application. Enter any name you want. In Authorised redirect URI enter the redirect URL, get it from OmniChat > Settings > Artificial Intelligence > Google > Authorised redirect URI. Click Create.
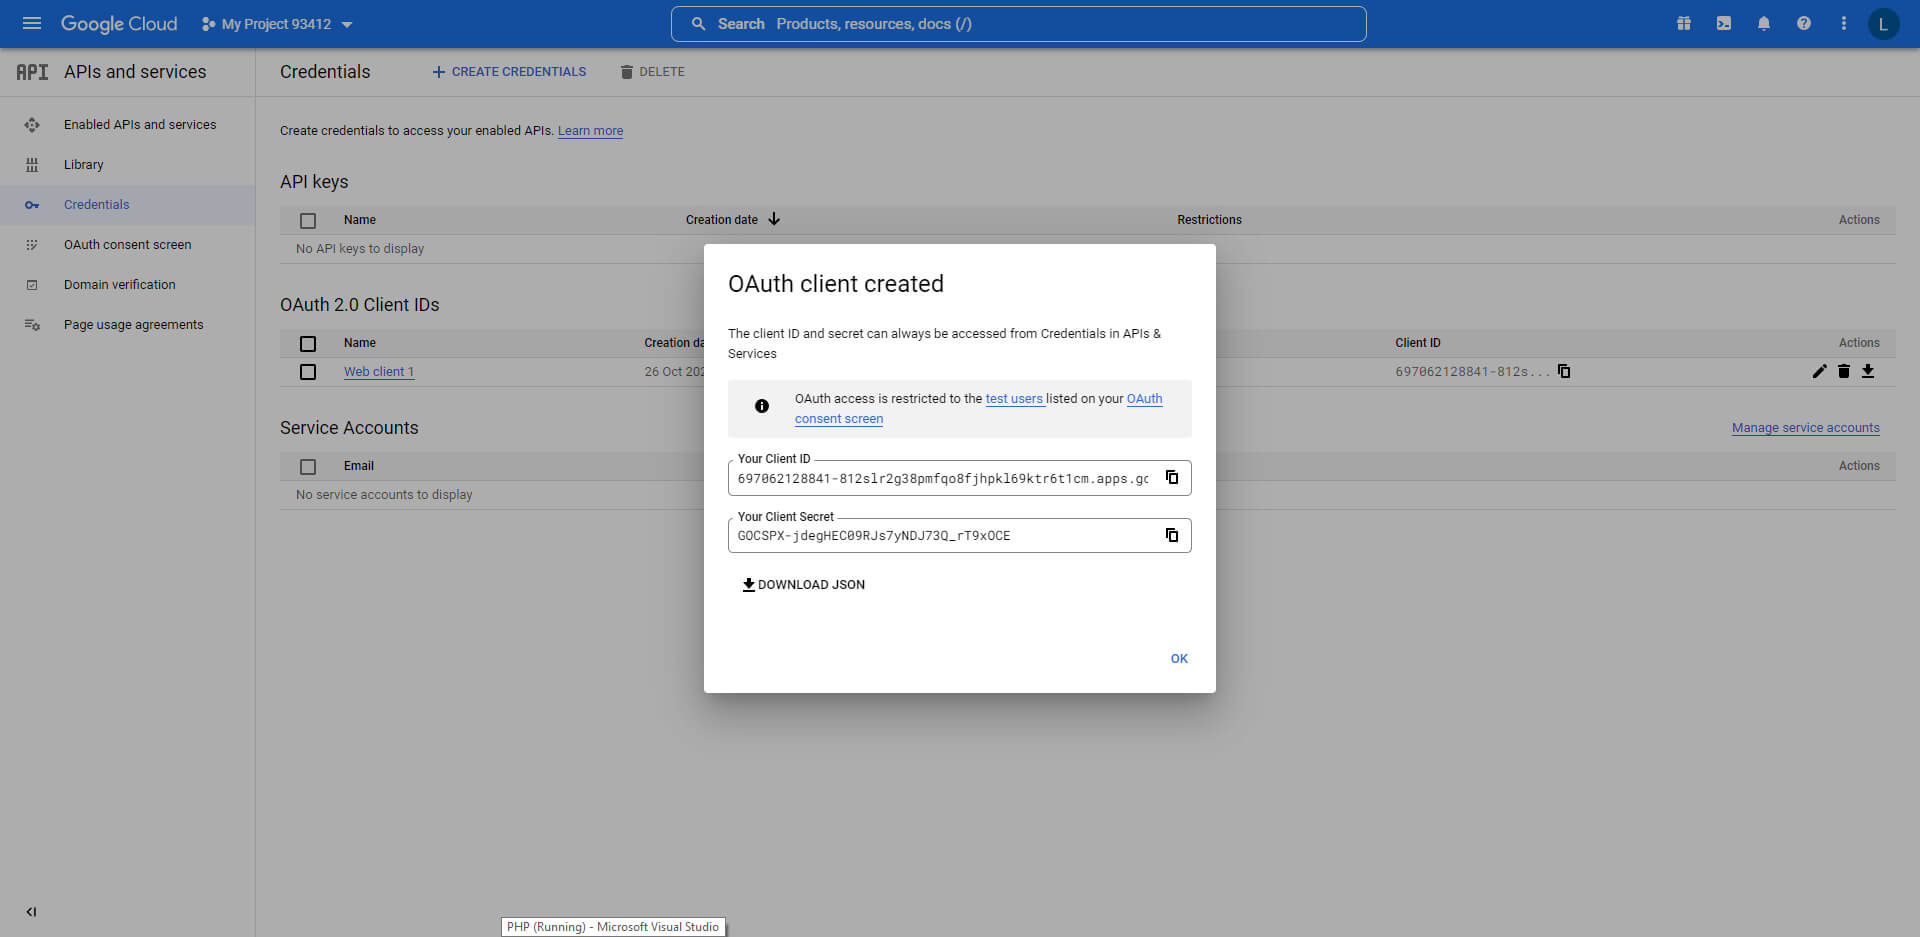
- Copy Client ID and Client Secret and paste them into OmniChat > Settings > Artificial Intelligence > Dialogflow. Save the settings.
- In Settings > APIs & Services > OAuth Consent Screen click PUBLISH APP. There is no need to complete the review process, leave it in the pending review state.
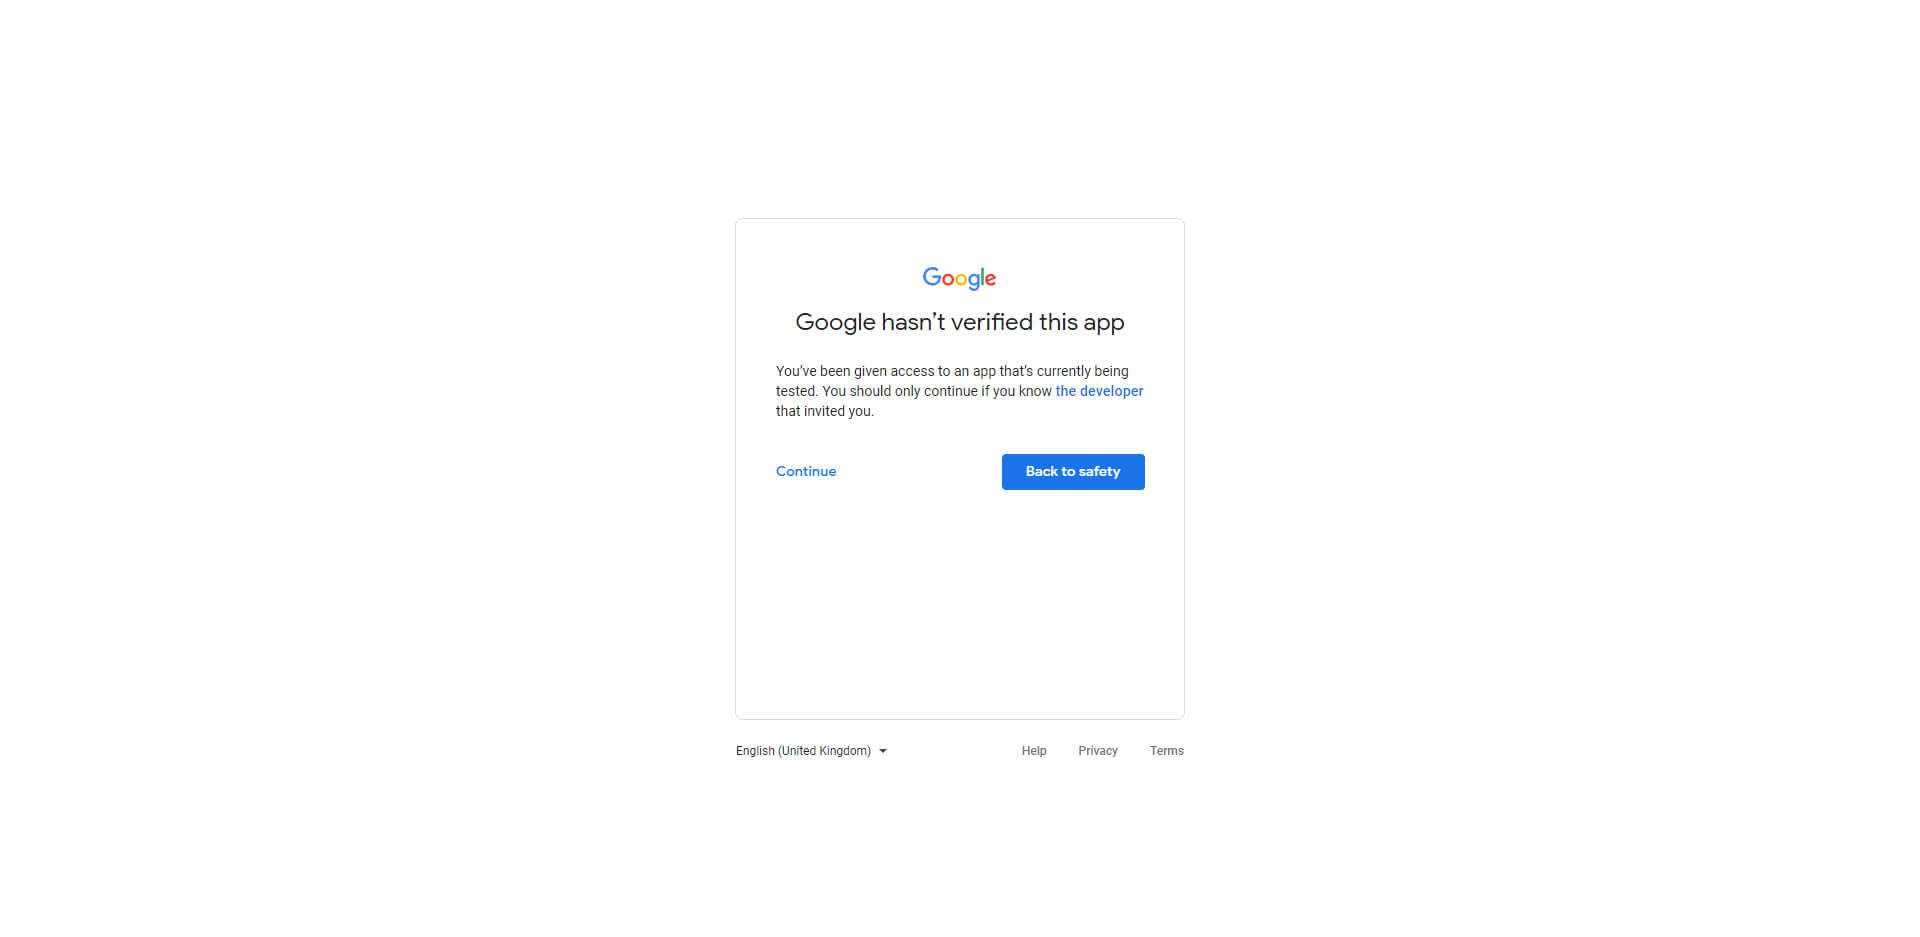
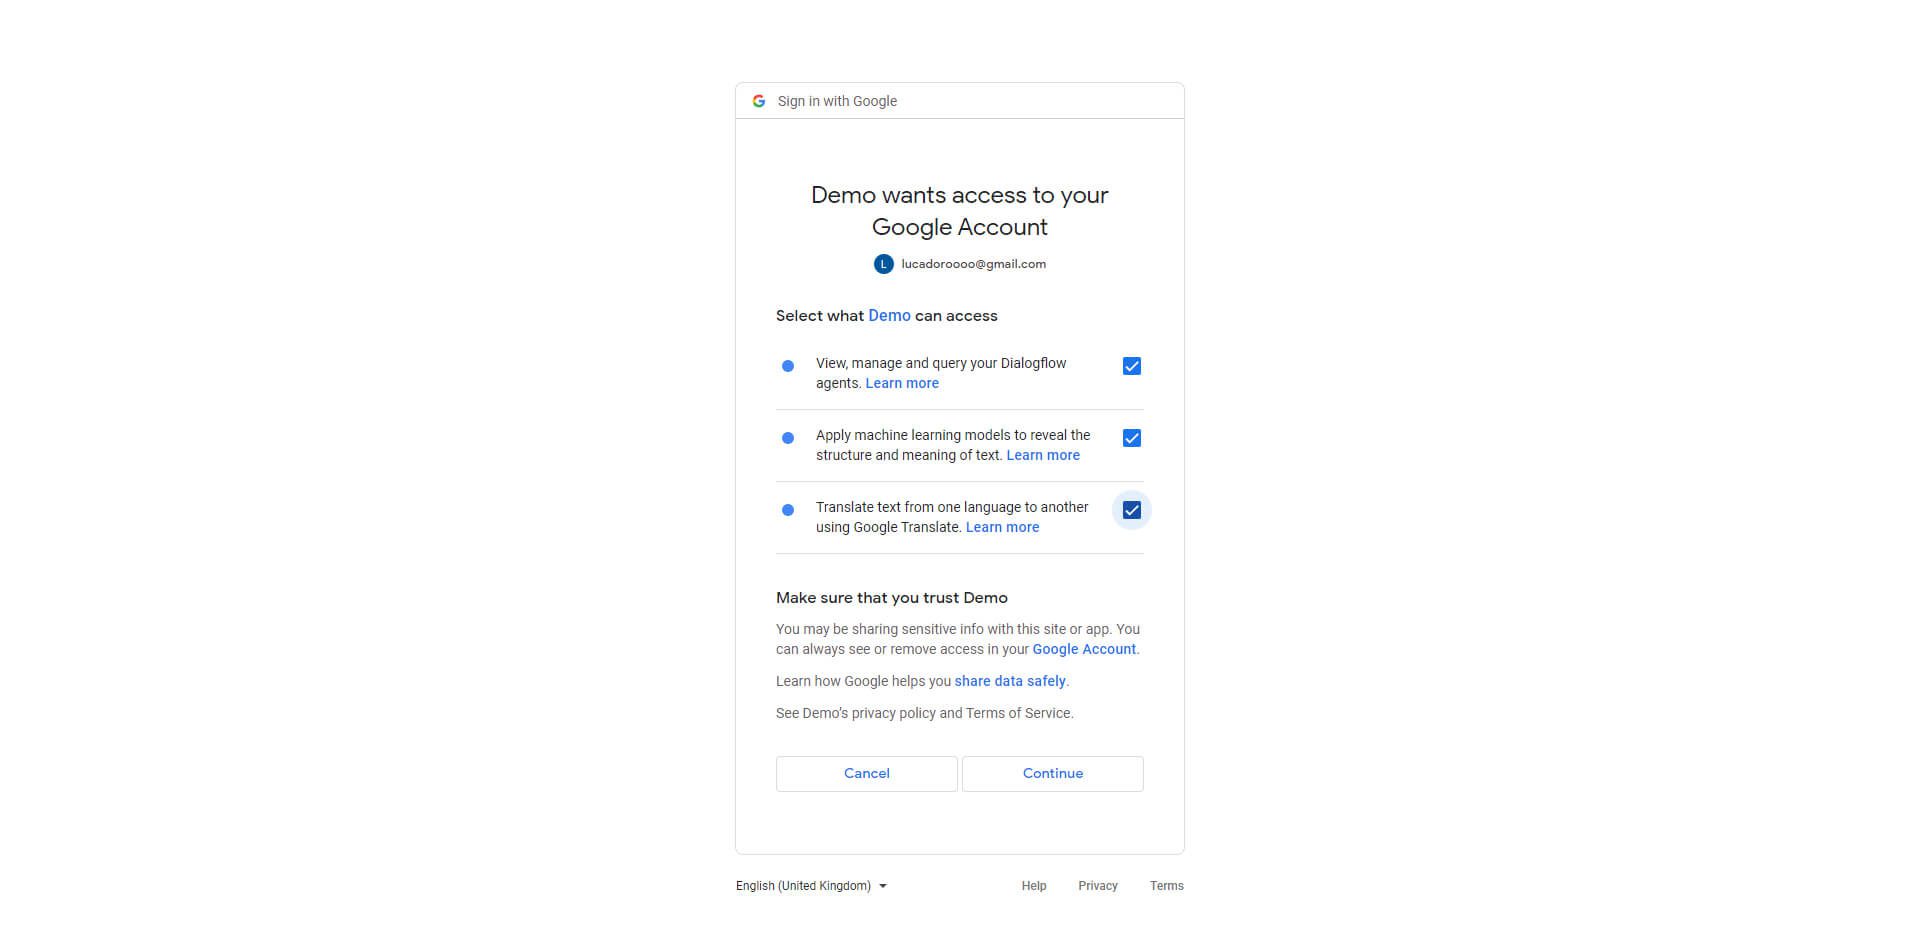
- Click OmniChat > Settings > Artificial Intelligence > Google > Synchronize. Login with the same Google account you have used till now. On the next screen click Continue.
On the next screen select all scopes and click Continue.
- Copy the Refresh token and paste it into OmniChat > Settings > Artificial Intelligence > Google > Refresh token.
- You are done! If you want to activate the Dialogflow chatbot, check Settings > Artificial Intelligence > Google > Dialogflow chatbot. Also, you have to enter your chatbot Project ID or Agent Name, to get it follow the steps below. Note that the app does not need to be approved by Google.
- If you are a Google Workspace user, go to https://admin.google.com/ and click Google Cloud Session control. Set Re-authentication policy to Never require re-authentication.If you have additional doubts, remember that you can always contact us.

