This is how to integrate ChatPion with BotCommerce for sending WhatsApp messages:
Step 1: Collect Phone Numbers #
- Set Up ChatPion Bot:
- Use ChatPion’s quick reply, user input flow, or web view form on Facebook Messenger to collect phone numbers.
- Ensure you have a bot already created for this purpose.

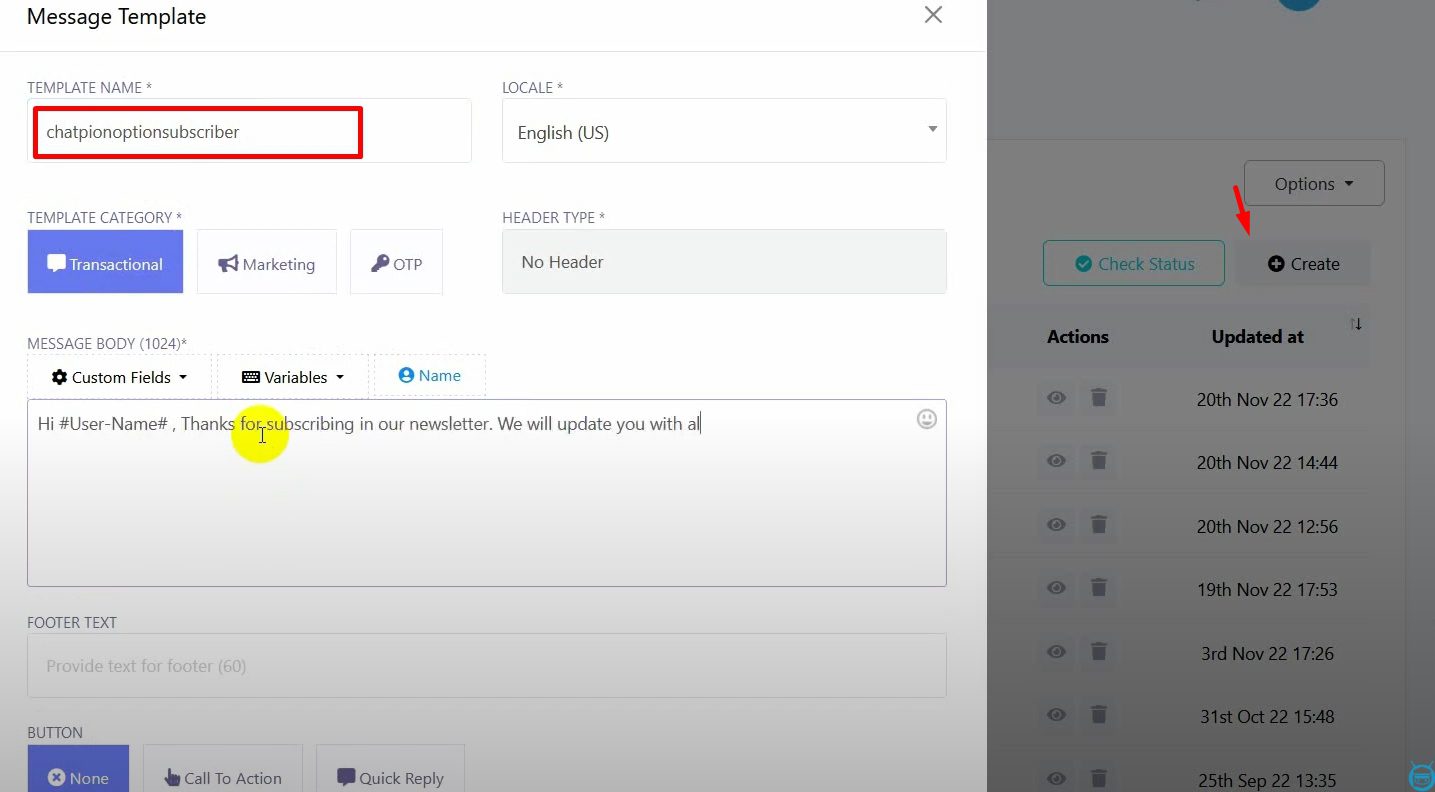
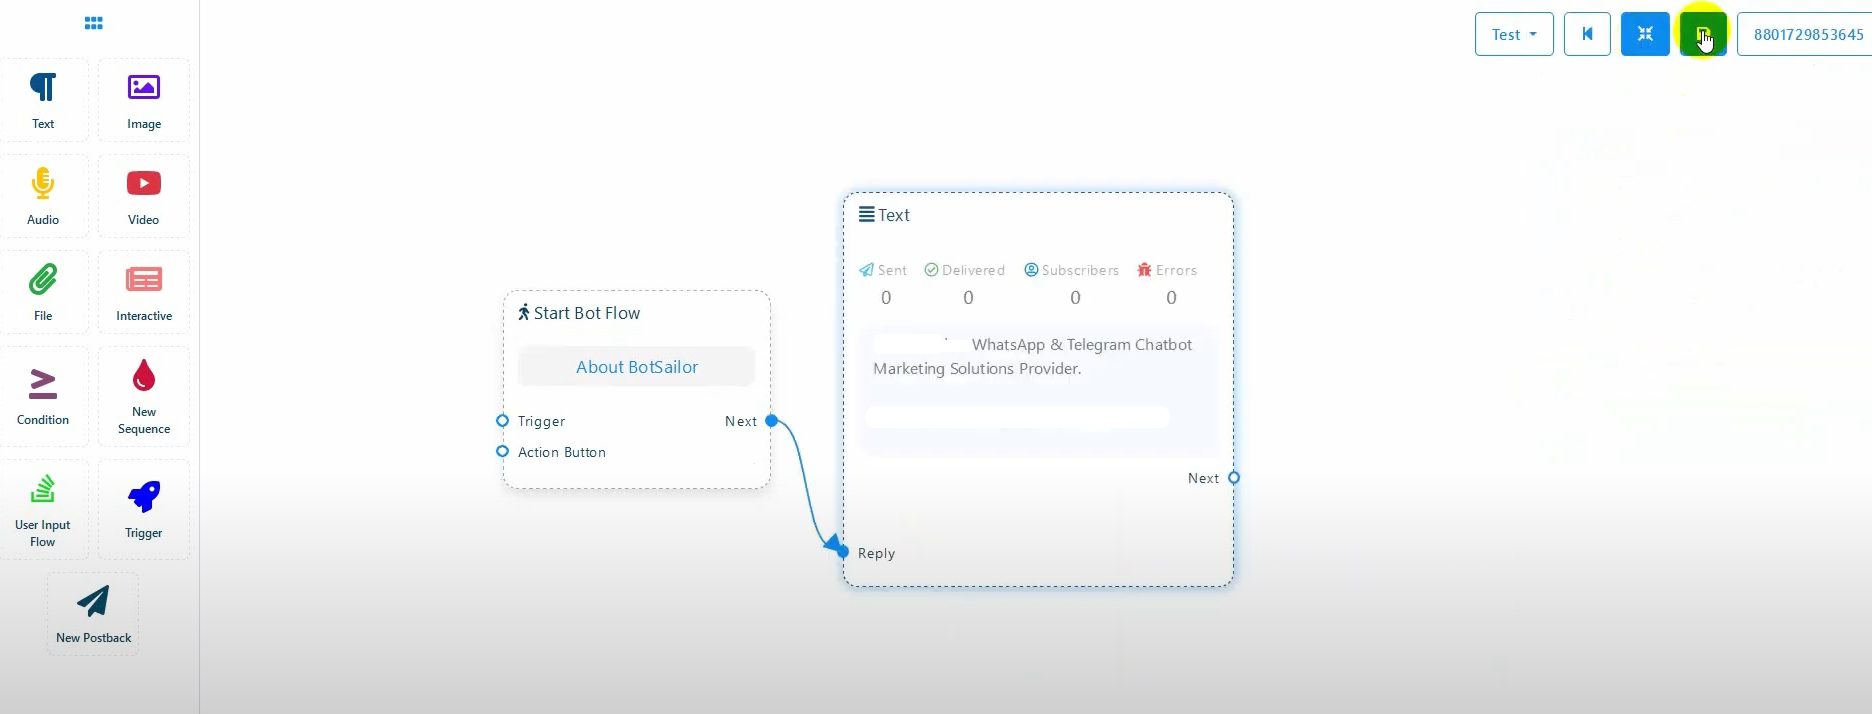
Step 2: Create a Message Template in BotCommerce #
- Access Bot Manager:
- Go to Bot Manager and select Message Template.

- Click on the Create button.
- Go to Bot Manager and select Message Template.
- Set Up the Template:
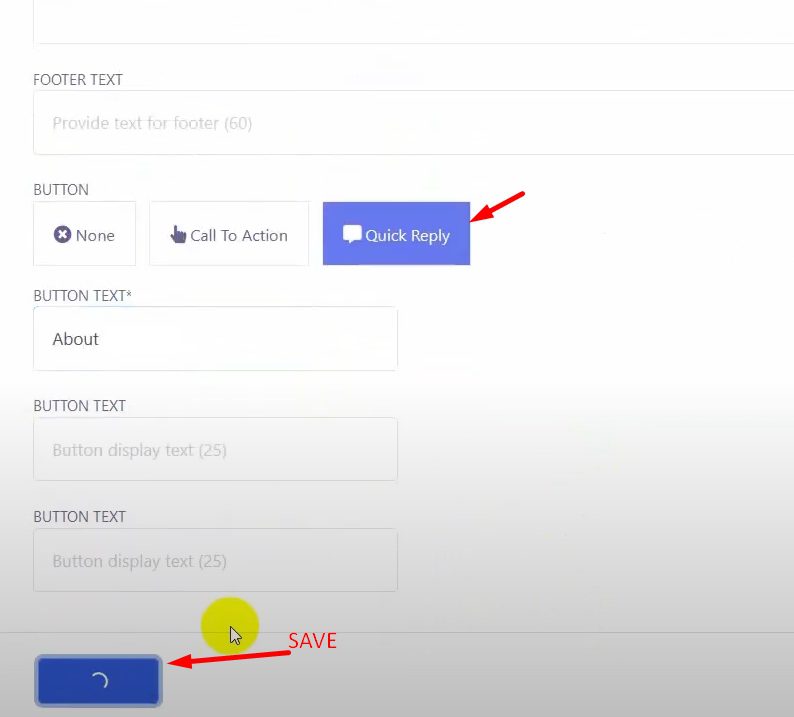
- Give a name to the template.
- Write the message body and add a quick reply button.


-
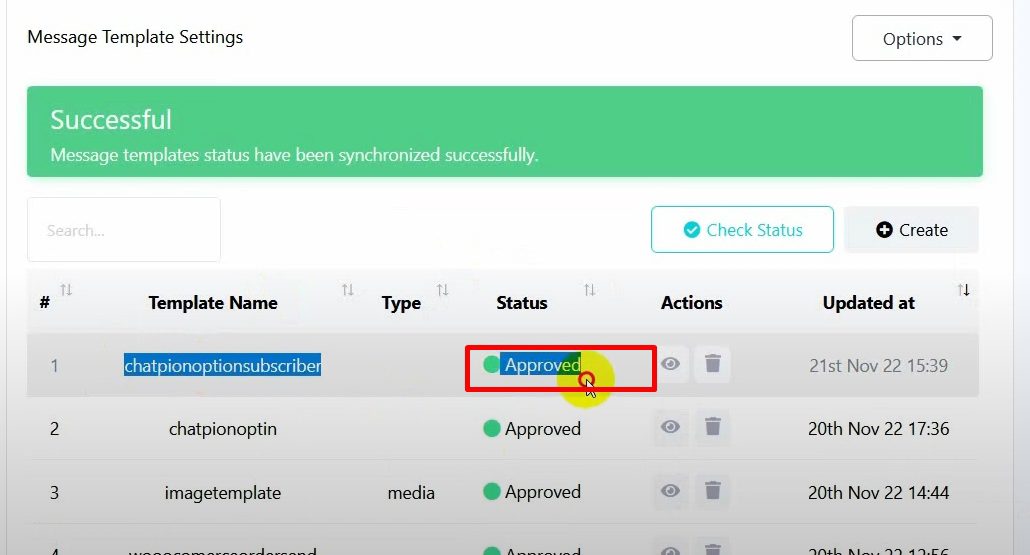
- Save the template and ensure it is approved by WhatsApp.


- Save the template and ensure it is approved by WhatsApp.

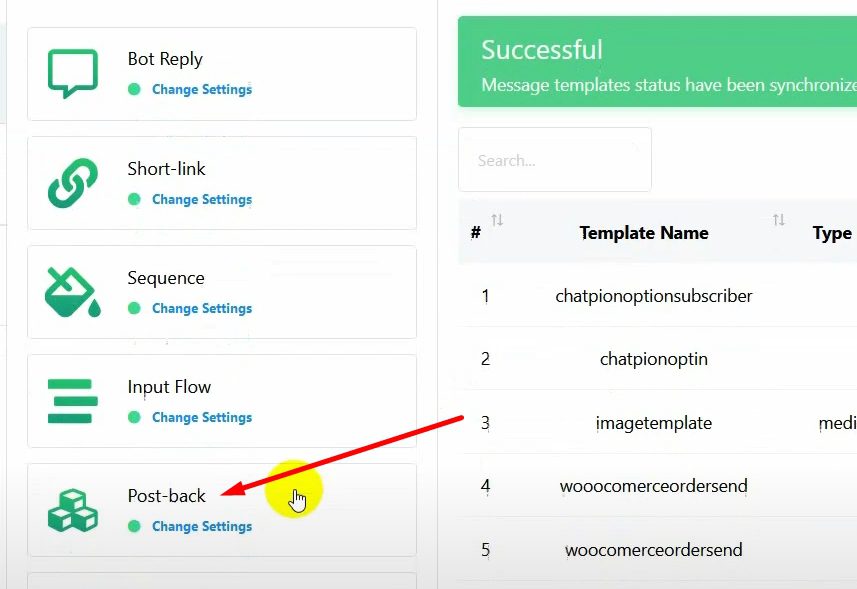
- Create a Post Back:
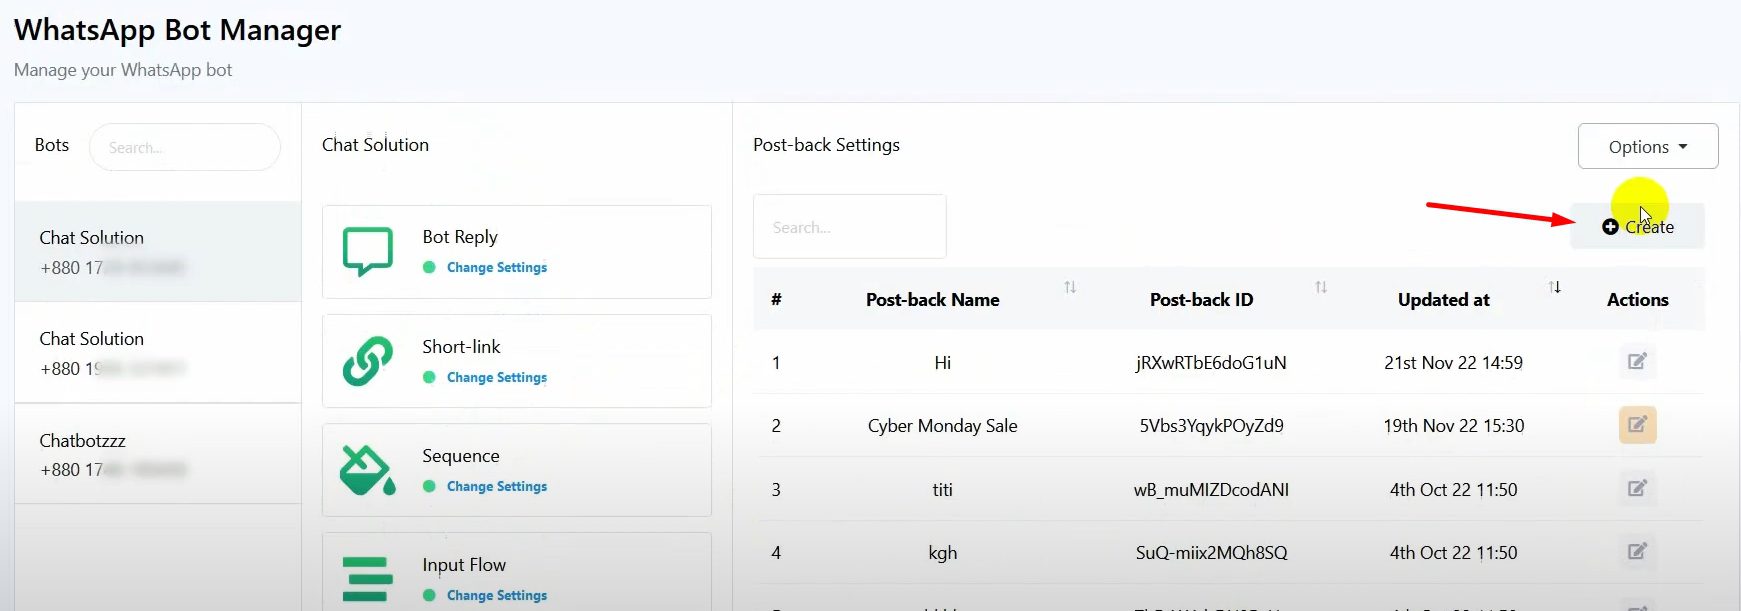
- Go to Post Back and click on the Create button.


- Go to Post Back and click on the Create button.
-
- Give a name for the post back and add a reply.

- Save the post back.
- Give a name for the post back and add a reply.
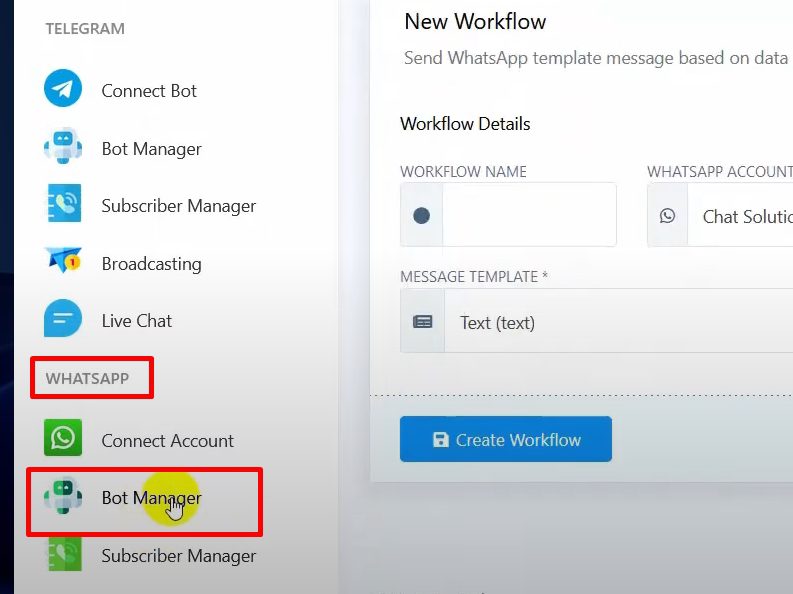
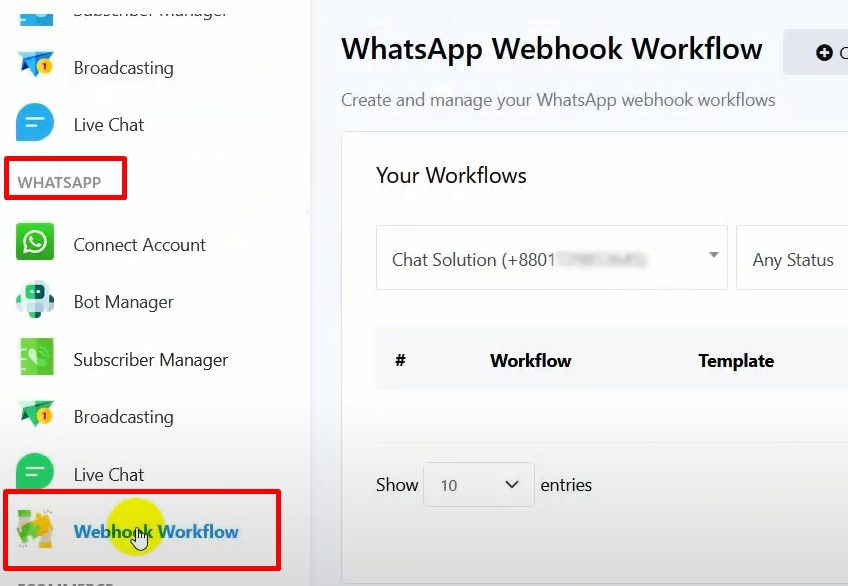
Step 3: Set Up the Webhook Workflow in BotCommerce #
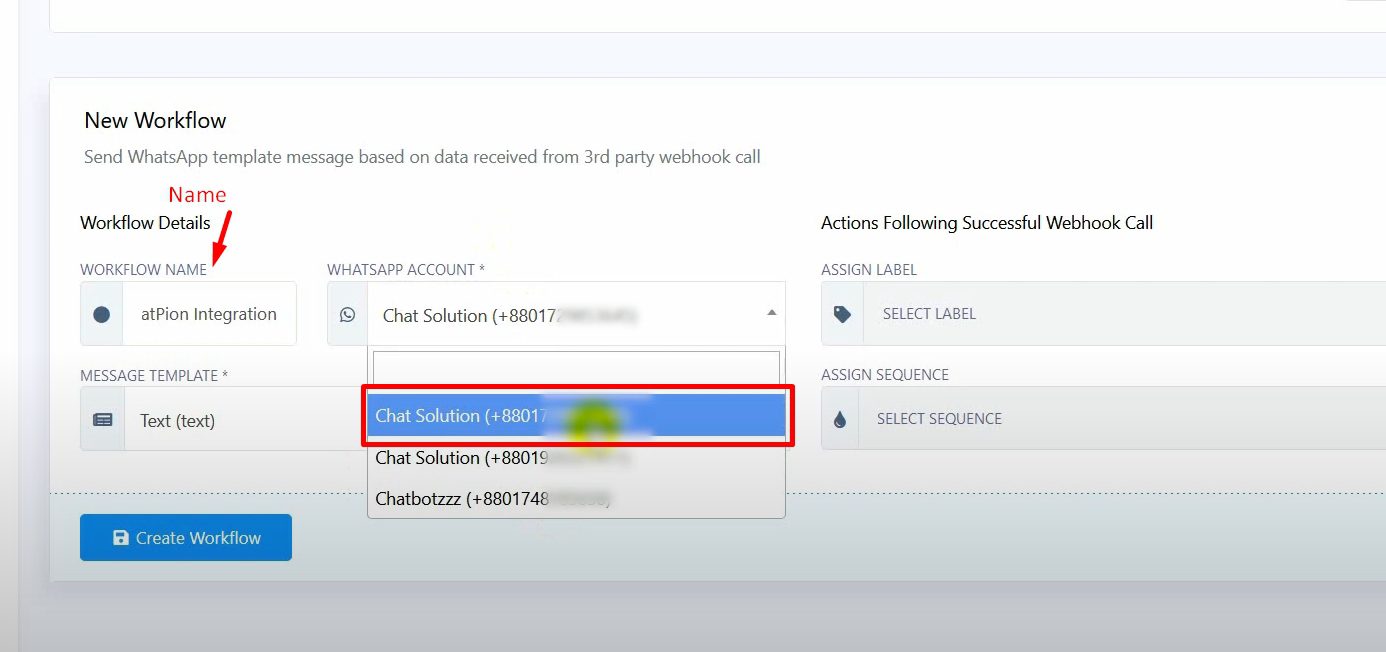
- Create a Workflow:
- Go to Webhook Workflow and click on the Create button.

- Go to Webhook Workflow and click on the Create button.
-
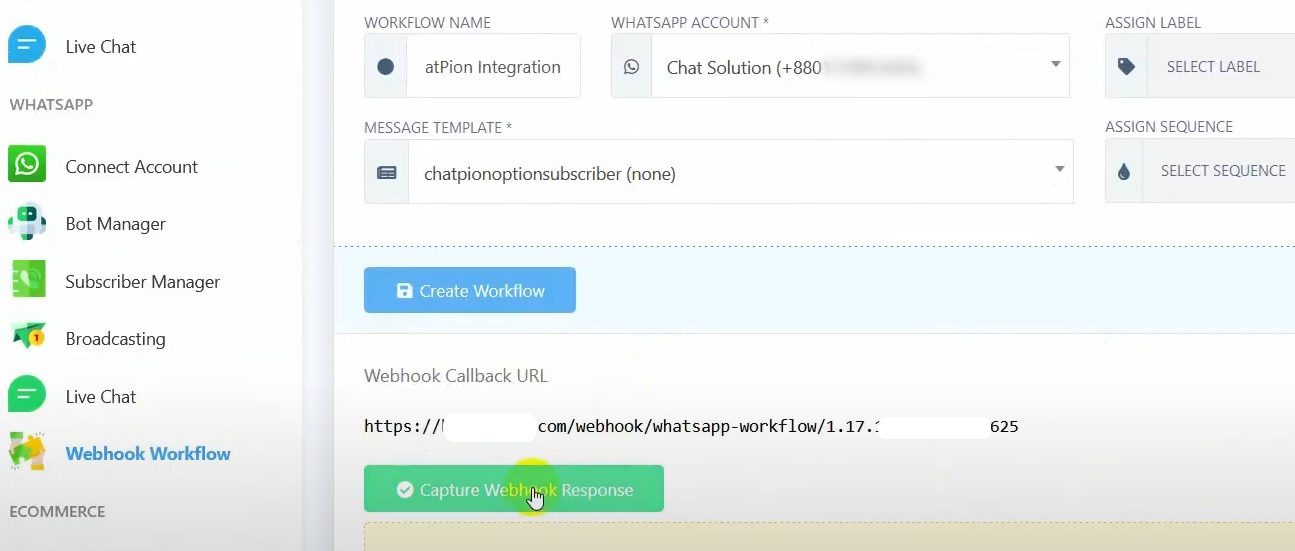
- Give it a name, select the WhatsApp bot account, and choose the message template.

- Give it a name, select the WhatsApp bot account, and choose the message template.
-
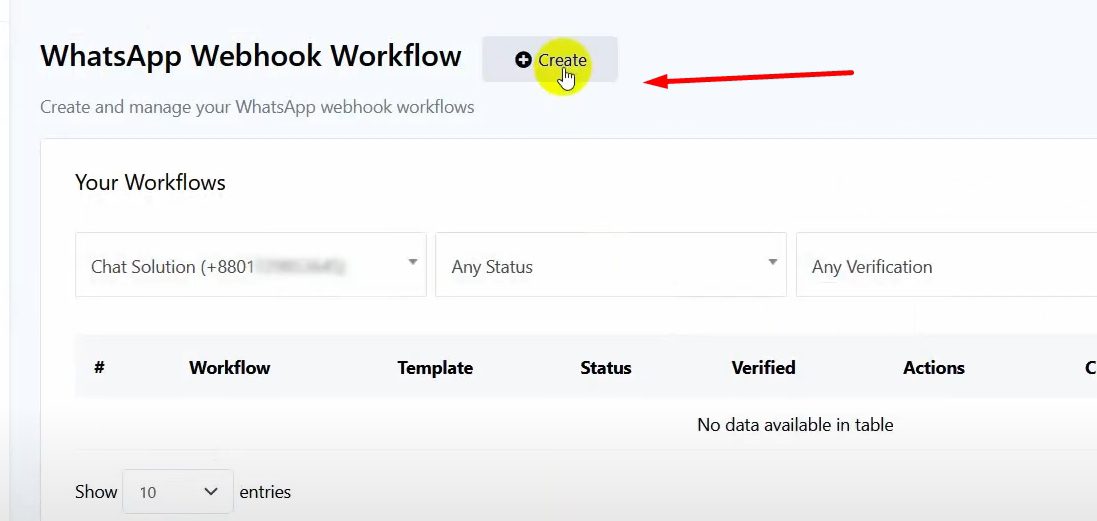
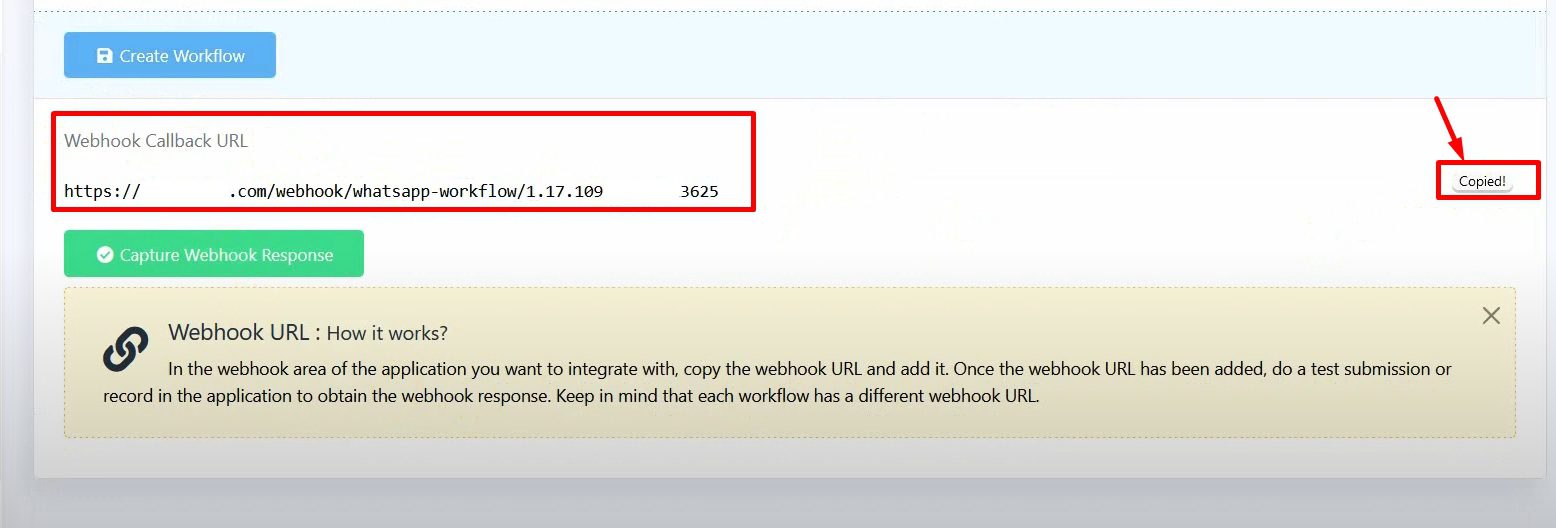
- Click on Create Workflow to generate a webhook callback URL.


- Click on Create Workflow to generate a webhook callback URL.

-
- Copy the URL.

- Copy the URL.
Step 4: Configure API Connection in ChatPion #
- Set Up API Connection:
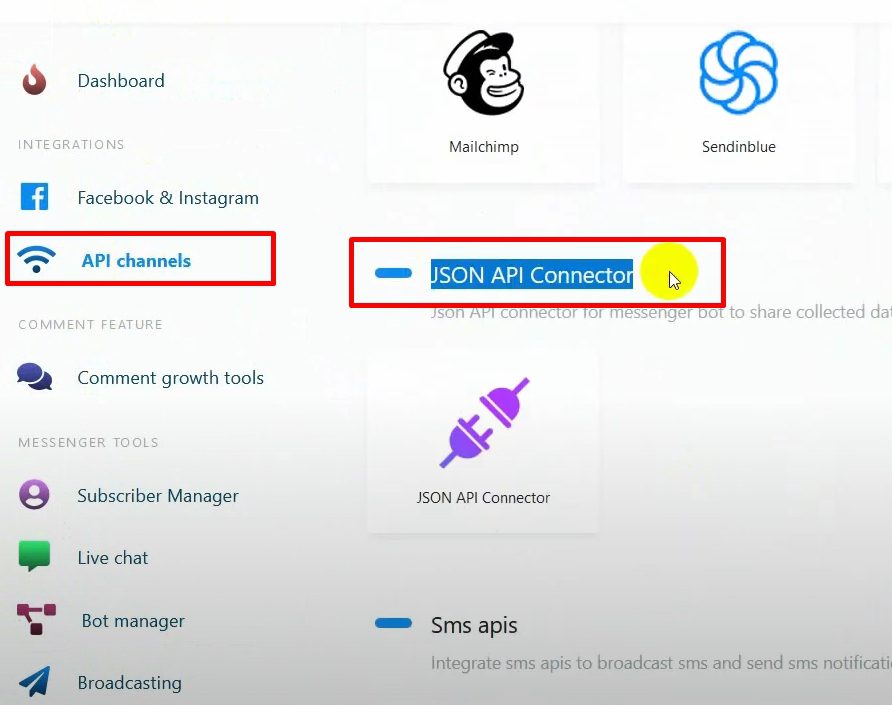
- Go to API Channels in ChatPion and select JSON API Connector.

- Go to API Channels in ChatPion and select JSON API Connector.
-
-
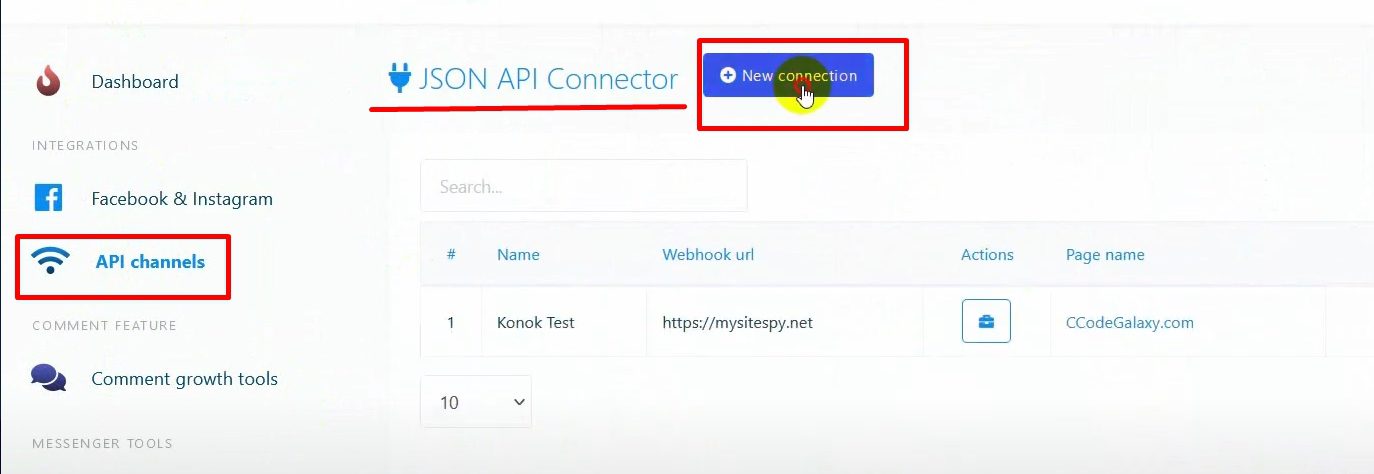
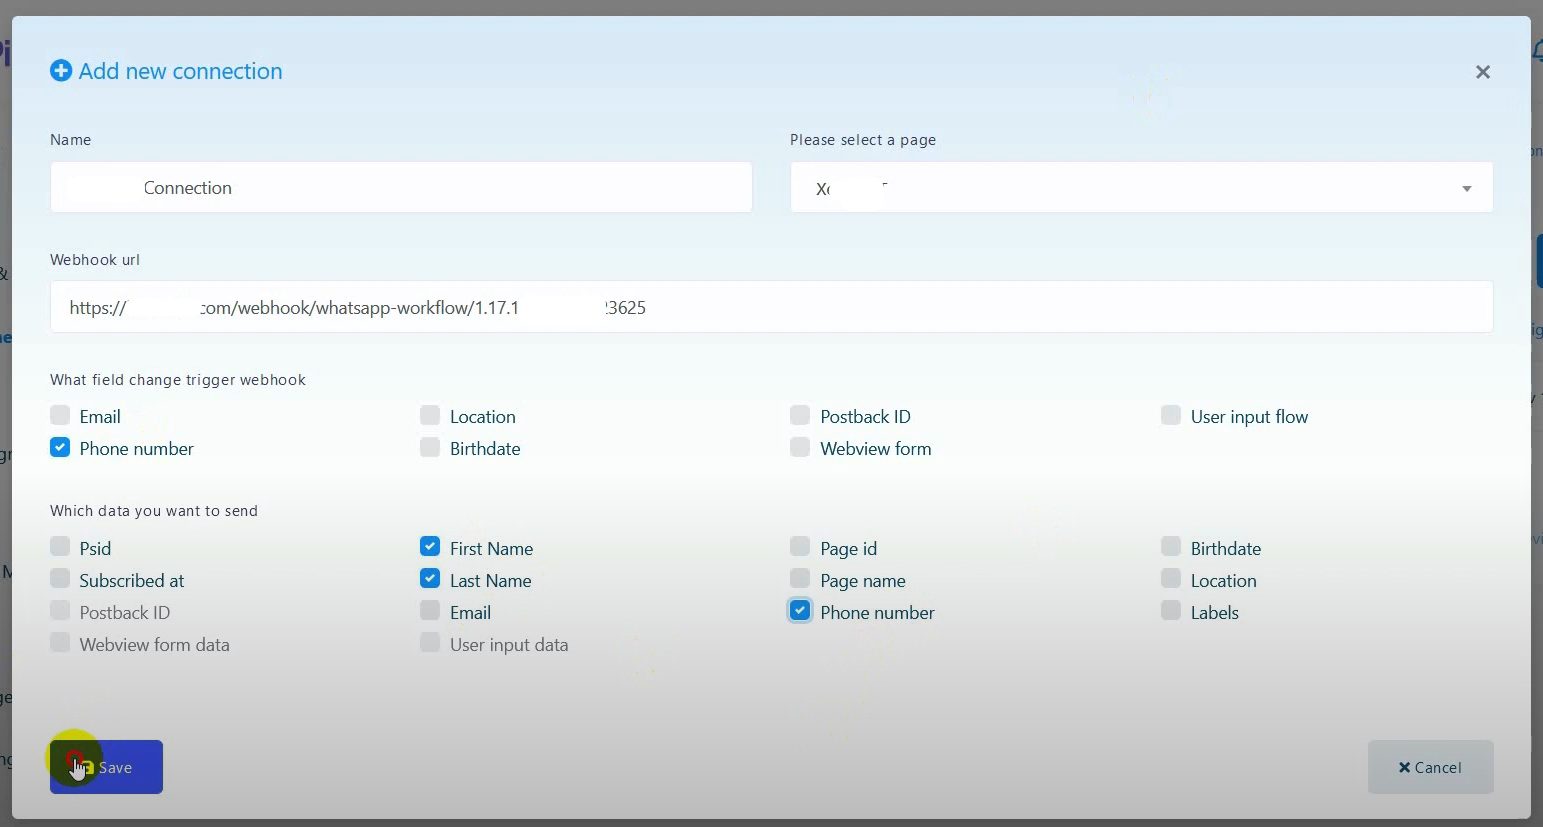
- Click on New Connection and give it a name.


- Click on New Connection and give it a name.
-
-
-
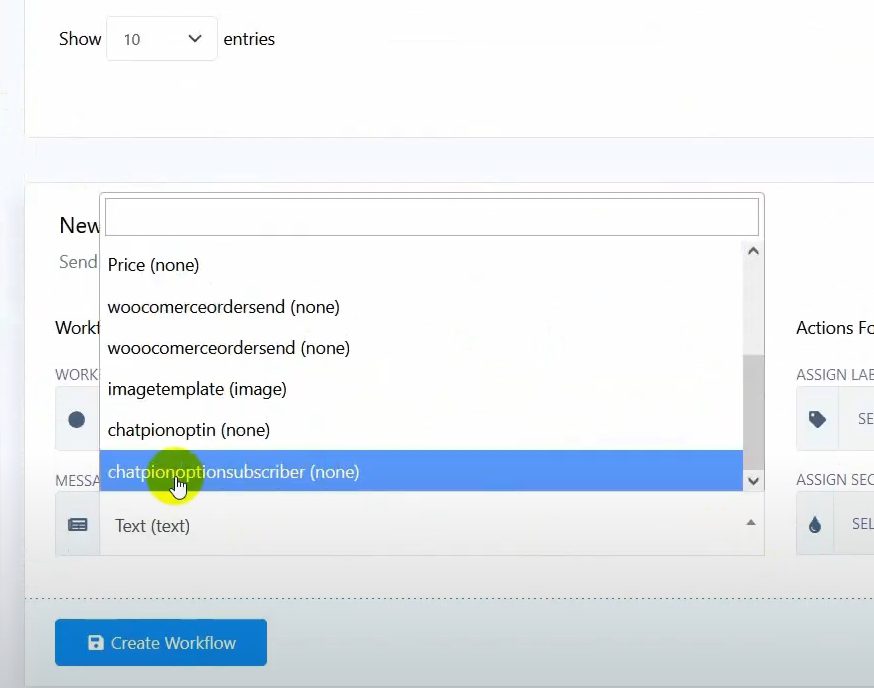
- Select the Facebook page and paste the webhook URL.
- Choose the fields to trigger the webhook (e.g., phone number) and the data to send (e.g., first name, last name, phone number).
- Save the connection.
-
Step 5: Capture and Map Webhook Responses in BotCommerce #
- Capture Sample Data:
- In BotCommerce, click on Capture Webhook Response.

- Provide a sample data by using the ChatPion bot to collect phone numbers.
- In BotCommerce, click on Capture Webhook Response.
- Map Webhook Data:
- Select the phone number field and create a formatter to remove the plus sign:

- Select the phone number field and create a formatter to remove the plus sign:

-
-
- Click on New, name the formatter, and select Trim Left.

- Click on New, name the formatter, and select Trim Left.
-
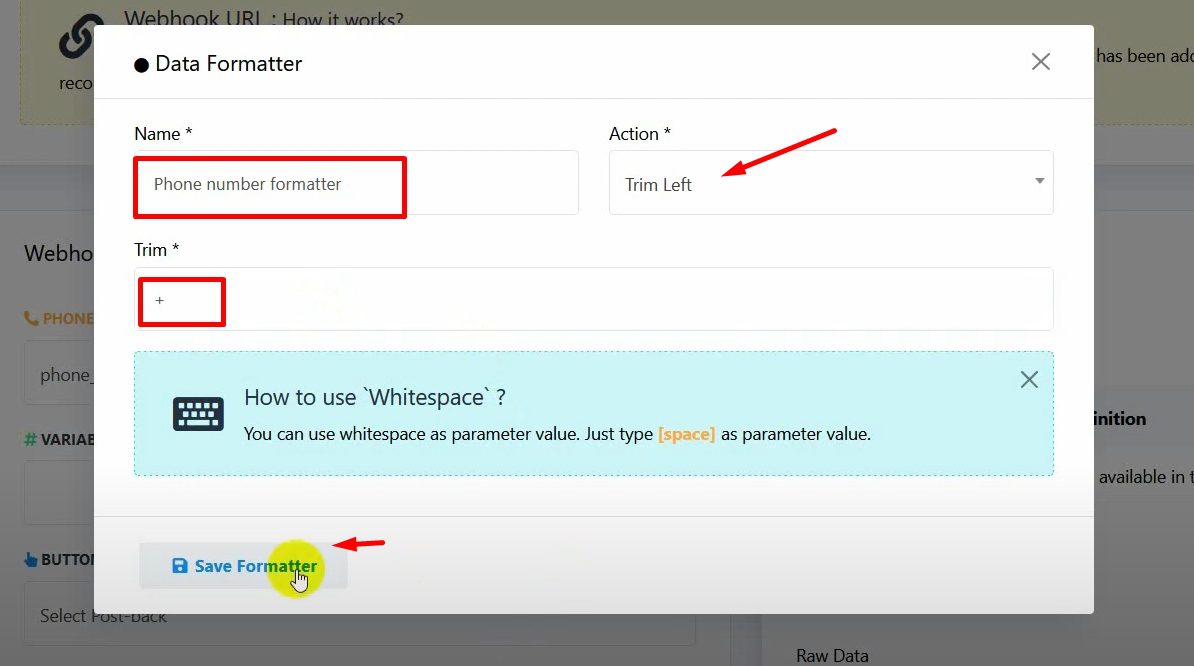
- Enter the plus sign (+) in the trim field and save.
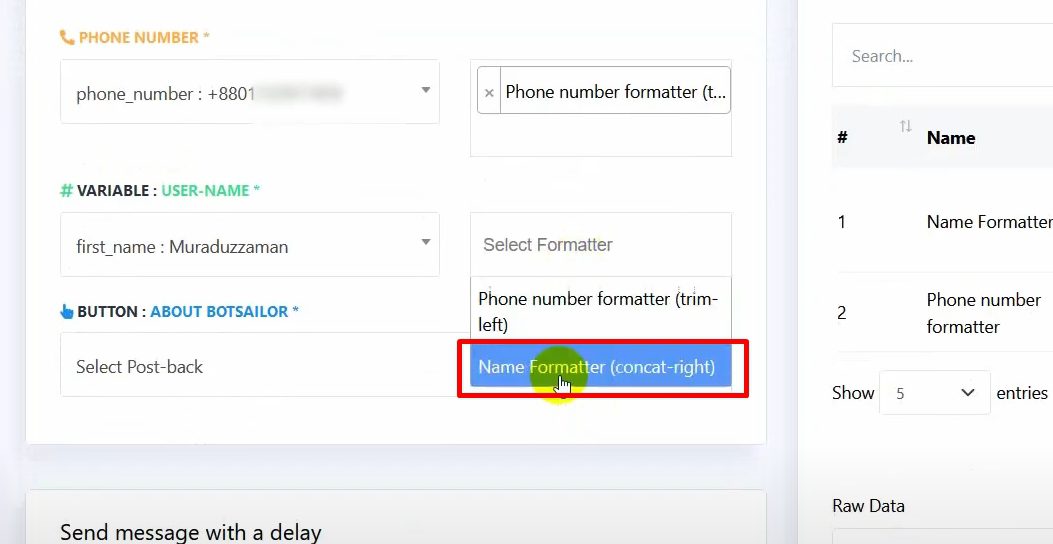
- Create a formatter to concatenate first and last names:
- Name the formatter, select Concat Right, and use whitespace as the separator.
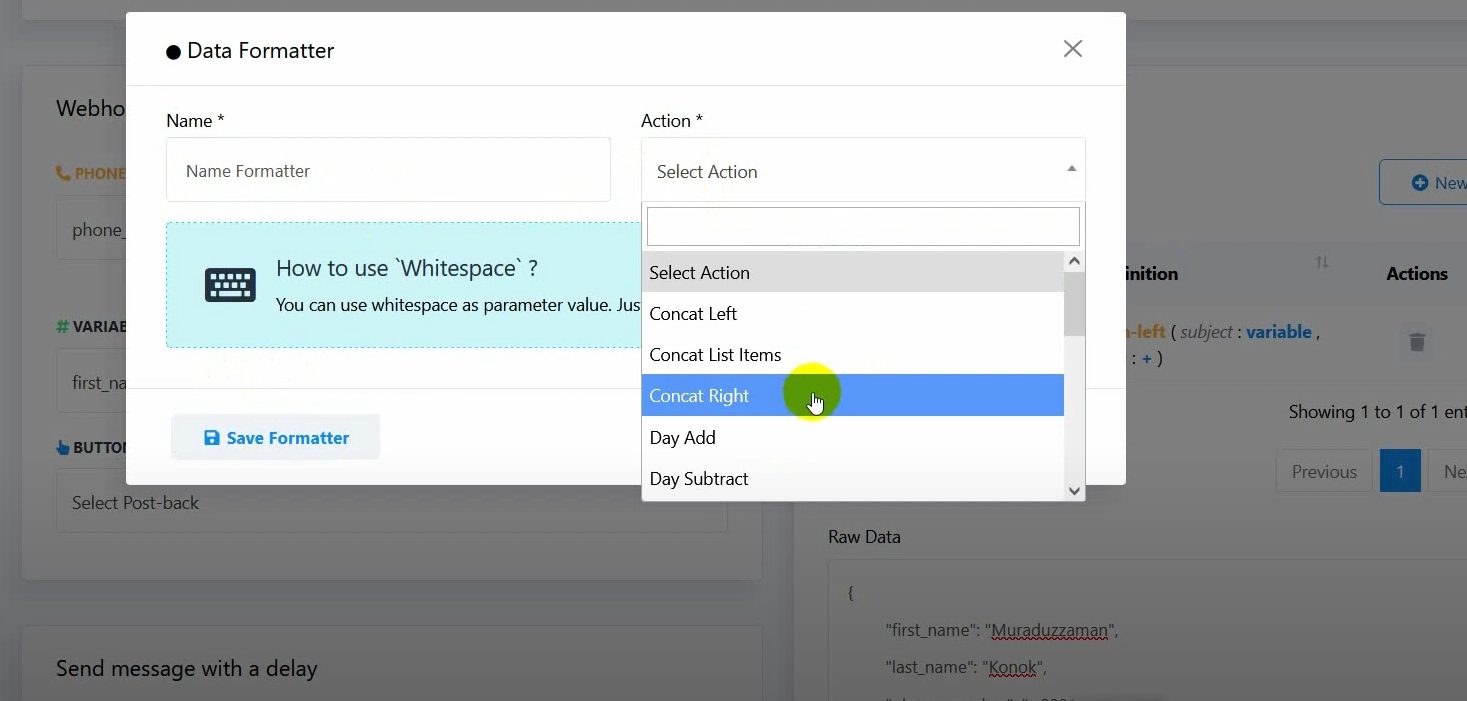
- Save the formatter and select it from the list.

- Configure Message and Delay:
- Select the post back for the quick reply button in the message template.

- Select the post back for the quick reply button in the message template.
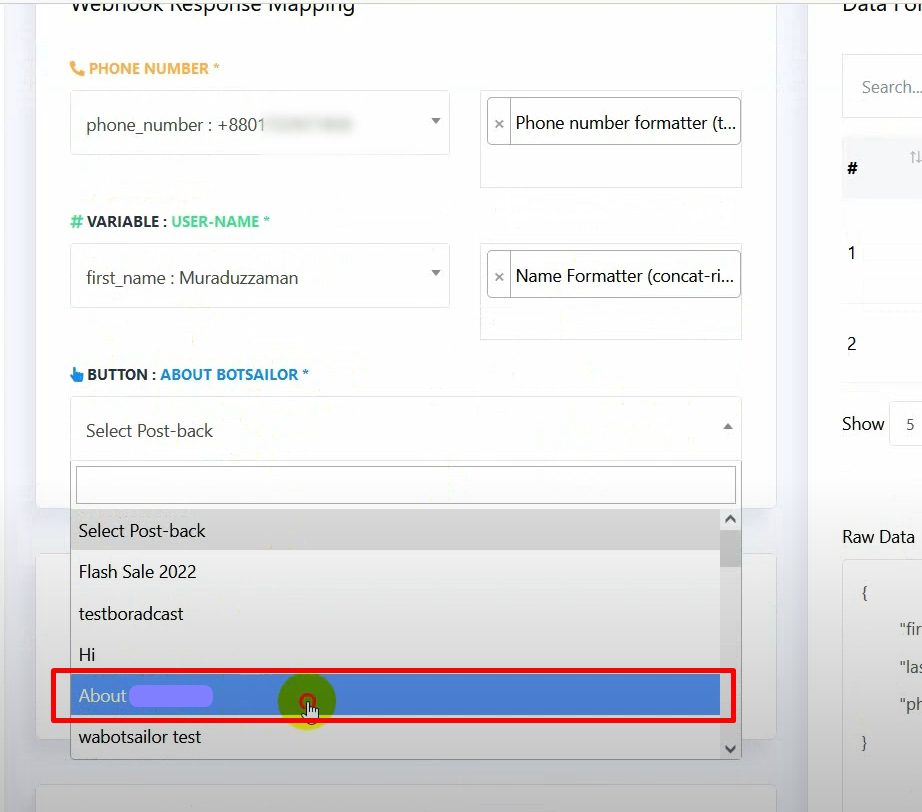
-
- Optionally, set a delay time for sending the message in minutes.
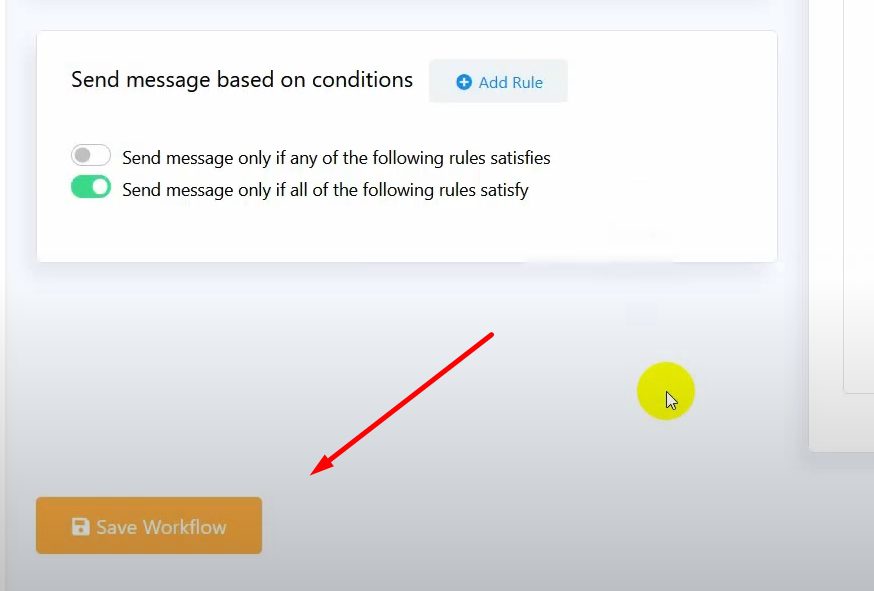
- Add conditions and create rules if necessary.
- Click on Save Workflow.

Step 6: Test the Integration #
- Provide a Phone Number on Facebook Messenger:
- Use the ChatPion bot to provide a sample phone number.

- Use the ChatPion bot to provide a sample phone number.
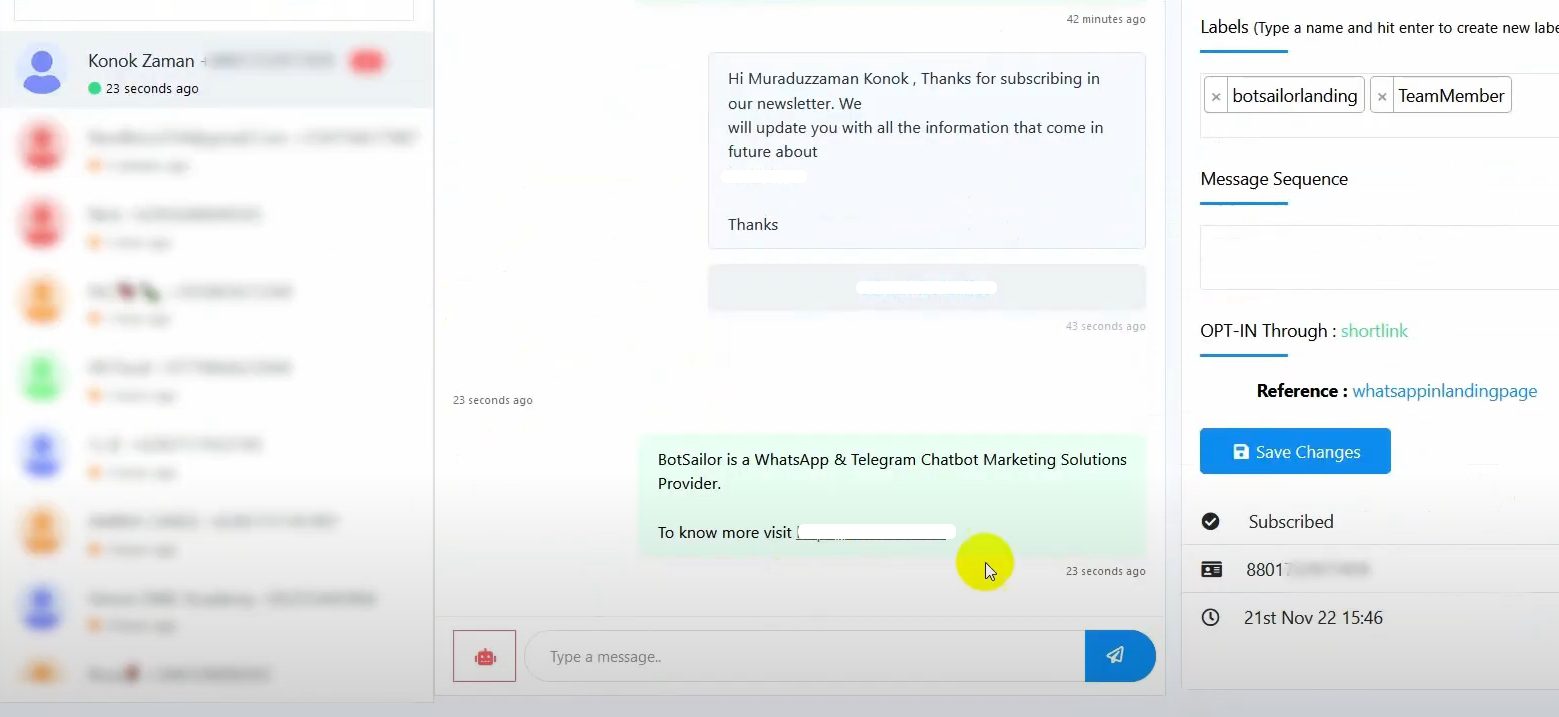
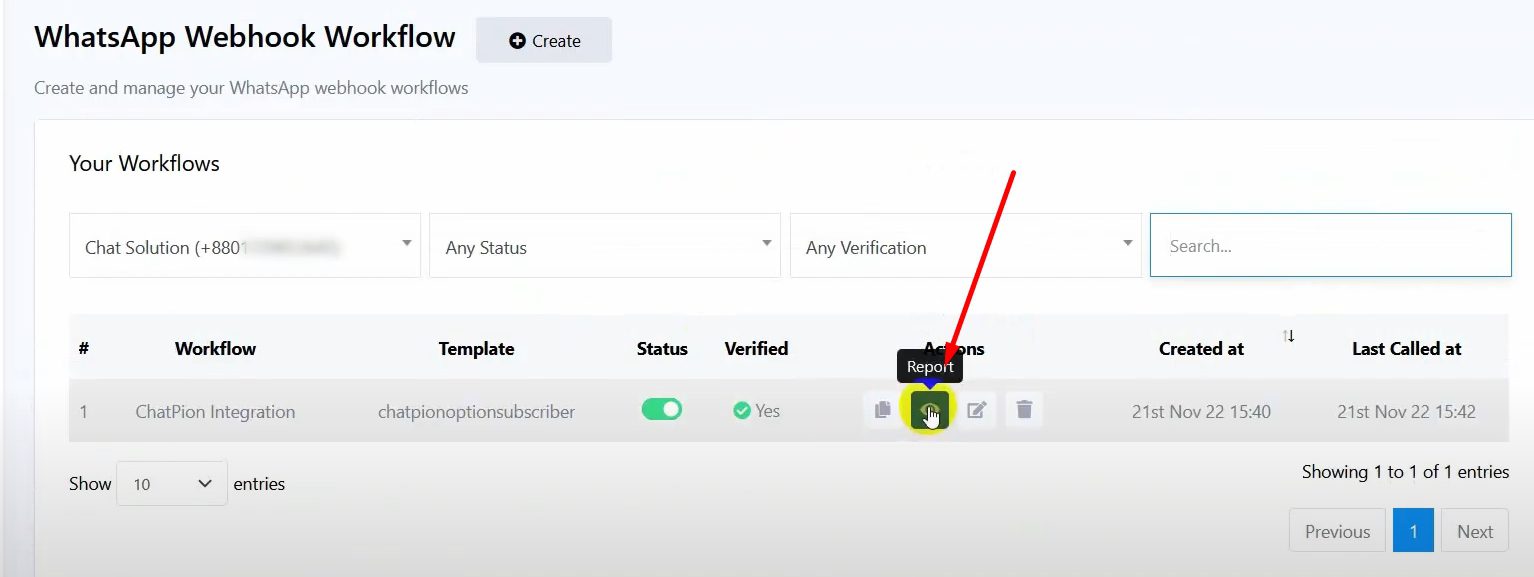
- Check the Report in BotCommerce:
- Verify that the message status is pending and wait for the message to be sent.

- Verify that the message status is pending and wait for the message to be sent.
-
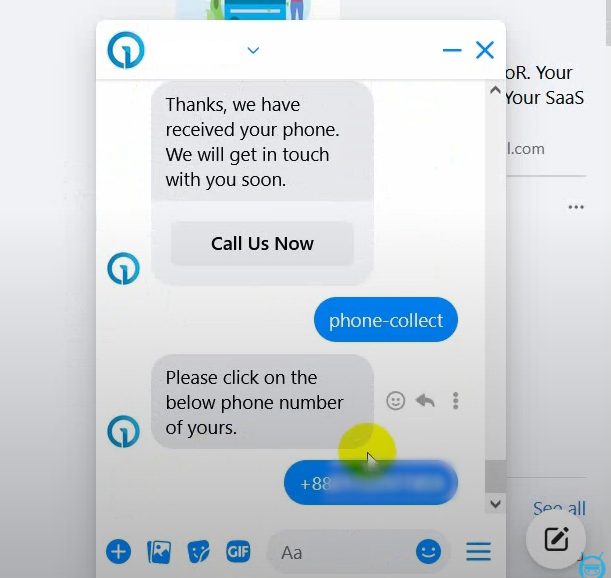
- Confirm that the message is received on WhatsApp.
- Verify in BotCommerce Live Chat:
- Check that the message is sent from the BotCommerce WhatsApp bot account.

- Check that the message is sent from the BotCommerce WhatsApp bot account.