This guide provides step-by-step instructions for integrating Facebook Messenger and Instagram with OmniChat.
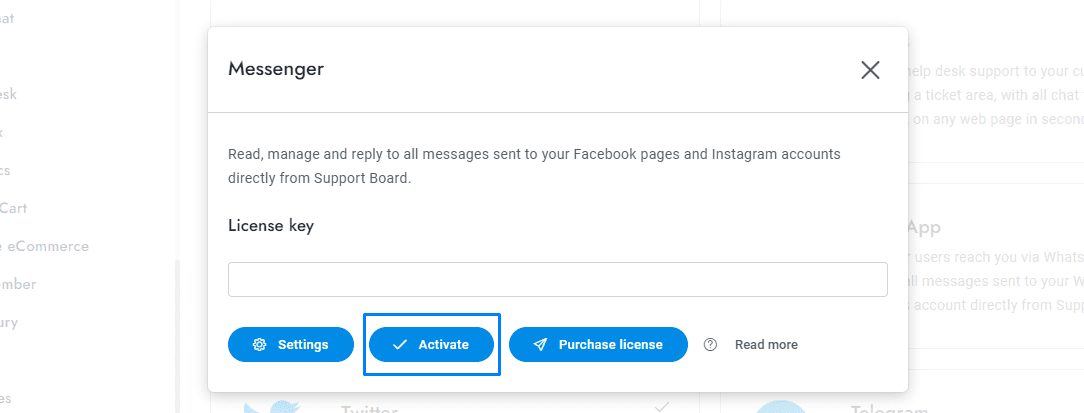
- From Settings > Apps click Messenger and activate the app.

Automatic sync mode
- Complete the synchronization by choosing at least 1 Facebook page and enter the returned information in Settings > Messenger > Facebook pages.
- You’re done. All messages sent to the Facebook pages and Instagram accounts you selected will appear in the conversation admin area of OmniChat. Mind that only new messages will be synchronized, the old ones will not be imported.
Manual sync mode
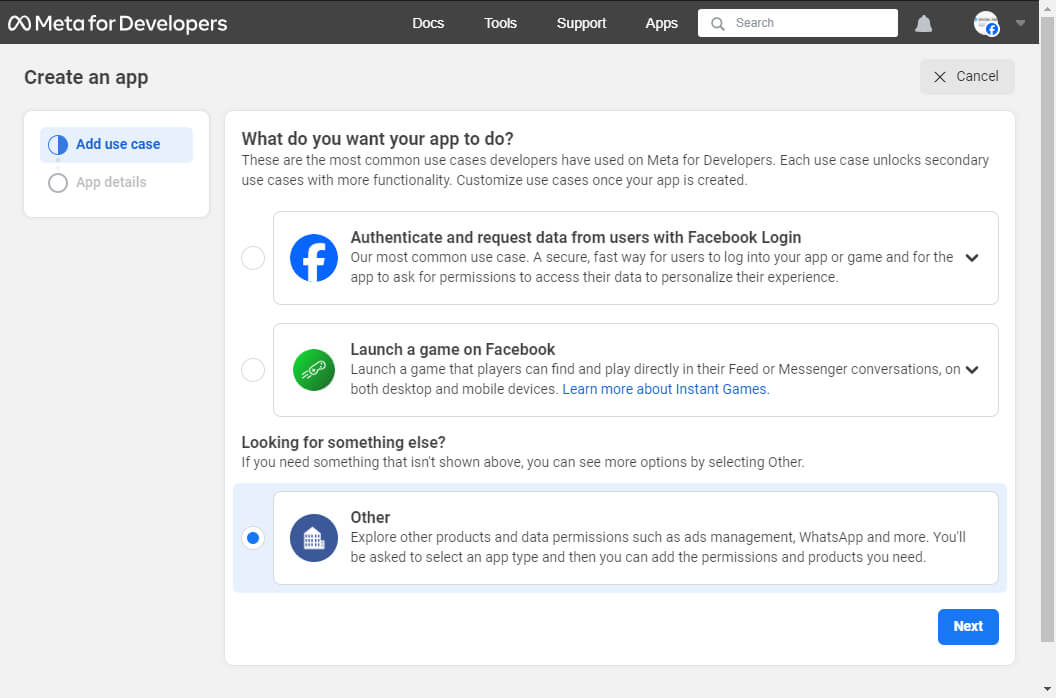
- Create a new account at https://developers.facebook.com/ or login with your existing account.
- Create a new app and choose Other as the app type. Then select Business. Enter a name for the app and skip selecting any Business portfolios.
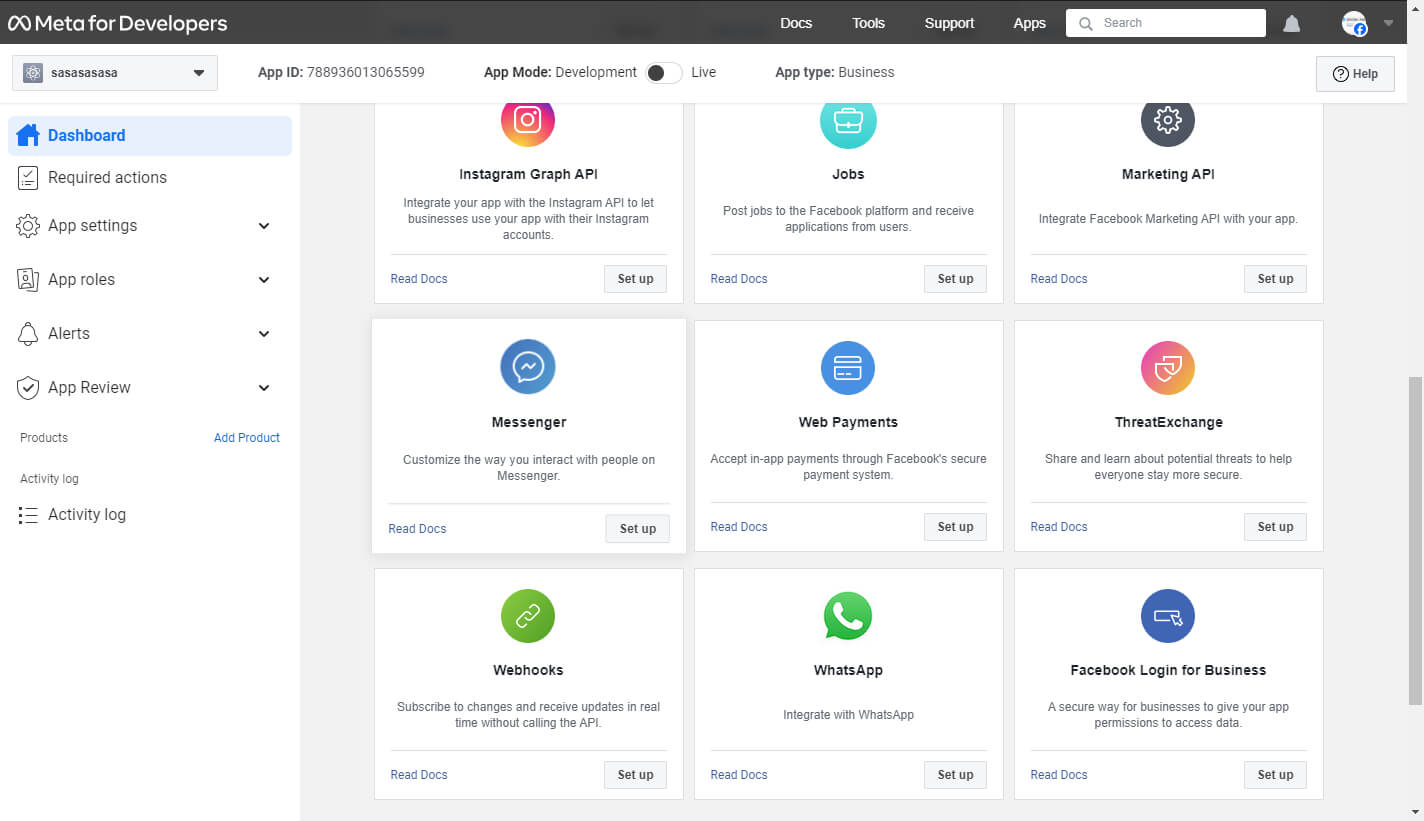
- From the menu on the left side, click on Add product. Choose Messenger.
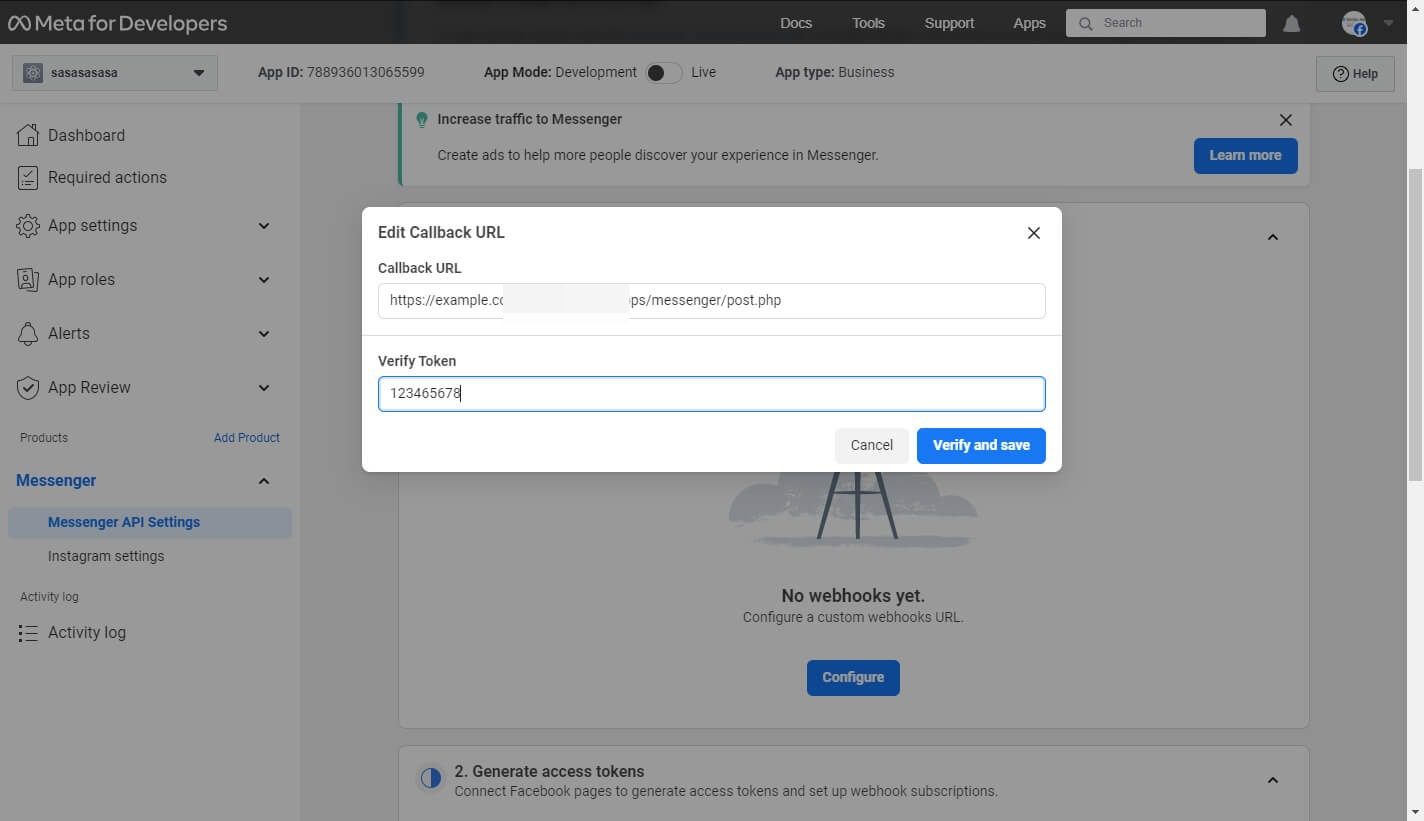
- Under the Configure webhooks section, click on Configure.
- Retrieve the Callback URL from Settings > Messenger > Messenger and Instagram settings > Get configuration URL.
- Set the Verification Token in Settings > Messenger > Messenger and Instagram settings > Secret key and save the changes, then use it to verify the webhook.
-
- In Webhook Fields select the following: inbox_labels, message_deliveries, message_echoes, message_reactions, message_reads, messages, messaging_account_linking, messaging_handovers, messaging_optins, messaging_policy_enforcement, messaging_postbacks, messaging_referrals.
- In the Generate access tokens section, click on Connect. Select the pages you want to sync and complete the process.
- Under the Webhook Subscription column, click on Add Subscriptions. Choose the scopes you want: messages, messaging_postbacks, messaging_optins, message_reads, and message_echoes.
- In the Tokens column, click on Generate. Copy the access token provided and paste it into Settings > Messenger > Facebook pages.
- Copy the Page ID and Page Name and paste them into Settings > Messenger > Facebook pages.
- Repeat these steps for all pages.

- Save the changes and you’re done. The final step is to put the app in Live mode.
- If you want to sync Instagram as well, follow these steps:
- From the menu on the left side, click Messenger > Instagram settings.
- In the Configure webhooks area, click on Configure. Repeat the same step you previously took for Messenger.
- Under the Webhook Subscription area, click on Add Subscriptions. Select the following scopes: messages, messaging_postbacks, messaging_optins, messaging_seen.
- Enter your Instagram ID in Settings > Messenger > Facebook pages > Instagram ID. To get it, open your web browser and enter the following URL: https://graph.facebook.com/FACEBOOK-PAGE-ID/?access_token=ACCESS-TOKEN&fields=instagram_business_account. Replace FACEBOOK-PAGE-ID and ACCESS-TOKEN with the corresponding Page ID and access token from the Facebook page linked to Instagram.
- Save the changes and you’re done. The final step is to put the app in Live mode.
- Your app must be in Live mode. To do that, your app must be submitted for review and approved by Meta. Please note this process is not covered by our support. If you require assistance, you can hire us.
If you have additional doubts, remember that you can always contact us.
