In this tutorial, you’ll learn how to connect your WhatsApp chatbot with email autoresponders like SendinBlue, MailChimp, and ActiveCampaign. By integrating these tools, you can automatically collect emails from chatbot conversations and send them directly to your mailing lists—perfect for growing your subscriber base and keeping in touch with your audience.
Add the Auto Responder to the app
From the dashboard, go to the WhatsApp Bot Manager. Select the account where you want to collect the emails.
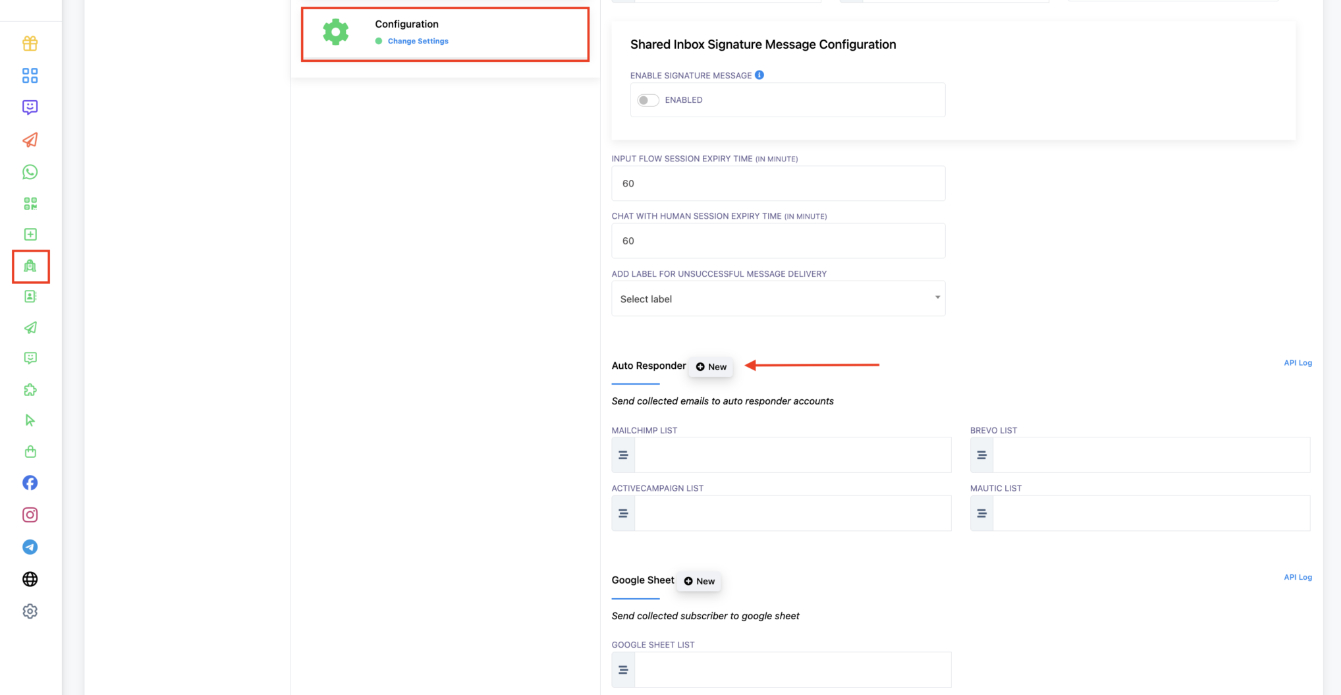
Go to Configuration and look for the Autoresponders section. Click on the New button.
You will be directed to the Integrations section on a new tab. Once again, click on New.

Select the Autoresponder you want to add from the list. On this example, we will use MailChimp. You need to provide an API Key to complete the connection.

Let’s see how to obtain it from MailChimp. Steps will be similar on any other auto responder. Login to your account. Click on your profile picture to open the Settings menu and select Profile.

Once there, click on Extras. Select API Keys.

You will be directed to the API Keys section. Click on Create a key.

Give your key a name to identify it. Then, click on Generate Key.

Copy the API key. Note that once you close this window, you will not be able to see it again.

Paste the API Key on the corresponding field. Click on Save.

You must see a success message. This means the connection was done correctly.

Go back to the Bot Manager Configuration tab. Reload the page and scroll down to the AutoResponder section again.
On the MailChimp list field, you will see all the email lists existing on the account you connected before. Select the one where you want to send your data. Make sure to click on the Save Settings button at the bottom of the page to apply your changes.

Now, let’s design an user input flow to collect the emails. Go to the Bot Reply section and click on Create to start a new flow.

Double click on the Start Bot Component to configure it. Add a trigger keyword and a title to identify the bot.

Drag a user input flow component into the dock. Connect it to the Start Bot Flow and double click on it to configure it.
Select Add new user input flow. Give it a title.

A new question will be added automatically. Double click on it to configure it.
As type, select free keyboard input. Add a message requesting the user’s email.
Make sure to store the answer on the system field Email. Select it on the Save to System field box.

Add a thank-you message to finish the user input flow. Click on the Save button at the top right corner to save the bot.

Let’s test! Open your WhatsApp account and trigger the bot. Provide your email.

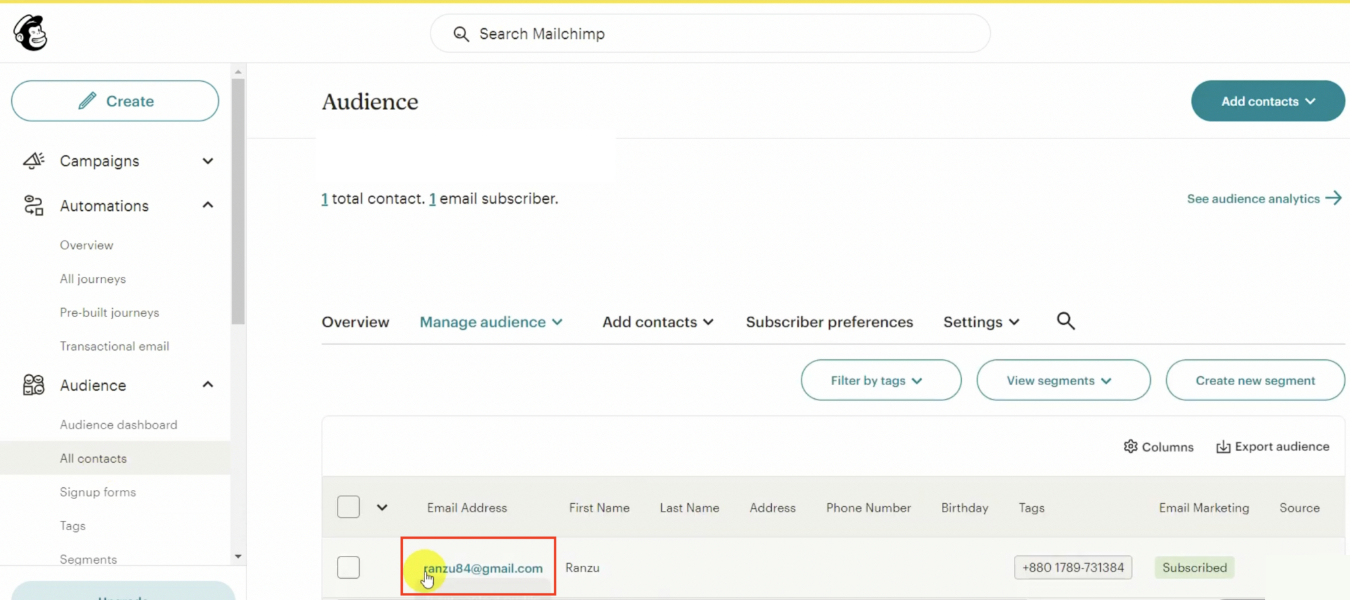
As you can see, the email is automatically added to the list. You can now use it to send newsletters as with any other MailChimp list.