Verifying Cash on Delivery (COD) orders on Shopify is crucial to prevent fraud and ensure successful transactions. In this guide, we’ll show you simple steps to effectively verify COD orders, protecting your business while maintaining customer trust.
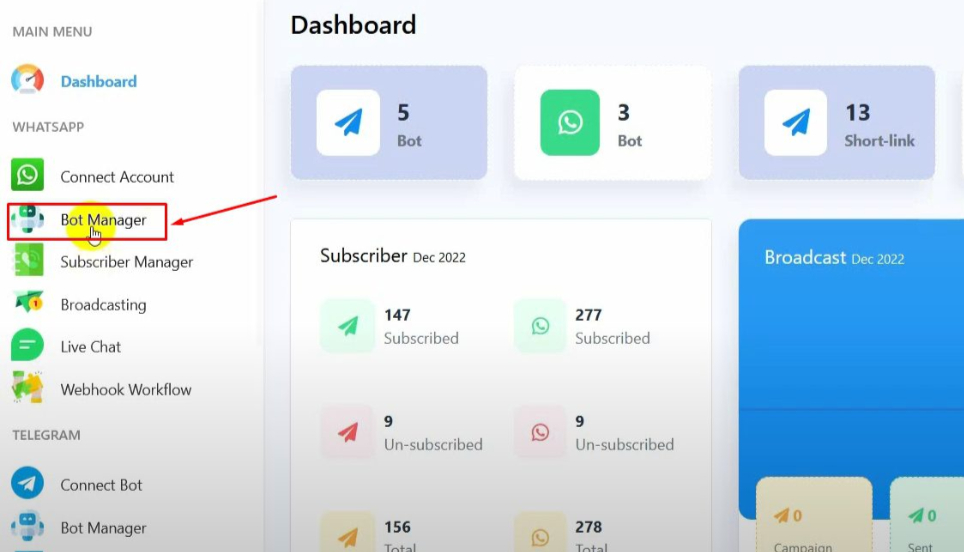
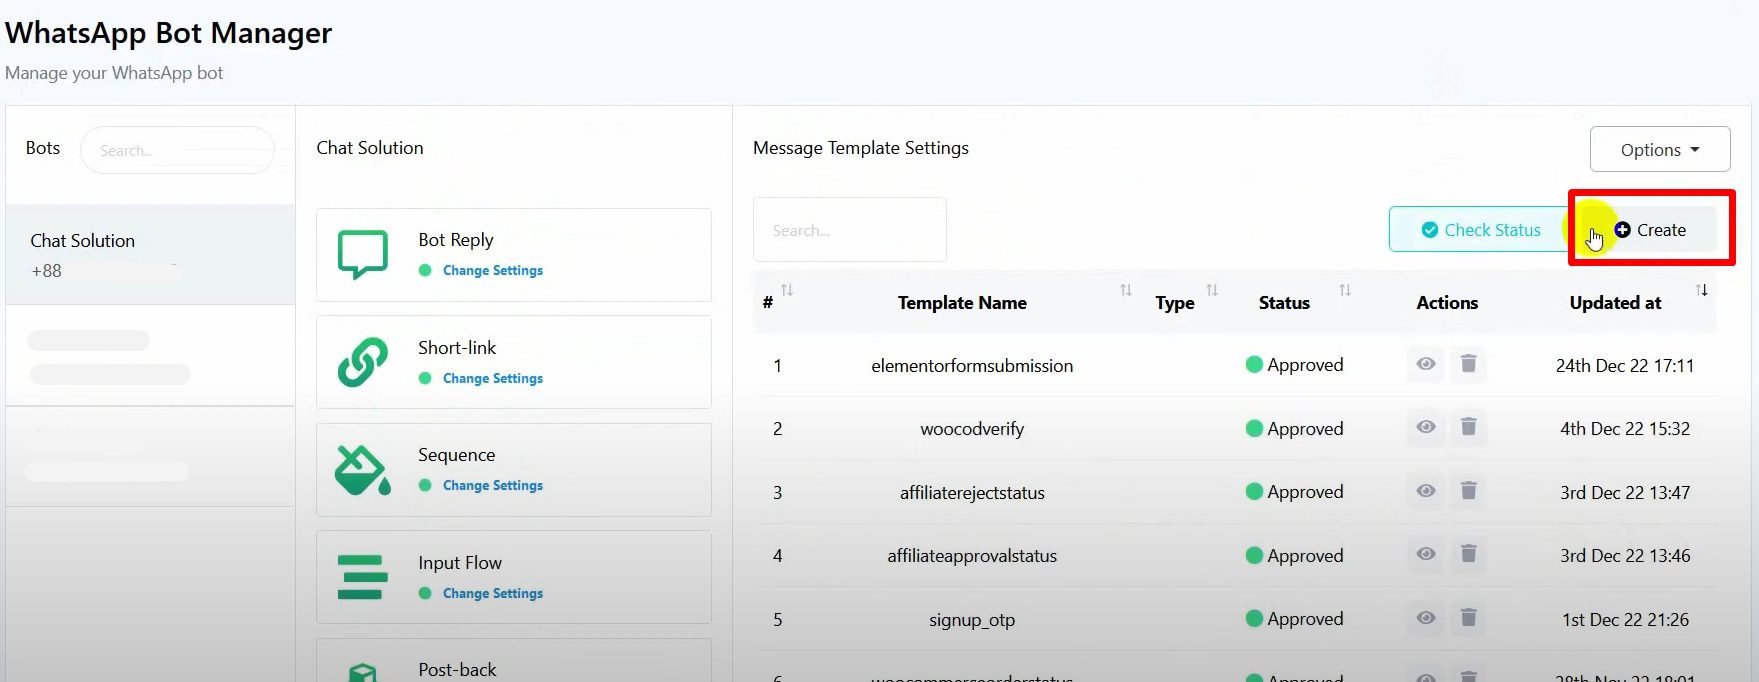
Start by navigating to the Bot Manager from the BotCommerce dashboard.
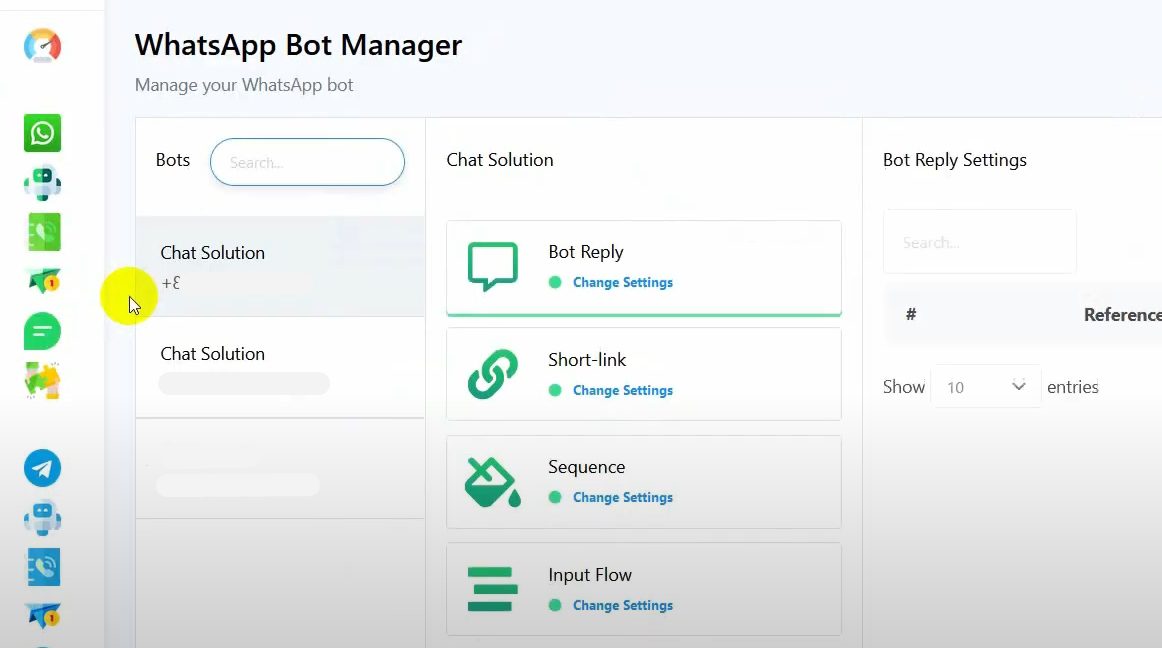
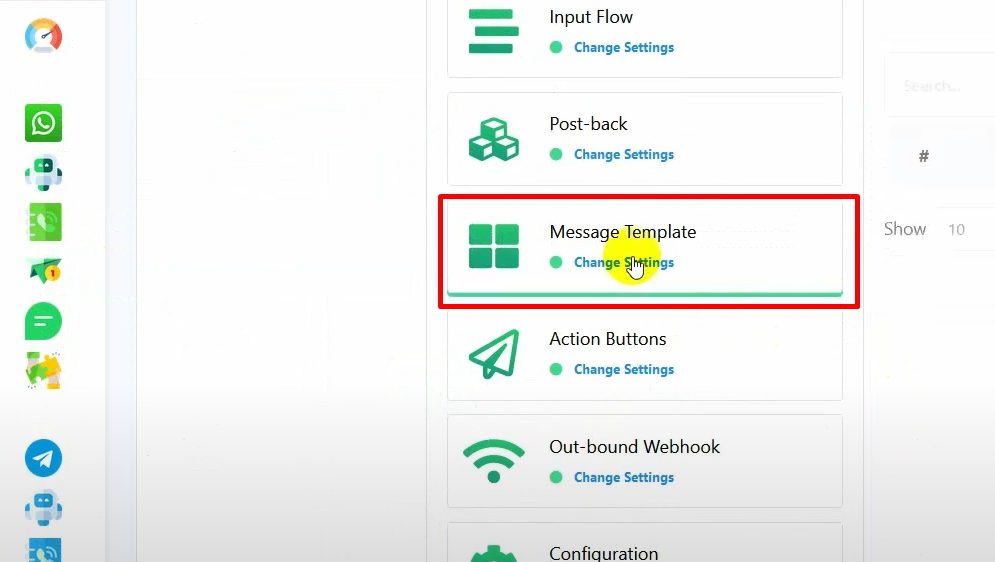
Click on Message Template to begin creating your template.
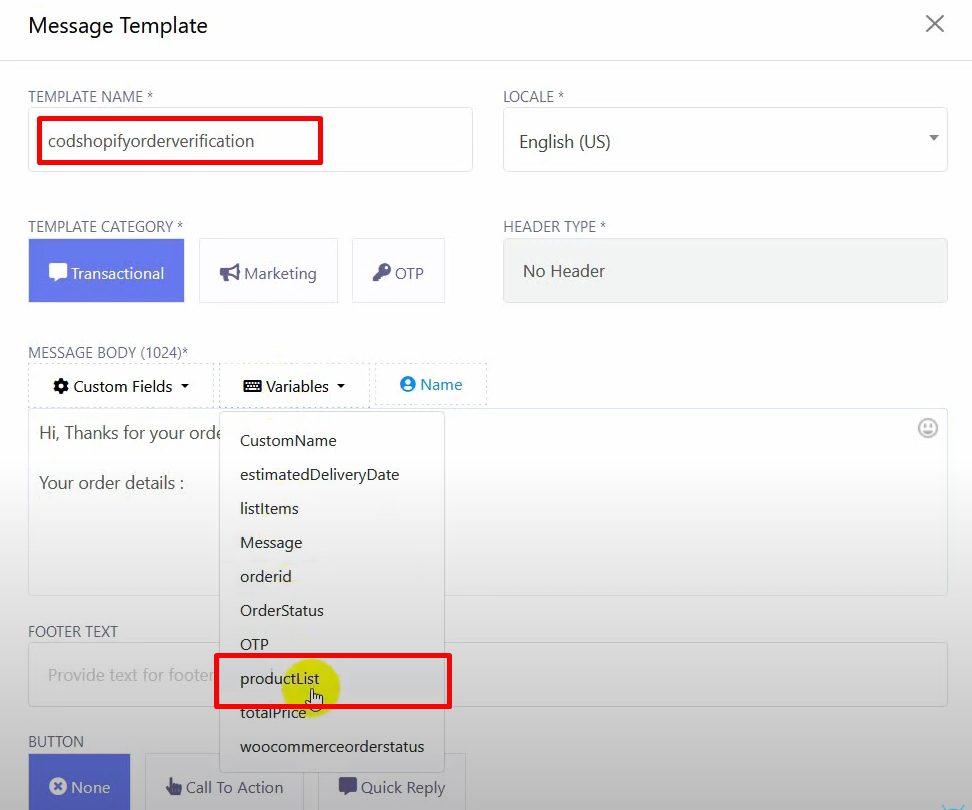
Add Variables: You can create variables directly within the message template, such as the product list or total price.
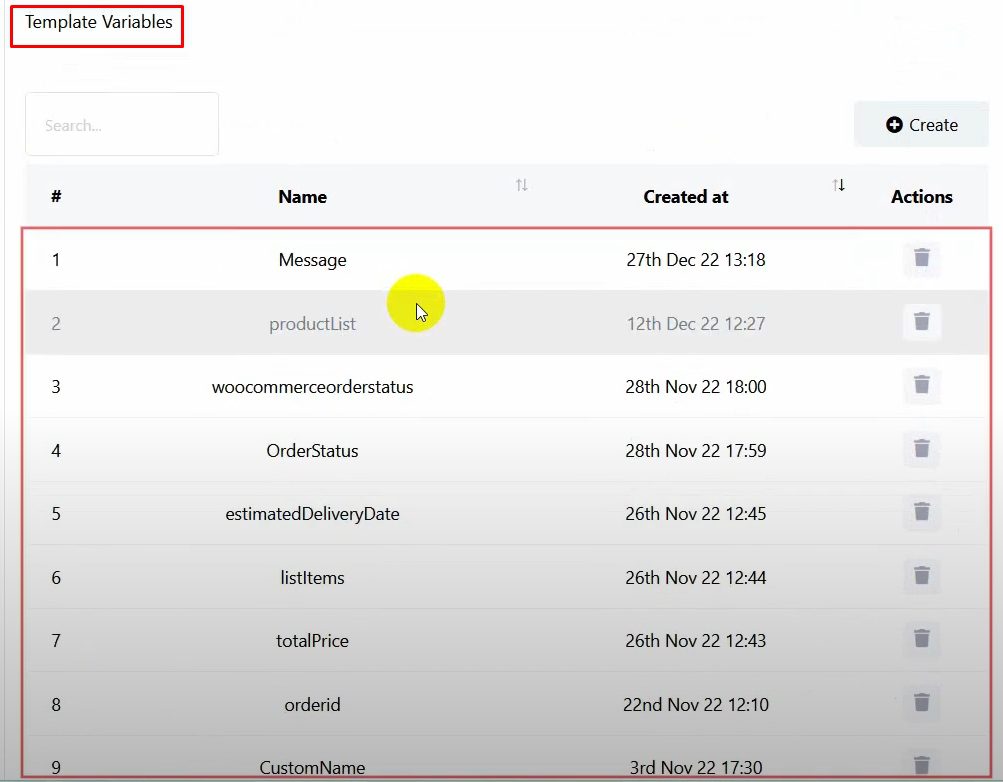
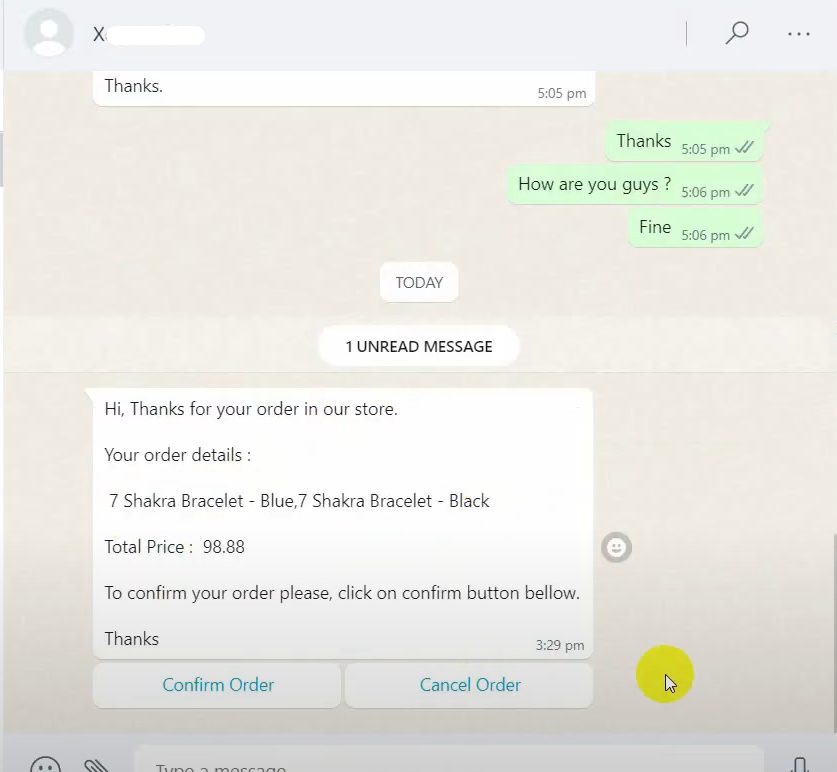
Write the message body and insert the variables as needed. For example, “Your order for {product_list} totaling {total_price} is ready.”
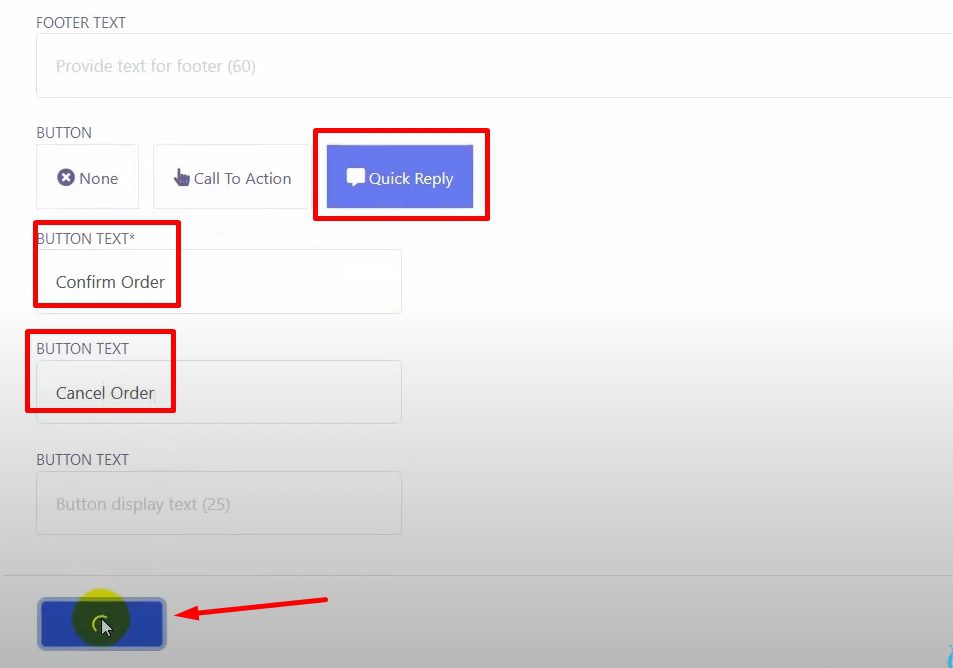
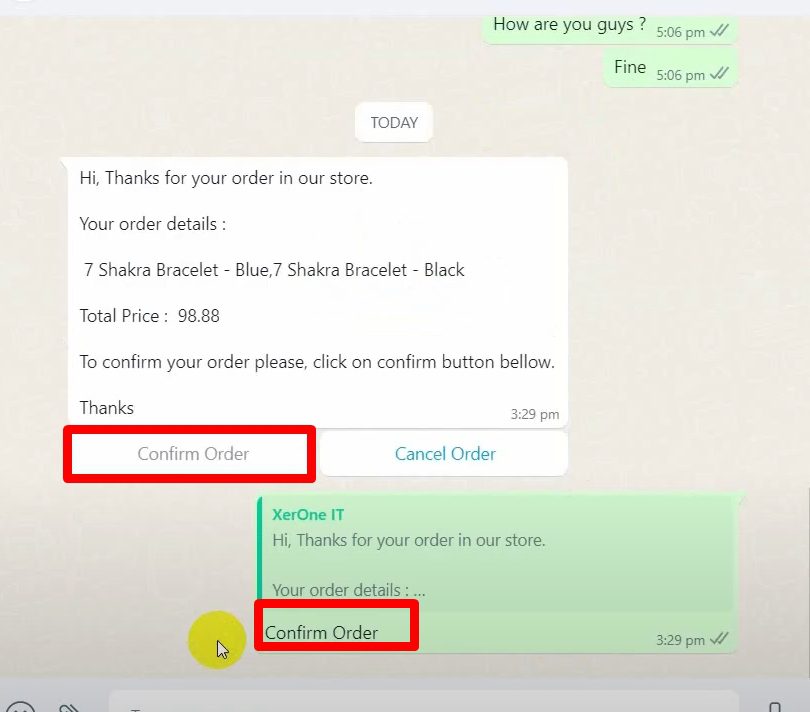
Add Quick Reply Buttons: Include two buttons in the template for confirming or canceling the order.
Example: “Confirm Order” and “Cancel Order.”
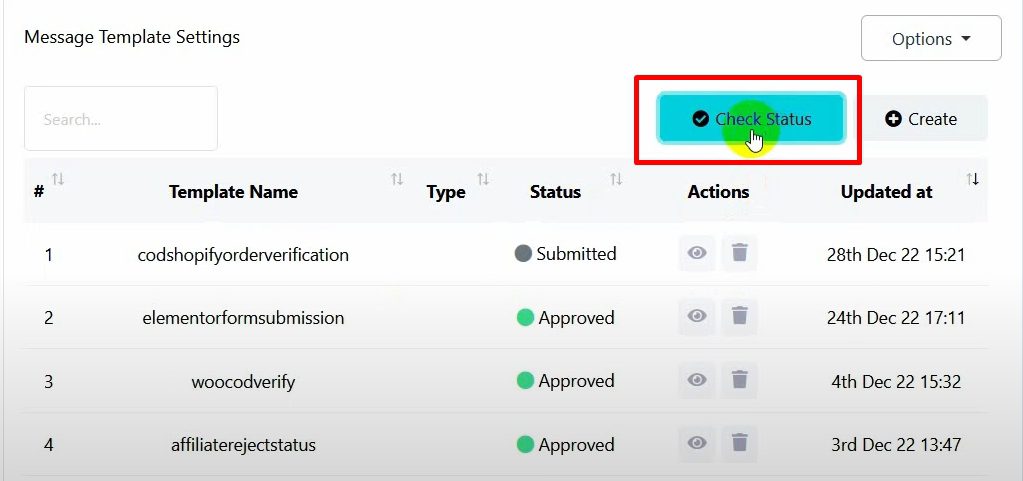
Once the template is complete, save it and check its status to ensure it’s approved by WhatsApp.
Go to the Postback section in BotCommerce.
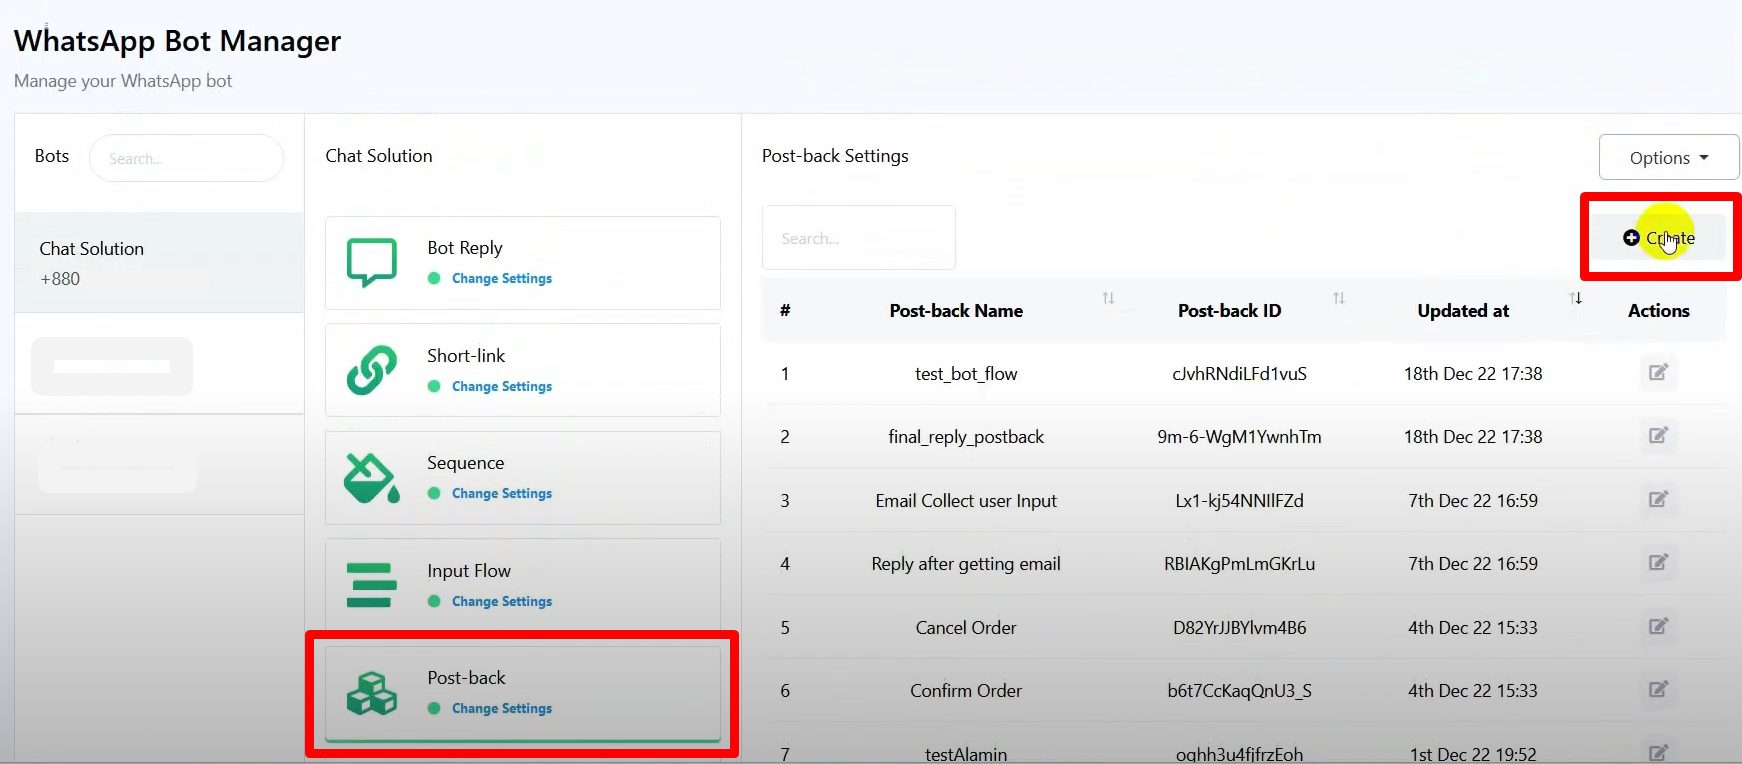
Click on Create to set up postbacks for the quick reply buttons you added in the message template.
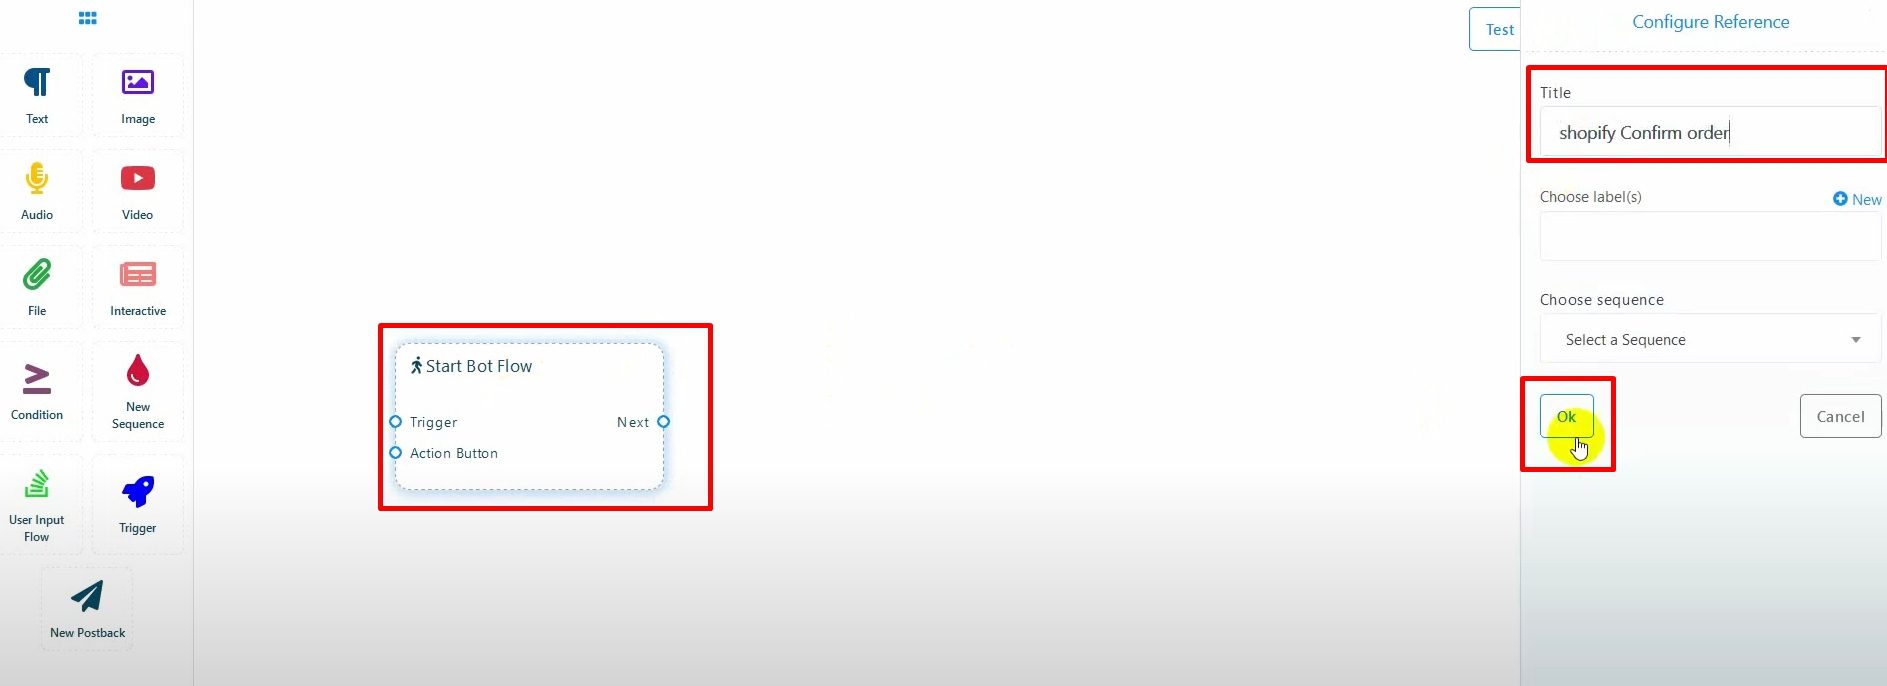
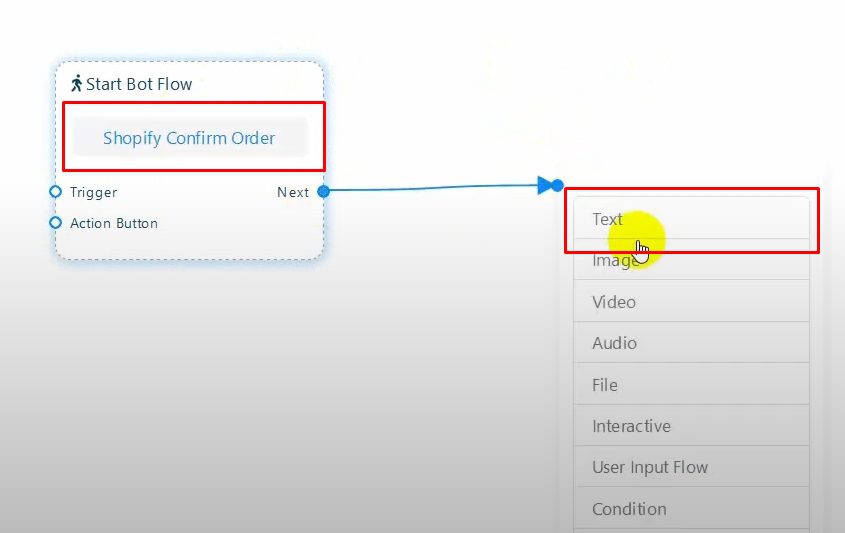
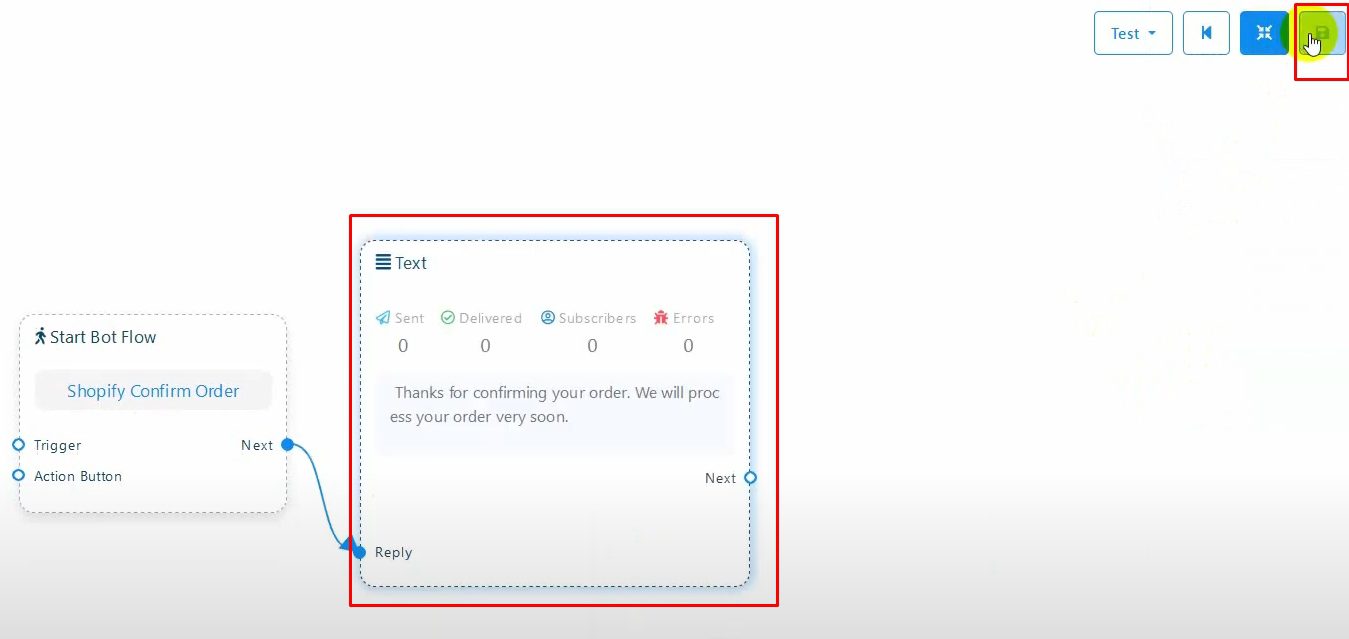
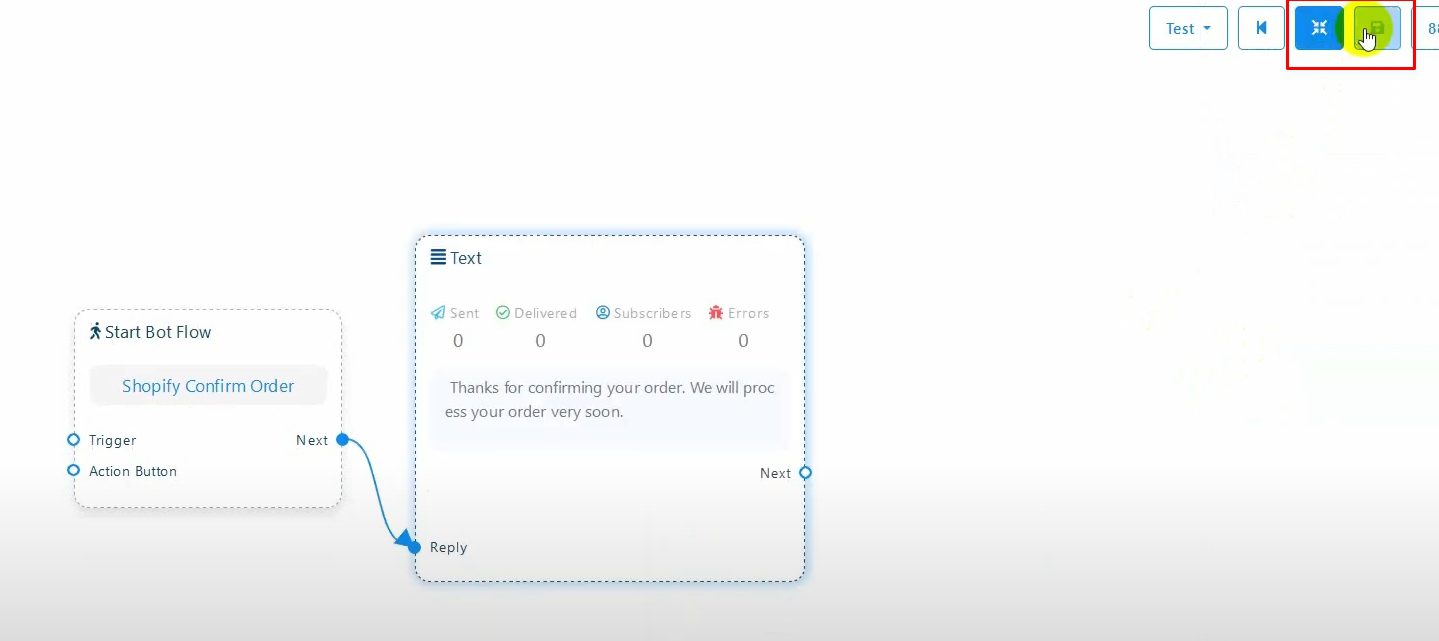
Use the Visual Flow Builder to design the response flow for each button.
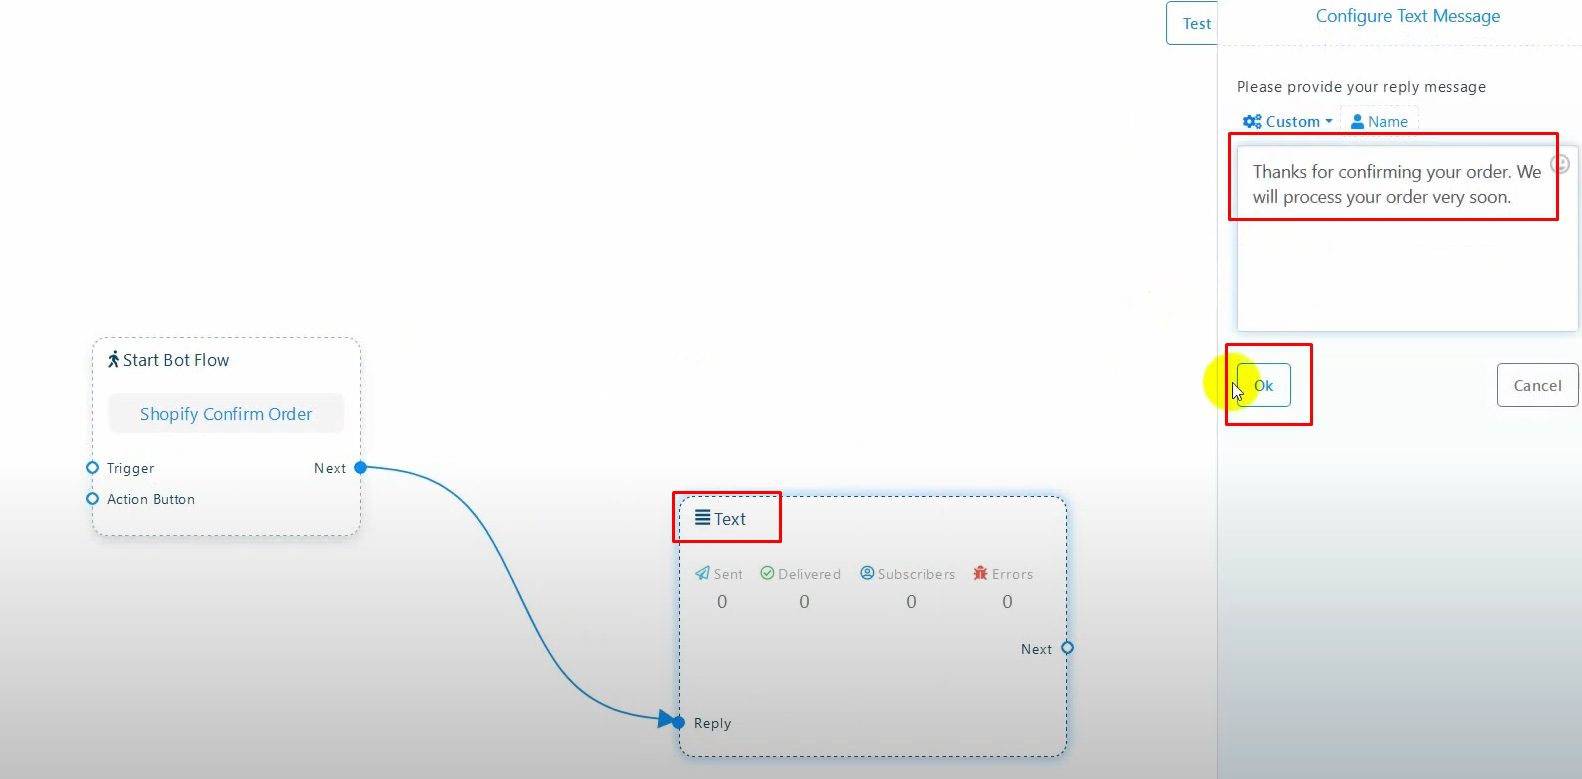
For the confirmation button, create a response that confirms the order.
For the cancellation button, create a response that cancels the order
Save each postback after configuring it.
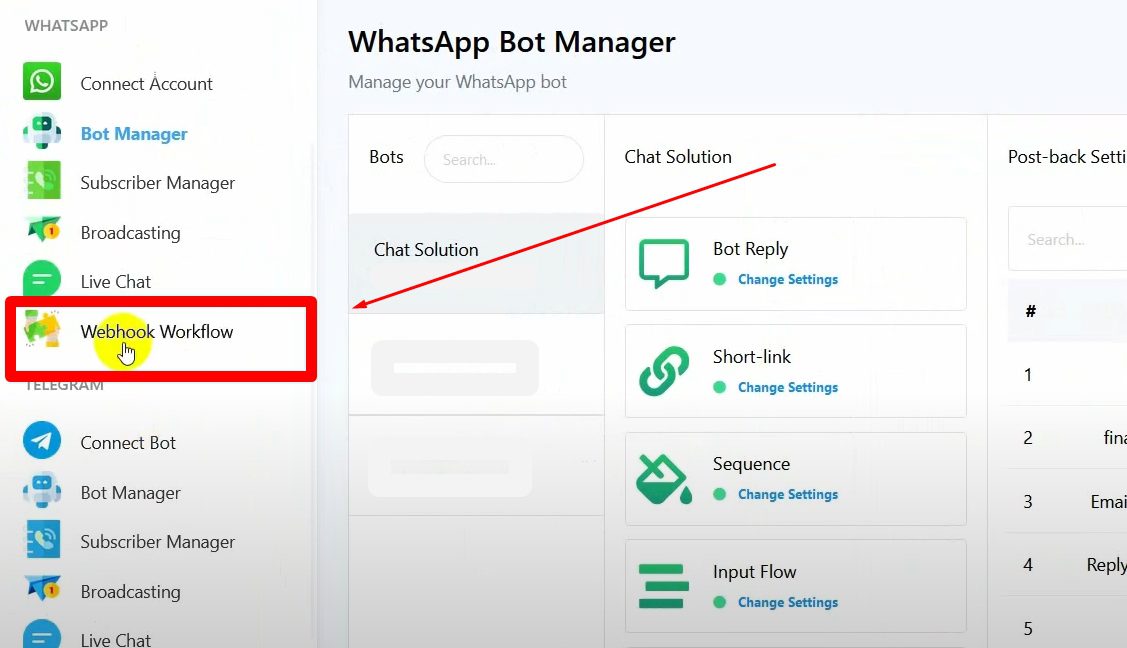
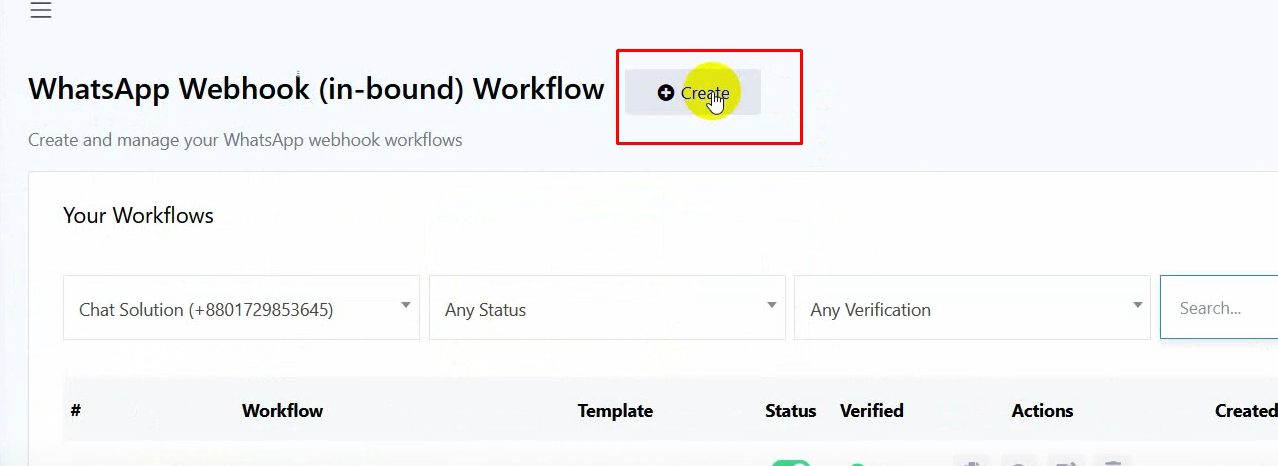
Navigate to the Webhook Workflow section and click on Create.
Name your workflow and select the WhatsApp account you’ll use for sending messages.
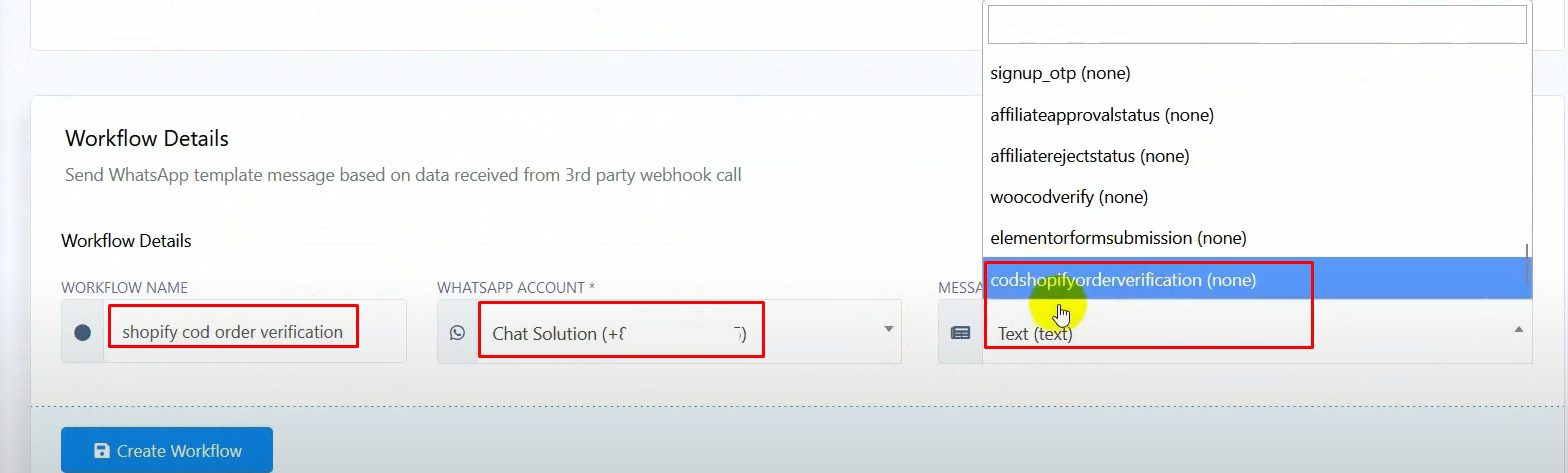
Choose the message template you created earlier.
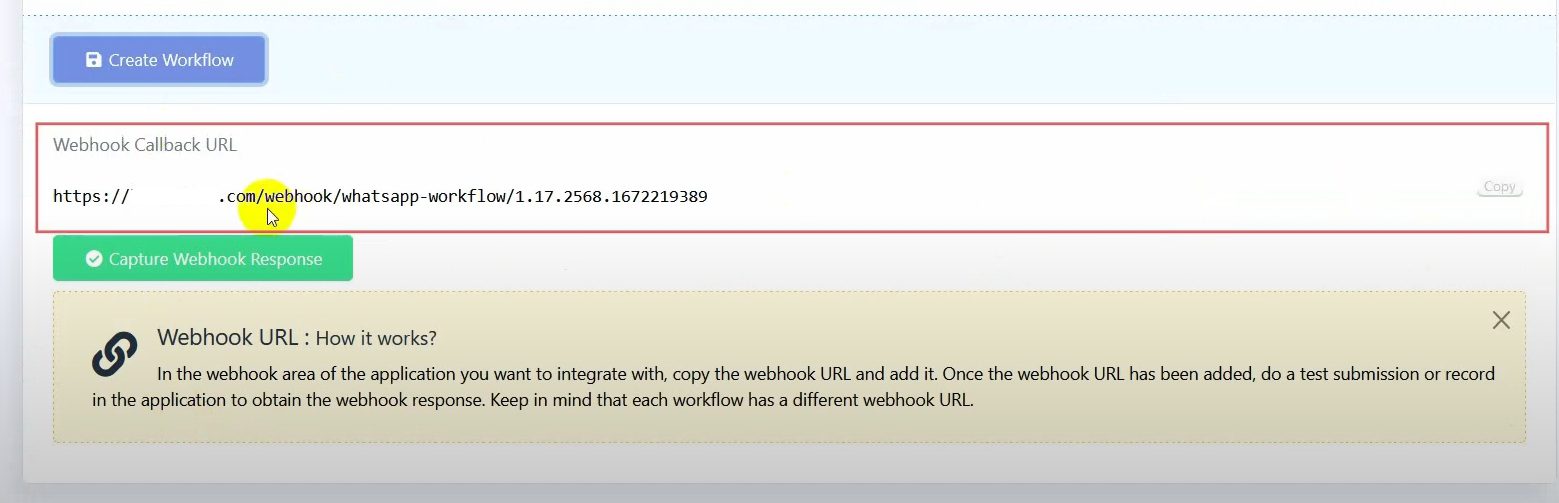
Generate Webhook Callback URL: Click on the create button to generate the URL, then copy it.
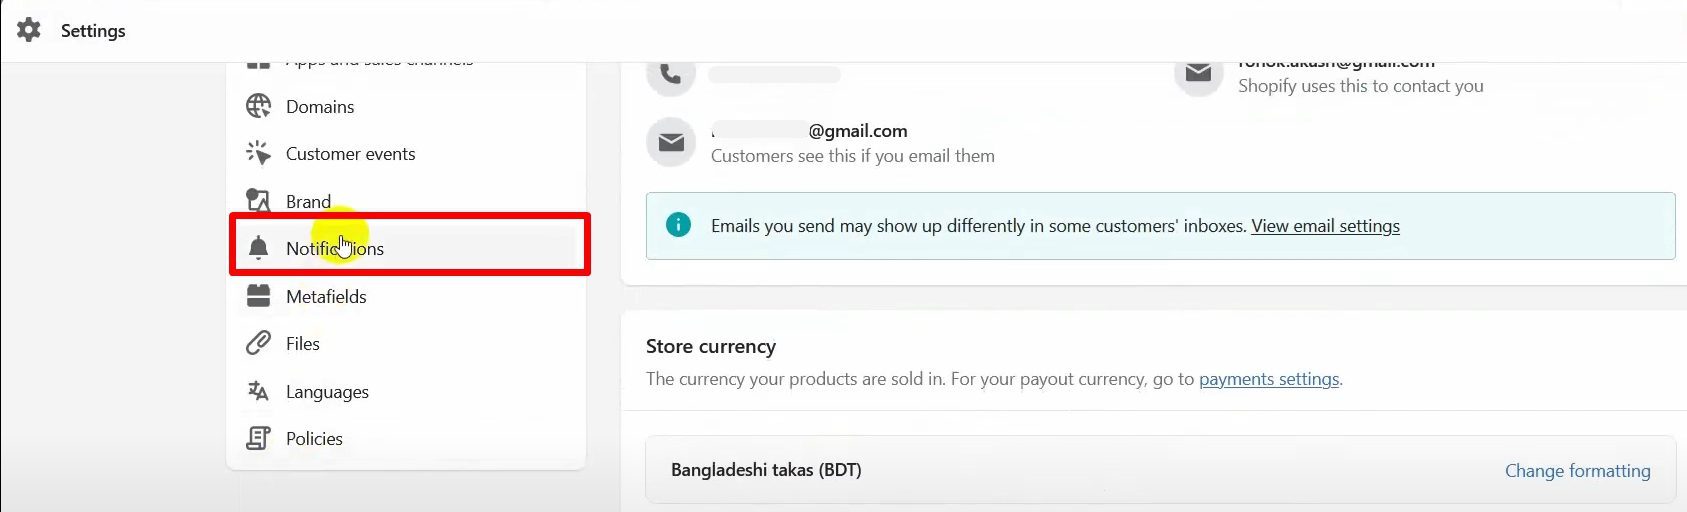
Configure Shopify to Use the Webhook: Go to your Shopify Dashboard, then navigate to Settings > Notifications.
Scroll down and click on Create Webhook.
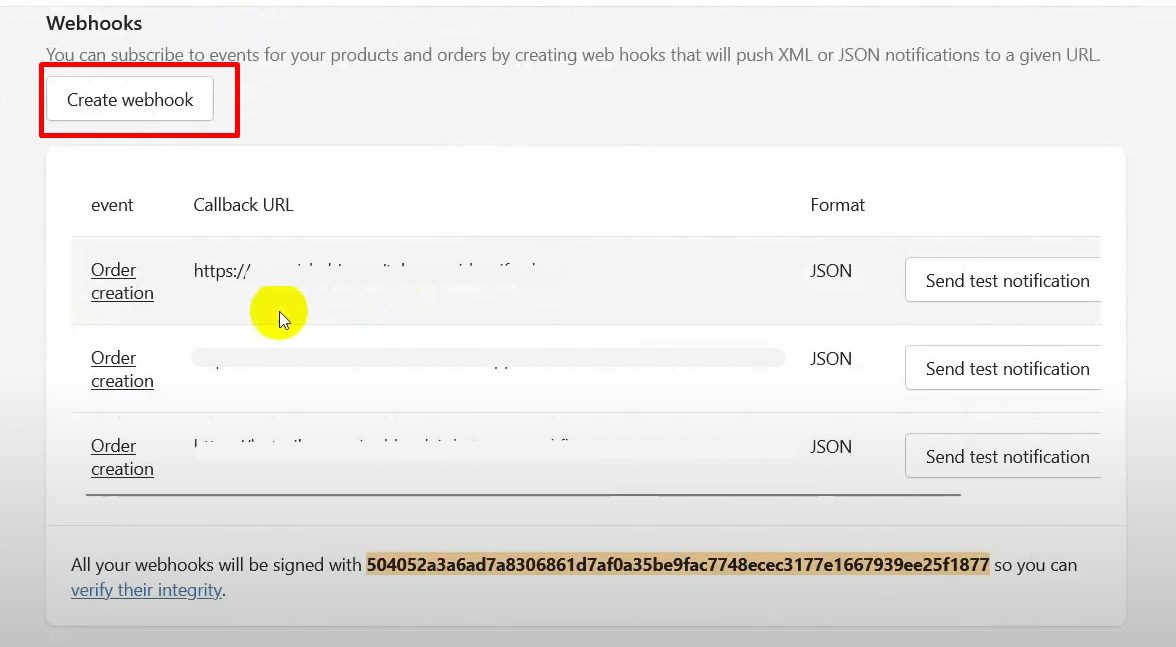
Select the event as Order Creation and paste the webhook URL you copied from BotCommerce.
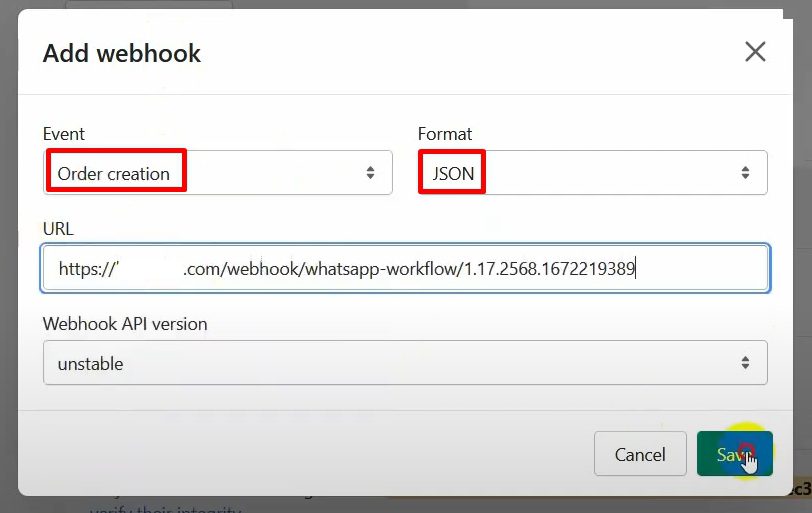

Save the webhook configuration.
Capture Webhook Response in BotCommerce
Return to BotCommerce and click on Capture Webhook Response.
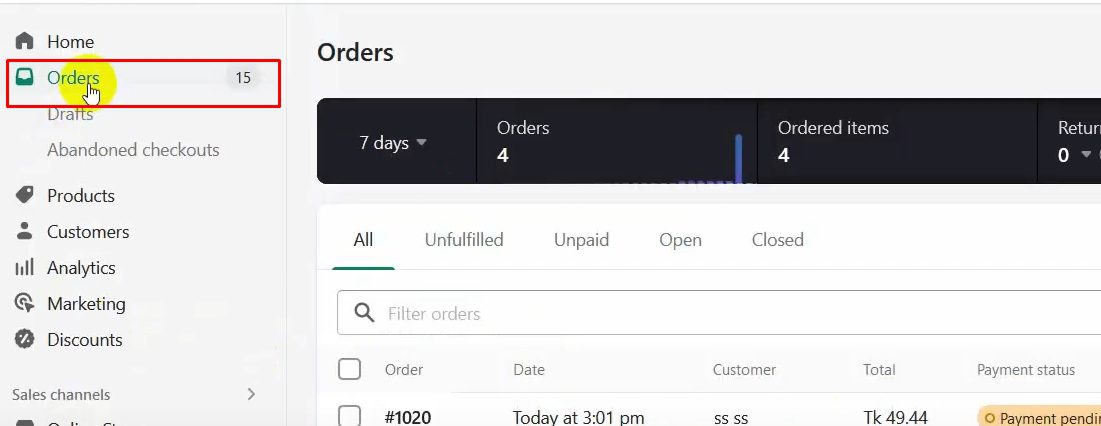
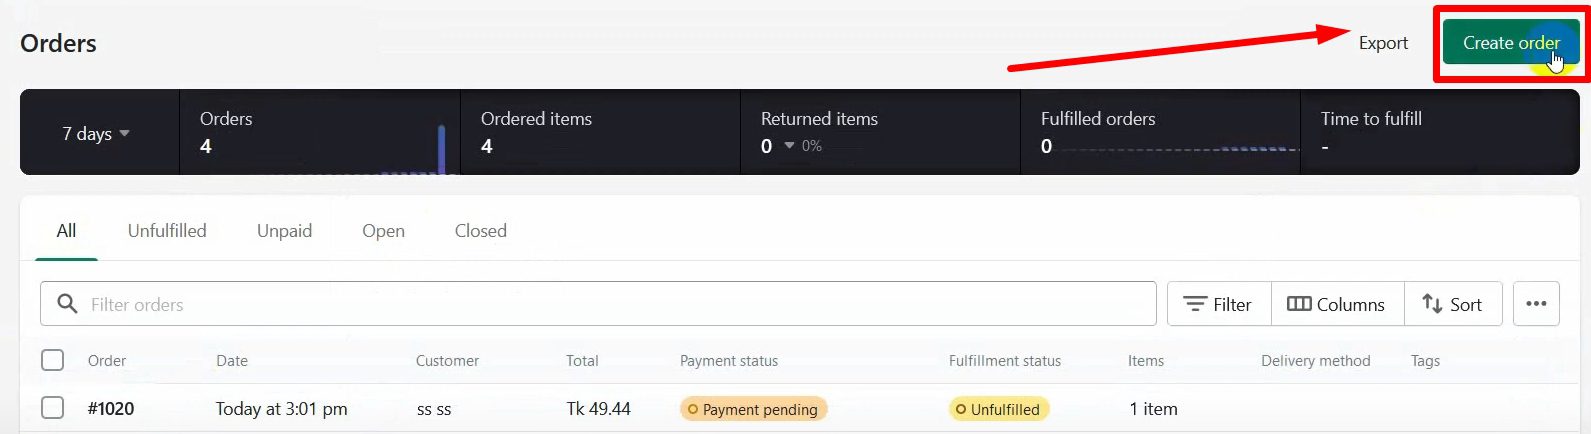
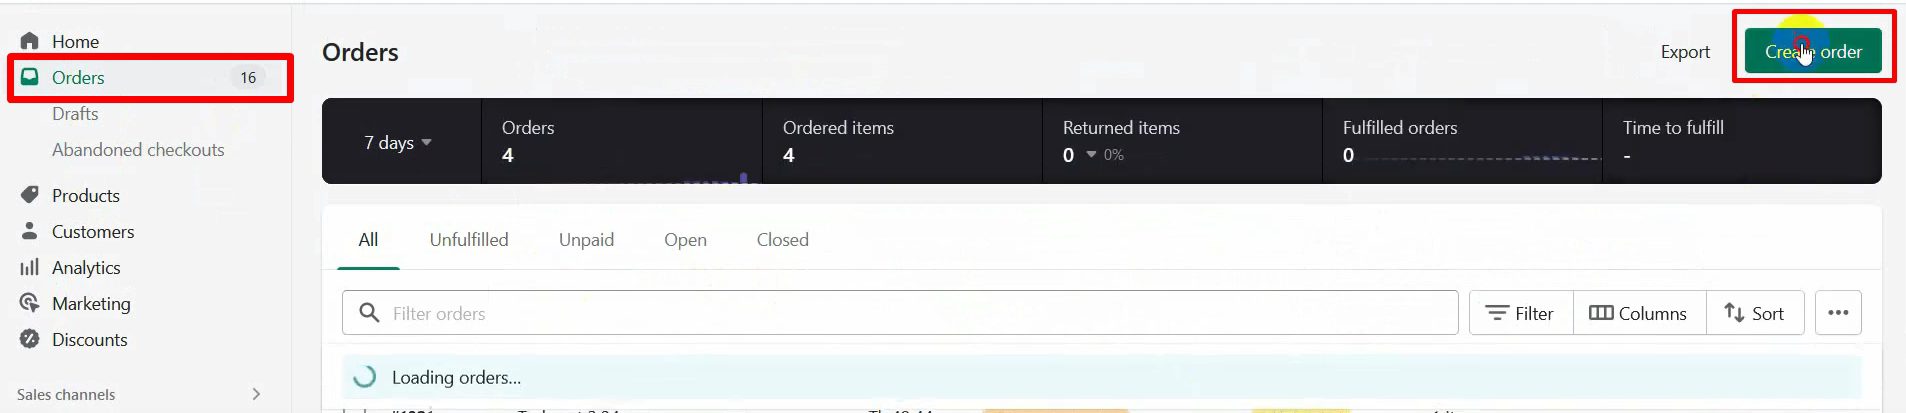
To get sample data for mapping, create a test order in your Shopify store.
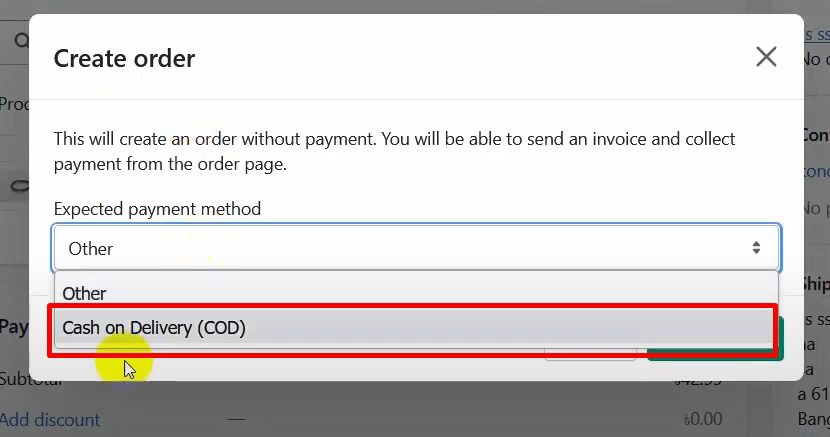
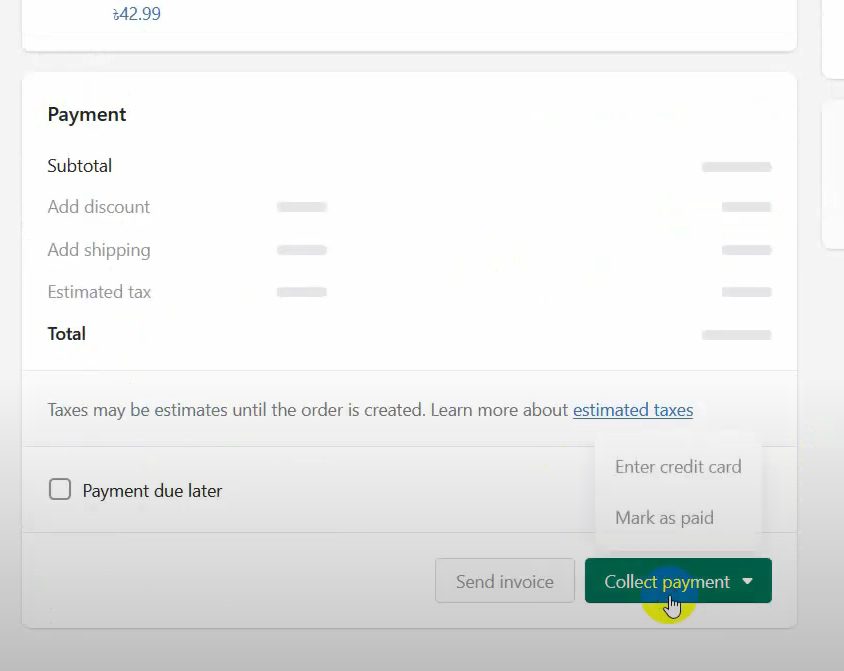
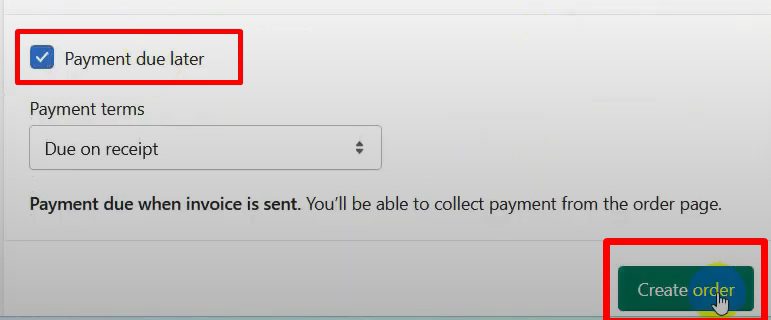
From the Shopify admin dashboard, go to Orders > Create Order and complete the order.
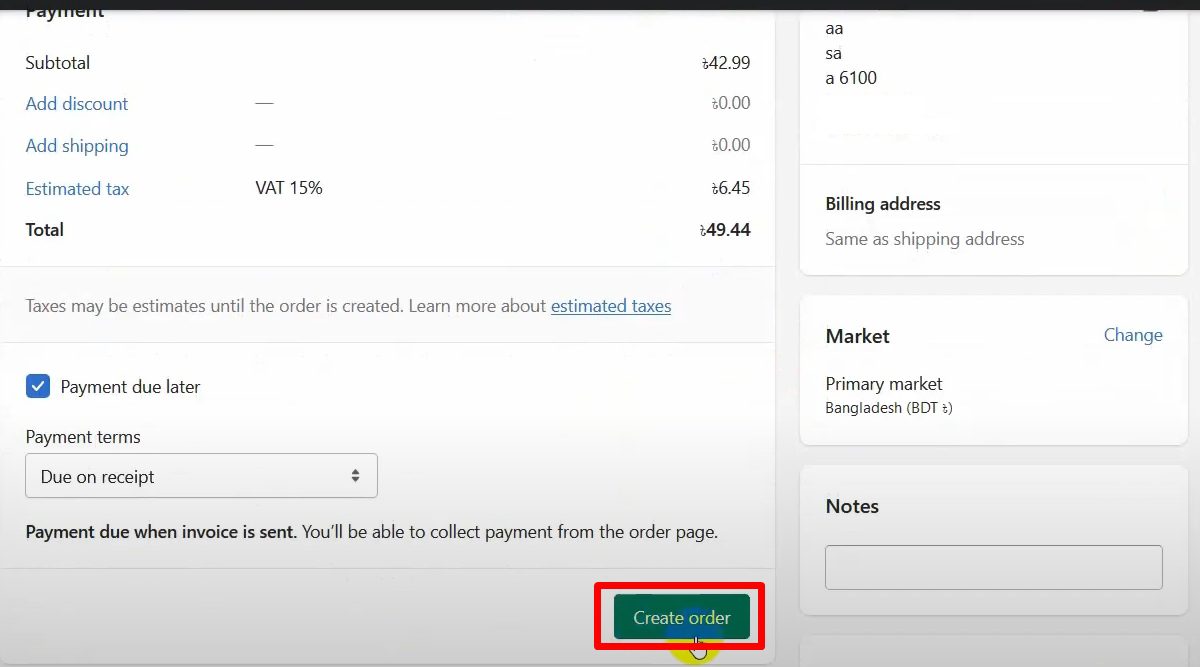
The sample data will be received by BotCommerce, allowing you to proceed with webhook mapping.
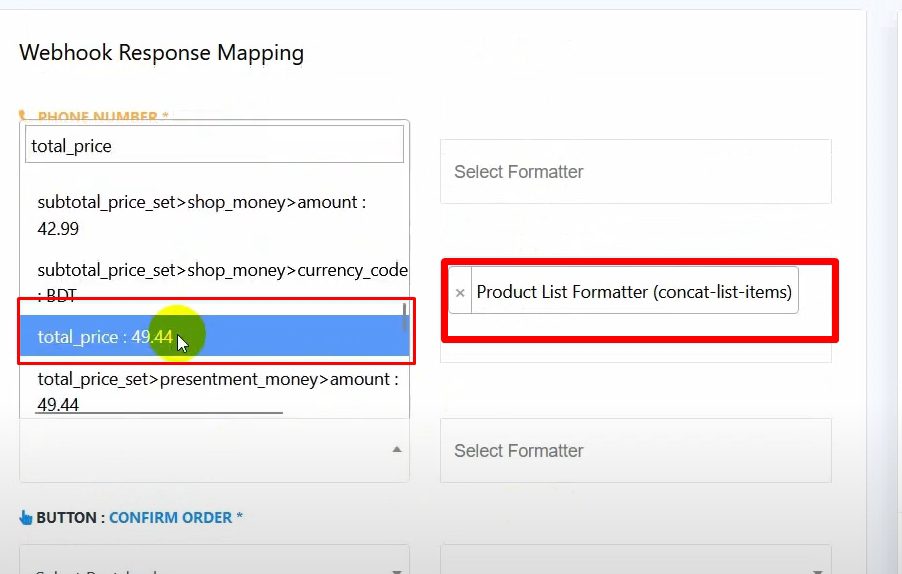
Map Webhook Data to Variables
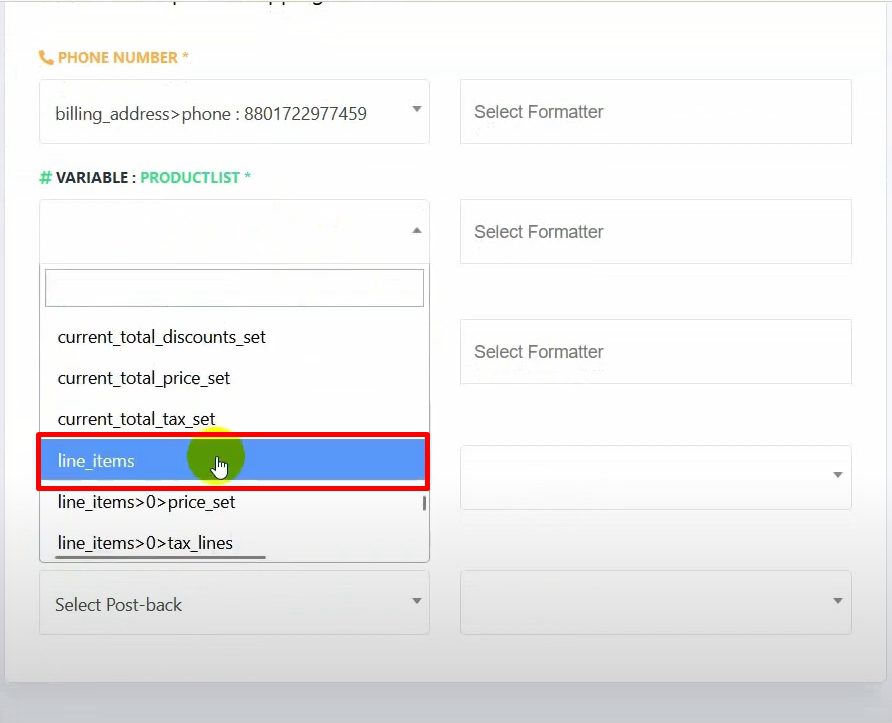
In the webhook mapping interface, assign the correct data fields to the variables: For the phone number, map it to the Billing Address Phone.
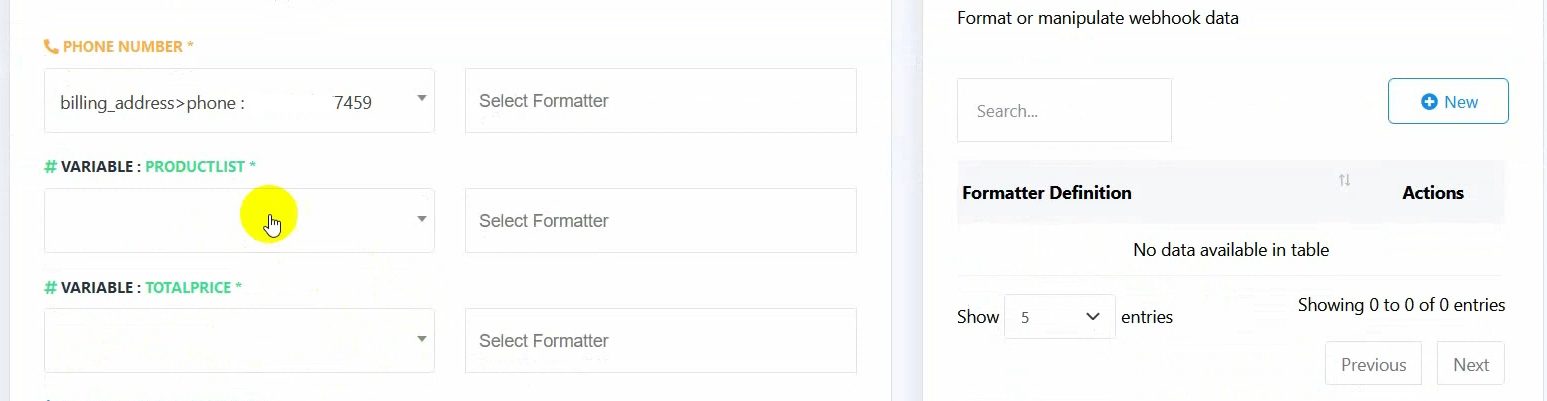
For the product list, use the Line Items under the list items.
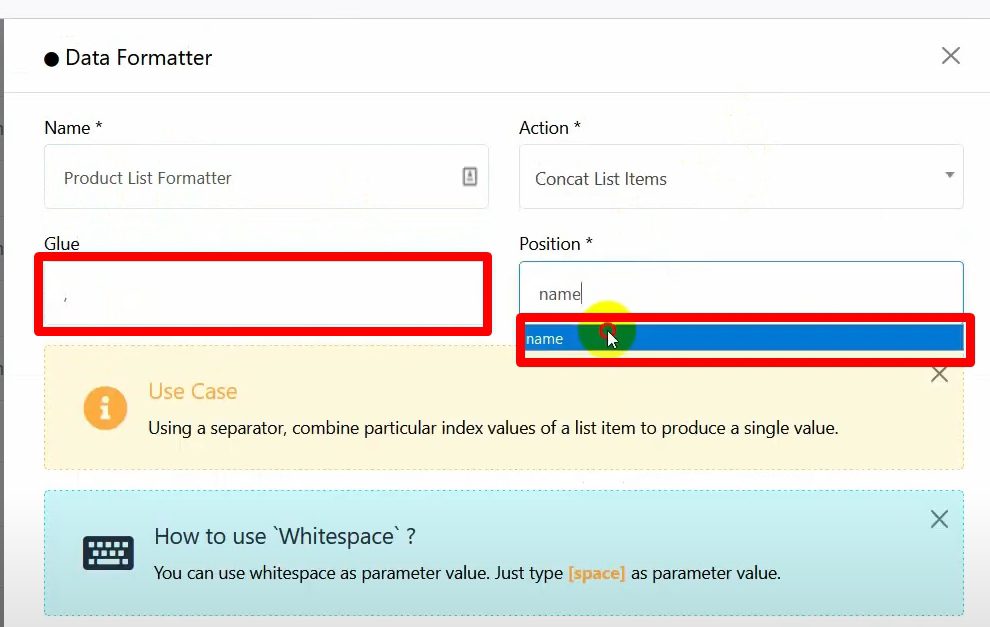
Use a Formatter: If there are multiple items, use a formatter to concatenate them. For example, create a formatter that joins items with a comma.
For the total price, map it to the Total Price field.
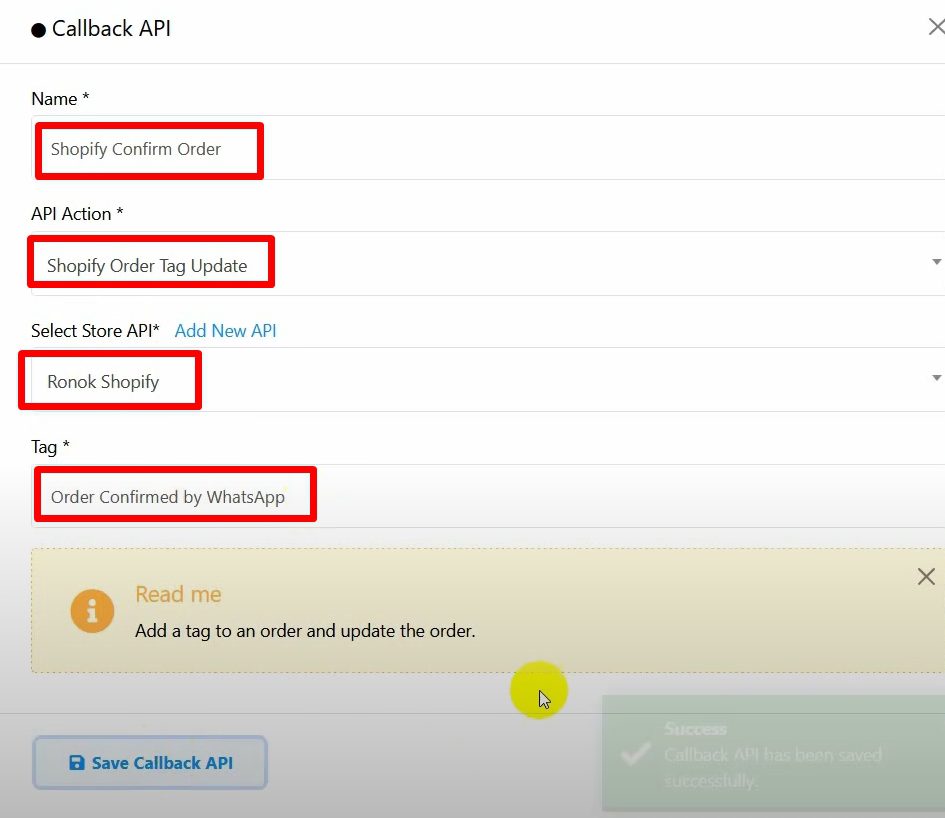
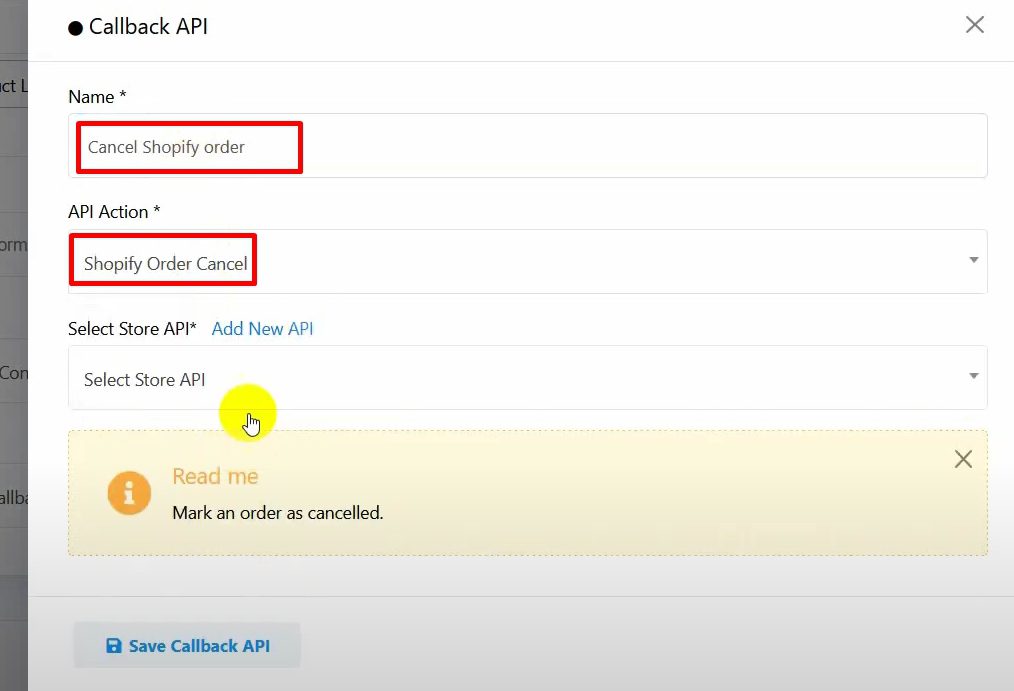
Configure Callback APIs for Button Actions
Set up callback APIs for the quick reply buttons: Confirmation Button: Create a callback API that updates the order tag in Shopify to indicate the order is confirmed.
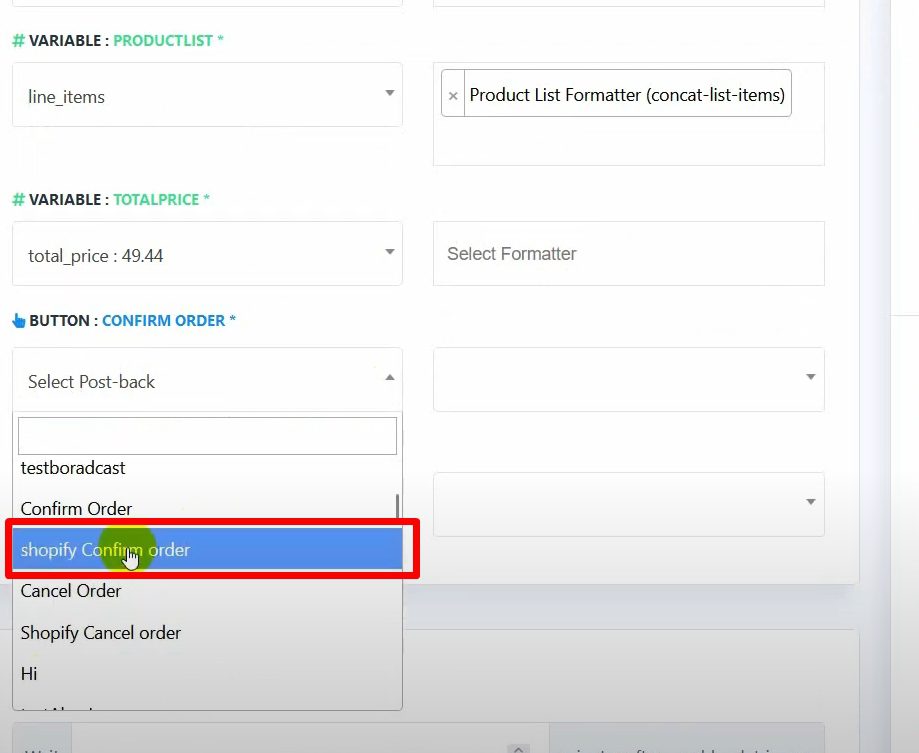
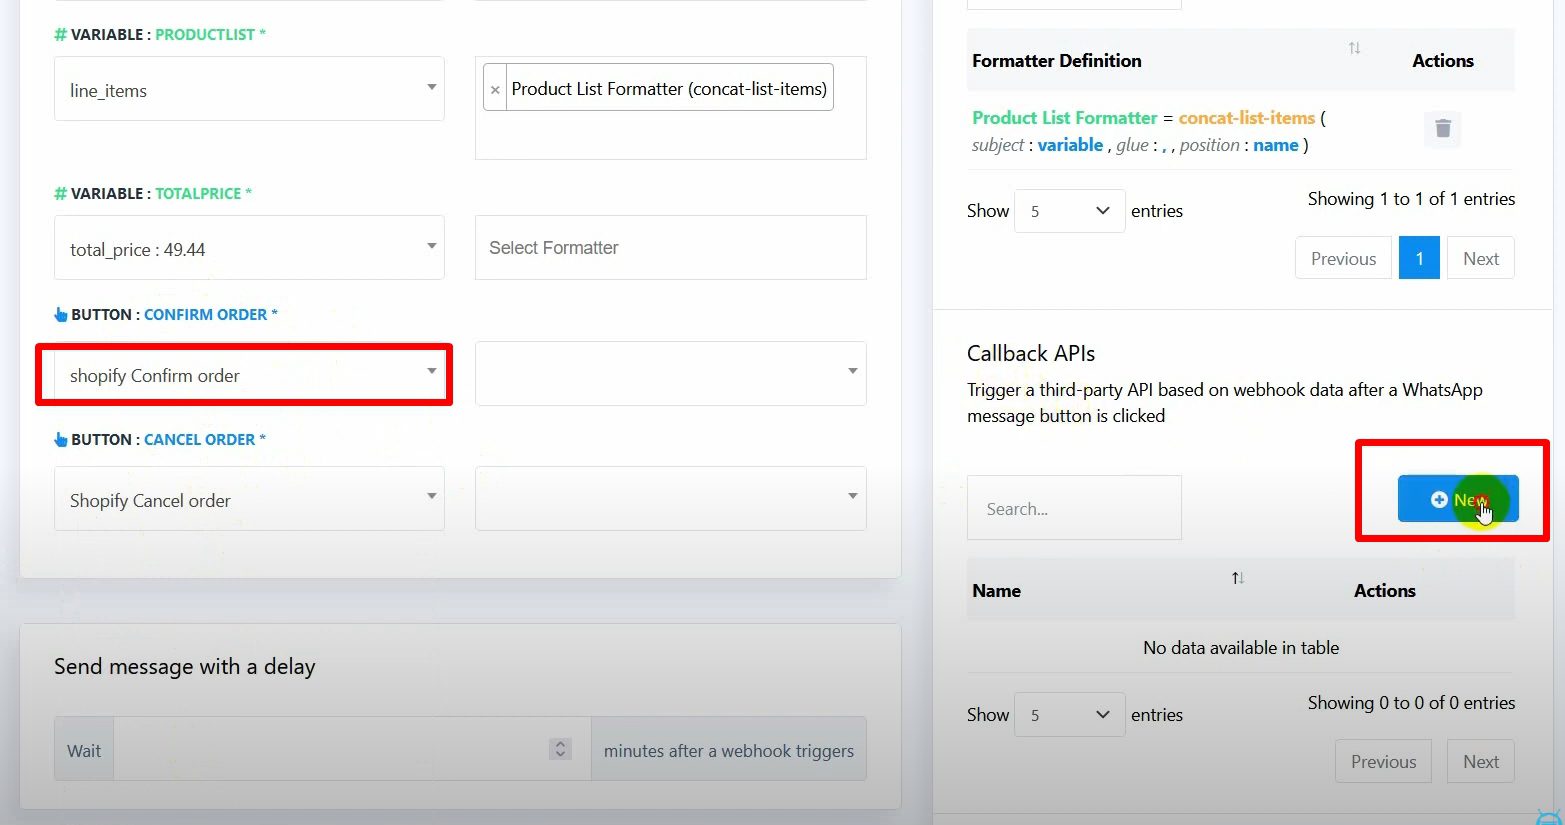
Cancellation Button: Create another callback API that cancels the order in Shopify.
Save each API configuration and link them to the respective quick reply buttons.
Add Conditional Messaging Based on Payment Method
Use BotCommerce’s conditional messaging feature to ensure messages are only sent to customers who choose the Cash on Delivery option.
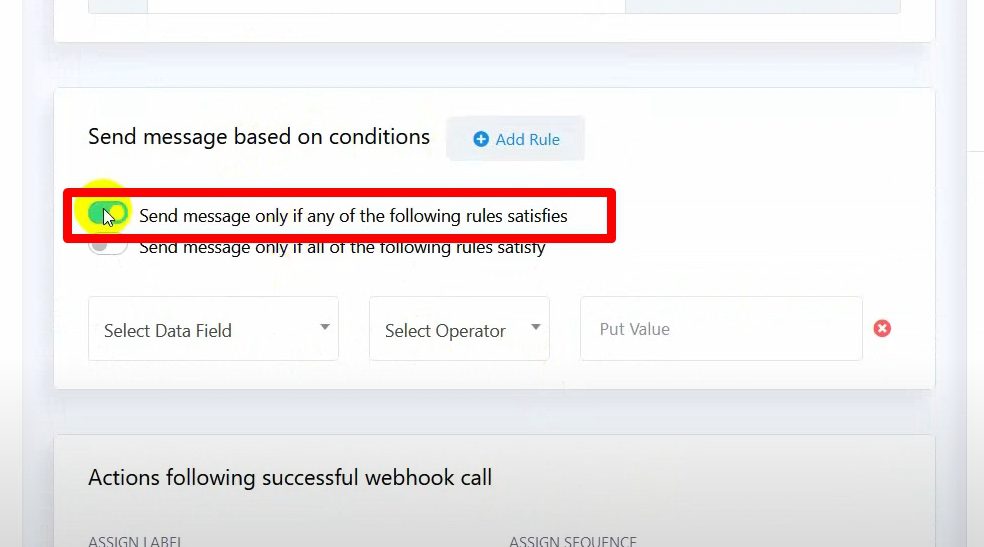
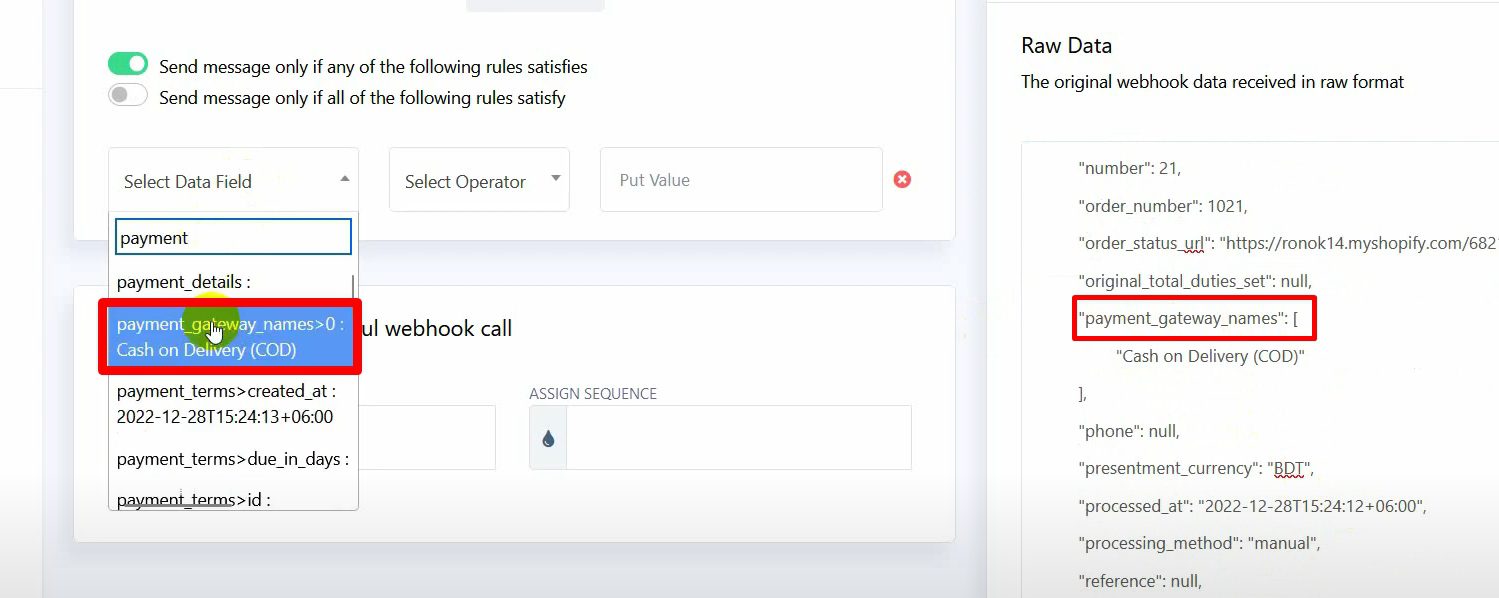
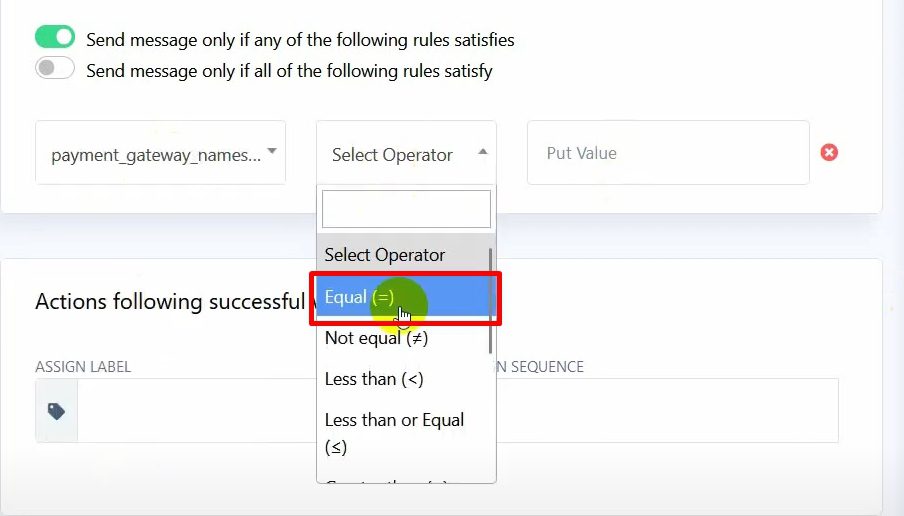
In the workflow, select the Payment Gateway option and set the condition to only send messages if the payment method equals Cash on Delivery.
Test and Verify the Workflow: Save the workflow and test it by creating a new Cash on Delivery order in Shopify.
Verify that BotCommerce sends the appropriate WhatsApp message and that the order updates correctly based on the customer’s response.
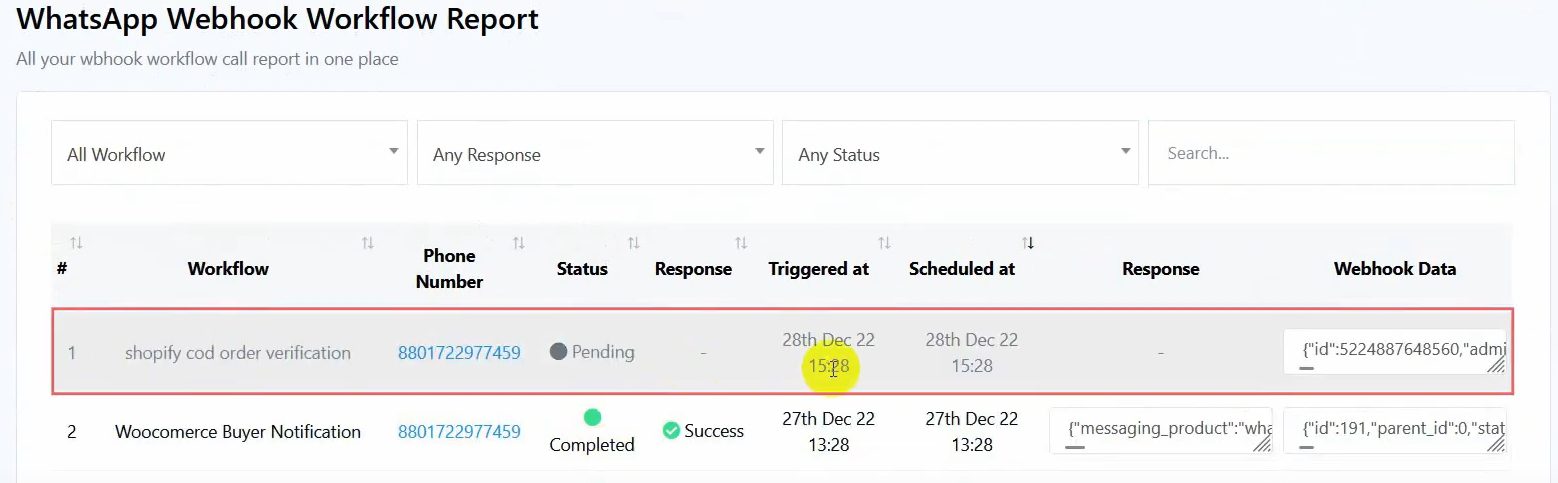
After testing, check the Workflow Report in BotCommerce to ensure everything executed as expected.
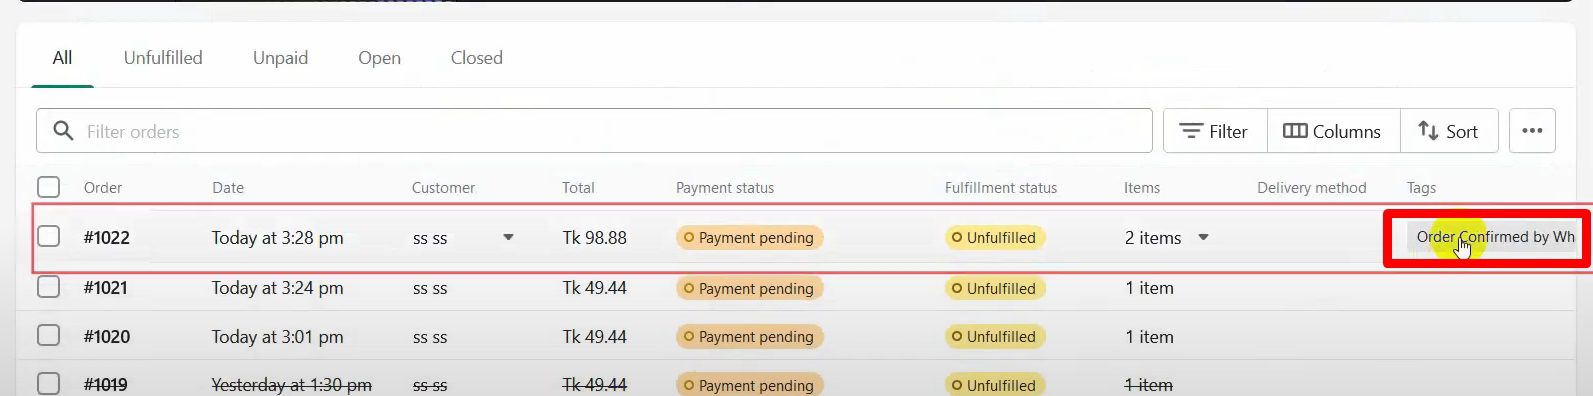
Review the order status in Shopify to confirm the order was updated properly based on the customer’s action.