Collecting user data through user input flow allows you to capture relevant information from users, which is stored in custom fields. This data can later be used as personalized variables or for campaign segmentation, optimizing the personalization and effectiveness of marketing strategies.
This guide explains how to use User Input Flow and Custom Fields to gather and organize user information, enabling you to tailor your chatbot’s responses and improve customer engagement.
By following the steps below using WhatsApp as an example, you will be able to carry out this process similarly on other platforms, such as Facebook, Instagram, and Telegram
Create a new input flow
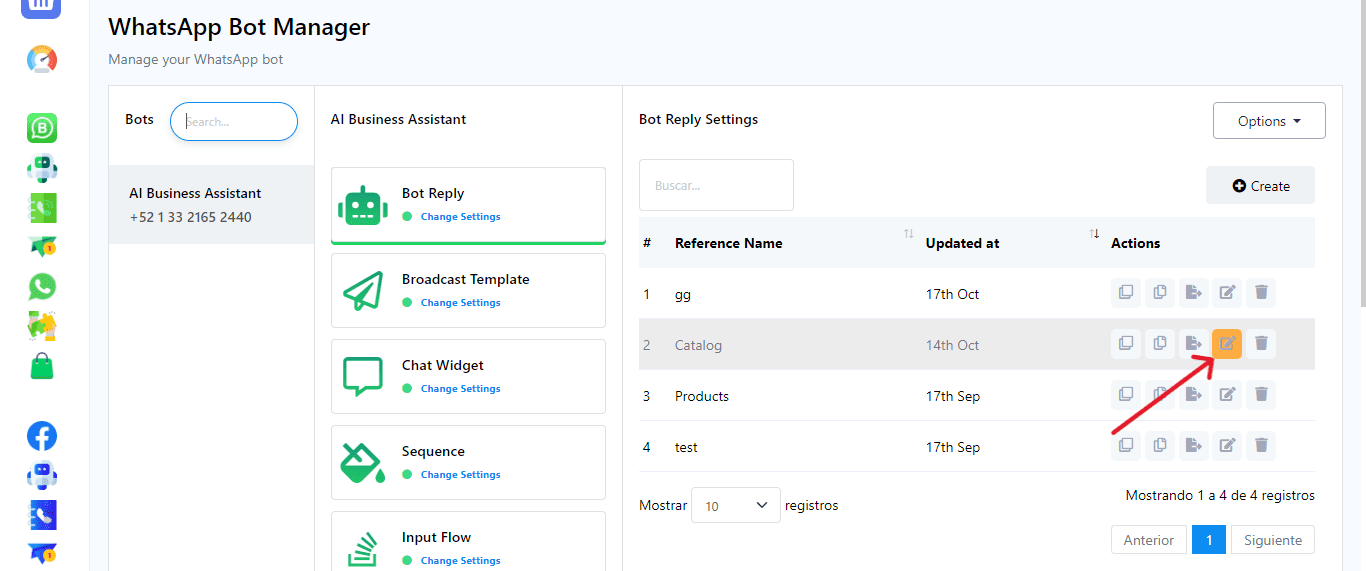
From the BotCommerce dashboard, navigate to “Bot Manager.”
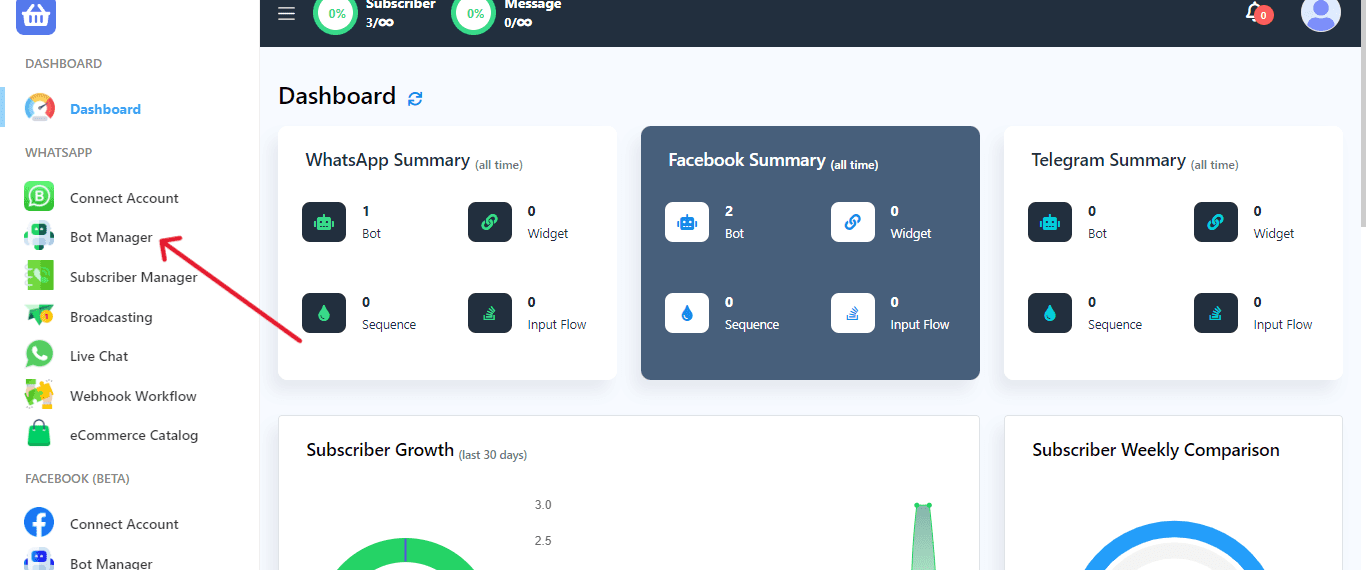
Select the bot account for which you want to collect user data.
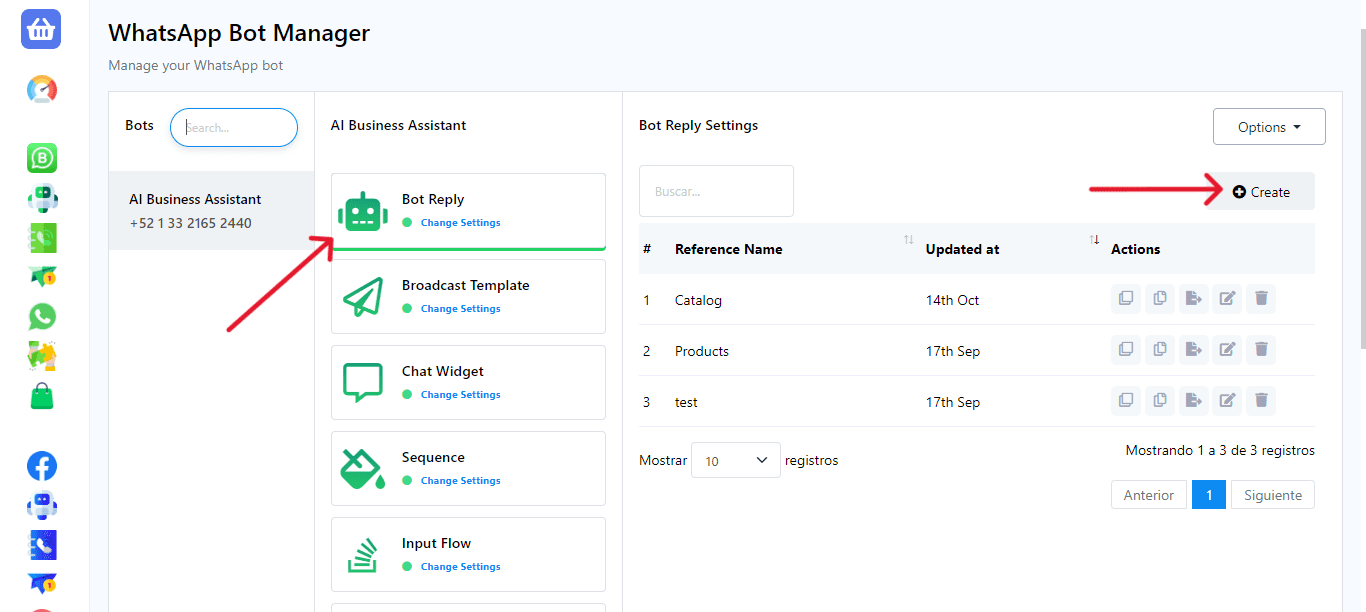
Click on “Create” to start a new bot. This will redirect you to the Visual Flow Builder.
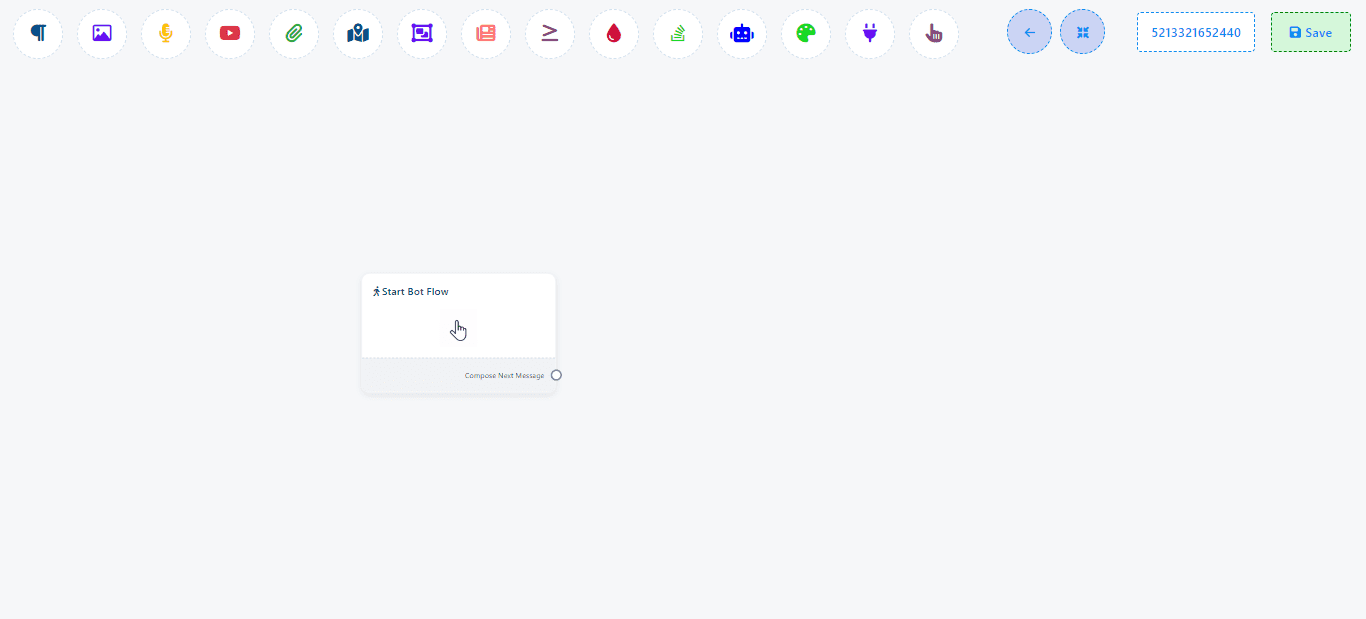
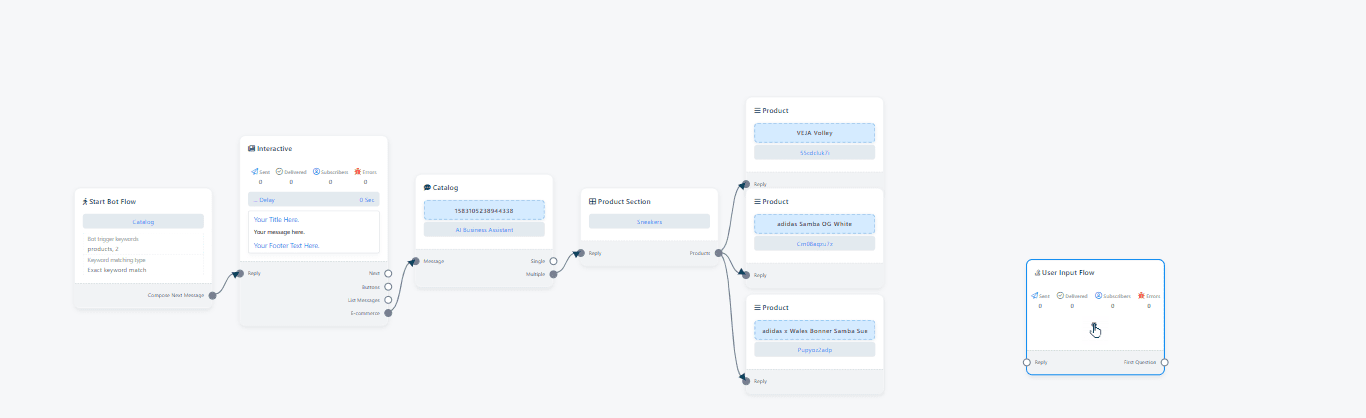
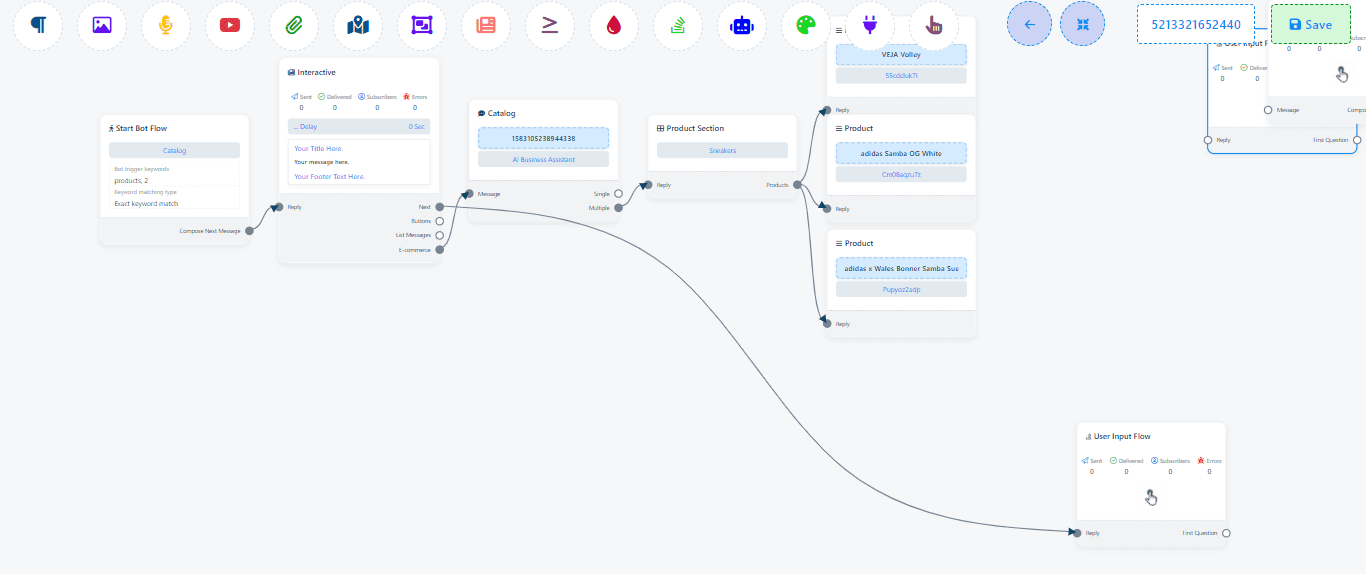
Configure your trigger by double-click on it
Set Up Bot Triggers
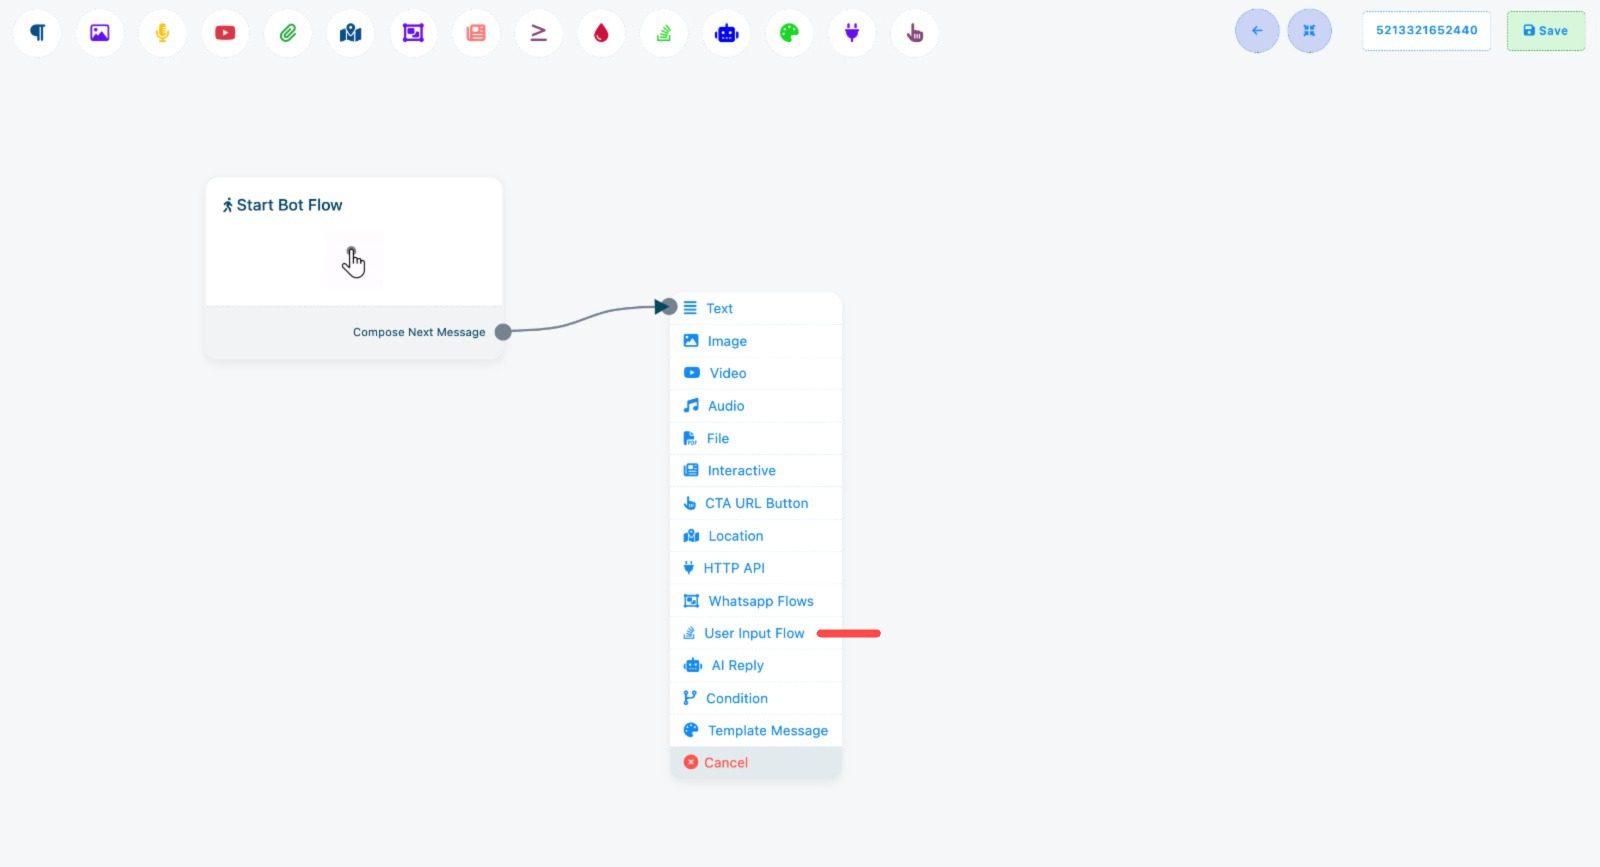
Add a Trigger: Drag a “Trigger” element from the dock menu and connect it to the “Start Bot Flow.”
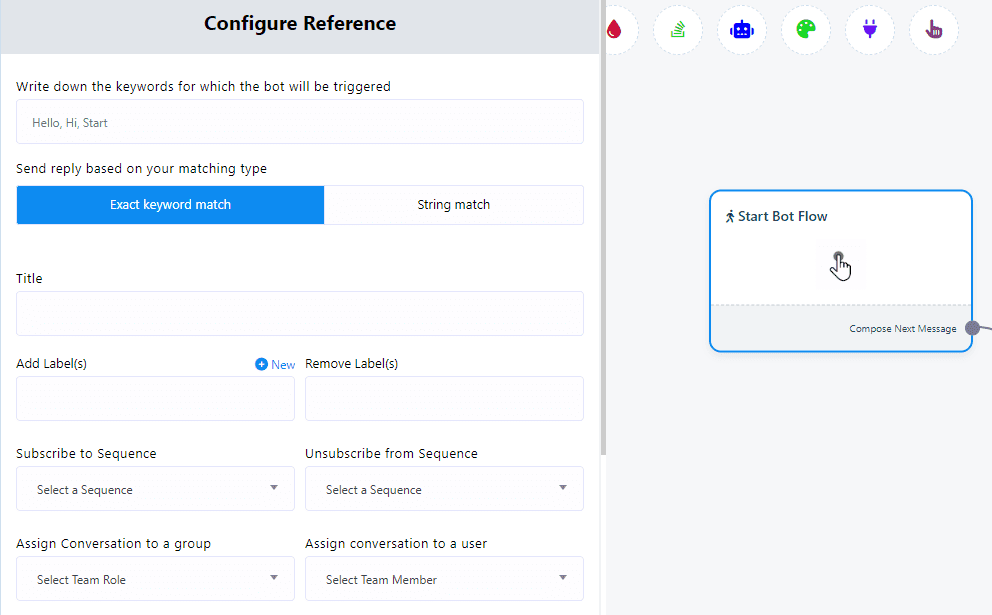
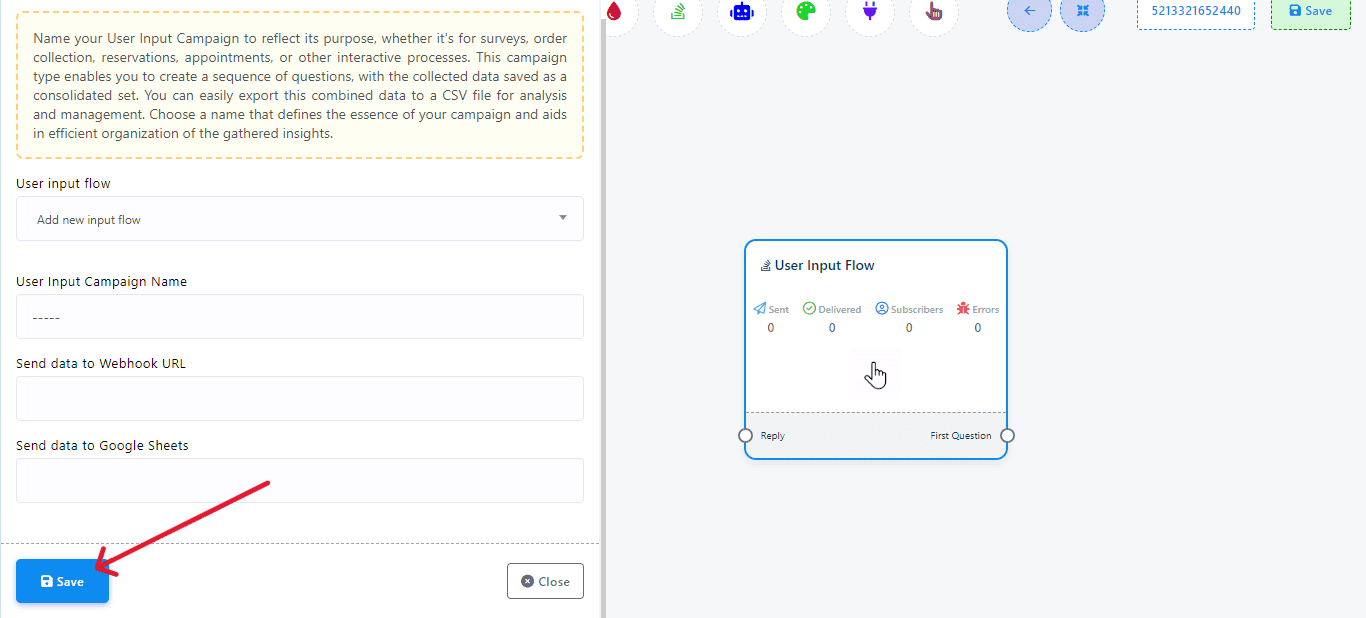
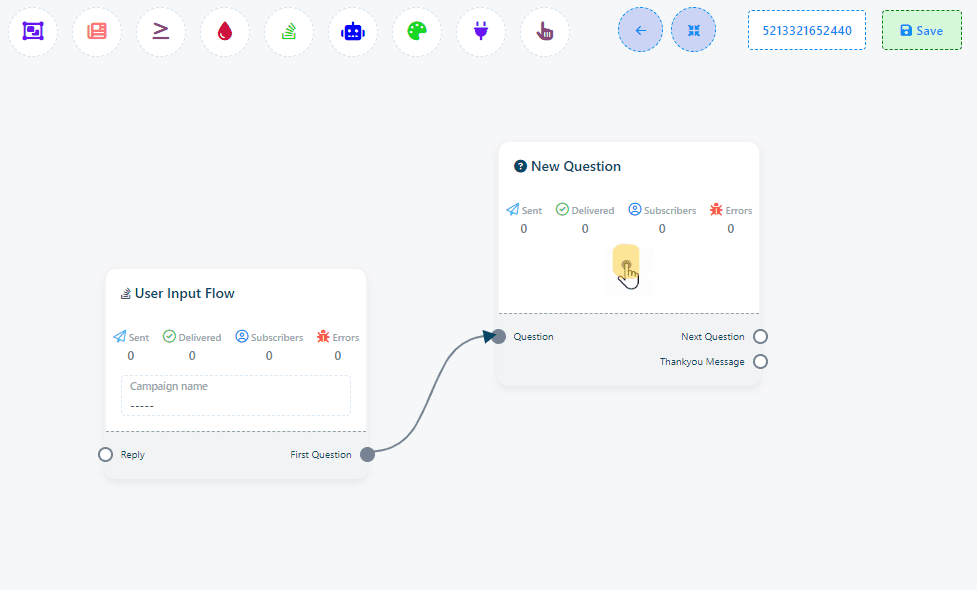
Select “Add New Input Flow” to create a new user input flow.
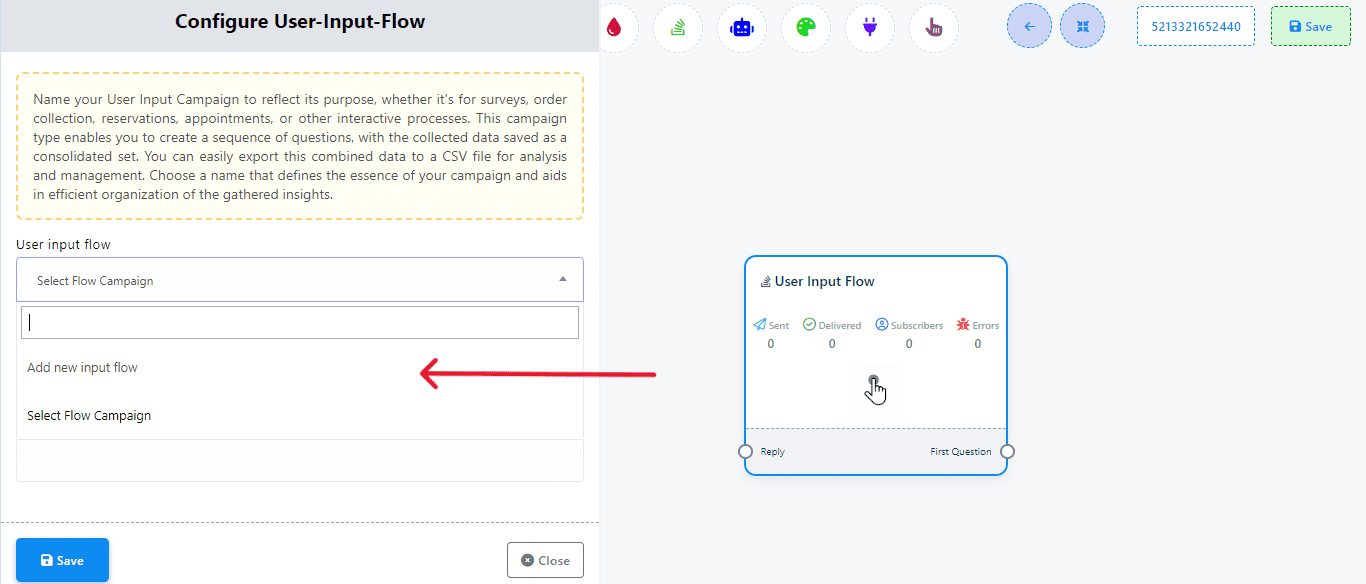
Give the input flow a name and click “Save”.
Double-click the newly added question to configure it.
Choose between “Free keyboard input” and “Multiple choice”.
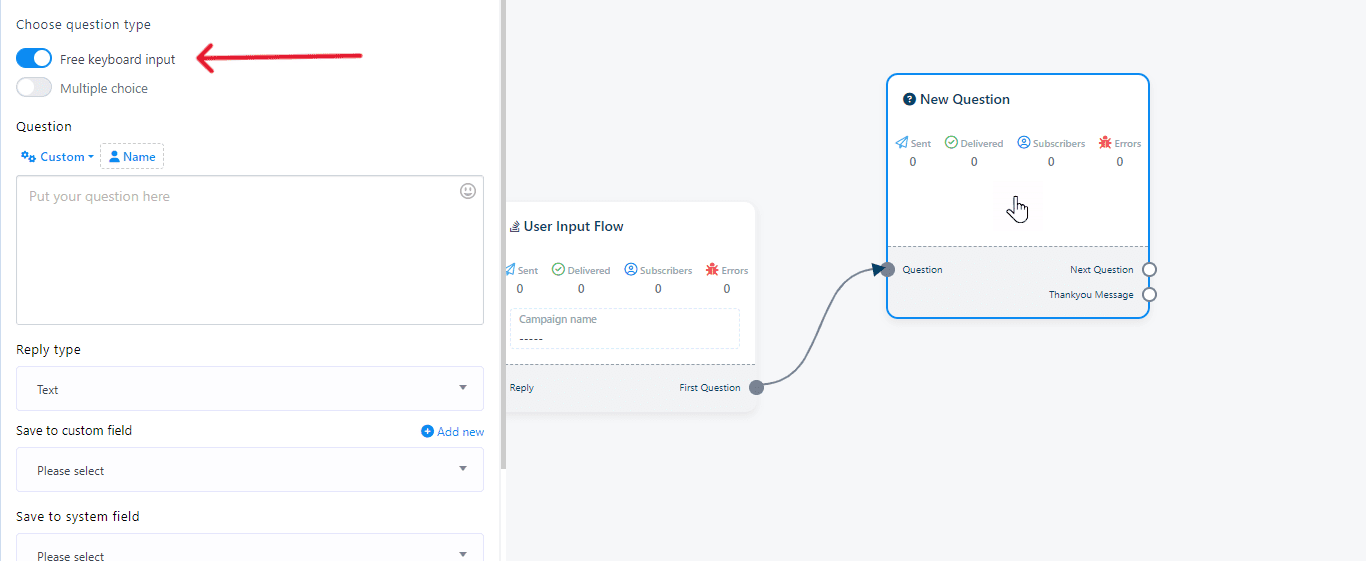
Select “Free keyboard input.”
Enter the question in the question field.
Use a custom field and the user’s name in the question.

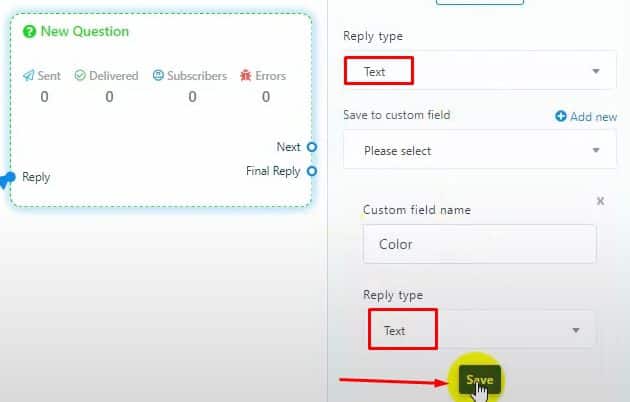
For example, ask for the user’s full name and select the response type as text.
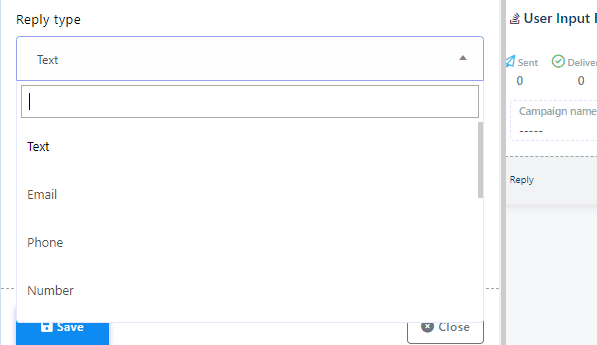
Save the response data to a custom field or a system field (e.g. email, phone, date of birth).
To create a new custom field, click “Add New,” name the field, select the type, and save.

Select the custom field from the drop-down list and click save.
Add another question with multiple choice options.
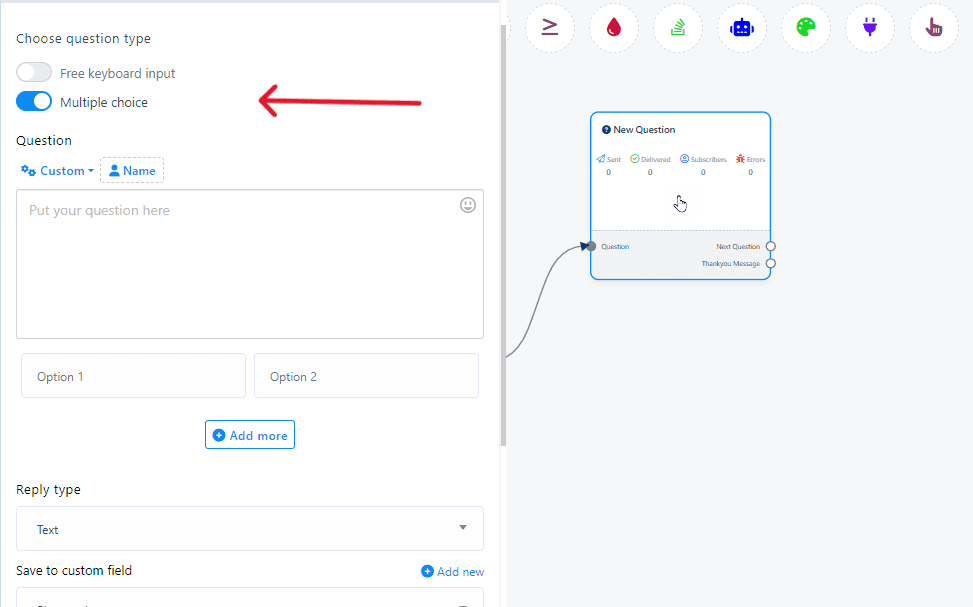
Write the question and add the options for the answer.
Click “Add More” to include additional options.
(If you want to add a new custom field click on add new)

Select the response type and custom field to save the data.
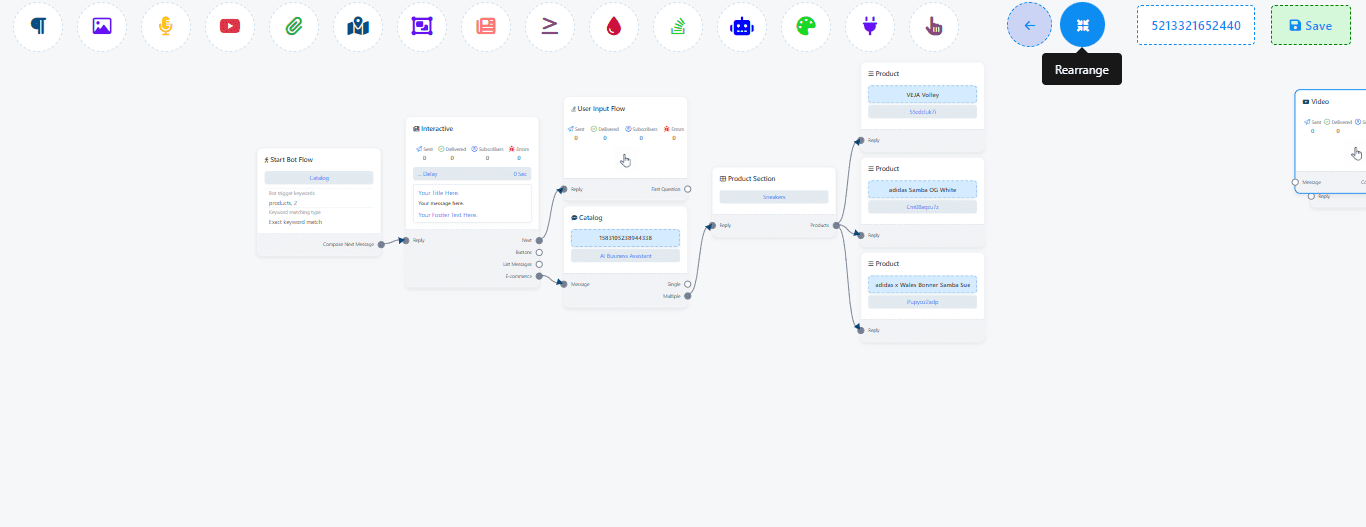
Create Additional Input Steps: You can add more steps to collect different pieces of data. Each user response can be stored in a corresponding custom field.
Ensure each input step is connected to the flow and that all data is stored correctly.
End The User Input Flow
Drag a connector from the final answer and leave the cursor.

Click on save.
Test Your Bot
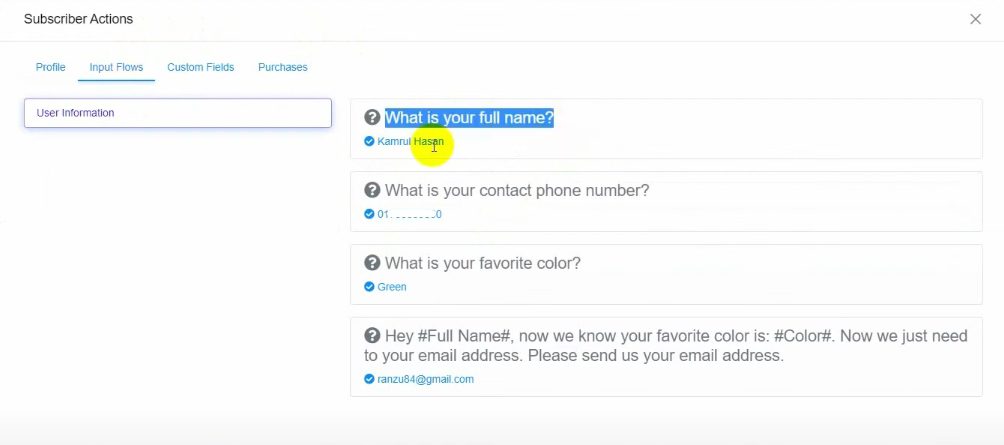
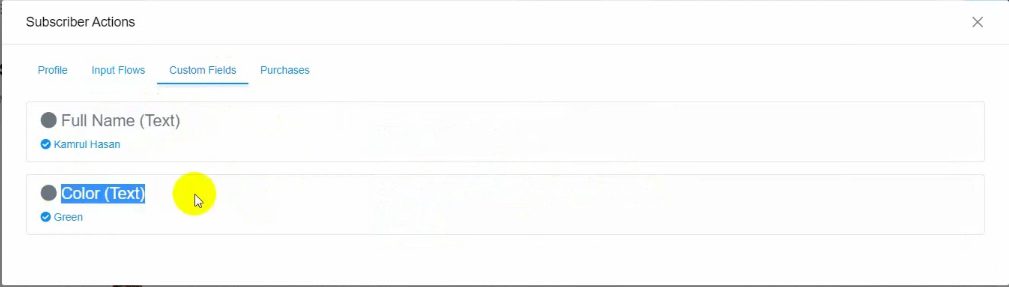
Go to the “Custom Fields” section in BotCommerce to view the data collected from users.
Use Collected Data: The data stored in custom fields can now be used in other bot interactions, personalized messages, or for segmenting your audience.
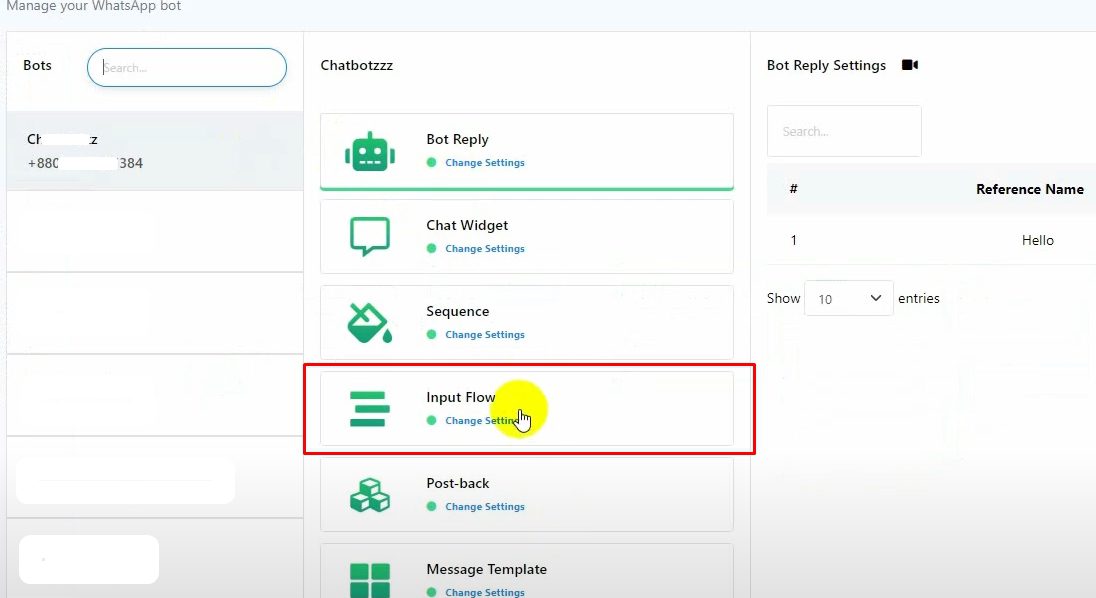
Edit An Existing Input Flow
Start with a basic chatbot you’ve built before.
Edit the existing bot and include a user input flow.
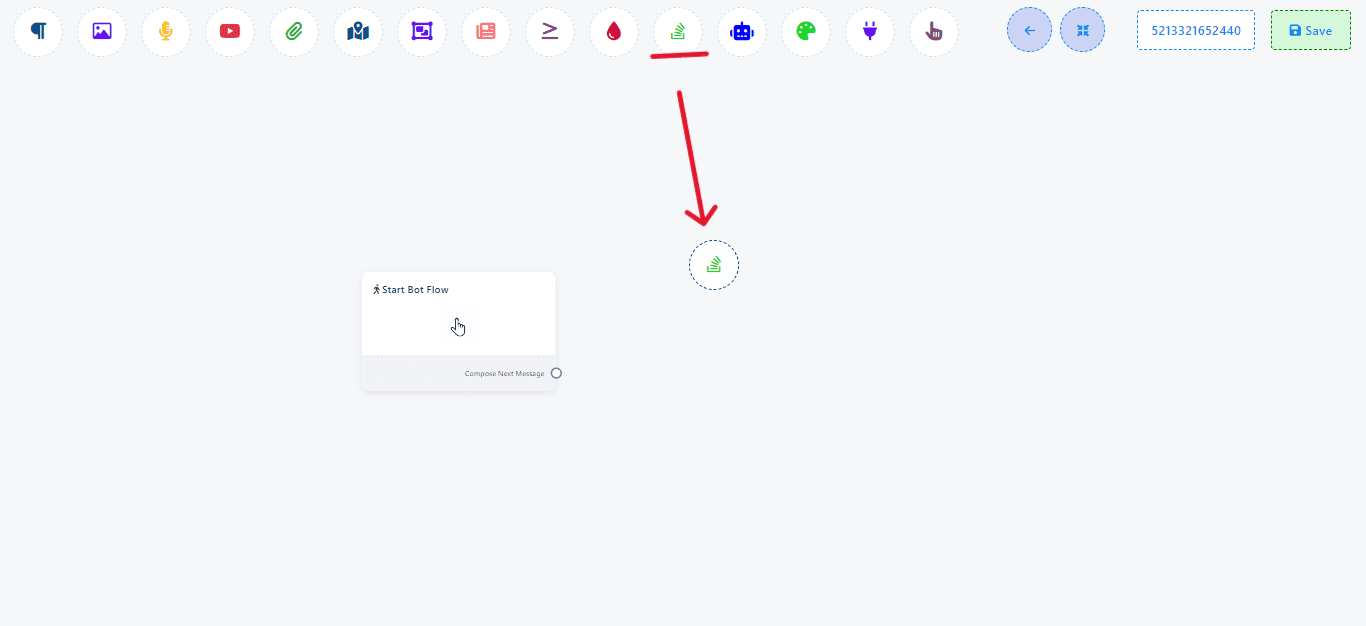
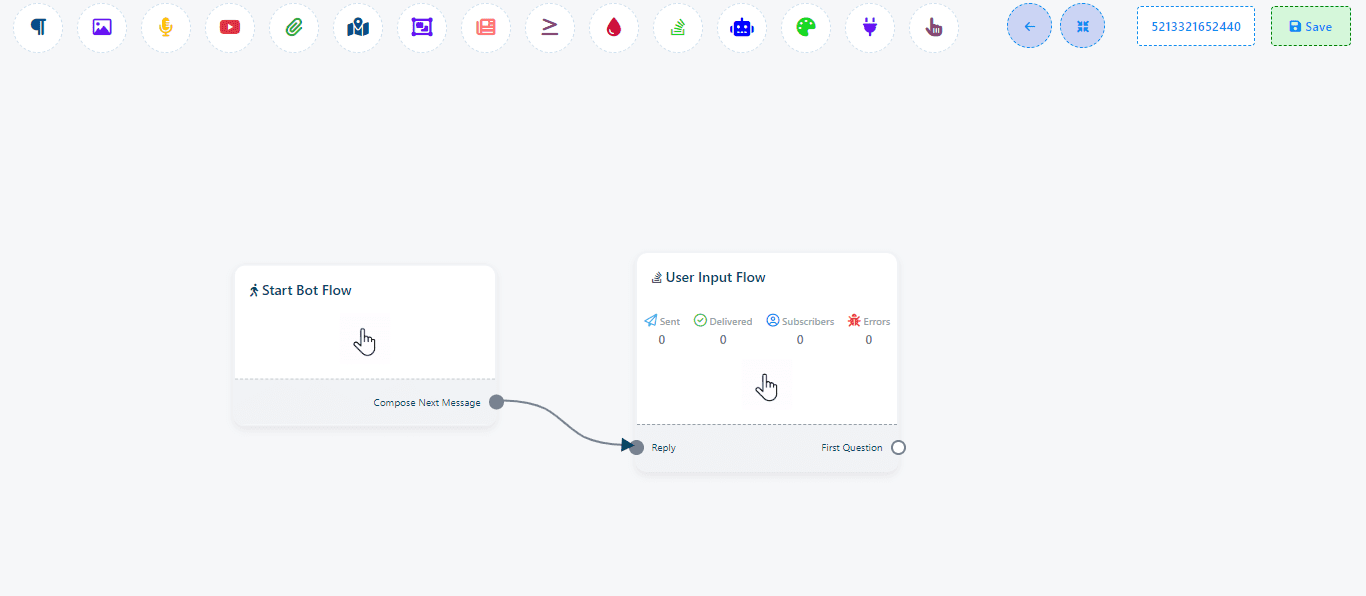
Drag the user input flow from the dock menu and drop it onto the canvas.
Connect it to the previous answer and double click on it to open the settings.
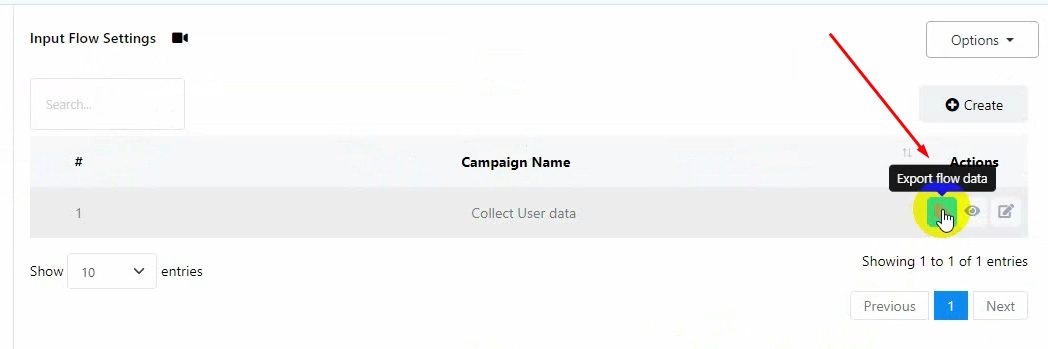
Exporting and visualizing data
From the Bot Manager, go to the User Input Flow.
Click “Export Flow Data” to export the data to a CSV file.
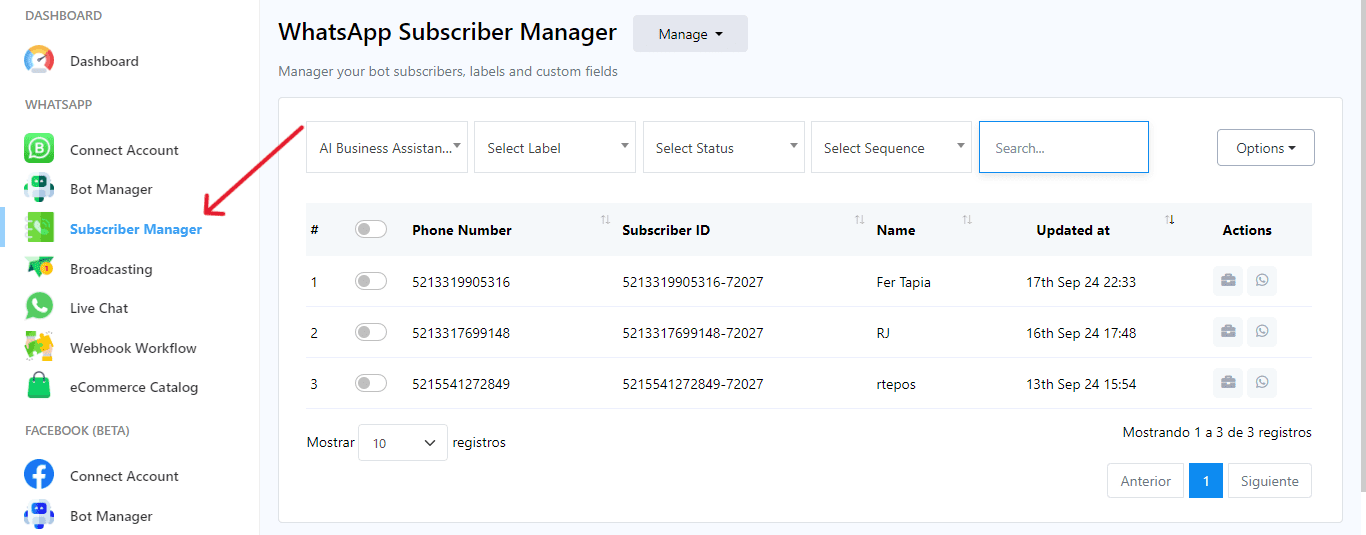
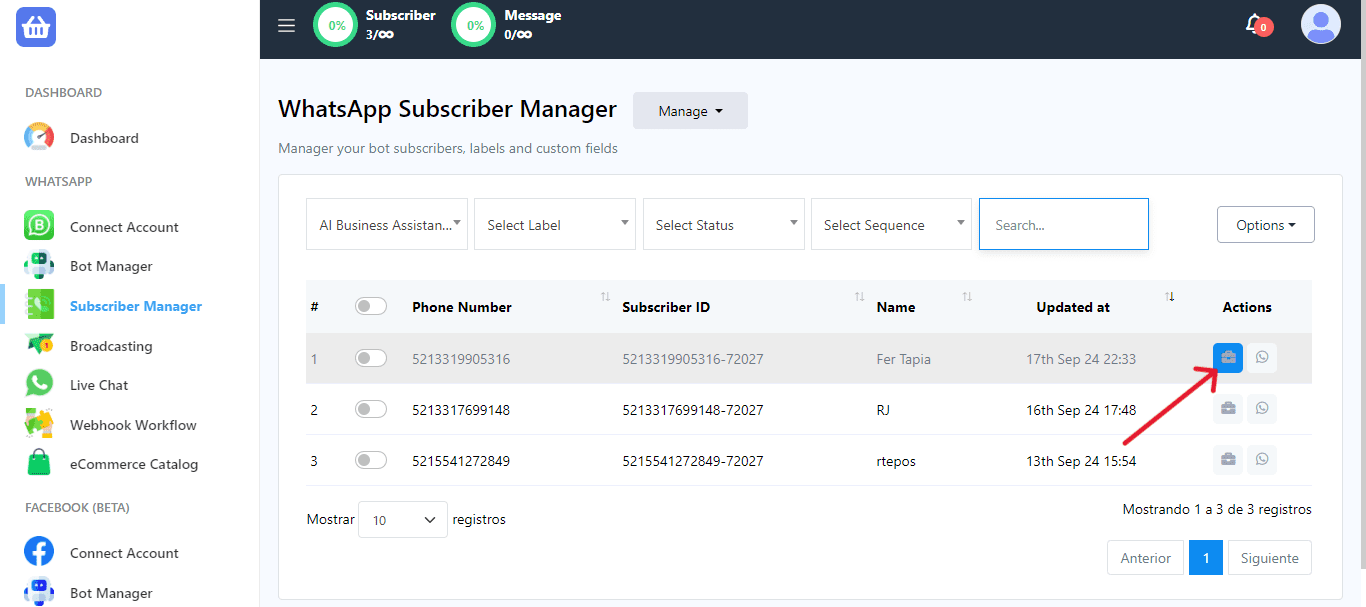
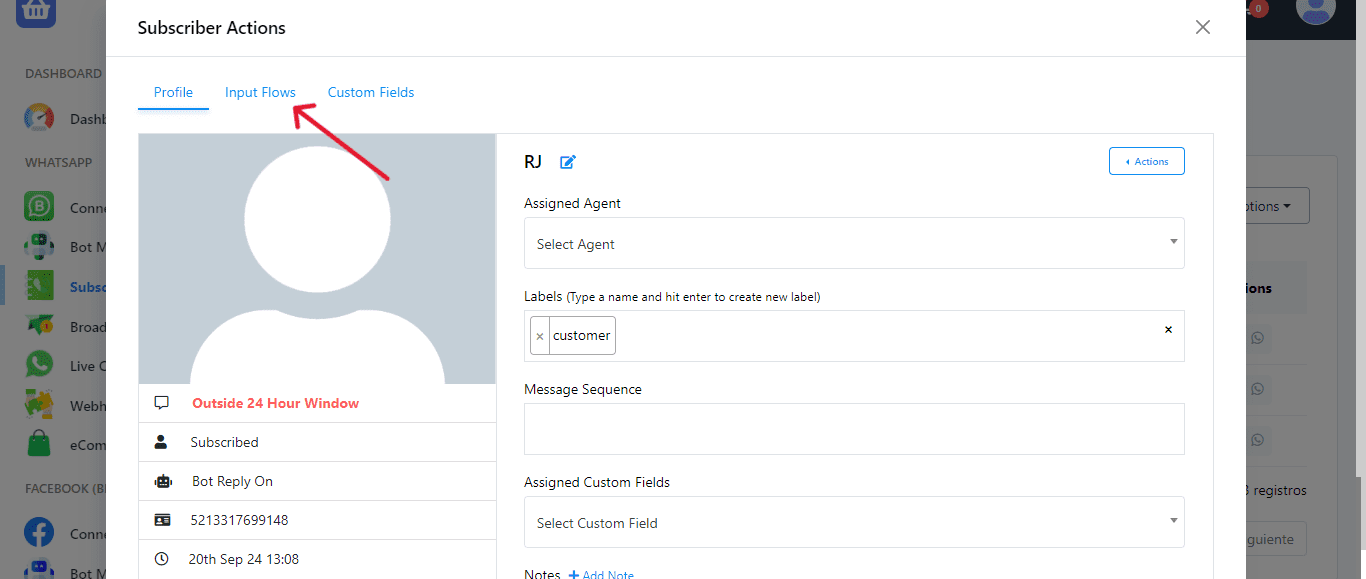
You can also view user input stream data from the Subscriber Manager.
Go to Subscriber Manager, click on Subscriber Actions and select the inbound stream.

By following these steps, you will be able to effectively use user input flow and custom fields in your WhatsApp chatbot with BotCommerce.
And that’s it! You’ve now learned how to use User Input Flow and Custom Fields to gather and organize user data. This will help you personalize your chatbot’s responses and enhance customer engagement.
If you have any questions or need further assistance, feel free to contact our support team. We’re here to help!
