Welcome to this comprehensive guide where you’ll walk you through the process of creating a condition-based messenger bot. By setting specific characteristics, you can tailor different sequences for different users, enhancing the personalization and effectiveness of your messaging strategy. Let’s dive in!
1. Accessing Bot Manager. Navigate to the Facebook Bot Manager section in the left sidebar of your dashboard.

2. Choosing Platform and Account. Choose the desired account, and click on “Create new flow” to open the Flow builder.

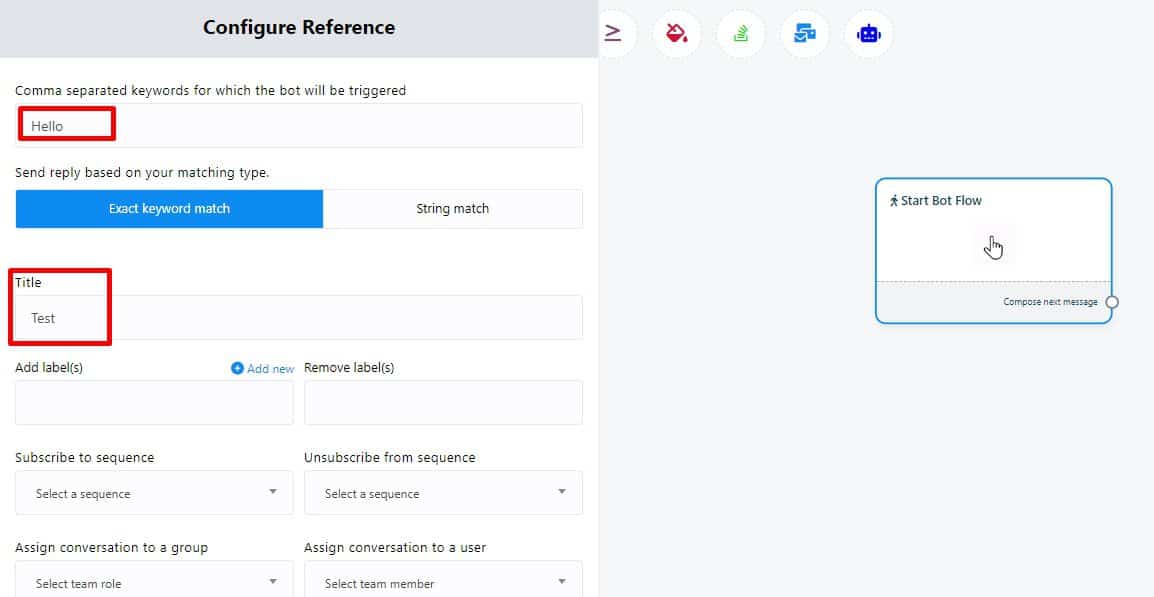
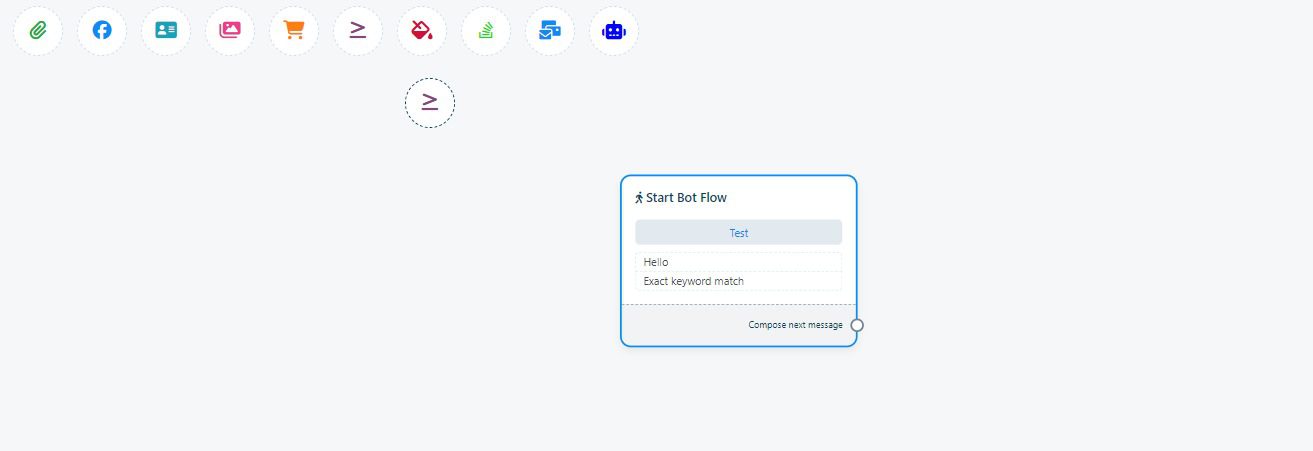
3. Setting Up Trigger and Flow. Add the trigger element, specify a keyword, connect it to the Start Box, and name your flow.
4. Incorporating Conditional Replies. Drag the conditional reply element into the editor, connect it, and double-click to configure.
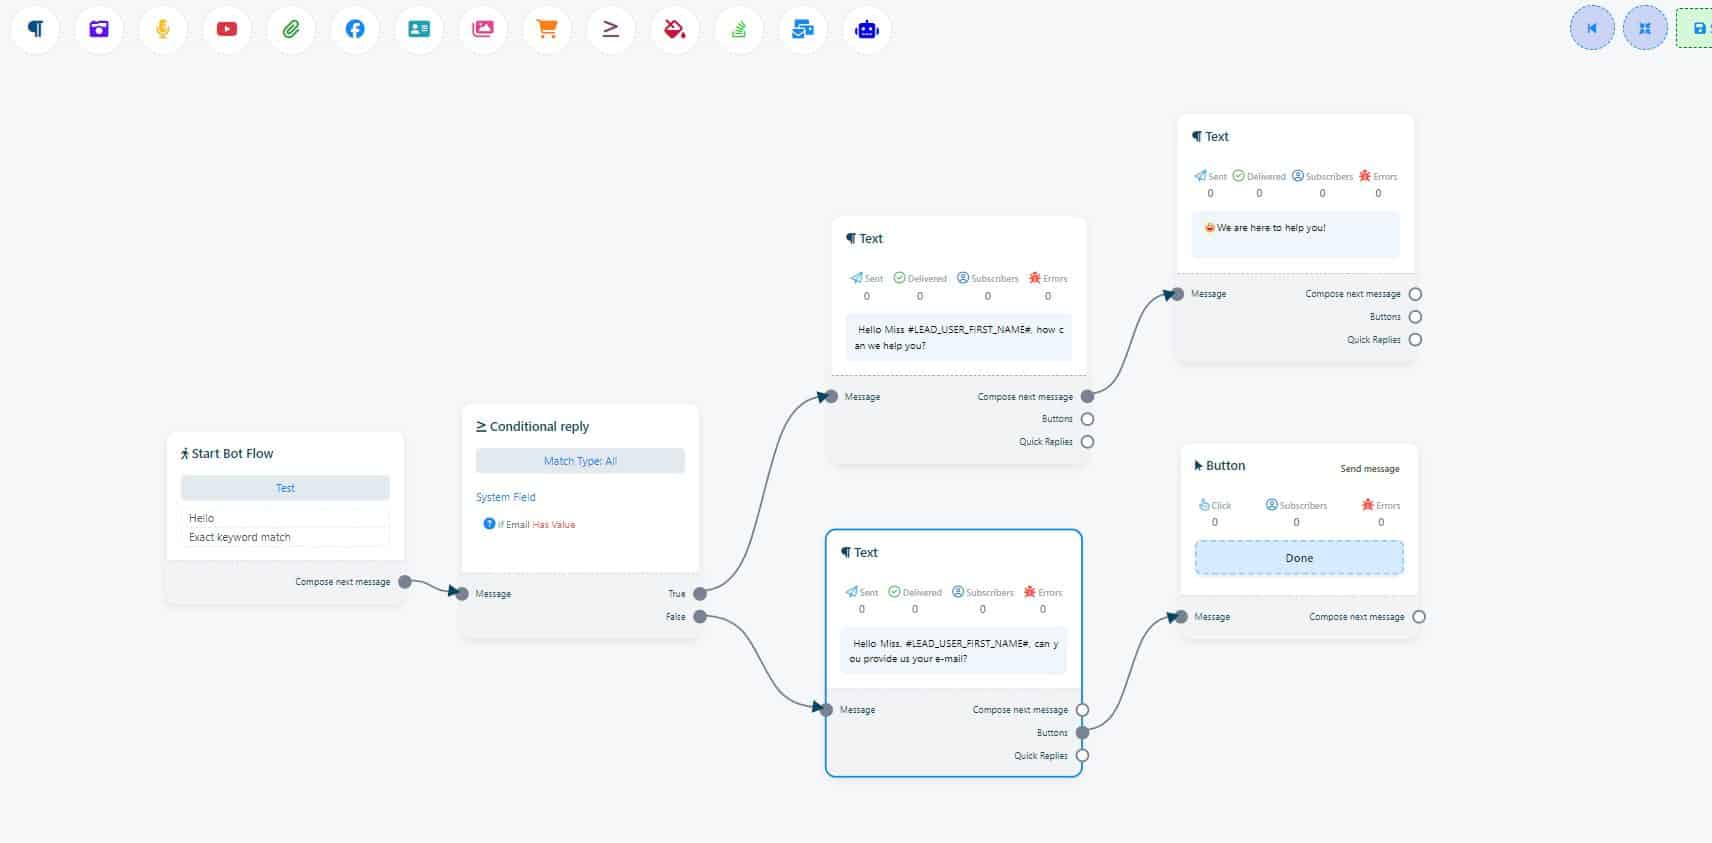
5. Creating Conditions. Drag and drop the condition element, connect it to the Start Bot Flow, and configure the conditions by double-clicking.
Choose between “All Match” or “Any Match” based on your criteria.
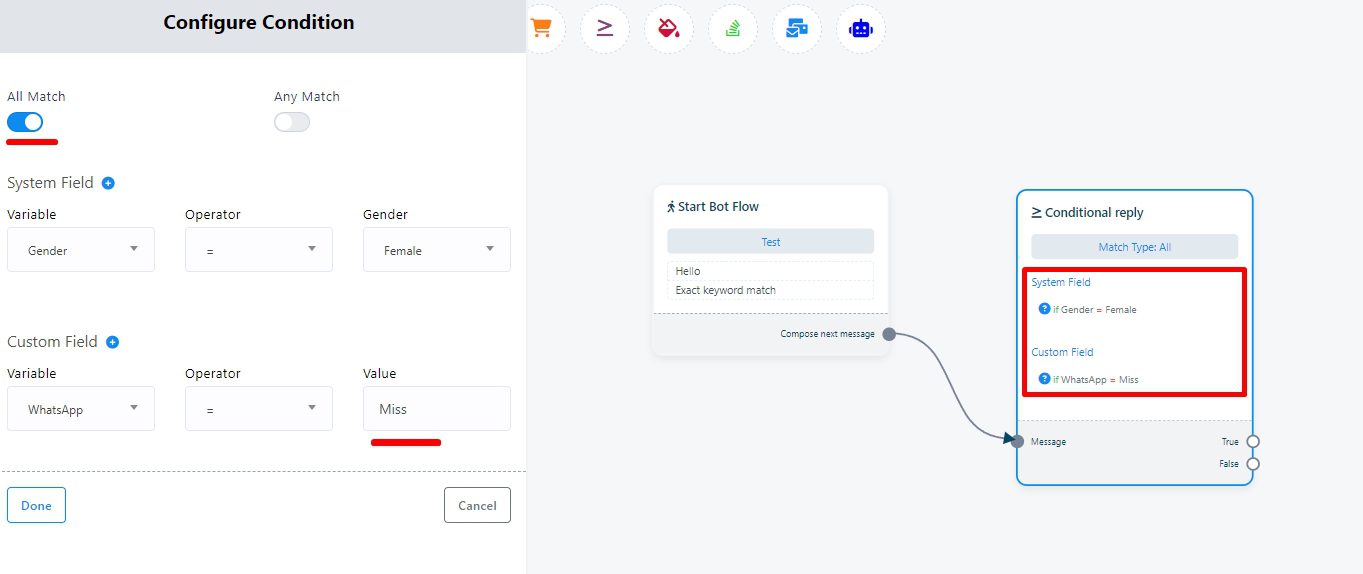
Utilize system and custom fields to set conditions. Example: Gender-Based Messages.
Set a condition to check the user’s gender and send messages accordingly.
Connect True and False sockets to messages like “Mister” and “Miss.”
Add a button for user interaction.
7. Adding additional Conditions. Set a condition to check if the system has the user’s email address.
Send messages accordingly, informing the user about the information update process.
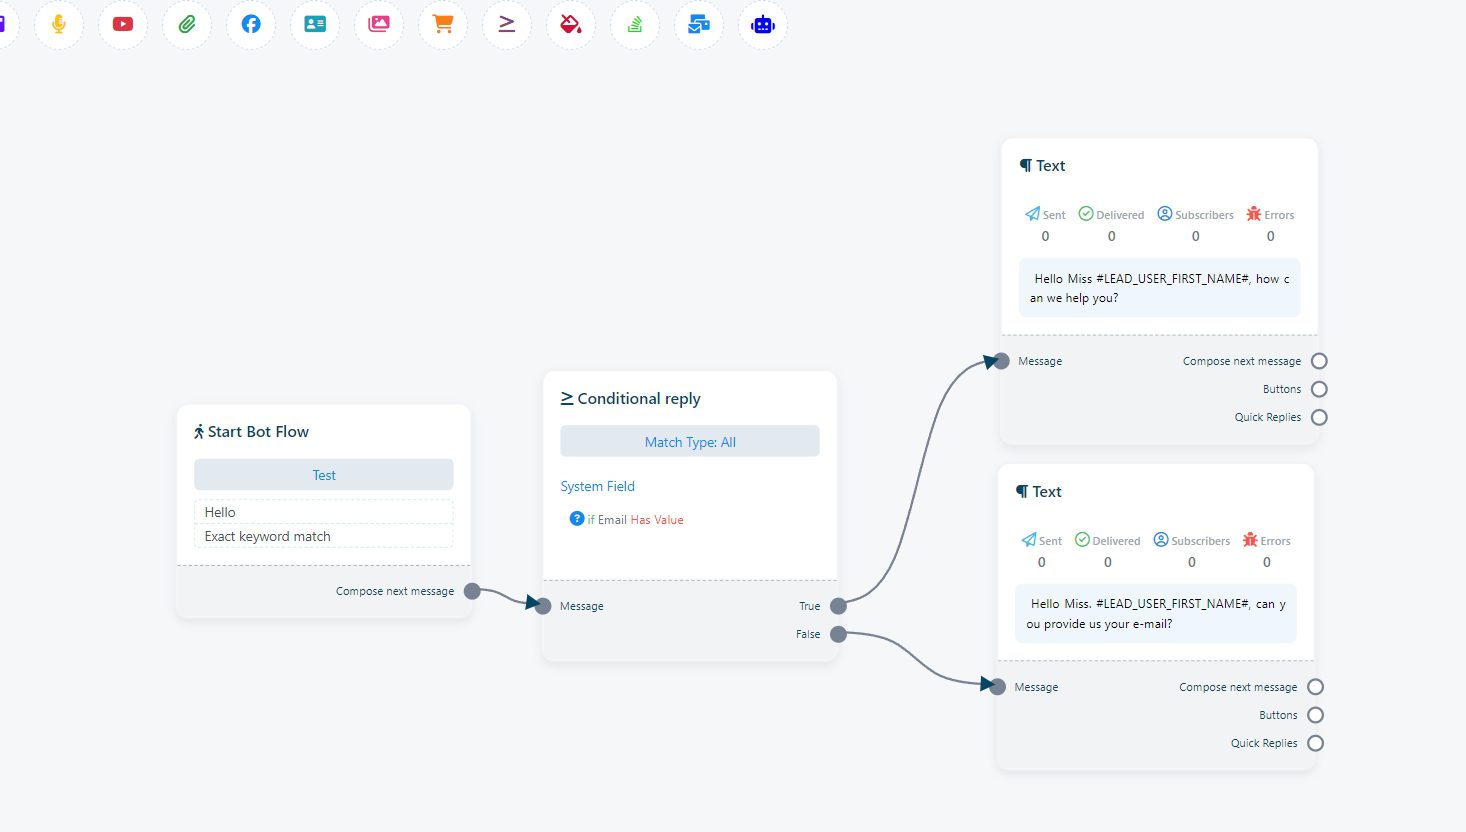
If no email is present, prompt the user to provide it.
8. Configuring Email Conditions. Add a condition element, connect it to the previous postback, and configure conditions related to the user’s email.
9. Crafting Messages. Add text elements after True and False sockets to inform the user about the email-related actions. Prompt the user for their email if not present.
10. Adding Interactive Elements. Include a button with user email as its type to collect email information.11. Saving Your Bot. Save your bot, and you are done!
Congratulations! You have successfully crafted a condition-based messenger bot that tailors messages based on user characteristics. Explore the power of personalized interactions and enhance your user engagement. For more in-depth information about our tools, visit our Tutorials section. Start creating dynamic and effective messenger bots today!
