Integrate your online forms with the AWeber opt-in email marketing service. Additionally collect and add subscribers to your email marketing lists automatically when a form is submitted.
- Automatically add subscribers to your email lists when a form is submitted.
- Control opt-in and only add subscribers when a certain condition is met.
- Automatically send a double opt-in message to insure only legitimate subscribers are added.
Create an Integrated Sign Up Form
Forms are created through the Form Builder. You just need to drag and drop the fields your form needs. Then, from the AWeber Add-On interface you can select the fields that will collect the necessary information to send to AWeber. For example, email, name and custom fields, etc.
Now, in the AWeber Add-On User Interface, follow the next steps:
- Click on the Create a Sign Up Form
- You will be redirected to the AWeber page to grant access to the application.
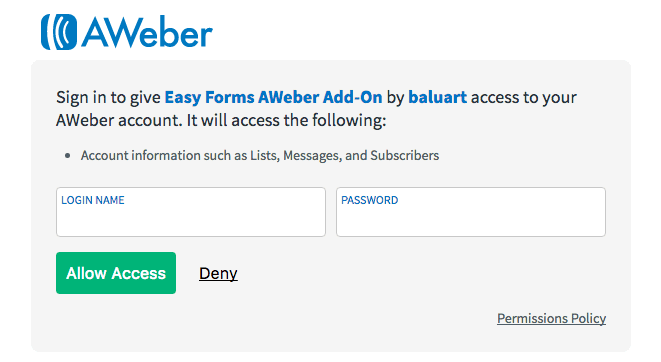
Now enter your AWeber username and password, and then click on the Allow Access button. You will go back to the Create Sign Up Form page.
iv. Finally, you need to map the form fields (from Easy Forms) to the list fields (AWeber).
- Select your Form
- Select your List
- Click on Status: ON.
- Click on Subscriber’s IP Address: ON.
- Enable an Opt-In Condition. The opt-in condition shows that in order to forward information to AWeber, the field value must be present when the form is submitted. It’s usually a CheckBox field, for example: A checkbox with the label: “Sign-up to our newsletter”.
- In the section Map Fields:
- Select your Form Email Field (required)
- Select your Form Name Field
- Map a Form Field to a List Field (AWeber Custom Field)
- In the Section Send Additional Information you can enter Tags, an additional note, an ad tracking code and a sequence number for the autoresponder configuration.
- Save the Form.
Now when the form you selected is submitted, it will automatically send the data you have selected to the AWeber List you have set up to receive data.