Learn how to set up WhatsApp Cloud API to create a WhatsApp Chatbot by following the next steps:
Access the Facebook Developer Console: #
-
- Go to developer.facebook.com.

- Go to developer.facebook.com.
-
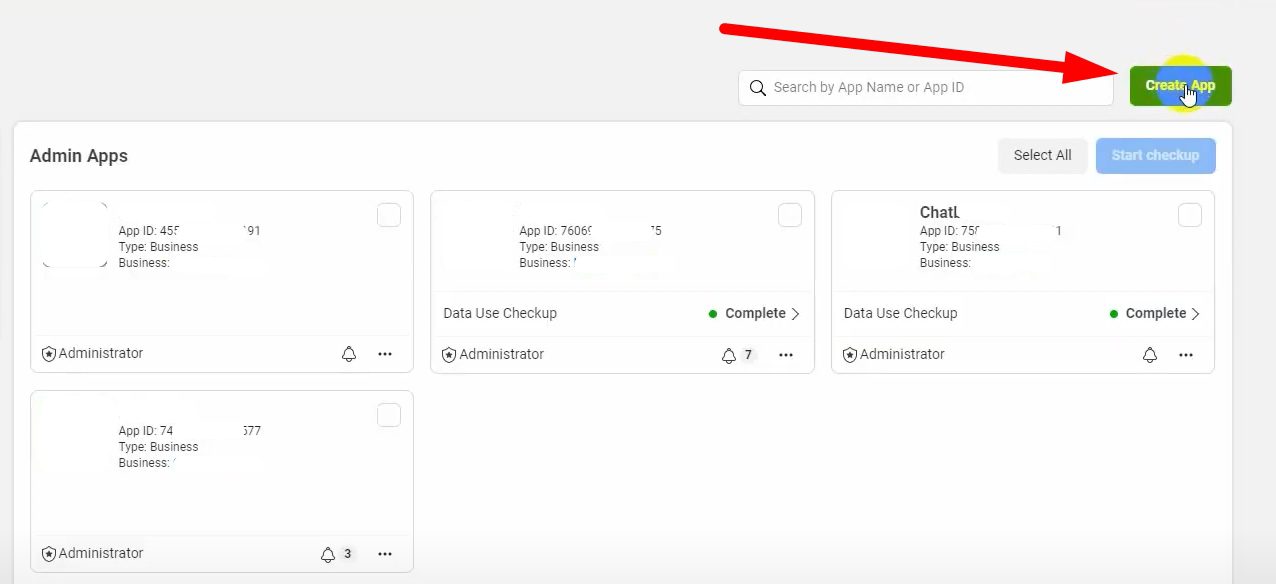
- Click on “My Apps” and then “Create App.”

- Click on “My Apps” and then “Create App.”
-
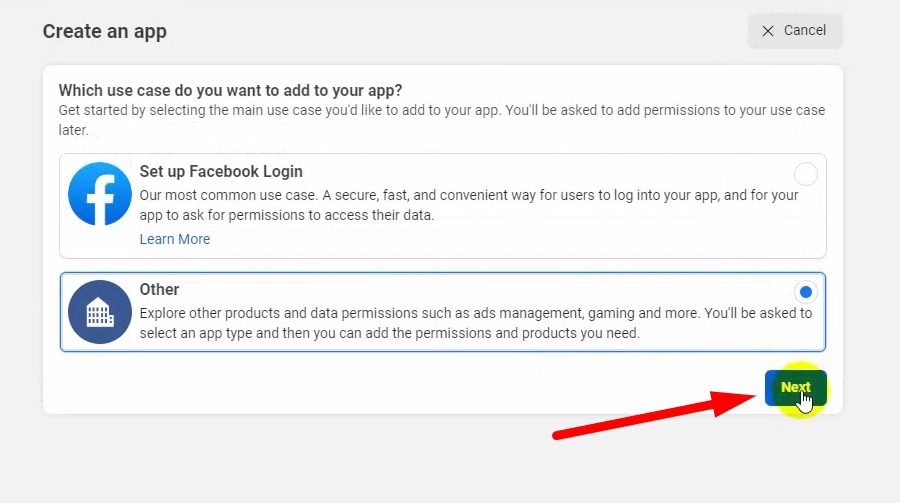
- Select “Other” as the main use case and click “Next.”

- Select “Other” as the main use case and click “Next.”

-
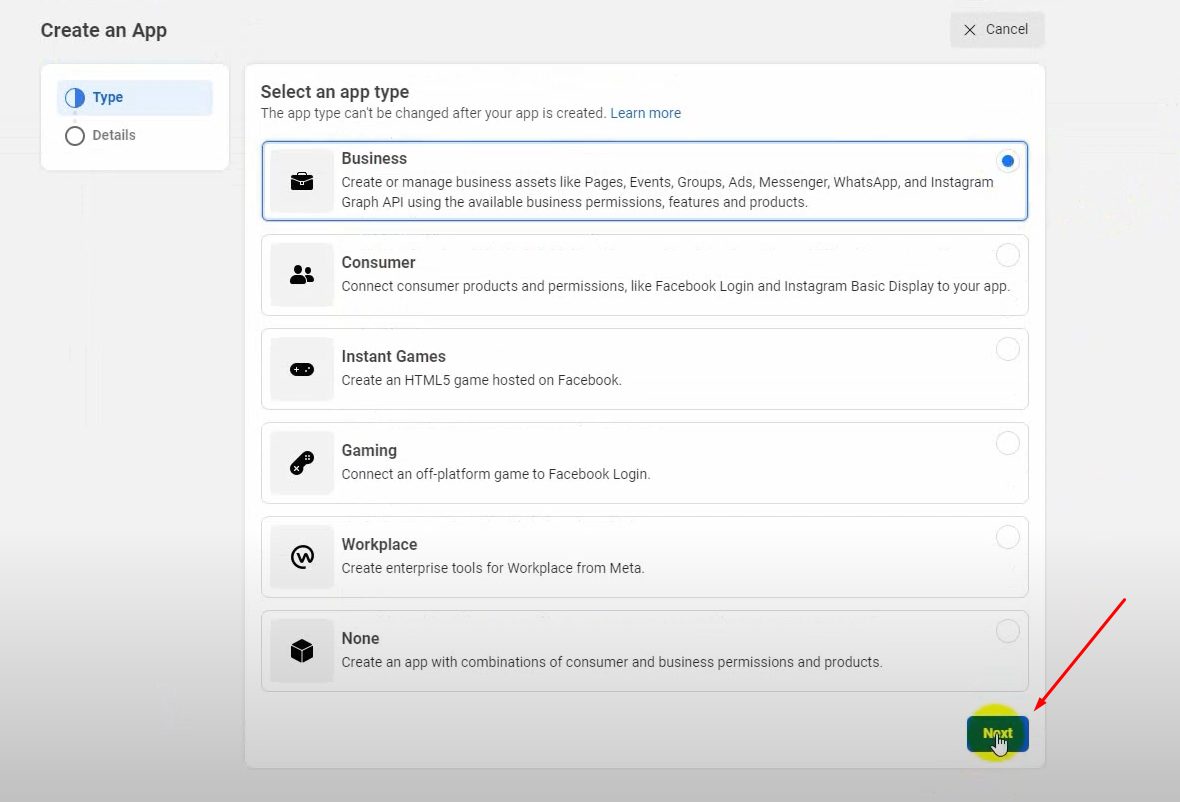
- Choose “Business” as the app type, name your app, and enter your Facebook account email.

- Choose “Business” as the app type, name your app, and enter your Facebook account email.
Set Up the WhatsApp Integration: #
-
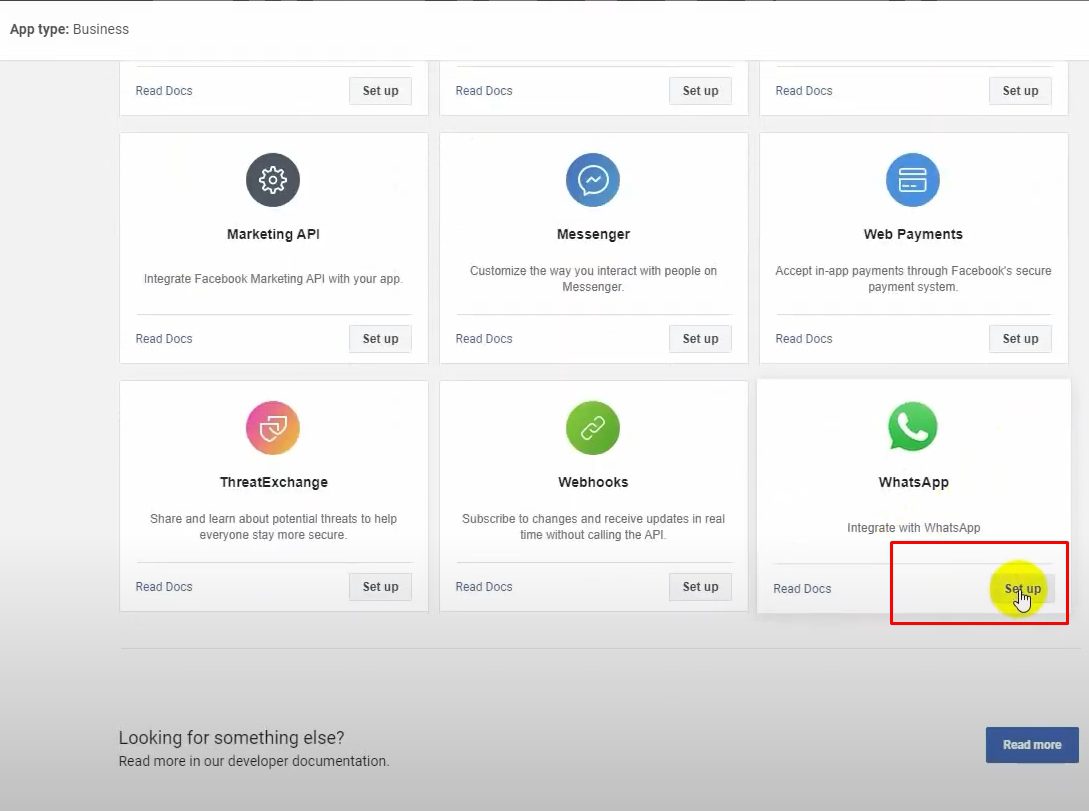
- After creating the app, scroll down to find “WhatsApp” in the “Add Products” section, then click “Set Up.”

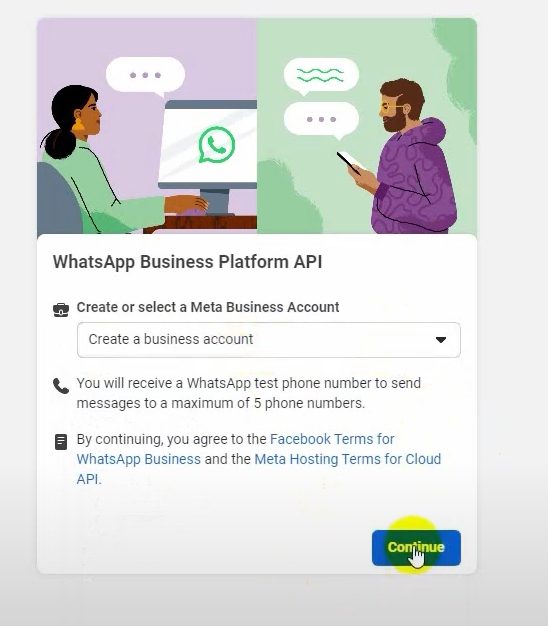
- If you don’t have a Facebook Business account, select “Create a Business Account.” Otherwise, select your existing account.
- After creating the app, scroll down to find “WhatsApp” in the “Add Products” section, then click “Set Up.”
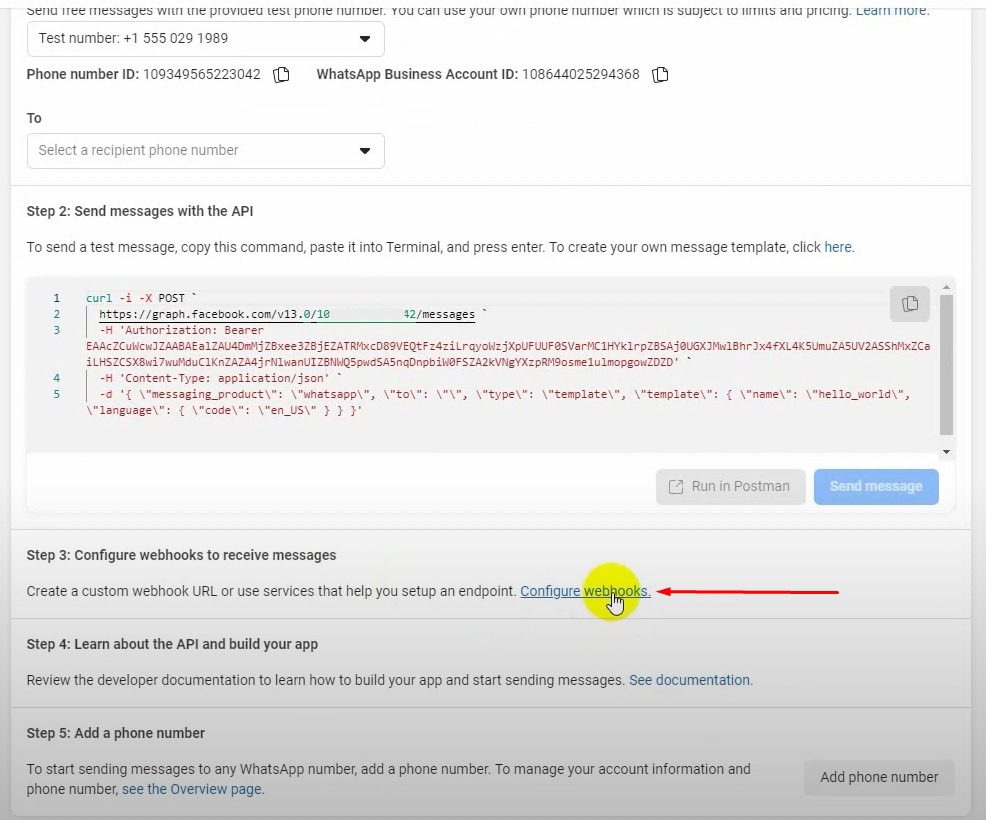
Configure Webhooks: #
-
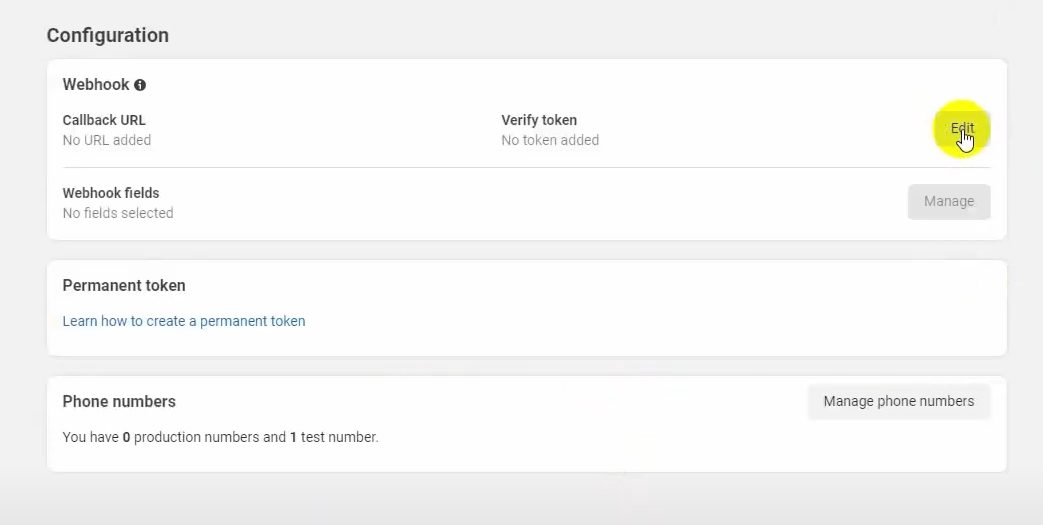
- In the “Configure Webhooks” section, add the callback URL and verify the token from BotCommerce.

- In the “Configure Webhooks” section, add the callback URL and verify the token from BotCommerce.
-
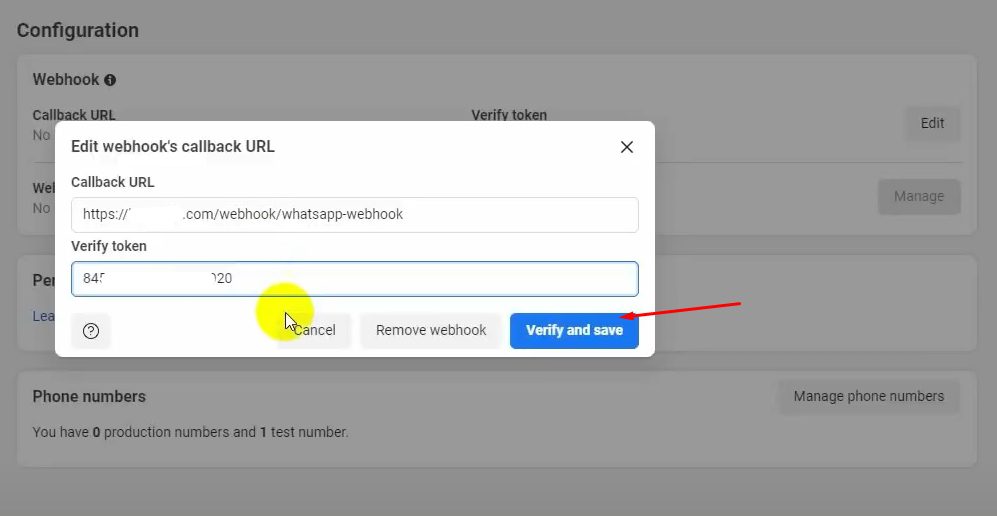
- Go to BotCommerce, copy the webhook callback URL and the verify token, and paste them into the Facebook configuration.

- Go to BotCommerce, copy the webhook callback URL and the verify token, and paste them into the Facebook configuration.
-
- Click “Verify and Save,” then subscribe to messages and click “Done.”

- Click “Verify and Save,” then subscribe to messages and click “Done.”
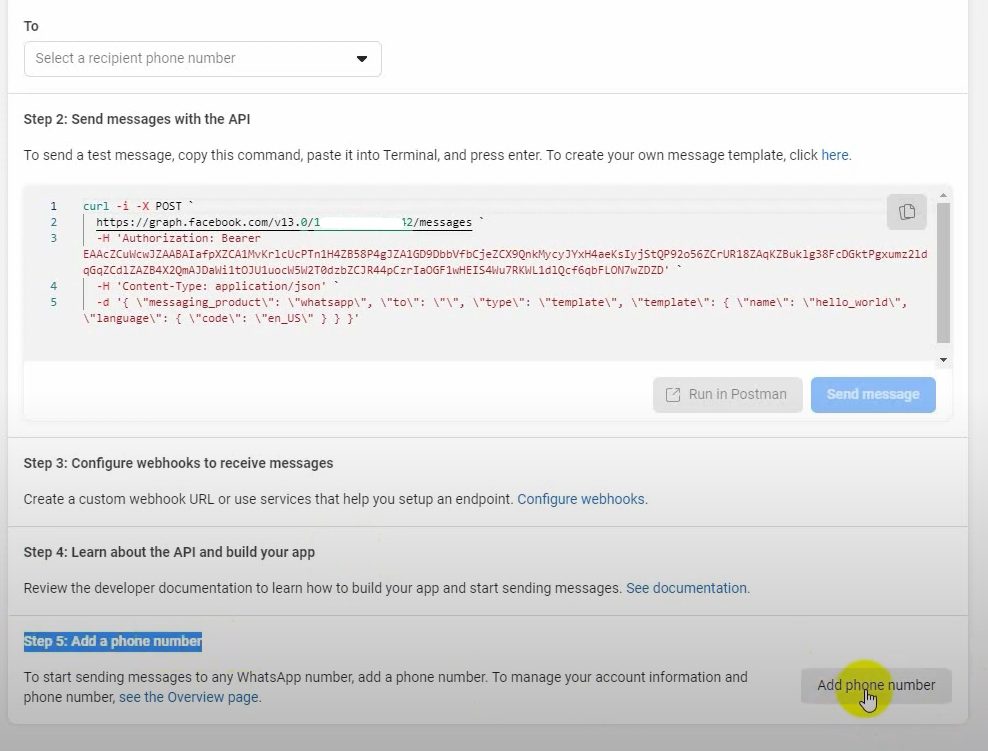
Add a Phone Number: #
-
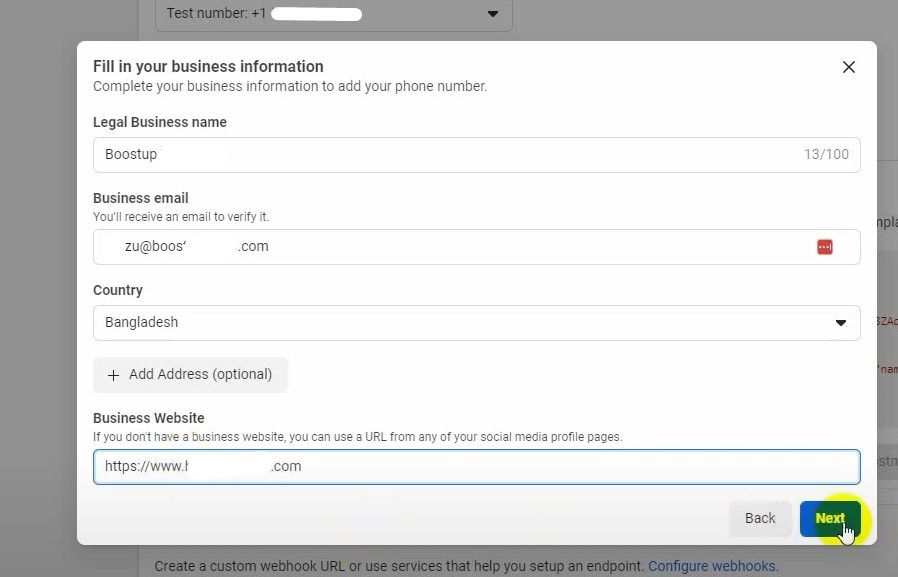
- Go to “Add Phone Number.” If you haven’t selected a business account, you’ll need to fill in your business details first.

- Go to “Add Phone Number.” If you haven’t selected a business account, you’ll need to fill in your business details first.
-
- Enter a legal business name, email, country, and website URL.

- Enter a legal business name, email, country, and website URL.
-
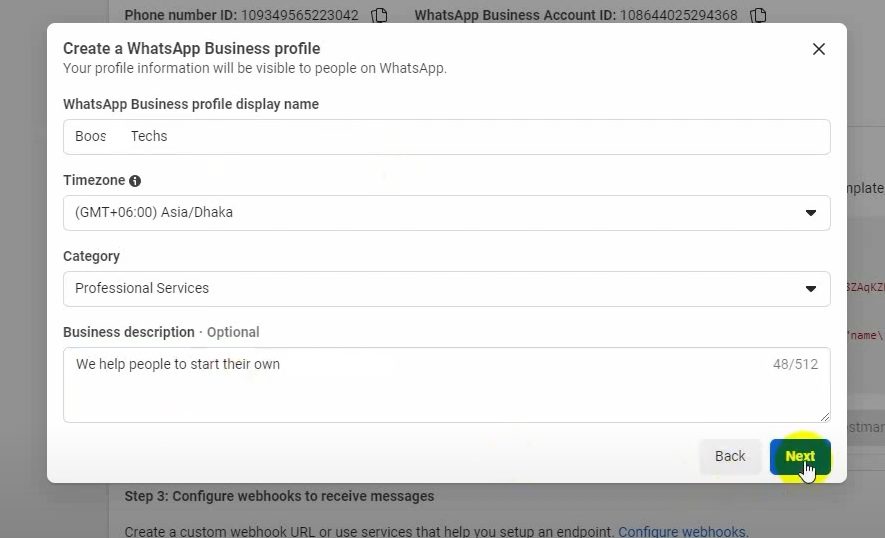
- Create a WhatsApp Business profile by entering a display name that exactly matches your business name, select the time zone, and business category.

- Create a WhatsApp Business profile by entering a display name that exactly matches your business name, select the time zone, and business category.
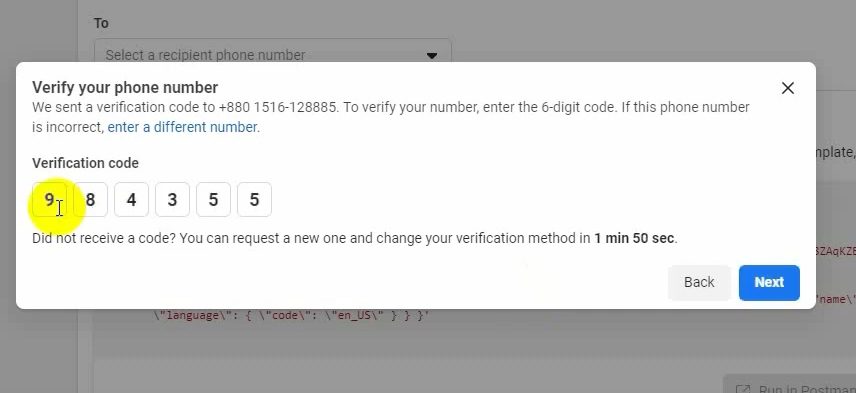
Verify the Phone Number: #
-
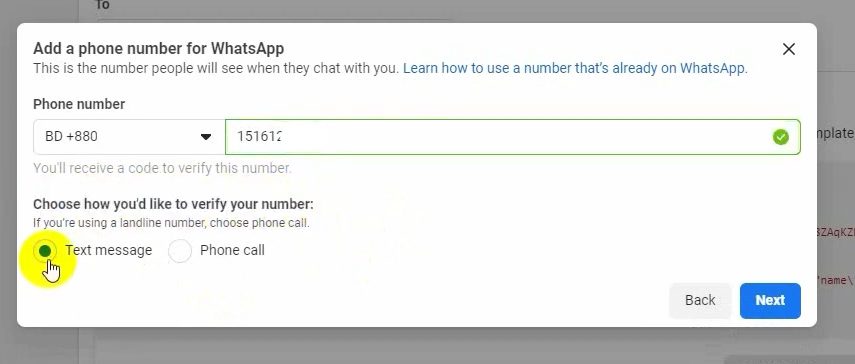
- Enter a phone number without a WhatsApp account or migrate an existing number.

- Enter a phone number without a WhatsApp account or migrate an existing number.
-
- Choose a verification method, enter the code sent to your phone, and click “Next.”

- Choose a verification method, enter the code sent to your phone, and click “Next.”
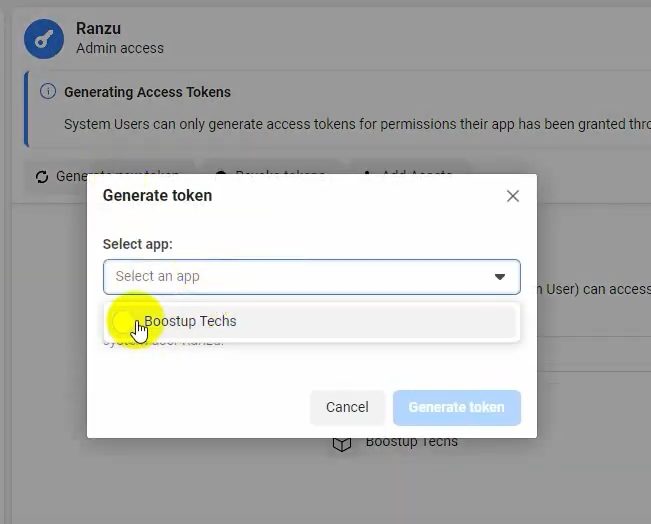
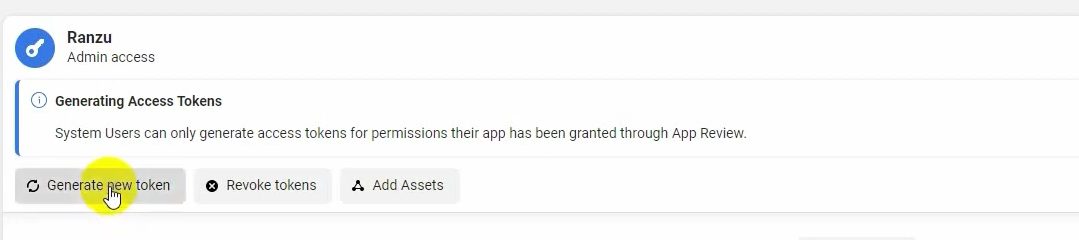
Generate a System User Token: #
-
- Go to “System Users” in the Facebook business settings and add a new system user.


- Go to “System Users” in the Facebook business settings and add a new system user.
-
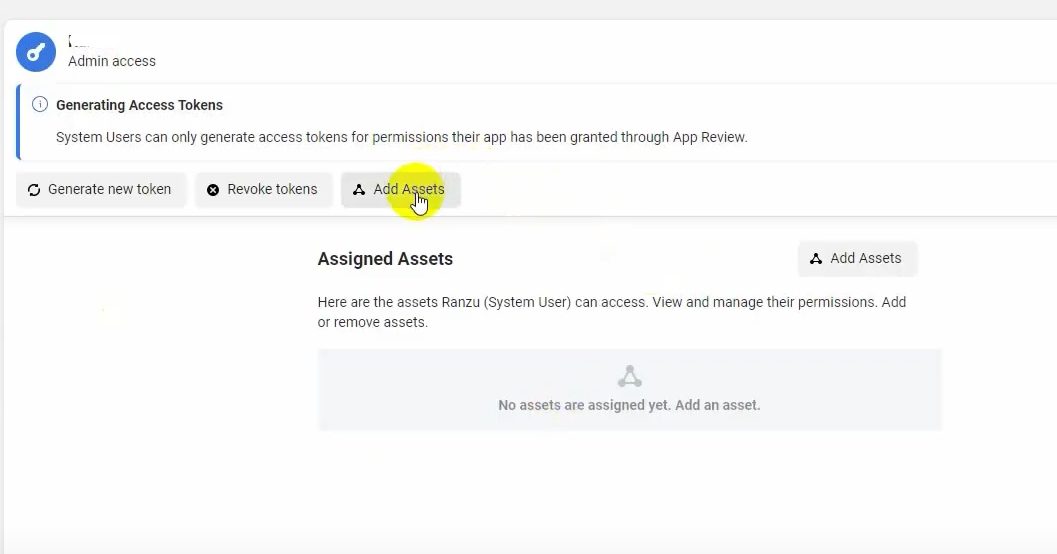
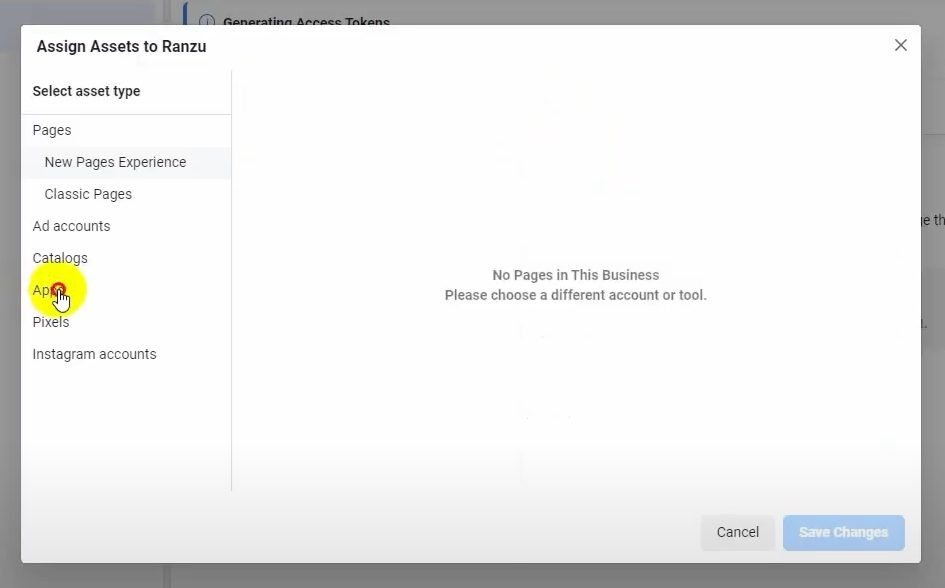
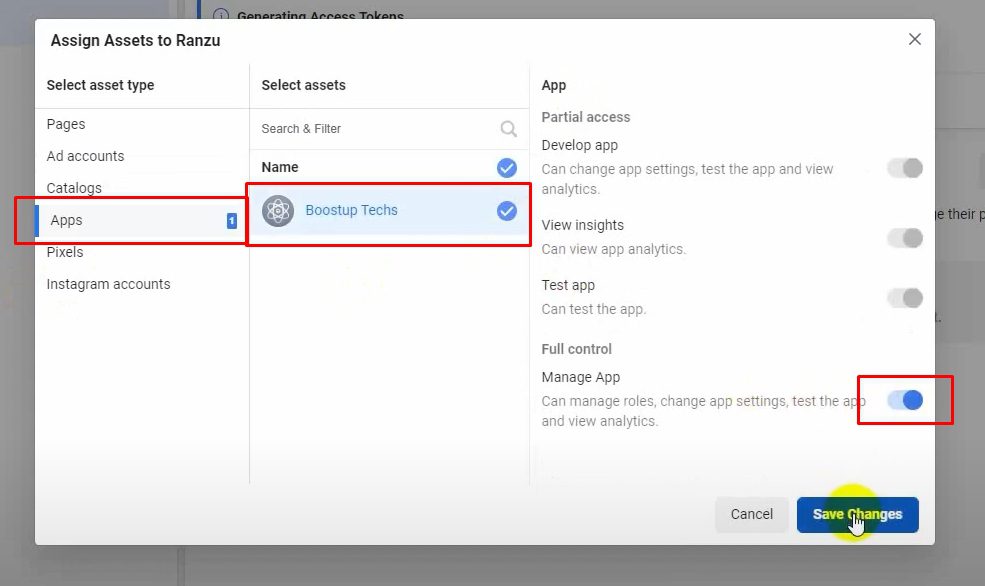
- Assign the role as admin, add the app you created, and allow full control.

- Assign the role as admin, add the app you created, and allow full control.
-
- Click on “Generate New Token” and select permissions like Business Management, Catalog Management, WhatsApp Business Messaging, and WhatsApp Business Management.
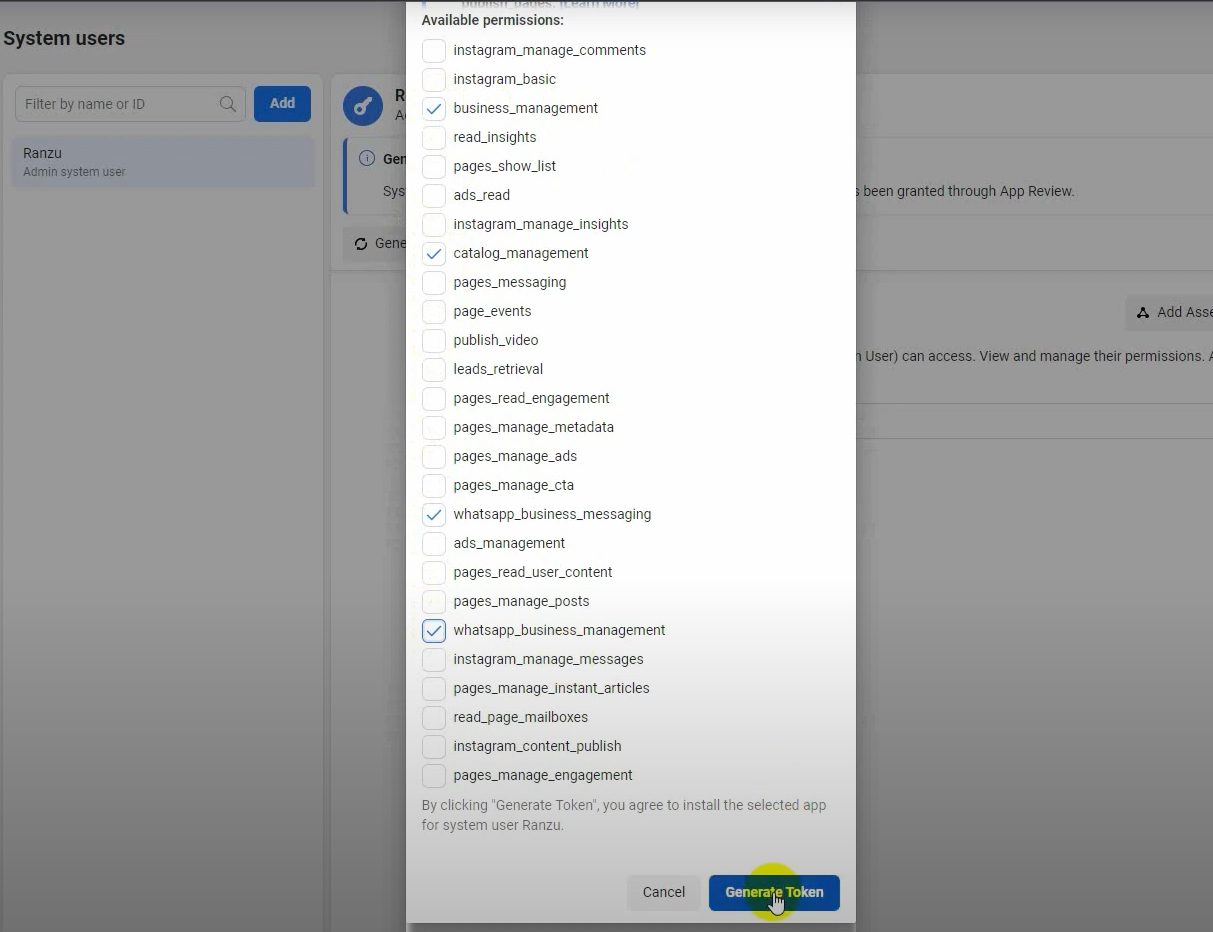
- Click on “Generate New Token” and select permissions like Business Management, Catalog Management, WhatsApp Business Messaging, and WhatsApp Business Management.
-
- Copy the token and paste it into BotCommerce.
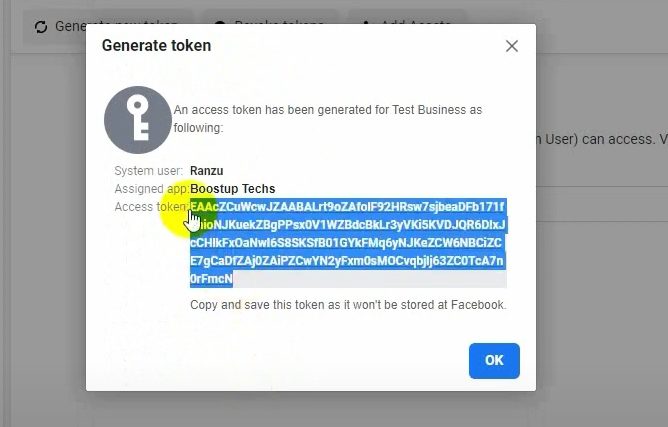
- Copy the token and paste it into BotCommerce.
Connect Your WhatsApp Business Account: #
-
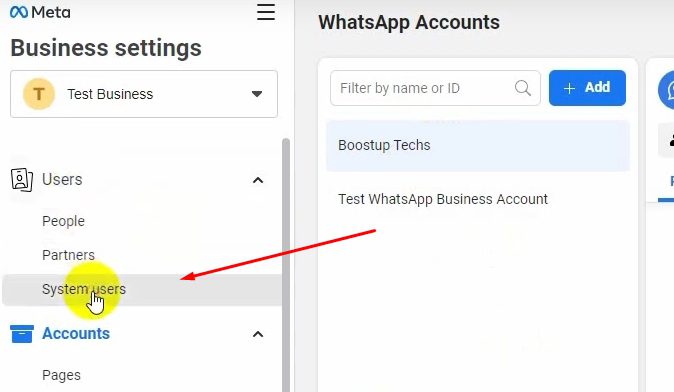
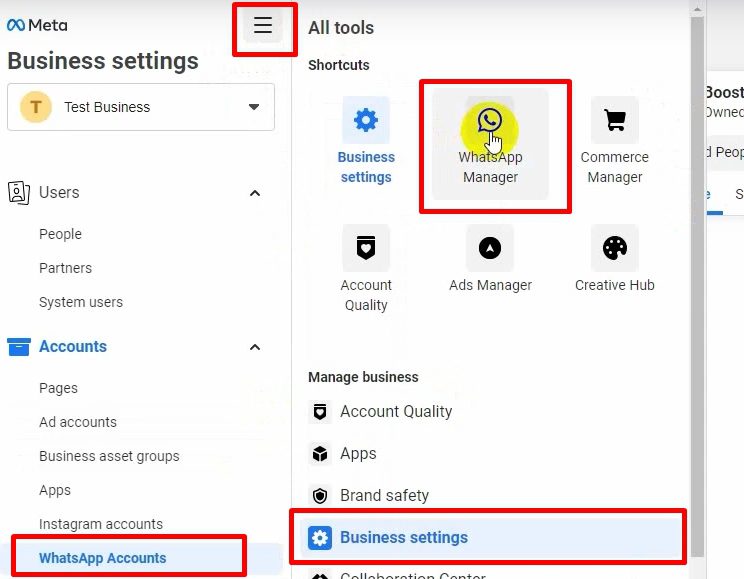
- Obtain the business account ID from the WhatsApp accounts section and paste it into BotCommerce.

- Click on “Connect” in BotCommerce to finalize the connection.
- Your WhatsApp Business account is now connected to BotCommerce.
- Obtain the business account ID from the WhatsApp accounts section and paste it into BotCommerce.

Test and Verify the Connection: #
-
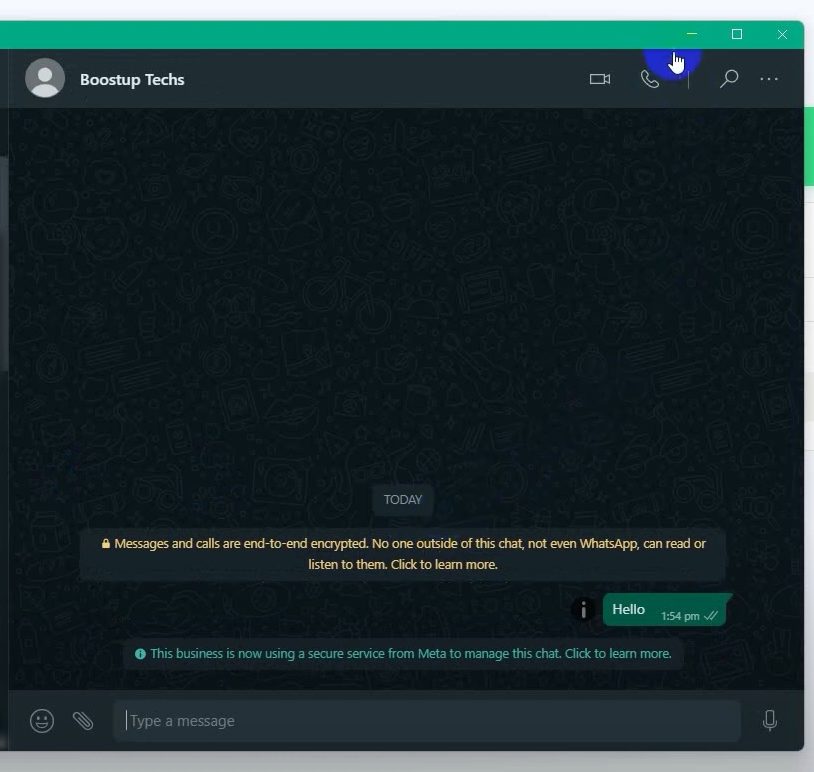
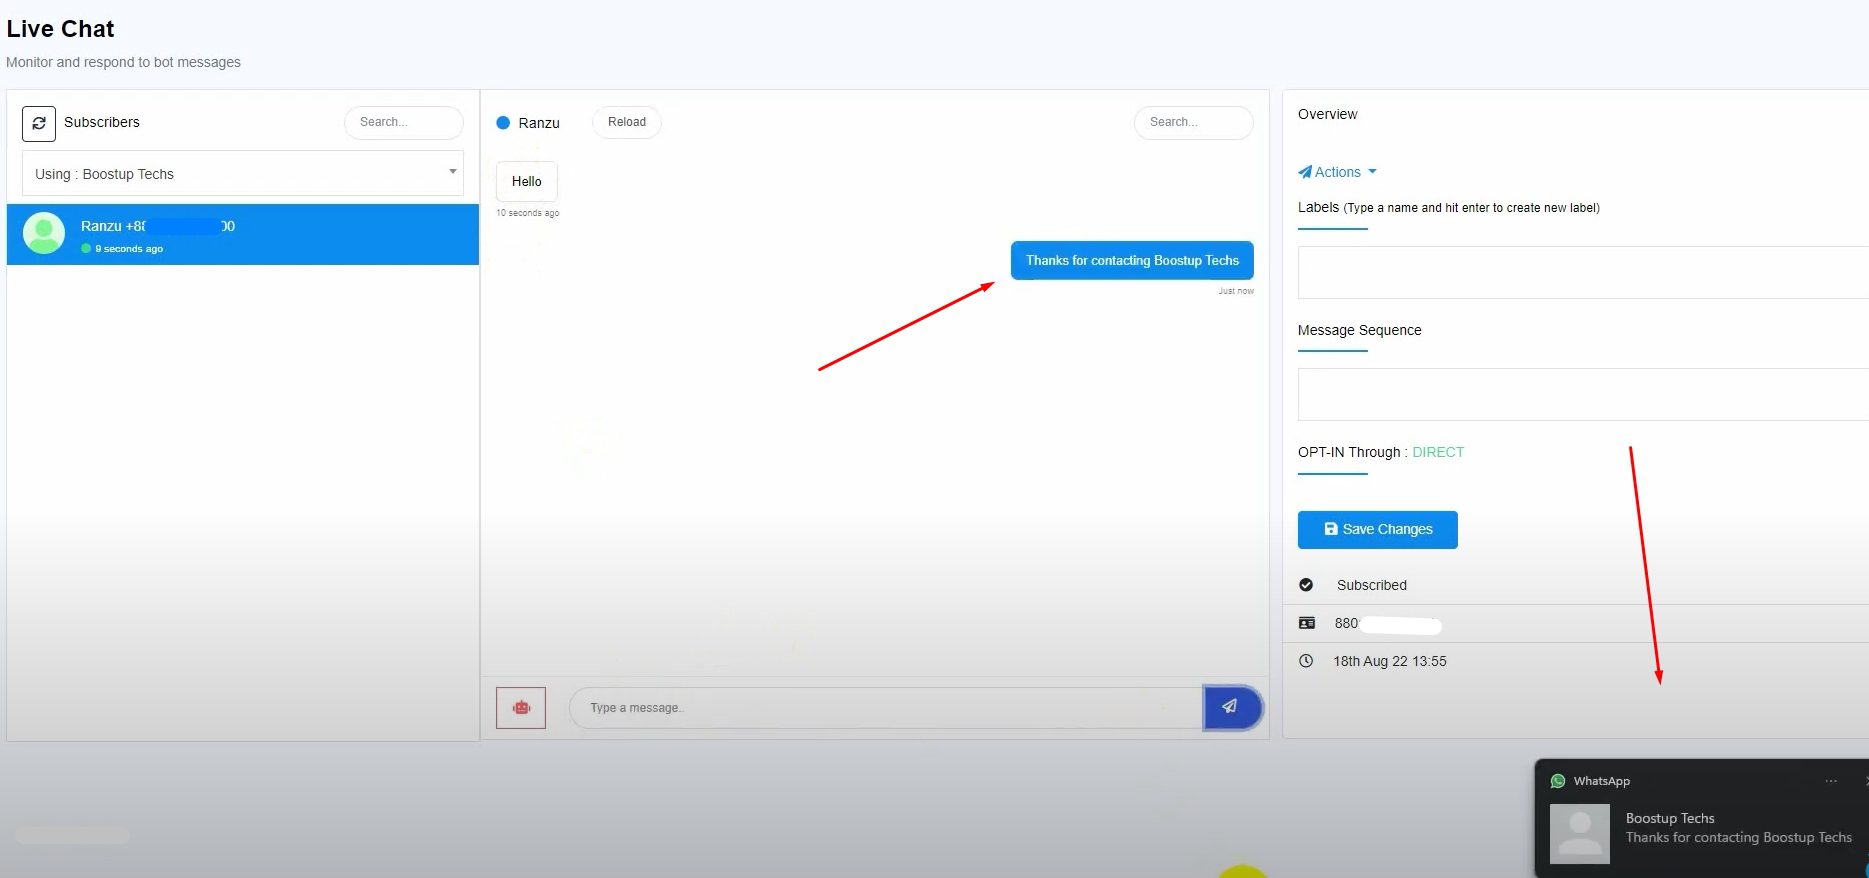
- Send a message from WhatsApp to the connected number. You should see the message appear in BotCommerce’s live chat.

- Send a message from WhatsApp to the connected number. You should see the message appear in BotCommerce’s live chat.
-
- You can now reply directly from BotCommerce, confirming the integration is successful.

- You can now reply directly from BotCommerce, confirming the integration is successful.
Additional Settings: #
-
- You can add a profile picture for your WhatsApp Business account by going to business.facebook.com, selecting “WhatsApp Manager,” and uploading a profile photo under “Settings” > “Profile.”

- You can add a profile picture for your WhatsApp Business account by going to business.facebook.com, selecting “WhatsApp Manager,” and uploading a profile photo under “Settings” > “Profile.”
Next Steps: #
-
- With your WhatsApp Business account connected to BotCommerce, you can now create bots, send sequence messages, broadcast to subscribers, and more.