Keeping customers informed about their order status is key to a great shopping experience. With WooCommerce, you can automate these updates and send them directly to customers via WhatsApp. In this guide, we’ll show you how to set up a webhook workflow to send WooCommerce order status change notifications to WhatsApp, ensuring your customers stay updated in real-time.
Create a Message Template
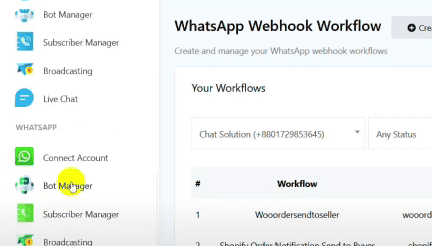
Go to “Bot Manager” from the BotCommerce dashboard.
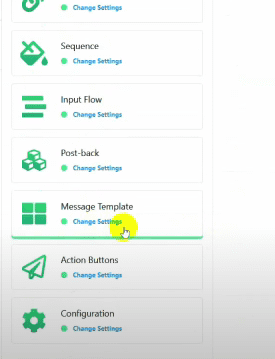
Select “Message Template”.
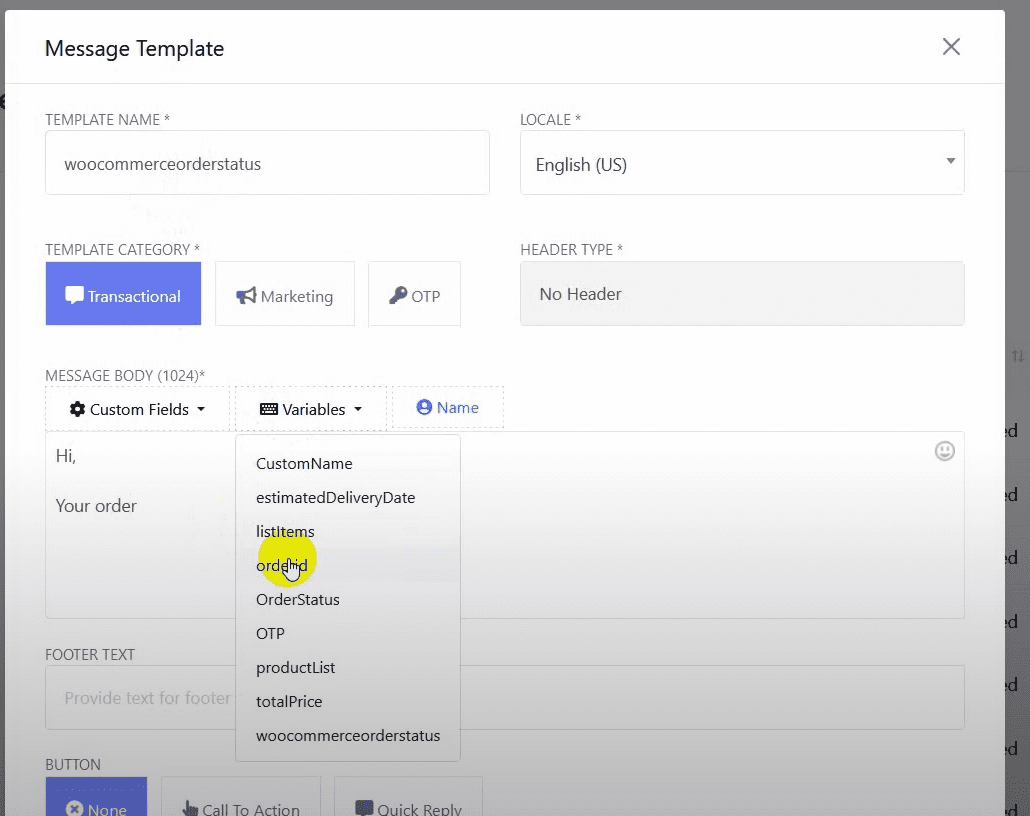
Before creating the template, create a variable for the order status.
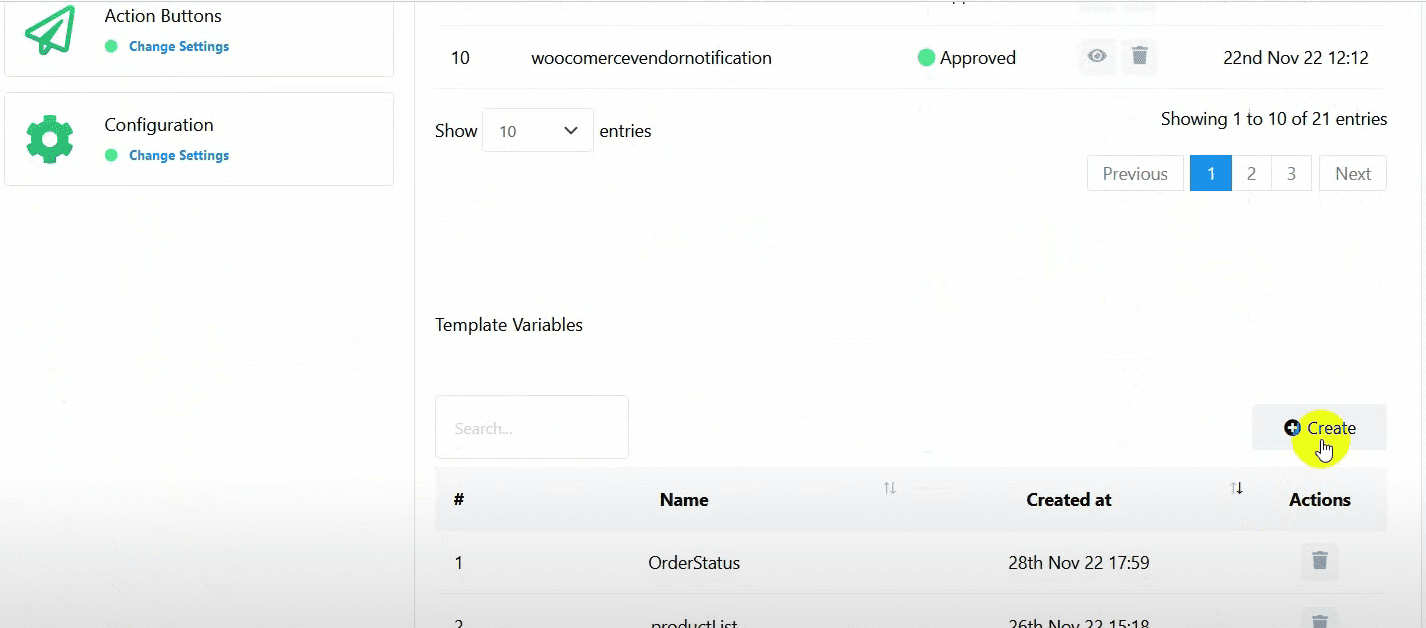
Click on the “Create” button under the variables section.

Name the variable “WooCommerce order status”.
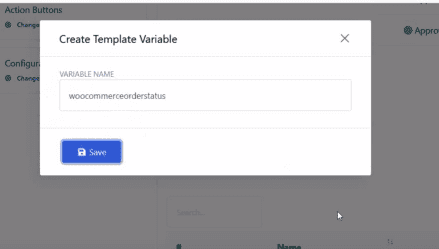
Click “Save” and refresh the page.
Click on the “Create” button under the message template settings.
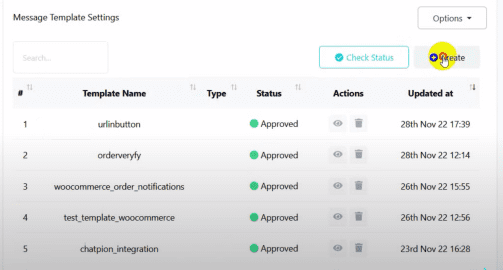
Name the template.
Write the body of the message, using the variables order ID and WooCommerce order status.
Finally, click on the “Save Webhook” button.
Set Up the Webhook Workflow
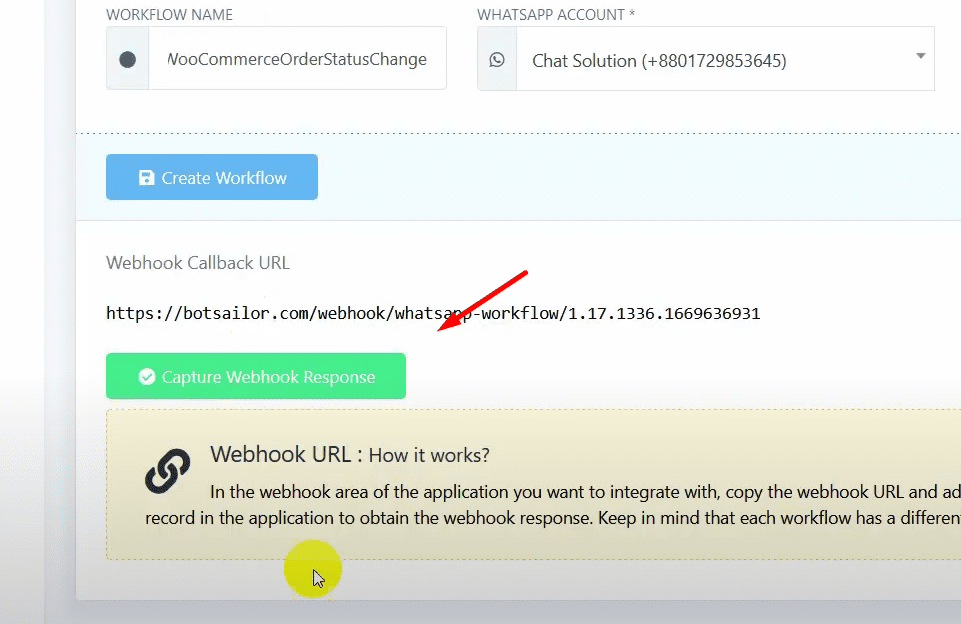
Click on the “Create” button in the Webhook workflow section.
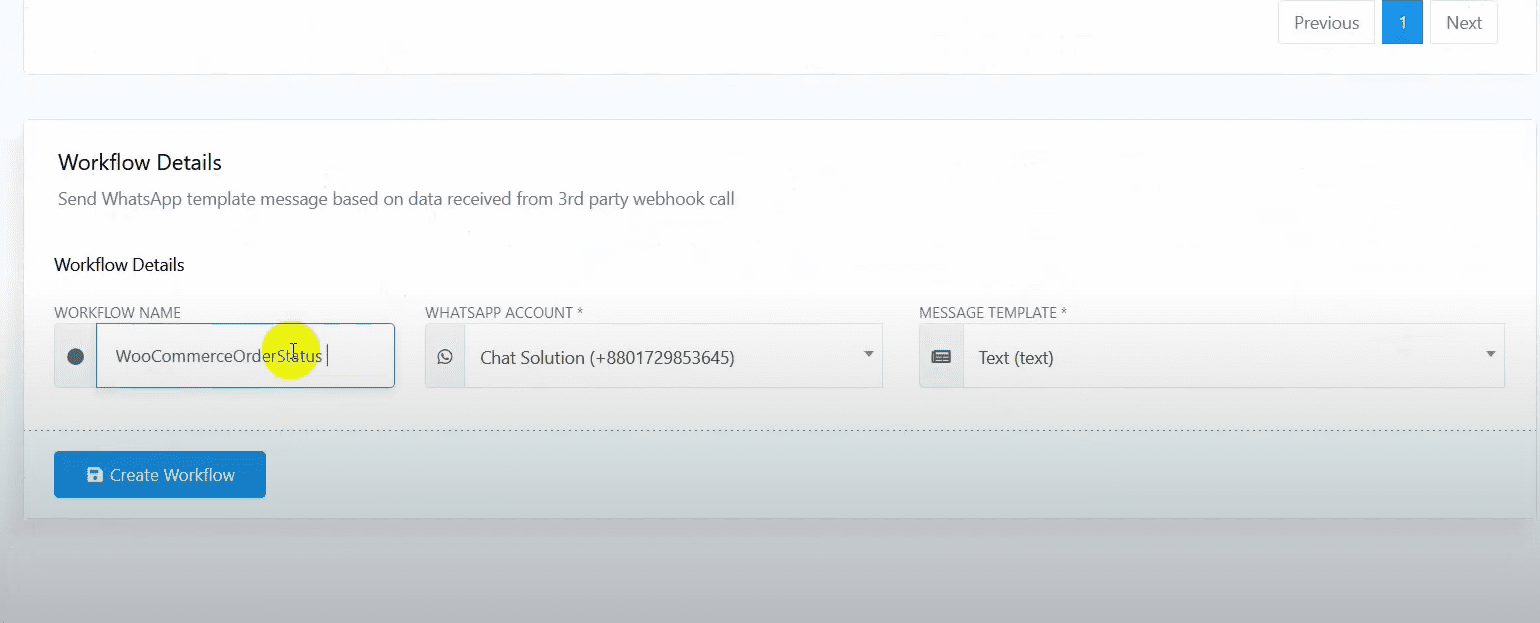
Name the workflow.
Select the WhatsApp bot account and the message template.
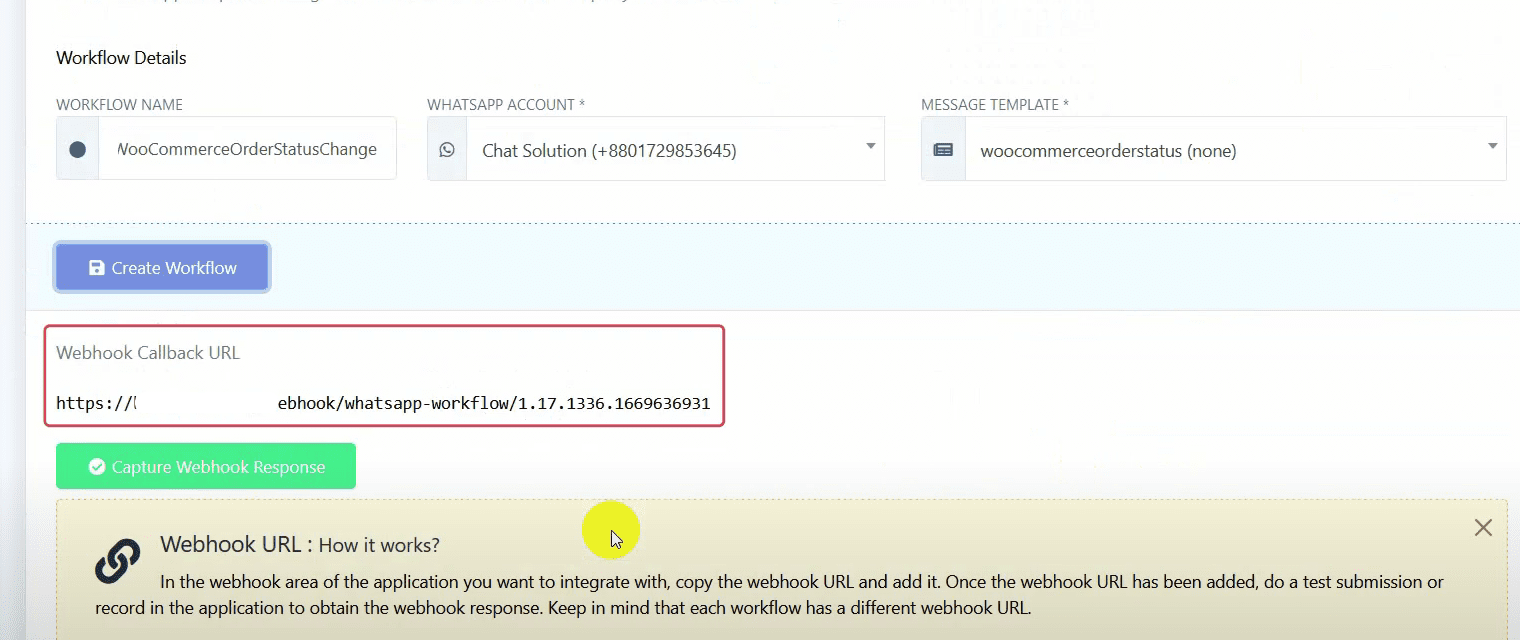
Click on “Create Workflow” to generate a webhook callback URL. Copy the URL.
Configure the Webhook in WooCommerce
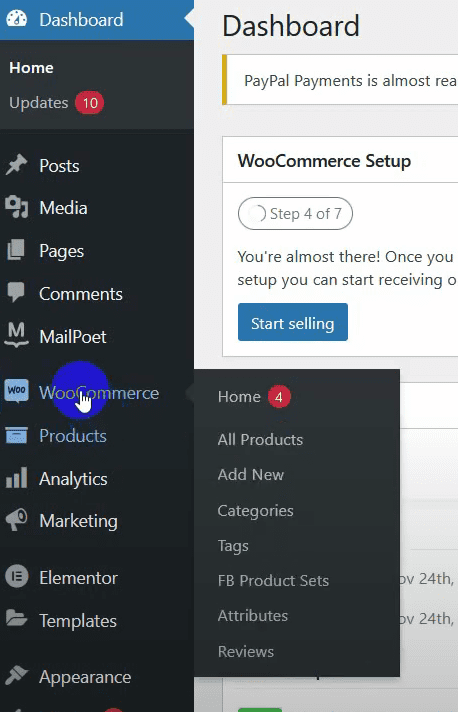
Go to the WordPress admin dashboard and select WooCommerce.
Go to “Settings” and then the “Advanced” tab.
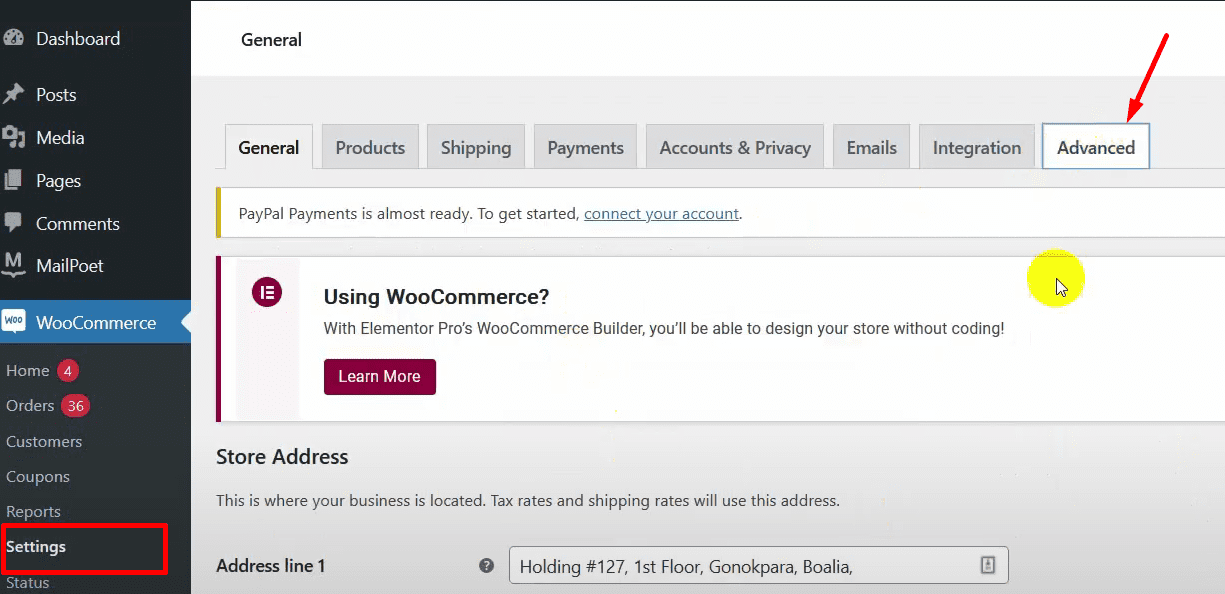
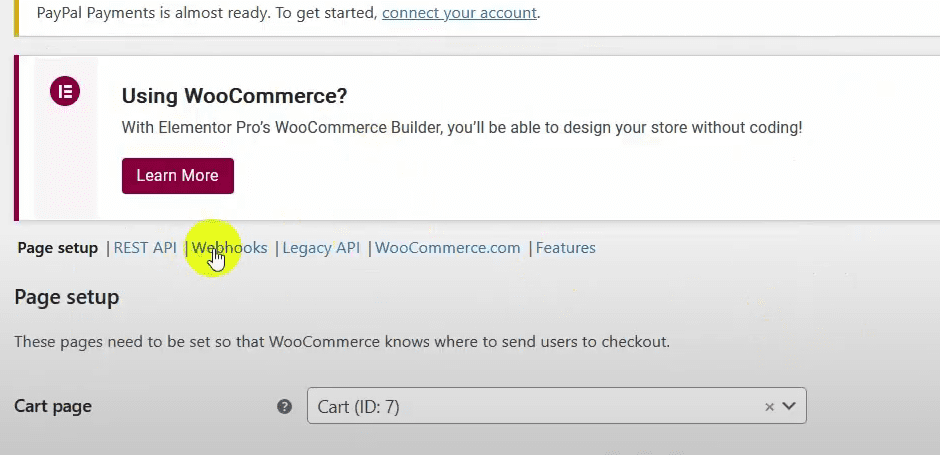
Select “Webhooks” and click on “Add Webhook”.
Name the webhook.
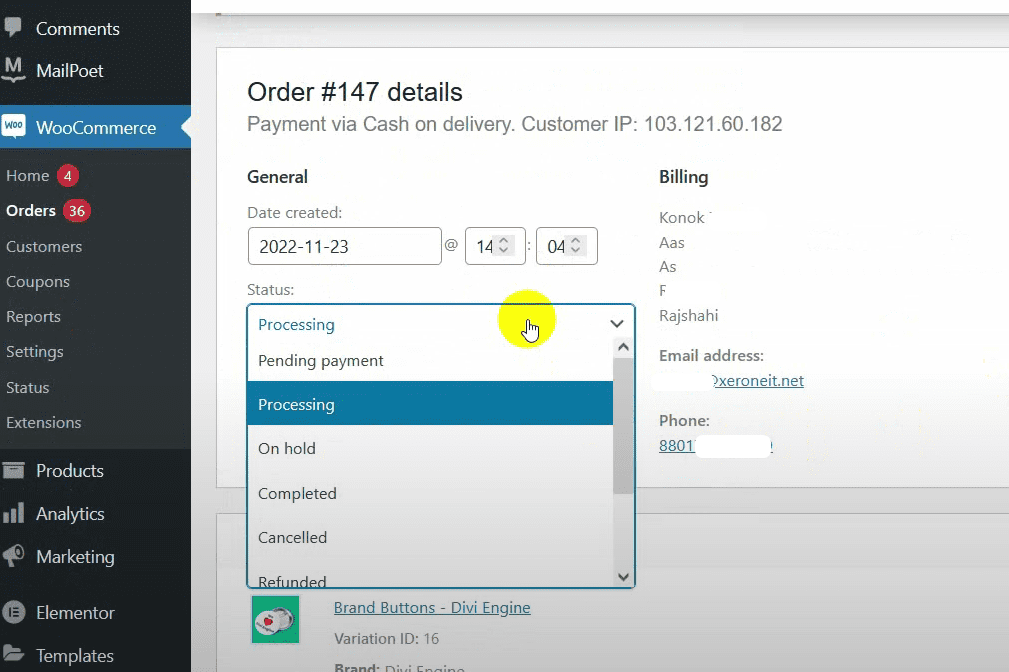
Select the status as “Active” and the topic as “Order Updated”.
In the Delivery URL, paste the URL copied from BotCommerce.
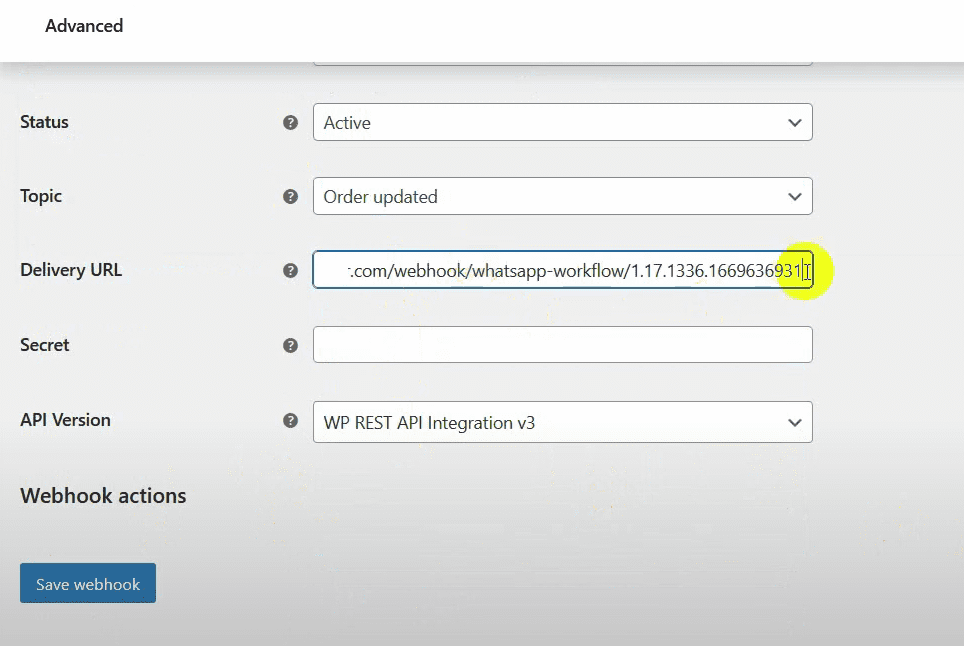
Finally, click on the “Save Webhook” button.
Capture the Webhook Response
Go back to BotCommerce and click on the “Capture Webhook response” button.
It fetched some data, but we need sample order change data to configure the mapping.
Go to the WooCommerce store and change the order status from “Processing” to “Completed”.
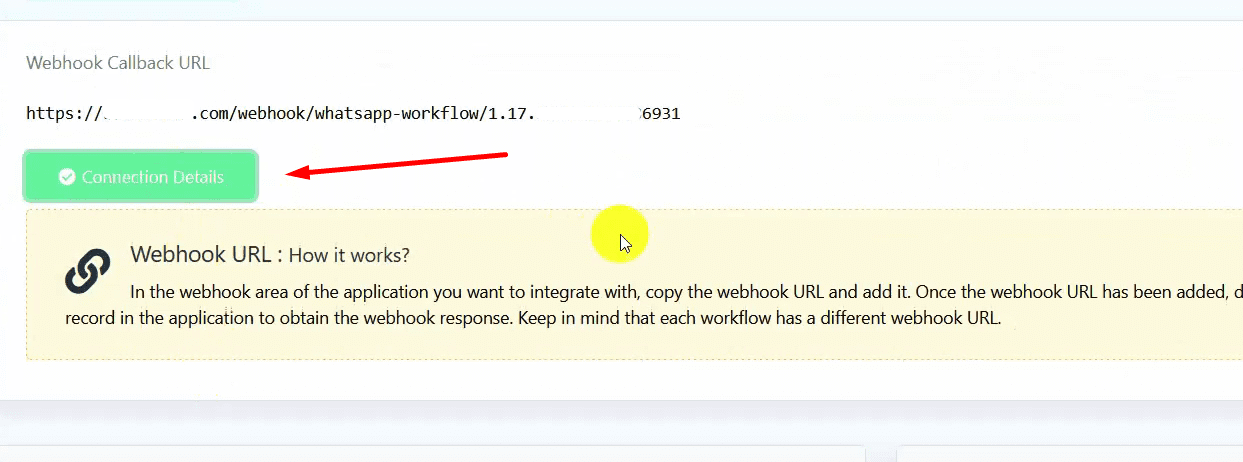
Go back to BotCommerce and click on the “Connection Details” button. It should fetch the order change data from WooCommerce.
Configure the Webhook Response Mapping
Select the phone number under the billing section.
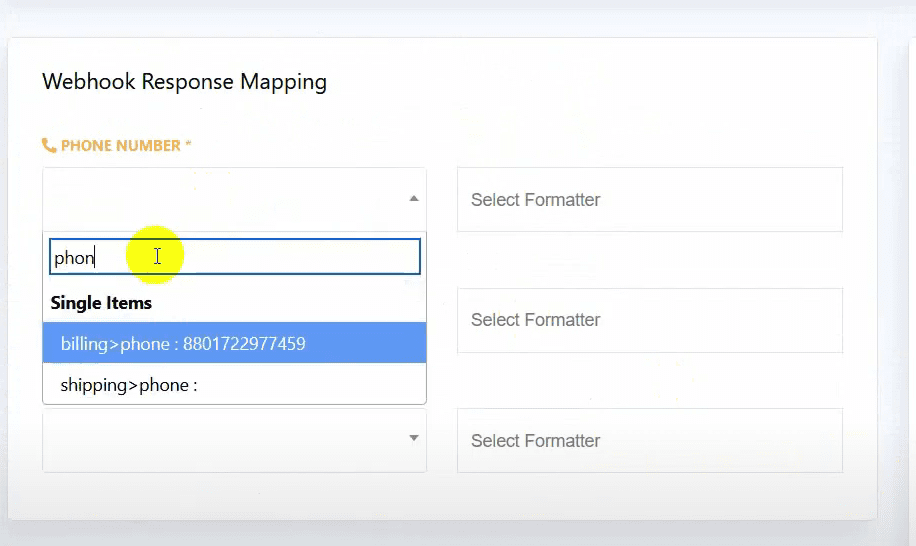
(Optional) Use formatters for phone numbers to remove any plus sign or dash.
Select the variable order ID.
Select the variable WooCommerce order status.
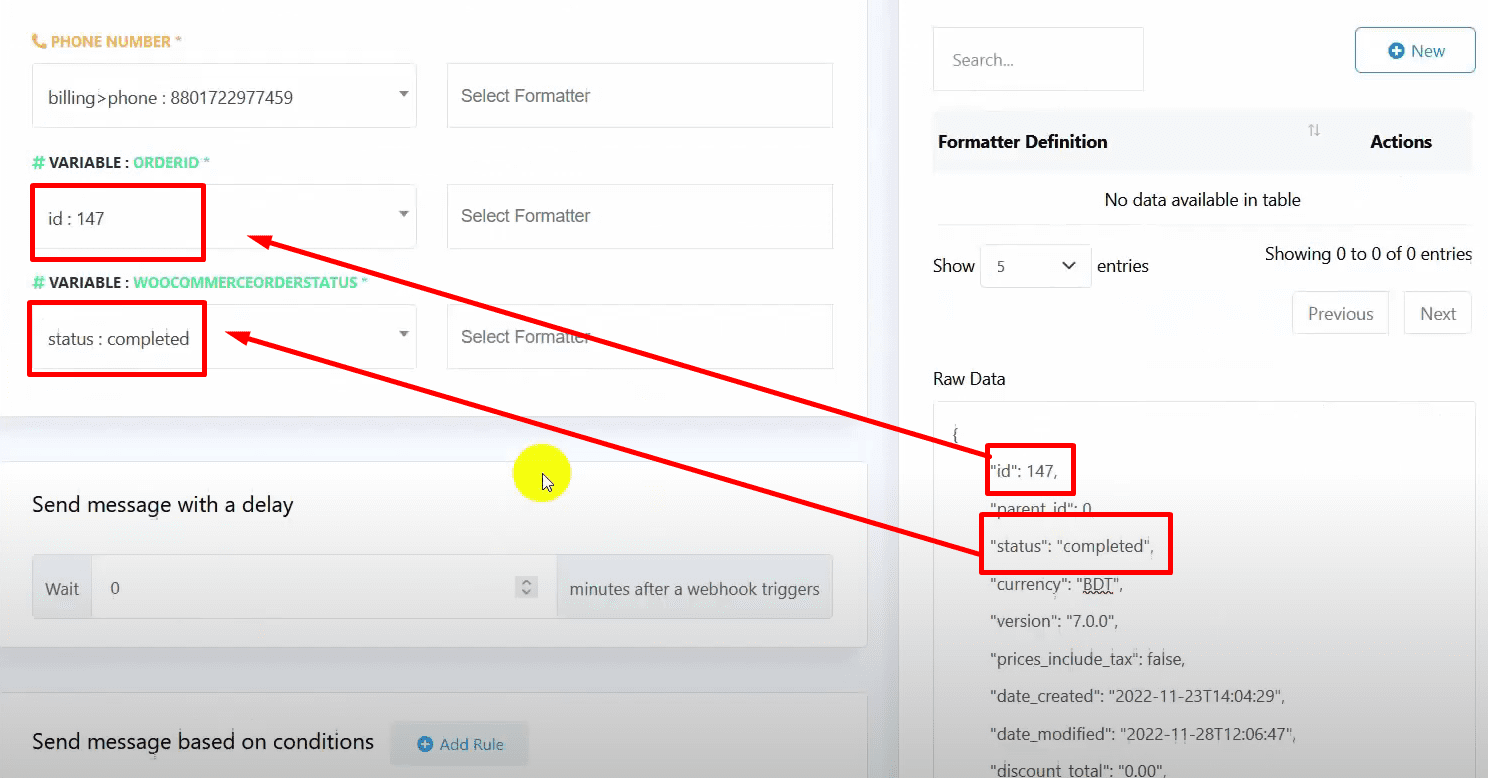
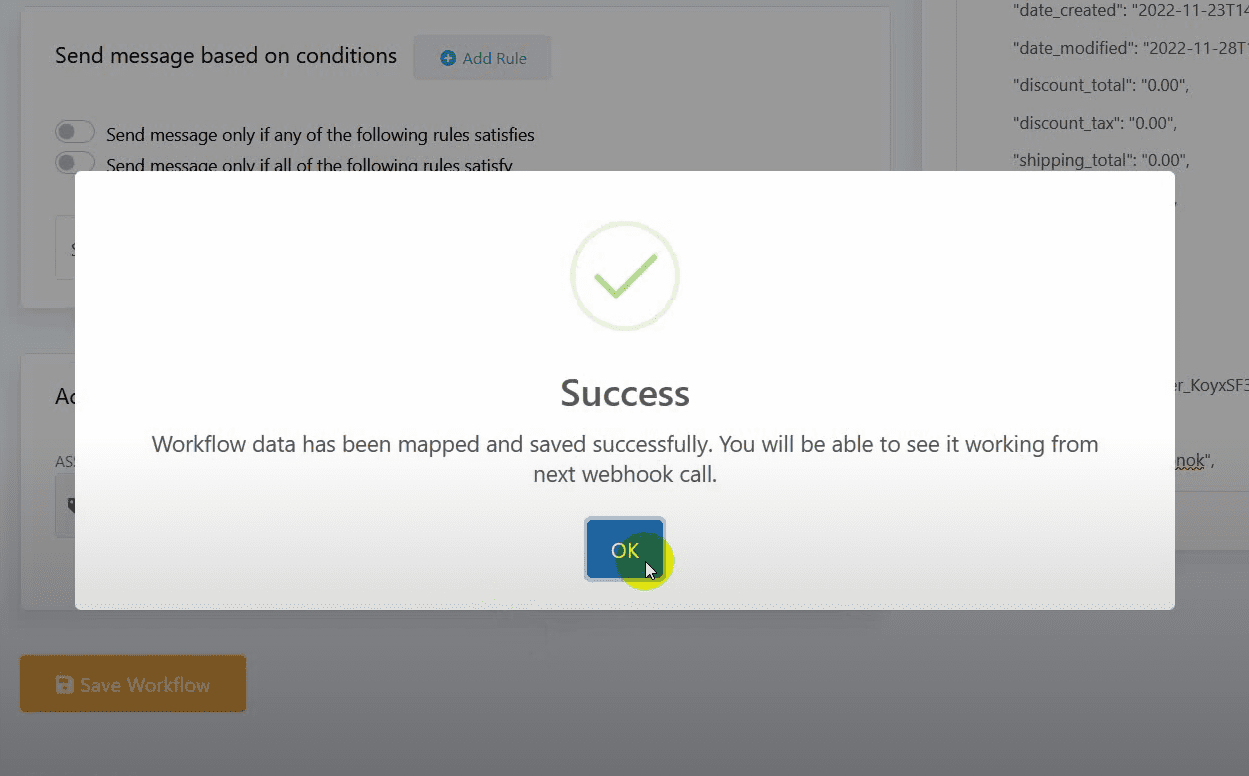
Finally, click on the “Save Workflow” button.
Verify the Workflow
Change the status of an order in WooCommerce.

Check BotCommerce under “Report”.
Wait a moment and verify that the process has been completed.
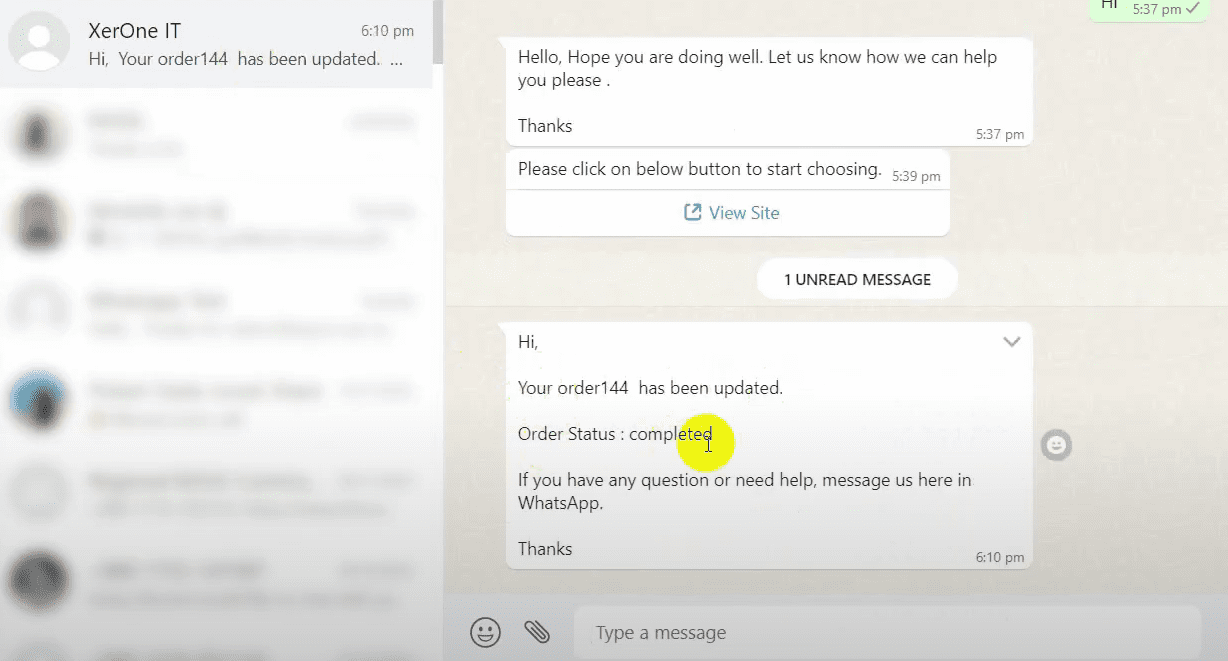
Check WhatsApp to confirm that the message with the order status change has been received.
For further adjustments or support, you can always revisit BotCommerce or WooCommerce settings. You’re ready to keep customers informed effortlessly!
