Learn how to send WhatsApp Messages to Facebook Messenger subscribers using BotCommerce
Collect Phone Numbers on Facebook Messenger:
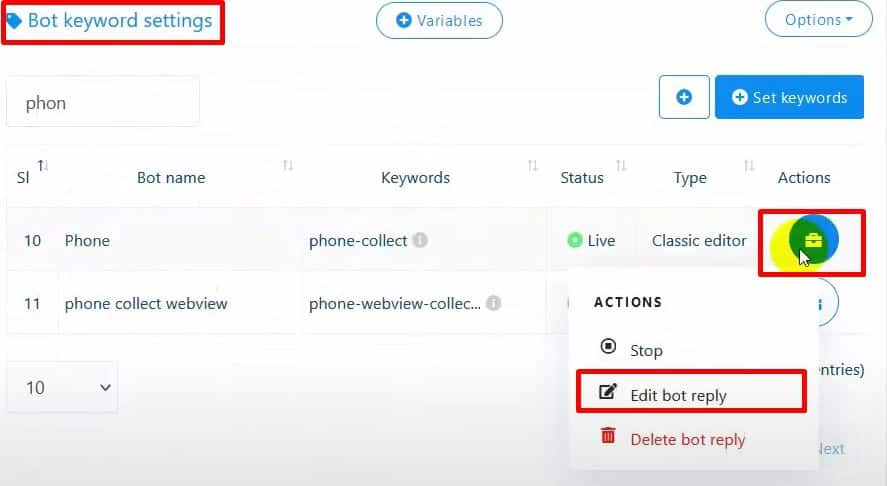
Use ChatPion’s Quick Reply, User Input Flow, or WebView form to collect phone numbers.
Ensure your bot is already set up to collect phone numbers via Quick Reply or other methods.

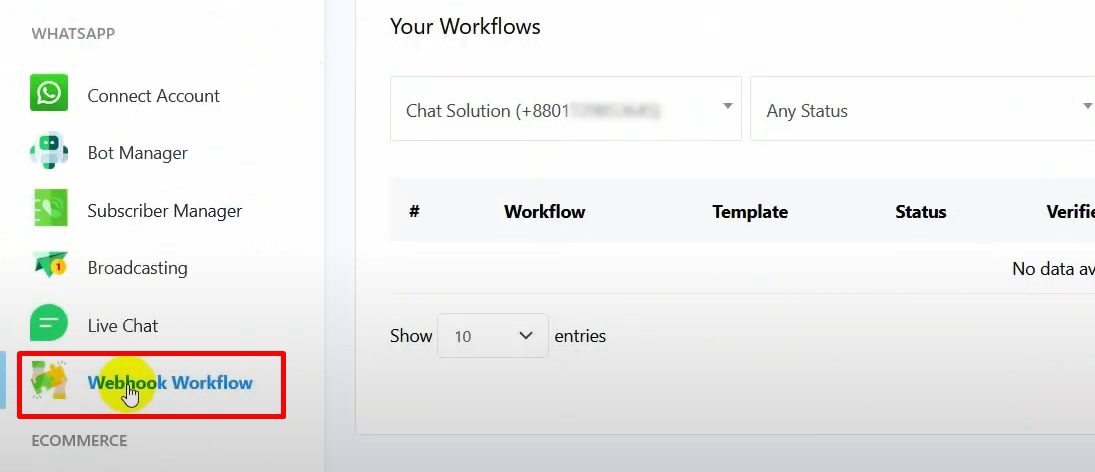
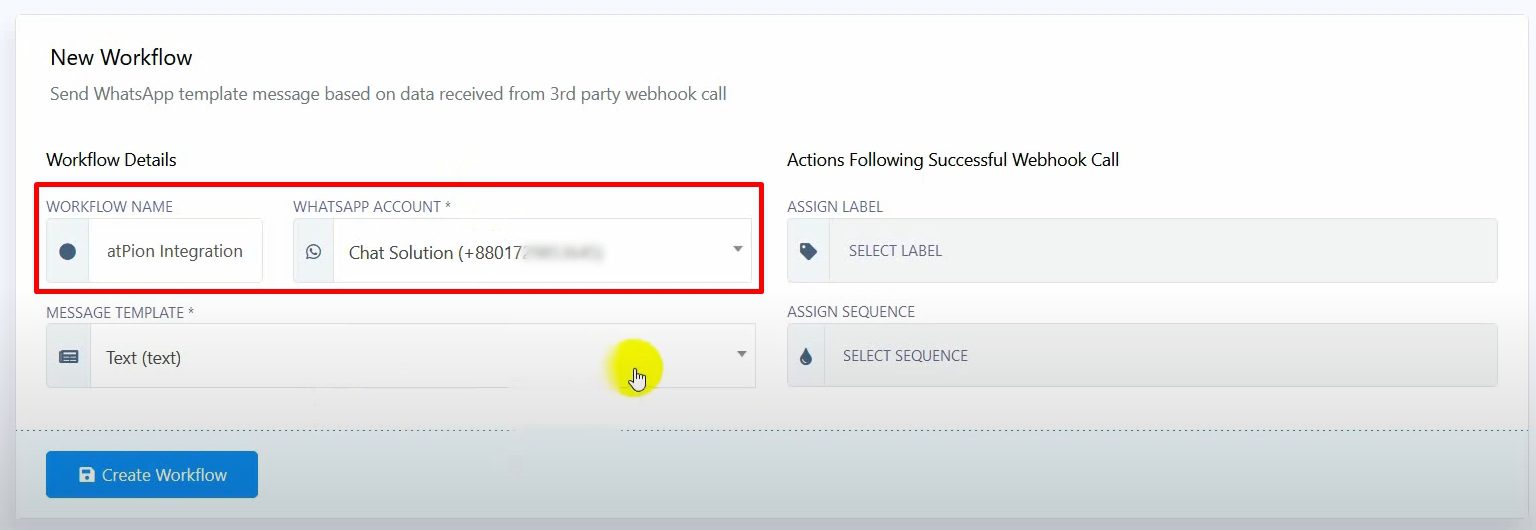
Go to BotCommerce and navigate to “Webhook Workflow”.
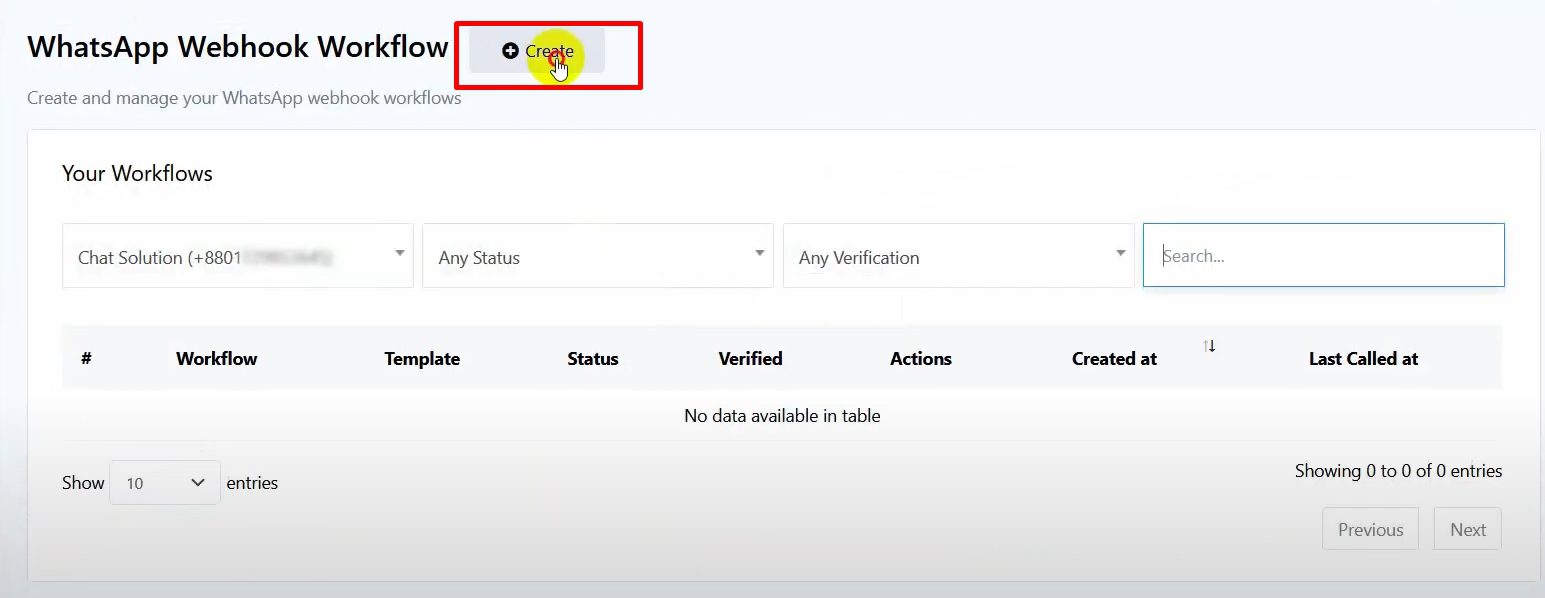
Click on “Create”, give a name to your workflow, and select the WhatsApp bot account you want to use.
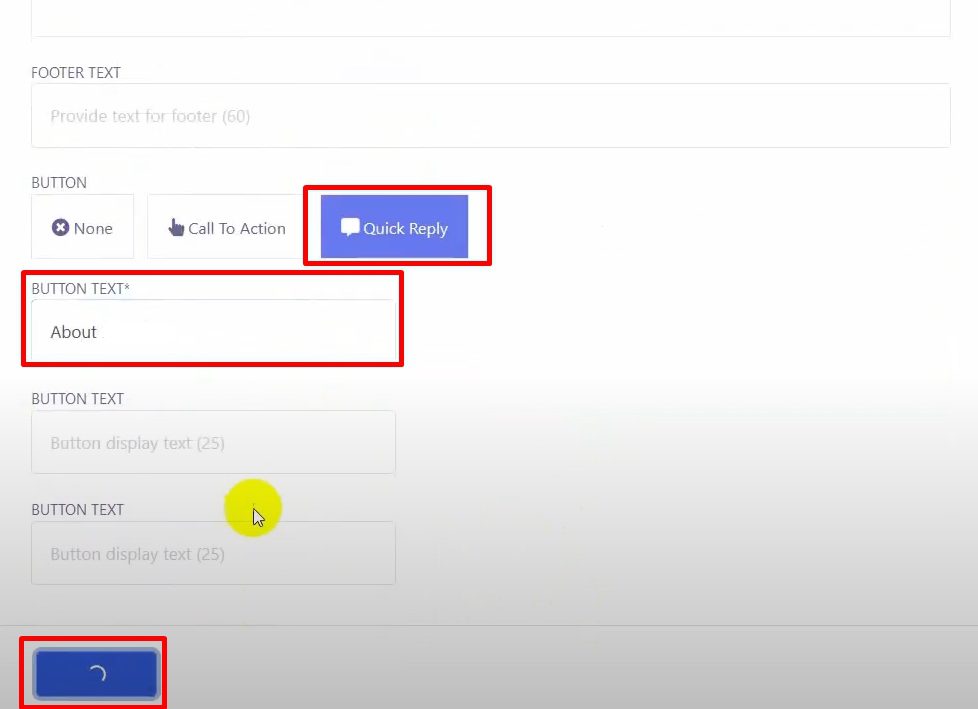
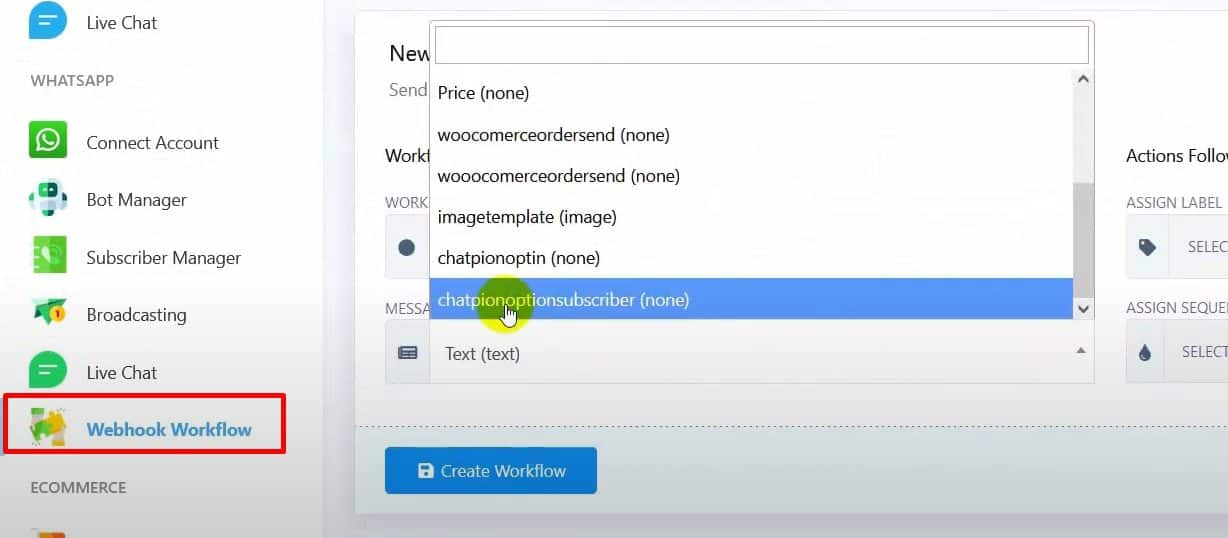
Choose a message template or create a new one.
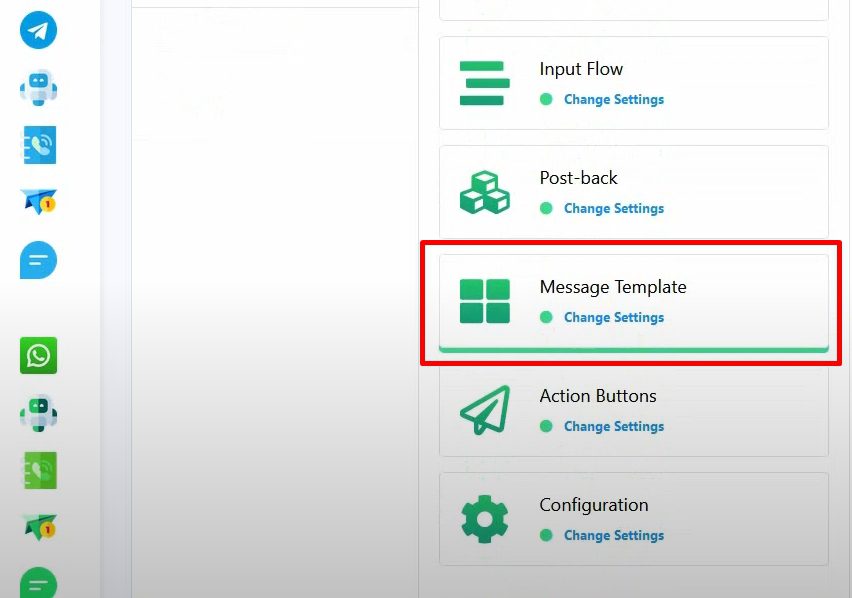
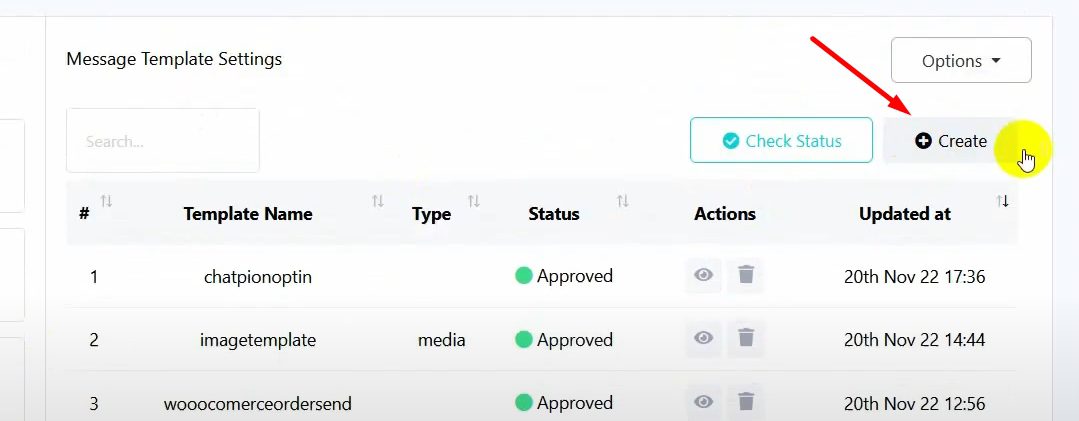
In BotCommerce, go to “Message Template” under the Bot Manager.
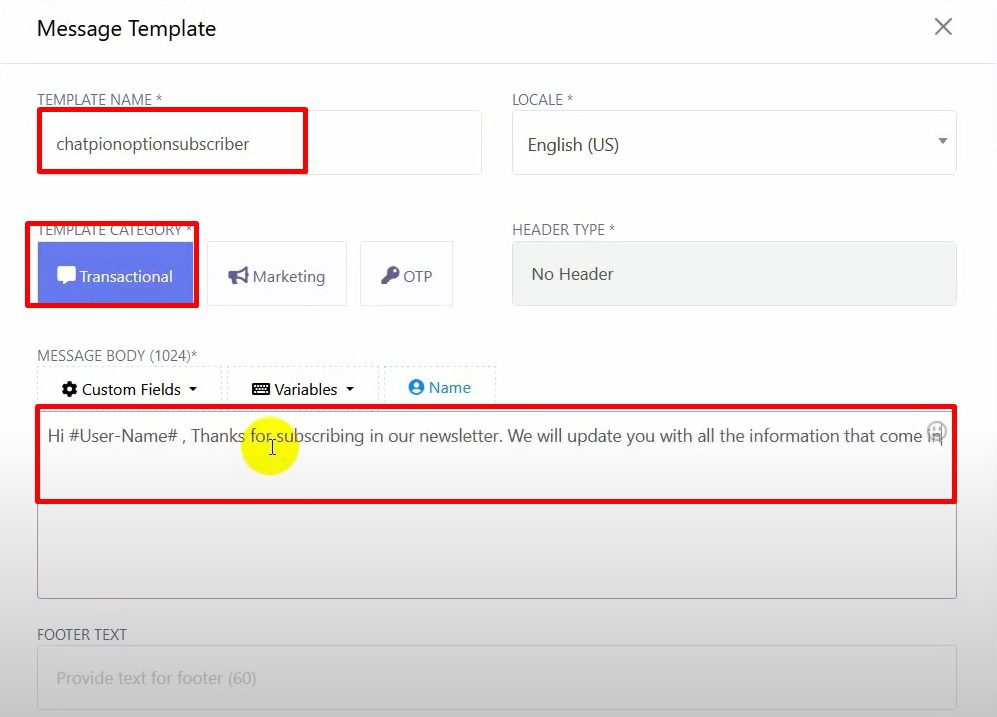
Click “Create”, name your template, and write the message body.
Optionally, add a Quick Reply button and click “Save”.
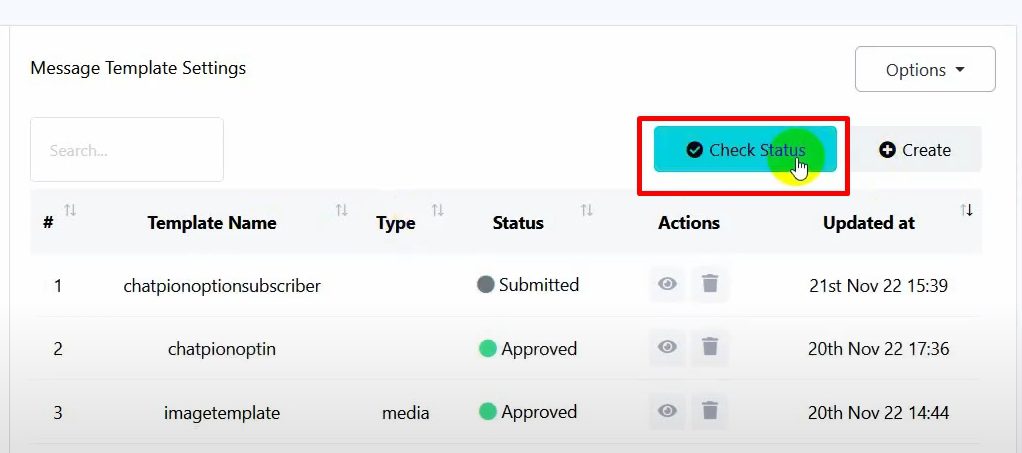
Ensure the template is approved by WhatsApp.
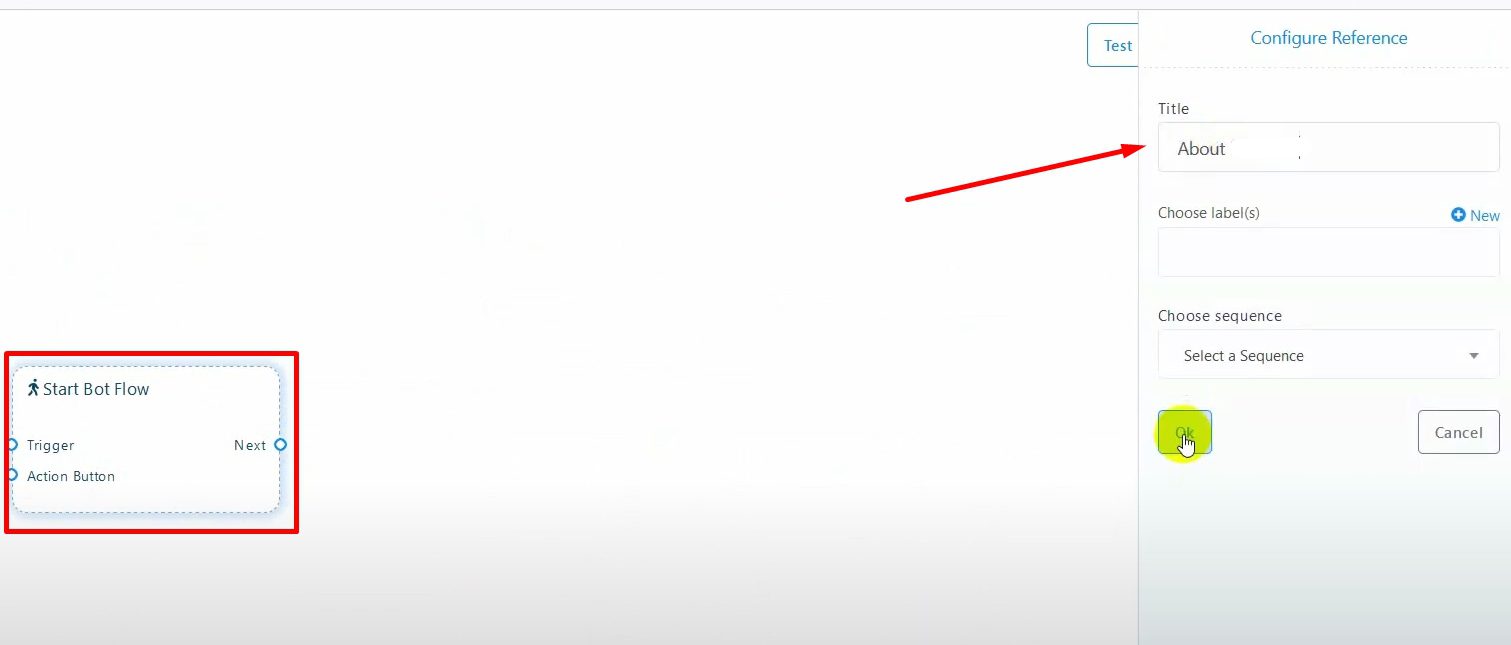
Go to “Postback” in BotCommerce, click “Create”, and add a reply.
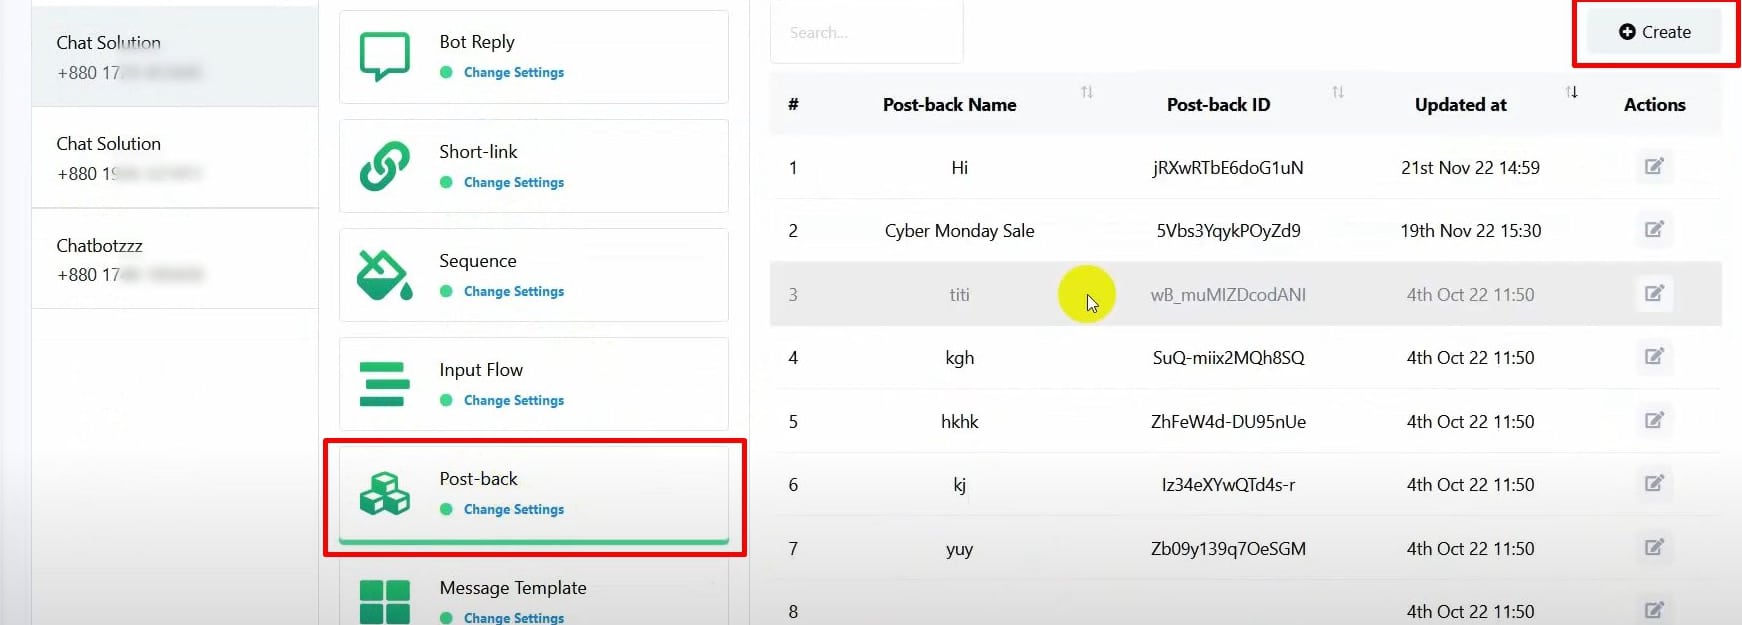
Name the postback and configure it as needed.

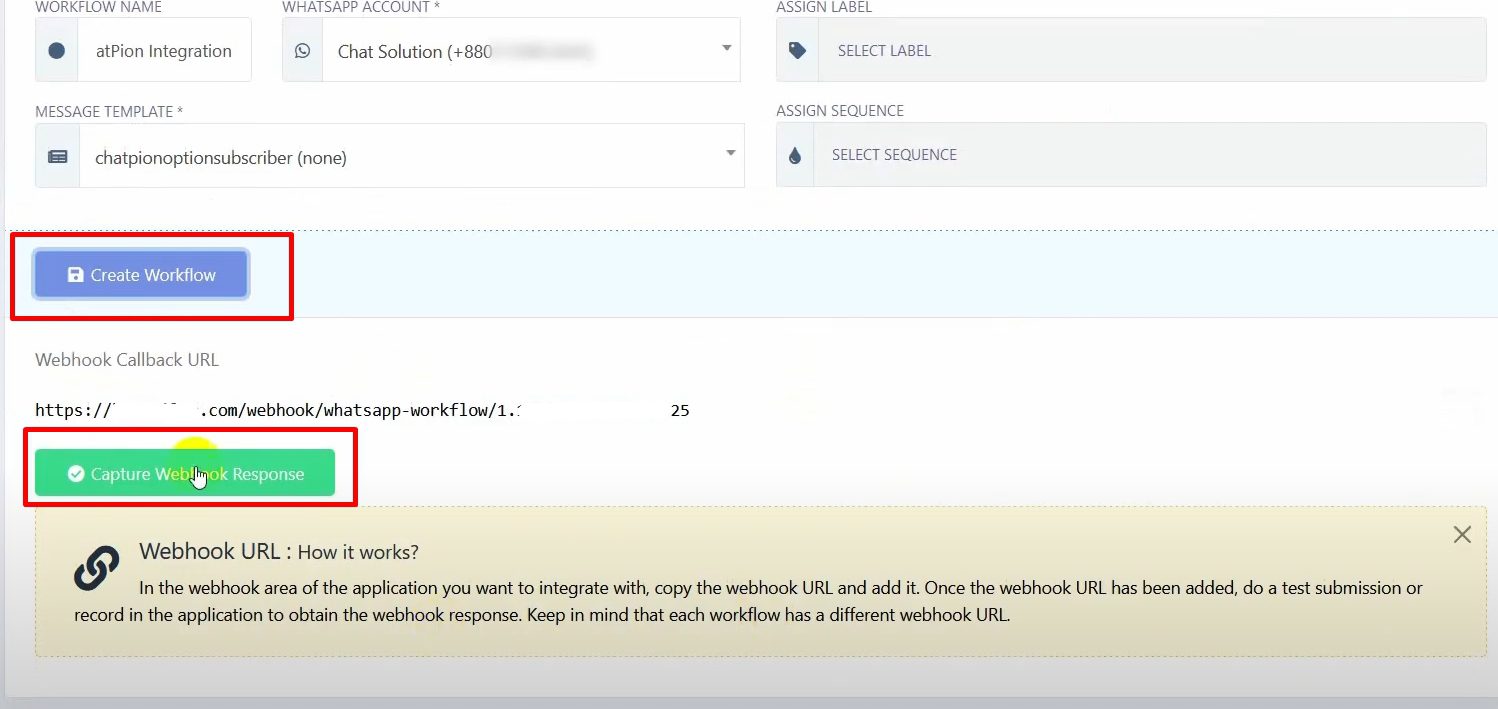
Create Workflow in BotCommerce:
Select the message template you just created and click “Create Workflow”.
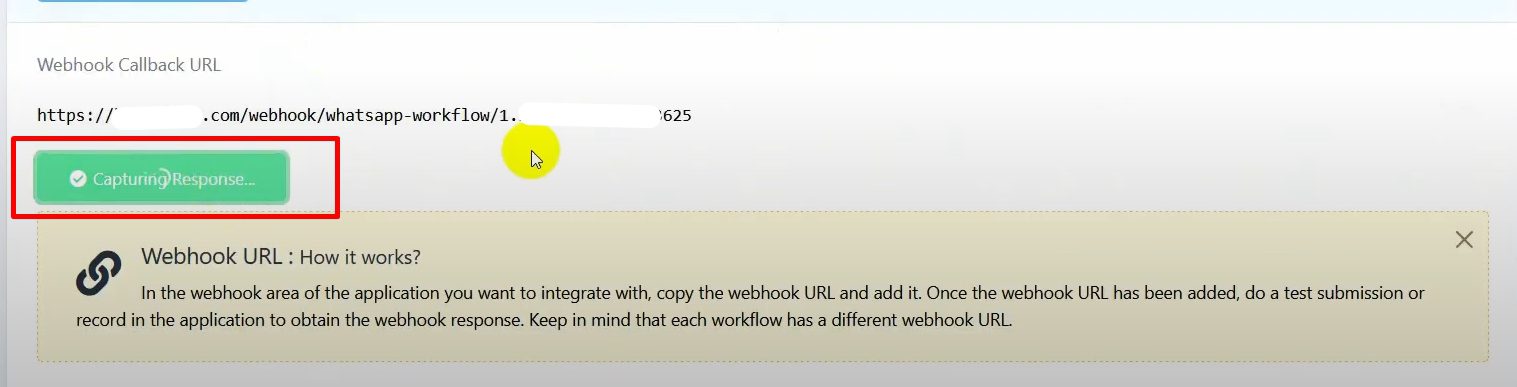
This will generate a webhook callback URL. Copy this URL.
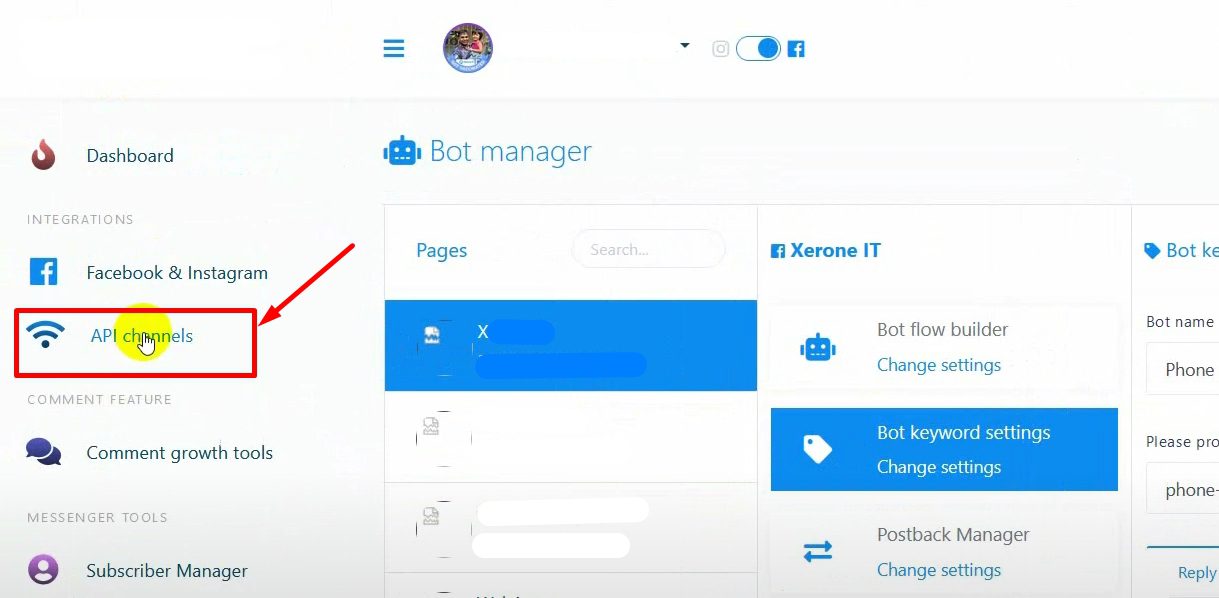
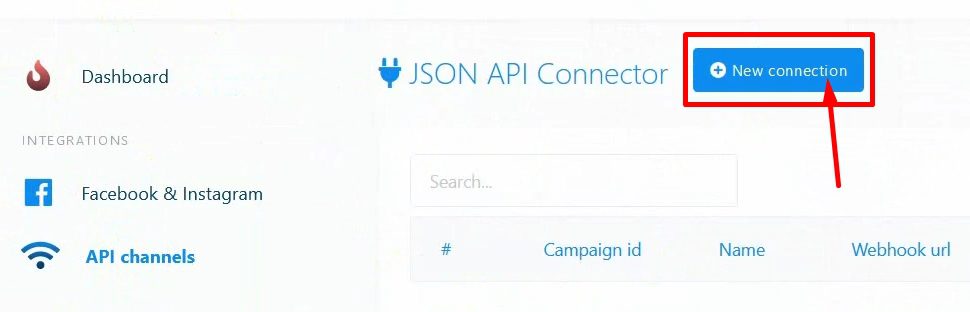
In ChatPion, navigate to “API Channels” and then “JSON API Connector”.
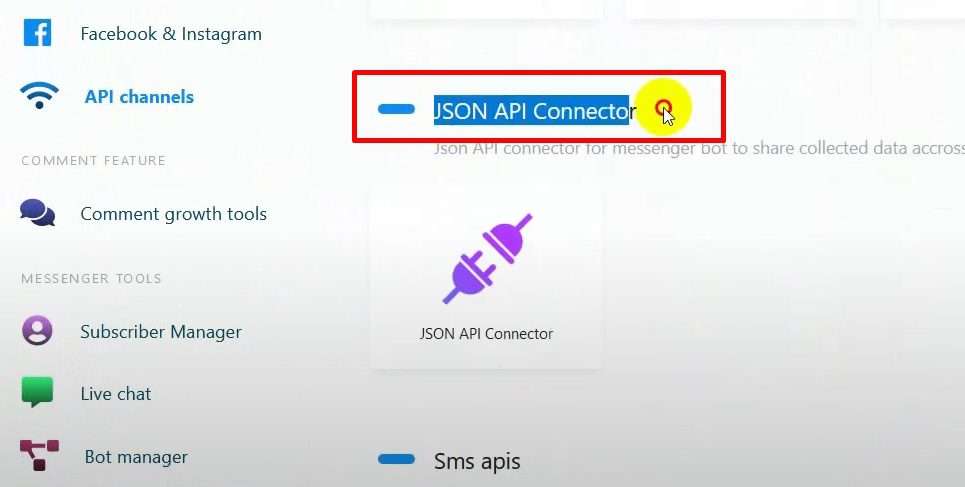
Click on “New Connection”, name it, select the Facebook page, and paste the webhook URL.
Select the fields for the webhook trigger (e.g., Phone Number) and the data to send (e.g., first name, last name, phone number).
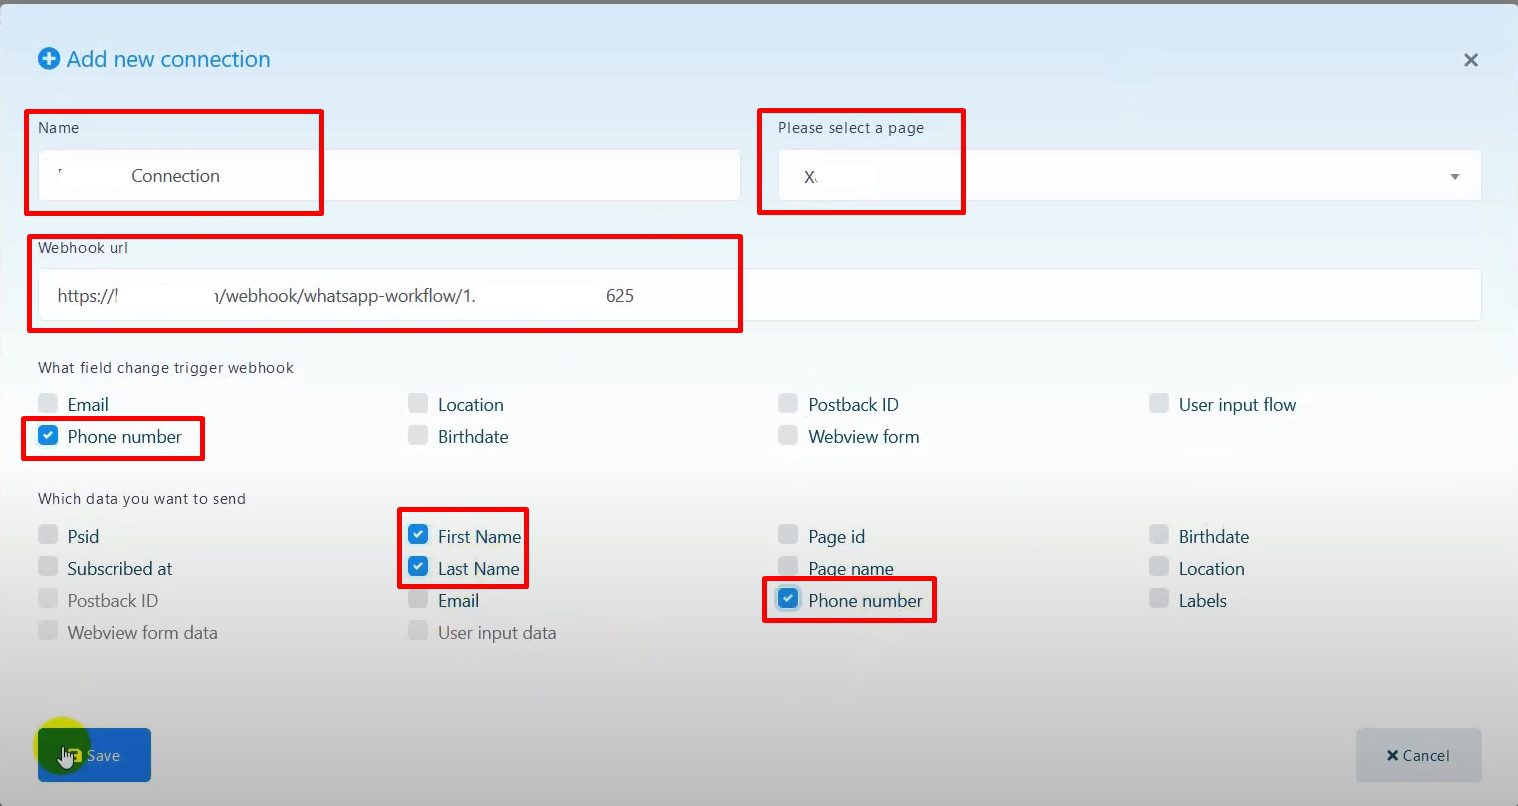
Save the connection.
In BotCommerce, click “Capture Webhook Response” to wait for a data sample.
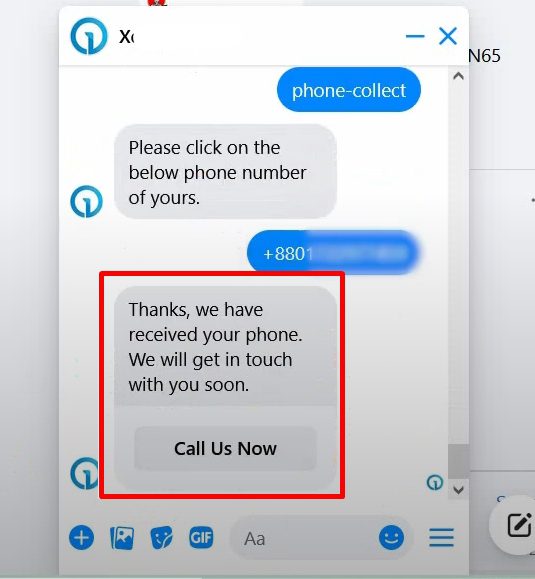
Provide sample data on the Facebook page where the bot is collecting phone numbers.
Return to BotCommerce to see the captured sample data.
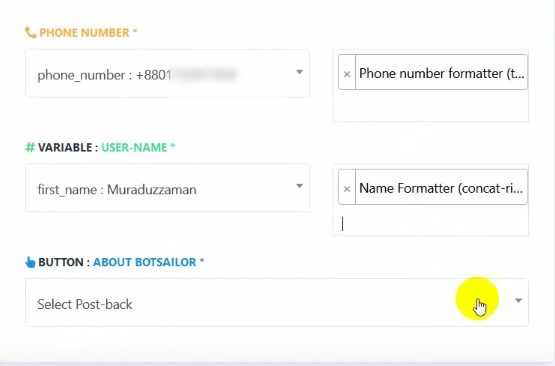
Map the captured phone number for sending WhatsApp messages.

Use a formatter to remove the plus sign from phone numbers if necessary.
Create a formatter for the phone number, selecting “Trim Left” and specifying the plus sign to trim.
Combine first and last names into a single string for the WhatsApp username using a CONCAT formatter

Configure Message Sending:
Select the postback for the message template’s Quick Reply button.
Add a delay time if needed (e.g., 120 minutes for 2 hours).
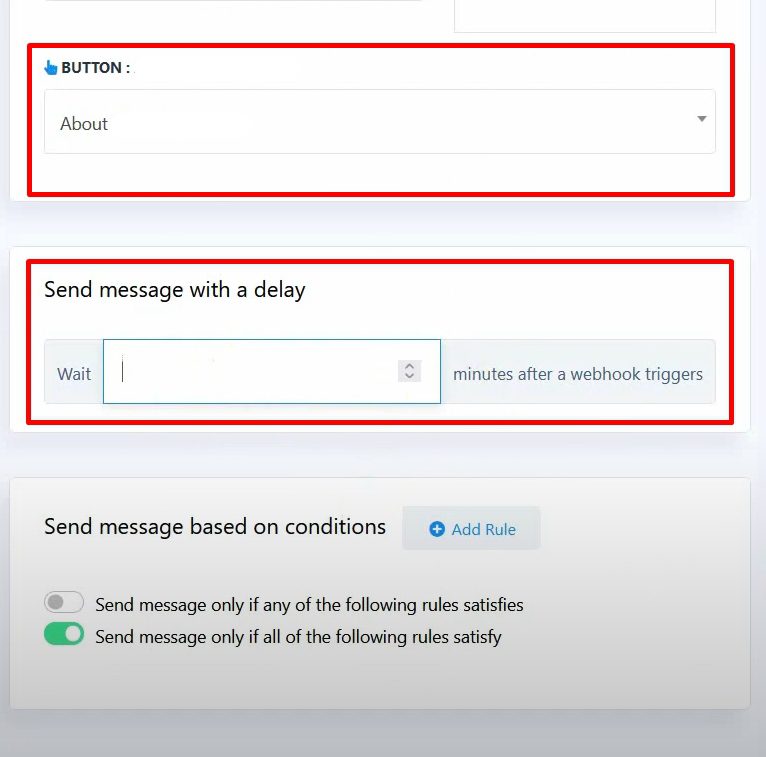
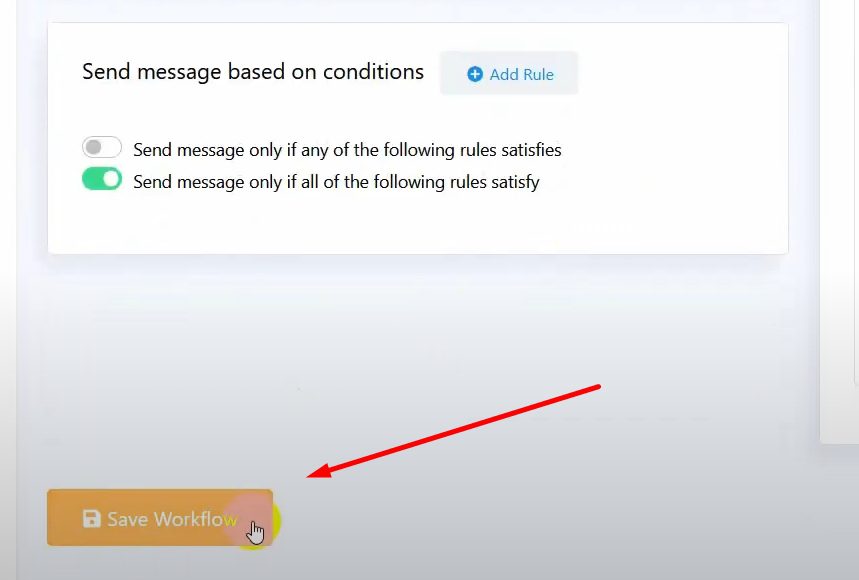
Optionally, create rules for sending messages under specific conditions.
Click “Save Workflow” to finalize.
Provide a phone number on Facebook Messenger to trigger the webhook.
Check BotCommerce for the pending status and wait for the message to be sent to WhatsApp.
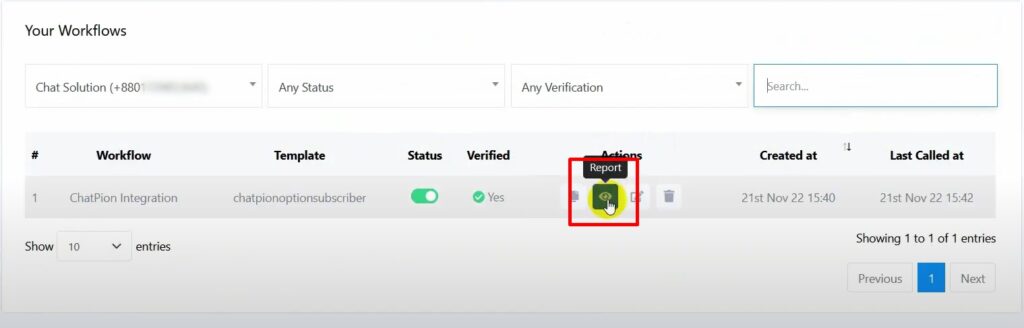
Verify the message delivery on WhatsApp and BotCommerce’s live chat.
By following these steps, you can successfully integrate ChatPion with BotCommerce, enabling you to send WhatsApp messages to your Facebook Messenger subscribers and enhance your multi-platform communication strategy.
