Many businesses use Google Sheets to securely store their data and ensure easy access. It can even serve as a data warehouse to streamline business operations. Often, we need to communicate with or send details to leads stored in Google Sheets, but doing this manually can be a major hassle. This is where Google Sheets integrations come in, enabling the automated sending of WhatsApp messages directly from the sheet’s data.
Please follow the below steps to create a successful automation campaign.
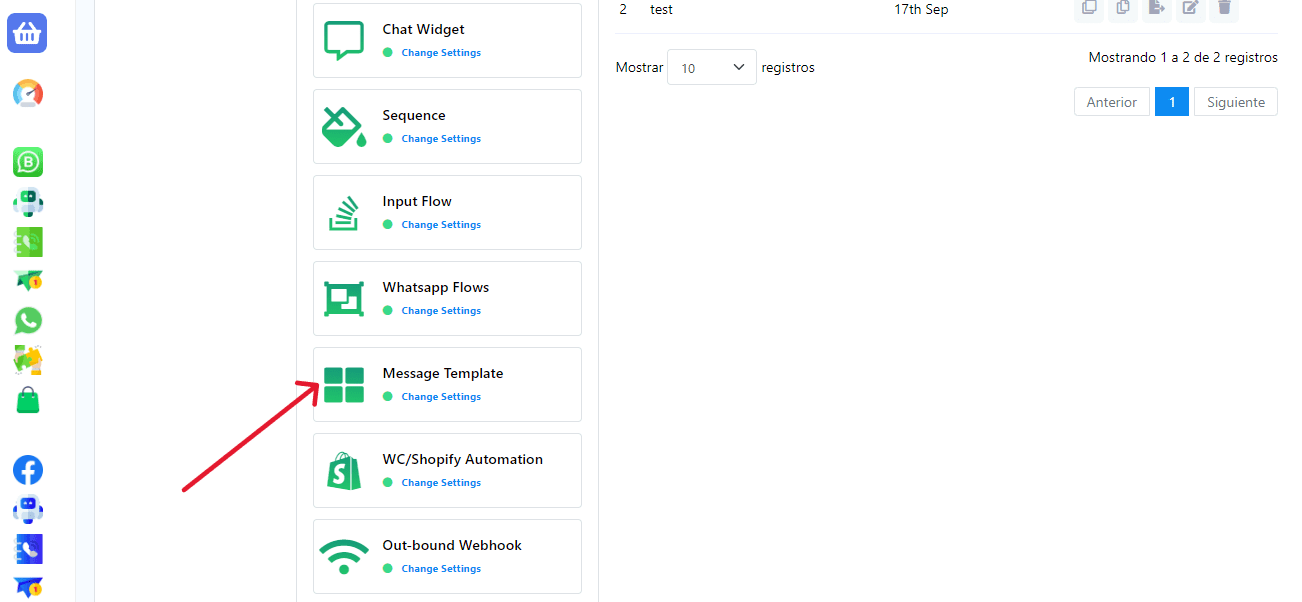
Create a Message Template
First, we need a WhatsApp message template, as WhatsApp only allows Message Templates for business-initiated messages. To include data from Google Sheets columns in the message, you must use variables within the template. Follow the steps below to create a message template.
Go to the Bot Manager, then go to Message Template and click on the create button.
Name the template, specify the Locale, select ‘Marketing’ as the template category, and add a header type if desired.
Write the message body, including variables where needed. (These variables will be replaced with data from Google Sheets columns.)
Finally, save the message template and close the window.
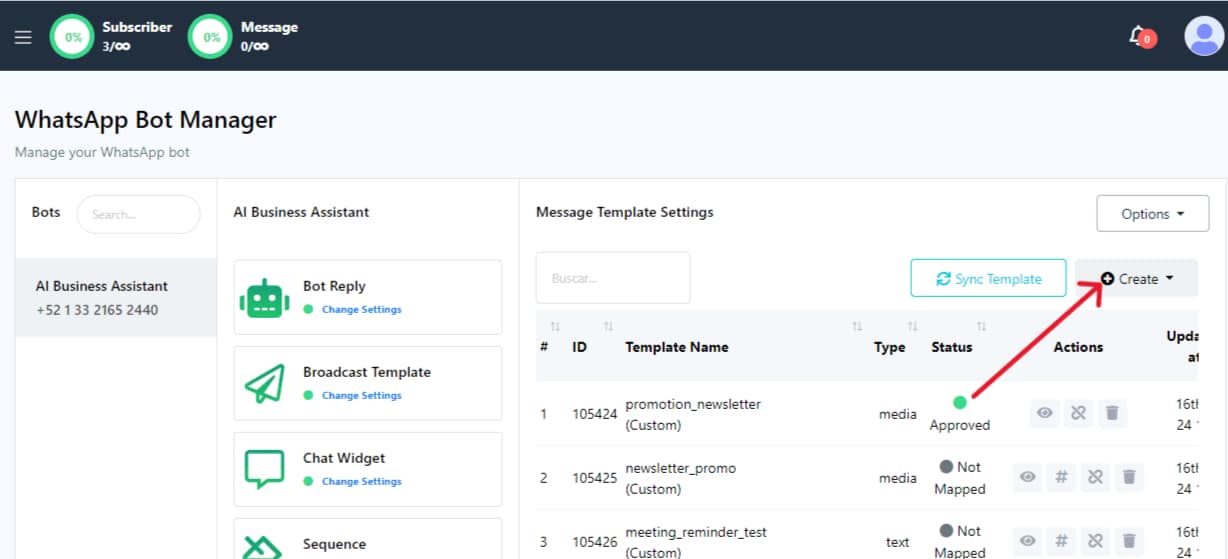
Click the Sync Template button to check if it’s approved. Once approved, the template is ready to be used in your automation campaign.

Create a Webhook Workflow
From the left-side menu, click on Webhook Workflow and then click the Create button.
Name the workflow.
Select the appropriate WhatsApp number if you have multiple numbers.
Next, select the Message Template you created for sending the message.
Finally, click on Create Workflow.

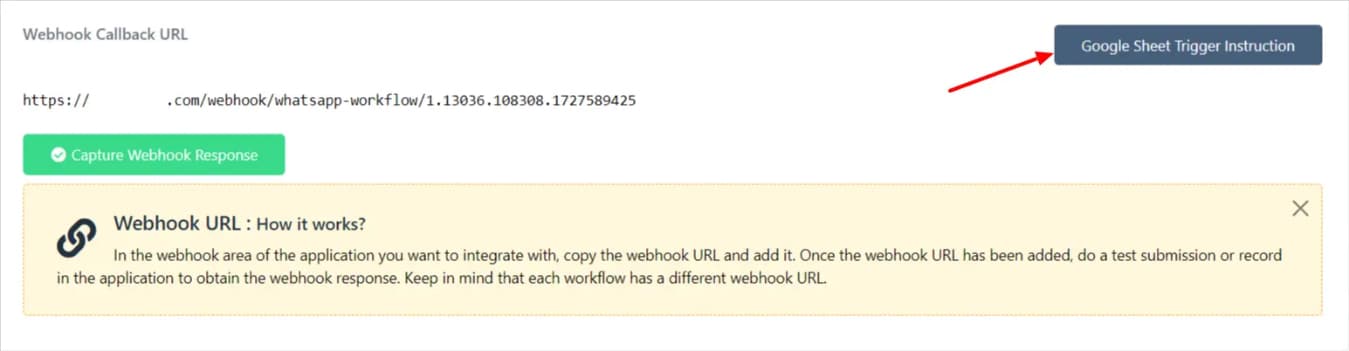
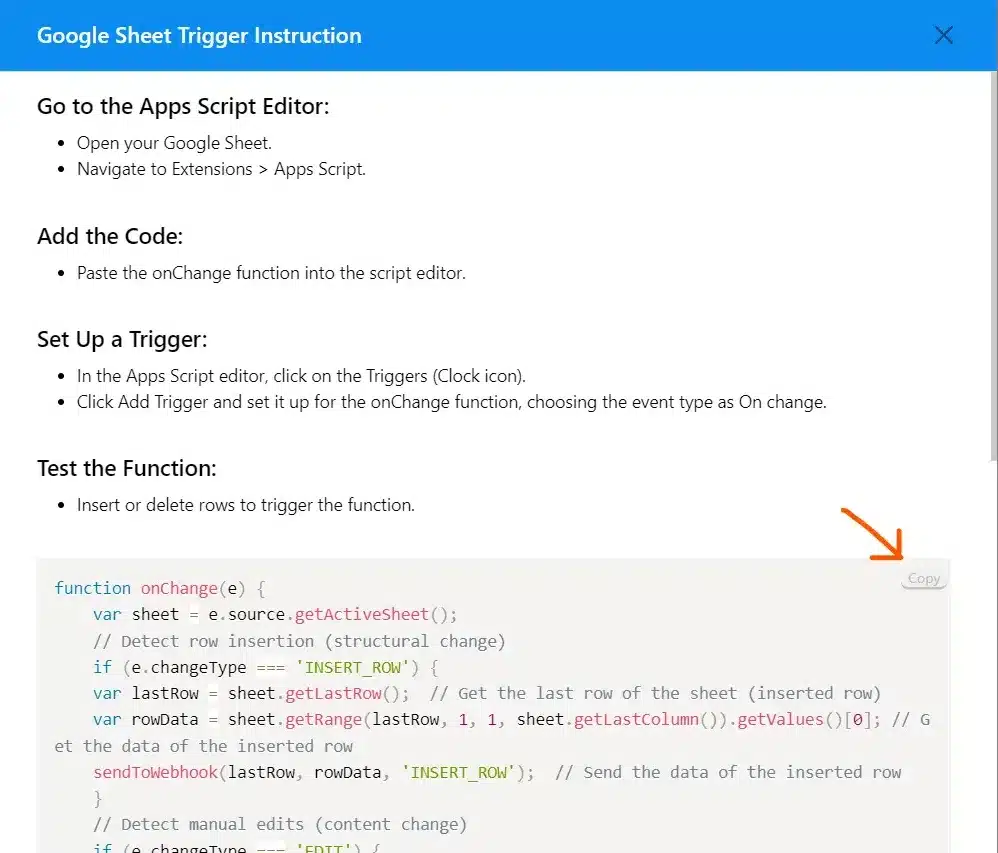
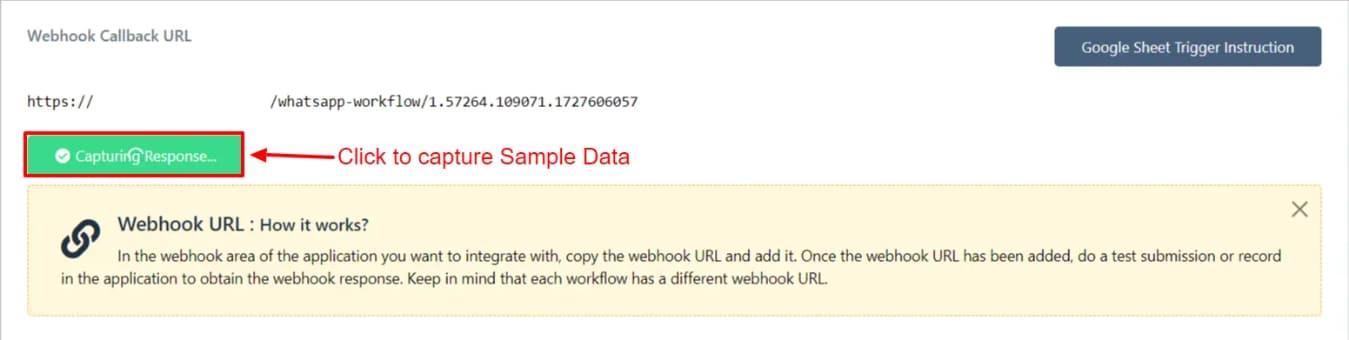
A Webhook will be created, and a Google Sheet Trigger Instructions button will appear. Click this button to view the instructions, which will include a block of code. Copy the code and go to your Google Sheet.
Configure the Google Sheet
Ensure your Google Sheet includes a column named ‘Phone Number.’ Other columns can be used as variable data in the message template. Be sure to label them exactly as you named the variables in your template.
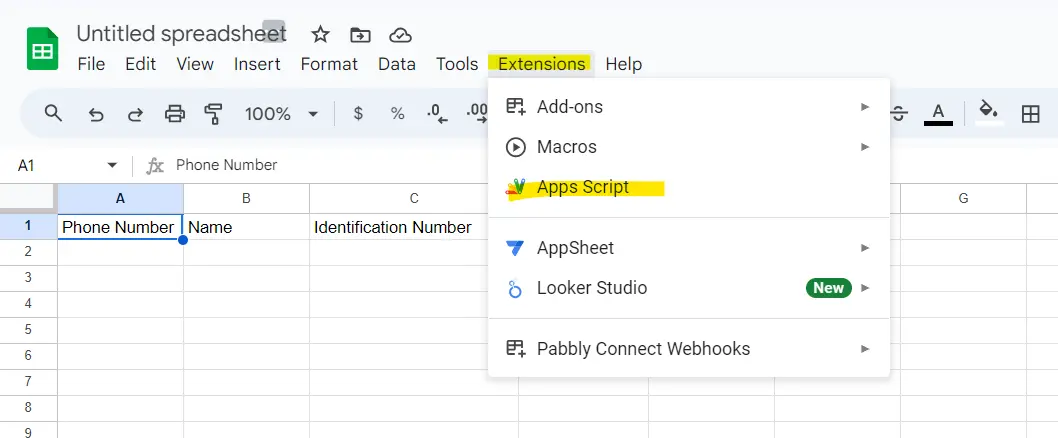
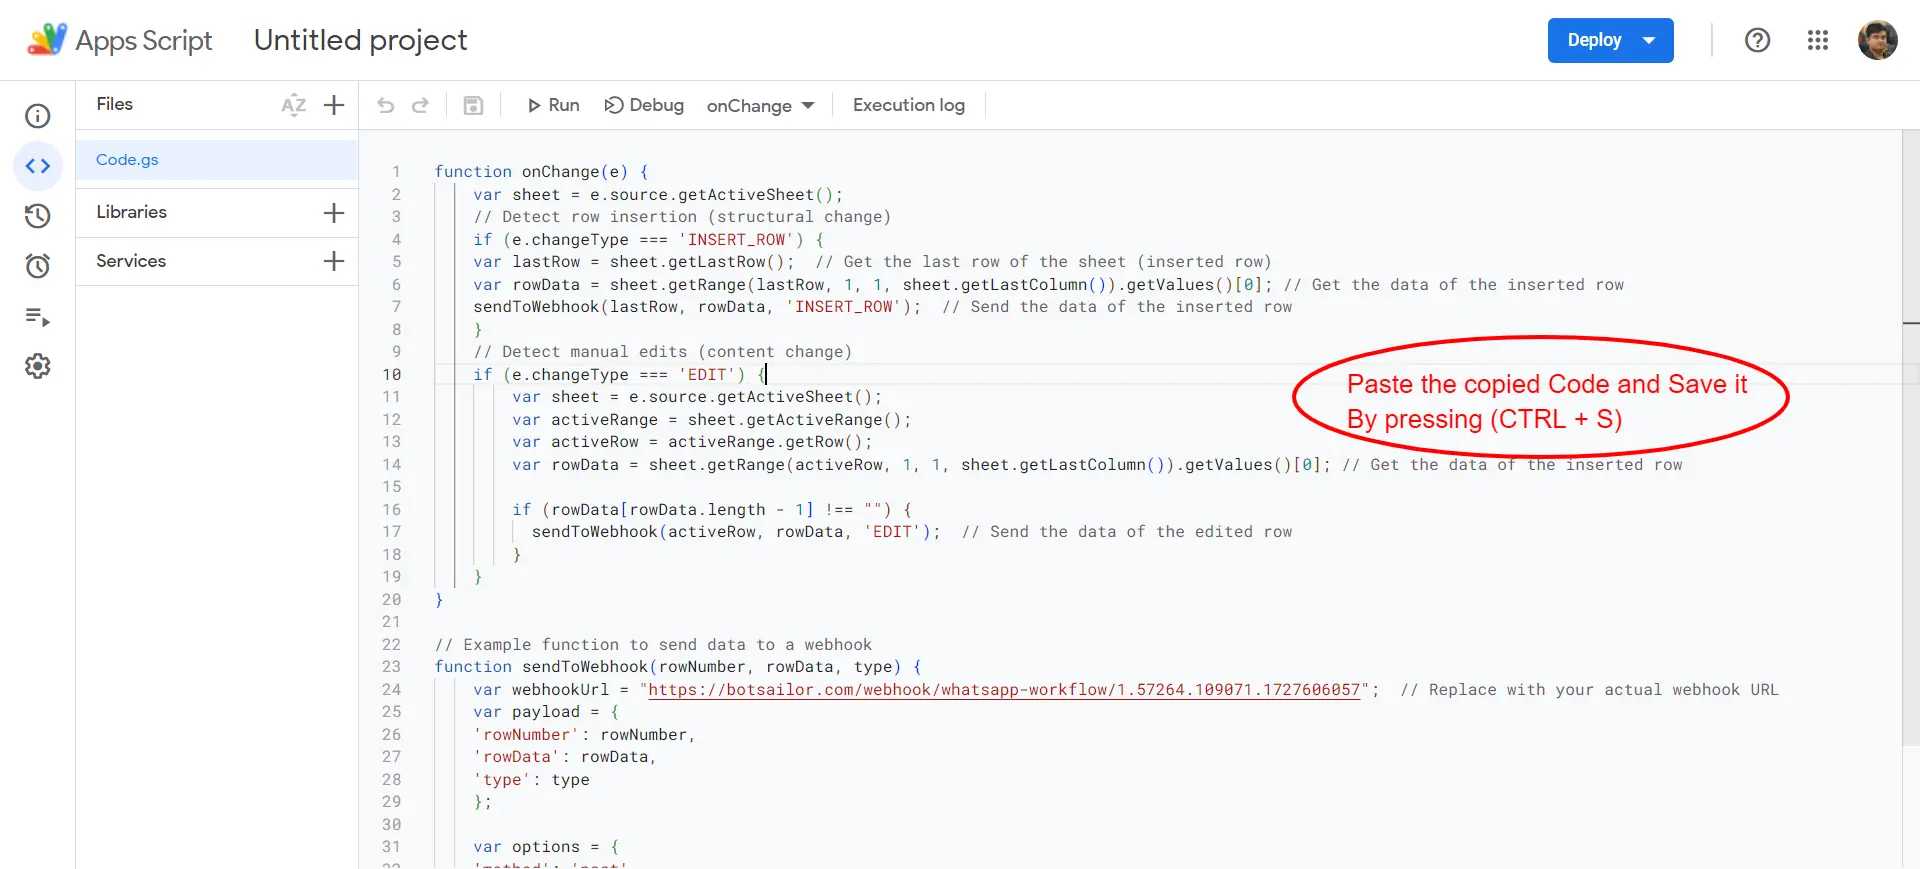
Then, from the Google Sheet’s top menu, go to Extensions and click on App Script. Paste the code you copied from BotCommerce, replacing the existing function. After pasting, save the code by pressing Ctrl + S.
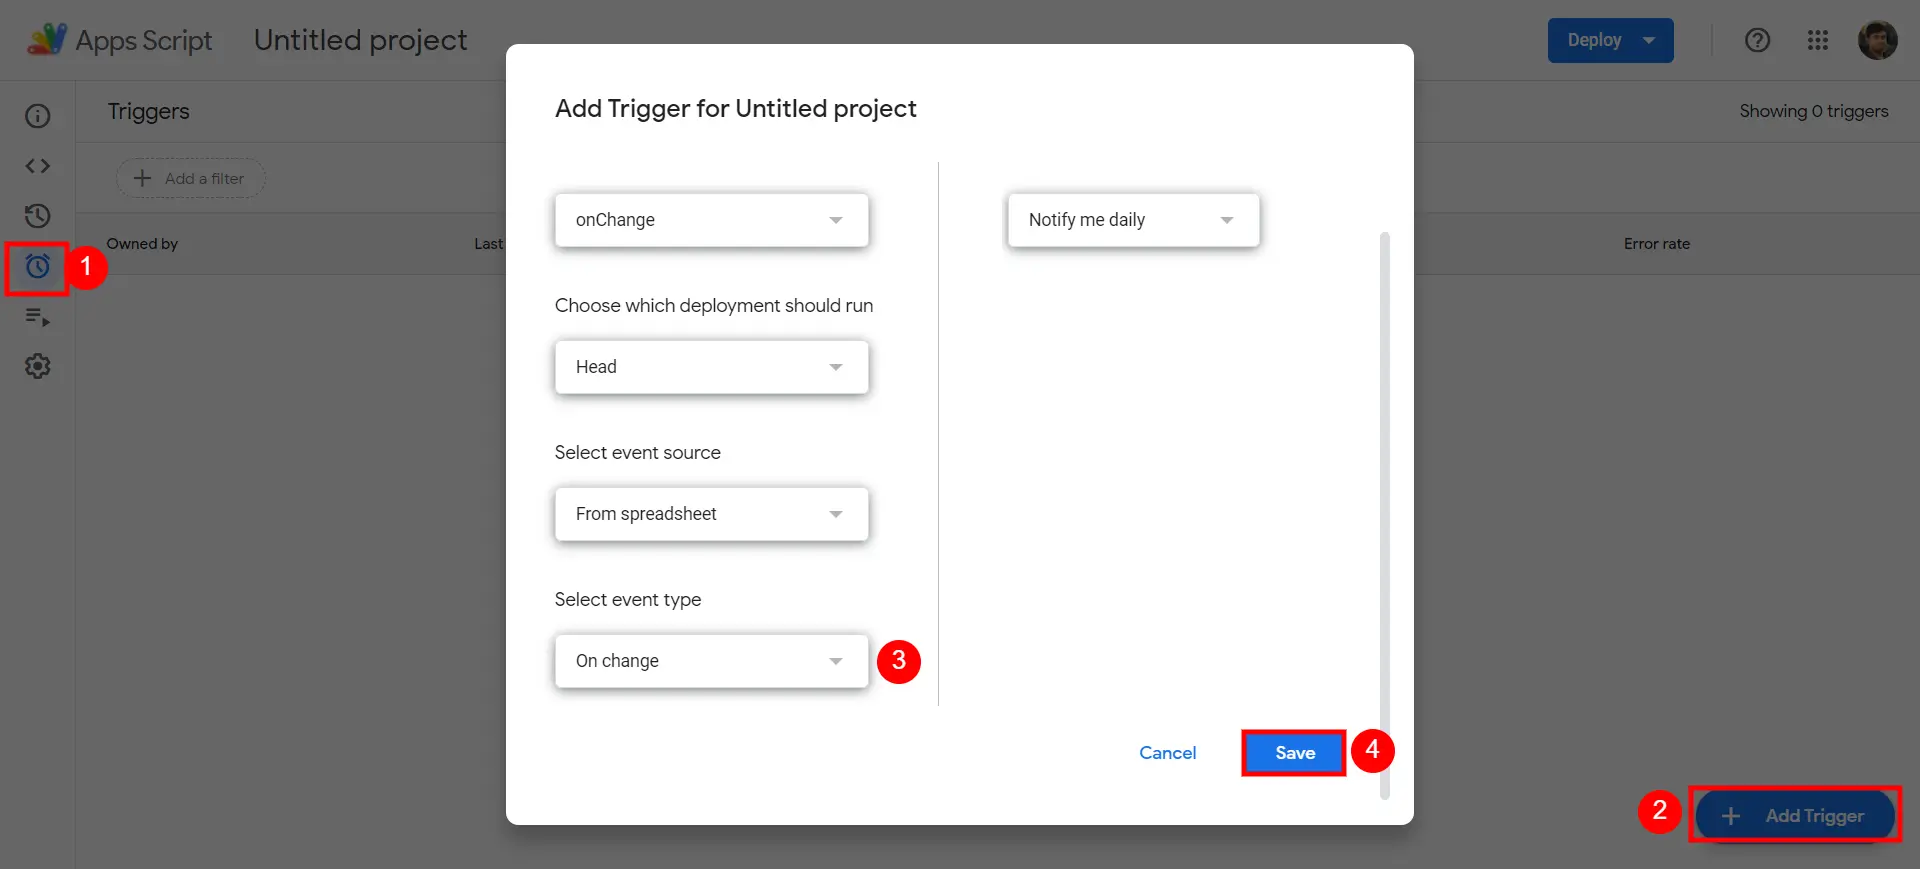
After saving the code, from the left side menu, click on the “Triggers” option and then click on “Add Trigger”. From there, select the event type as “On Change” and finally save it.
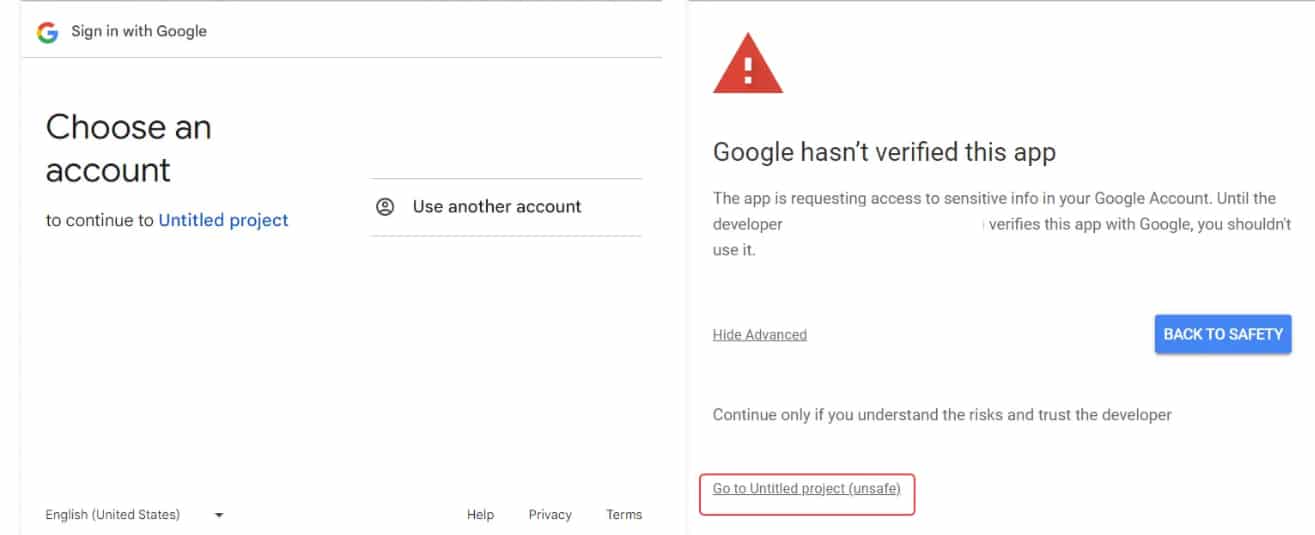
While saving, you may be prompted to select a Google Account and verify the app. Select your Google account, click on the Advanced option, and then choose Go to project. Finally, click the Allow button.
Mapping Your Webhook Workflow
Return to BotCommerce and click on Capture Webhook Response. Then switch back to your Google Sheet and add sample data to it. This data will be received in BotCommerce as raw data and will help map to the Message Template.
In the phone number field, select the data from the Phone Number column. Similarly, map the row data for the variables used in your message templates.
Finally, save the Workflow.

That’s it! Now, whenever a row is added to the Google Sheet, BotCommerce will send a message to the phone number.
