Integrating WooCommerce with WhatsApp allows you to send order notifications directly to your customers. This guide will show you how to set up and automate these notifications, ensuring your customers stay informed every step of the way.
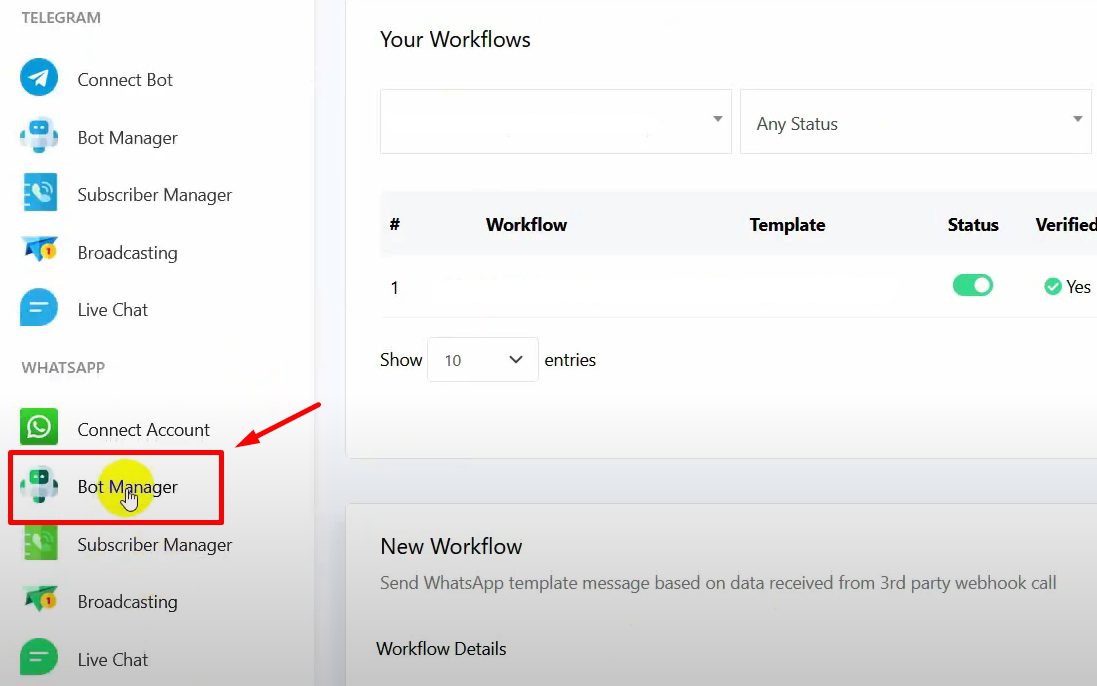
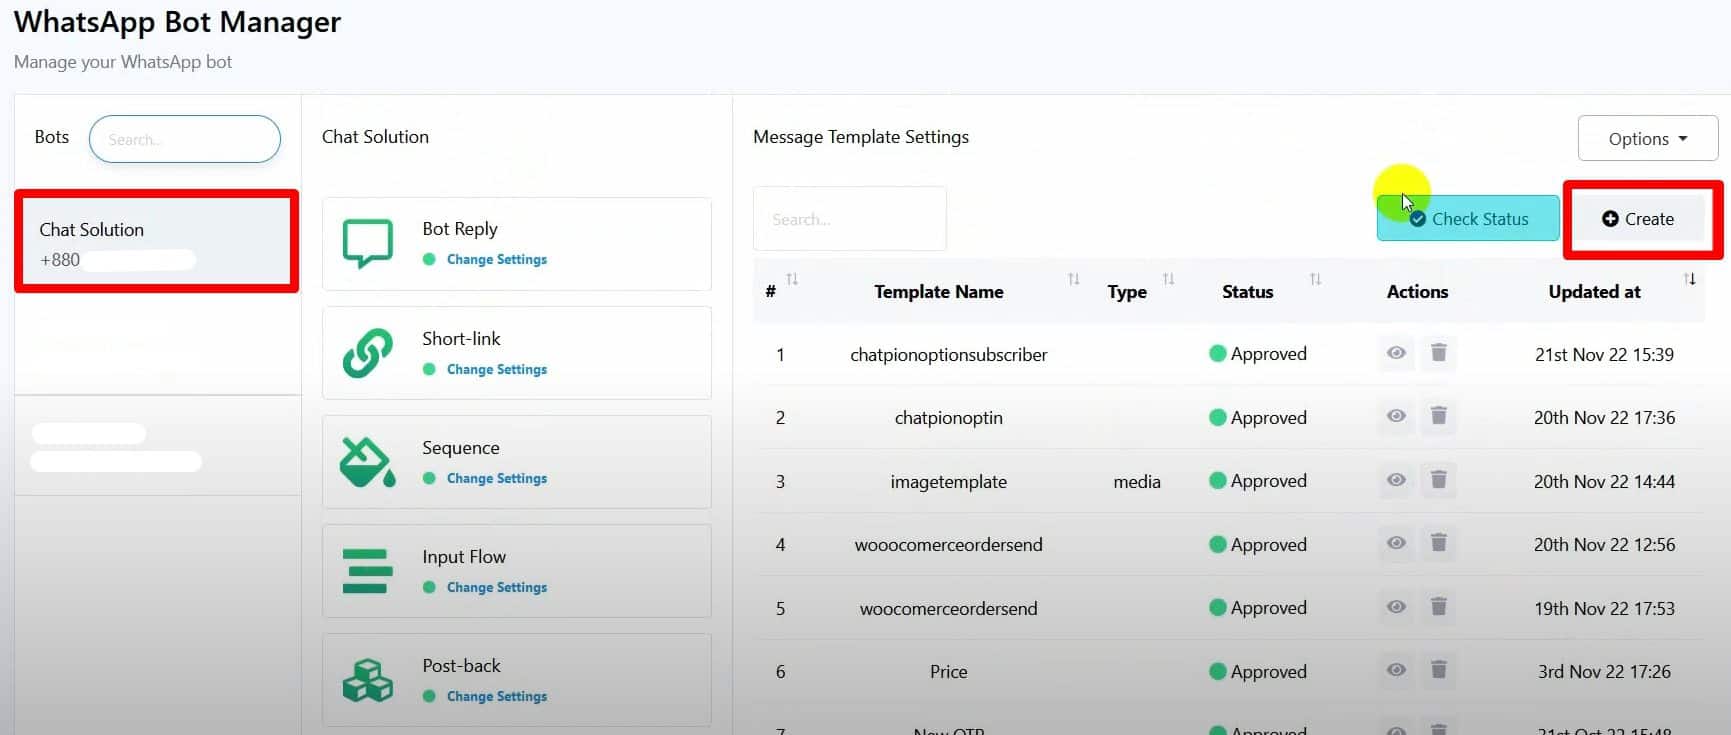
Create a Message Template in BotCommerce: Go to the Bot Manager in the BotCommerce dashboard.
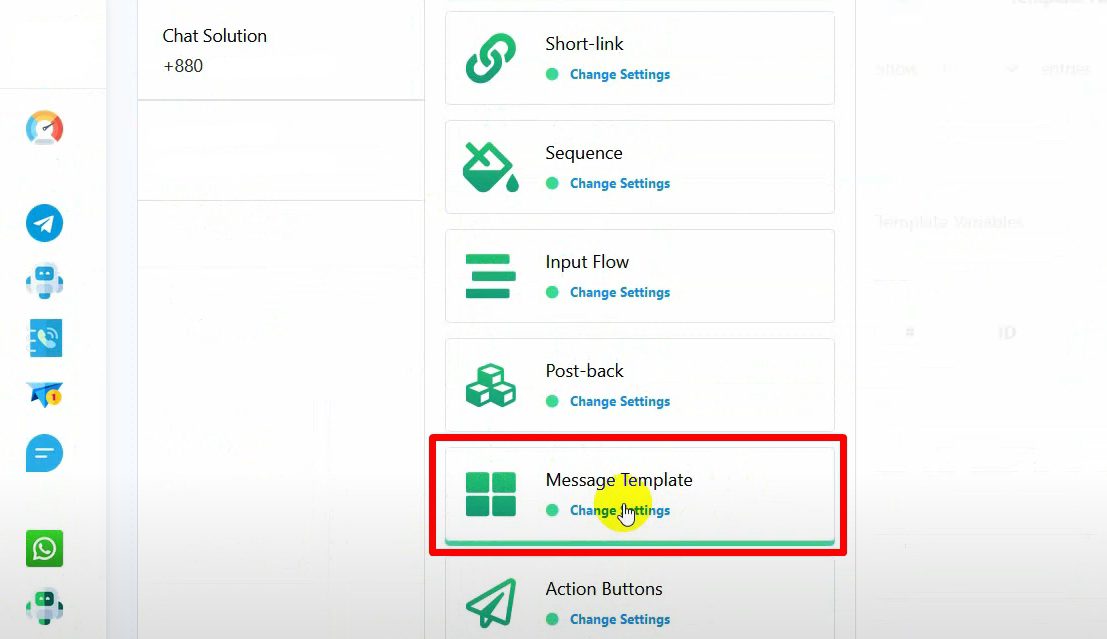
Navigate to Message Template and start by creating the necessary variables
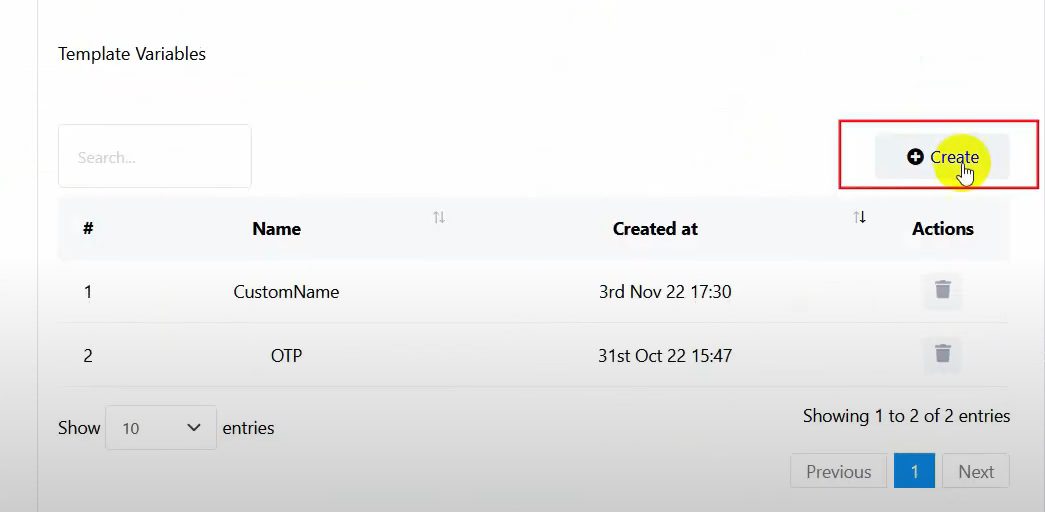
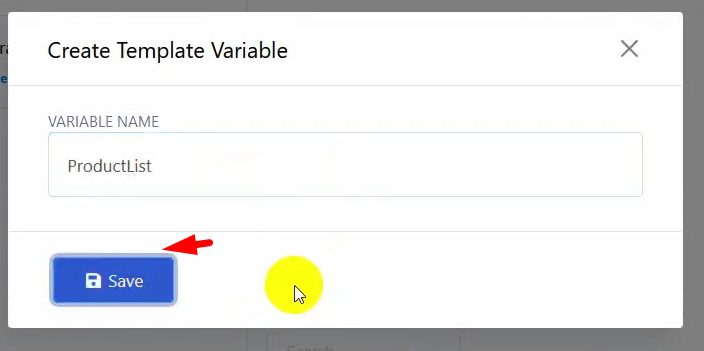
Product List: This variable will display the list of products ordered.
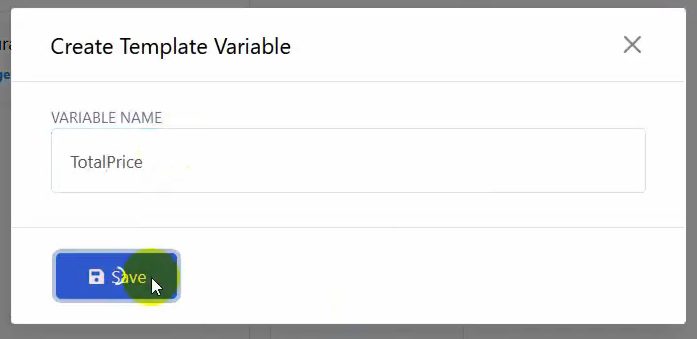
Total Price: This variable will show the total cost of the order.
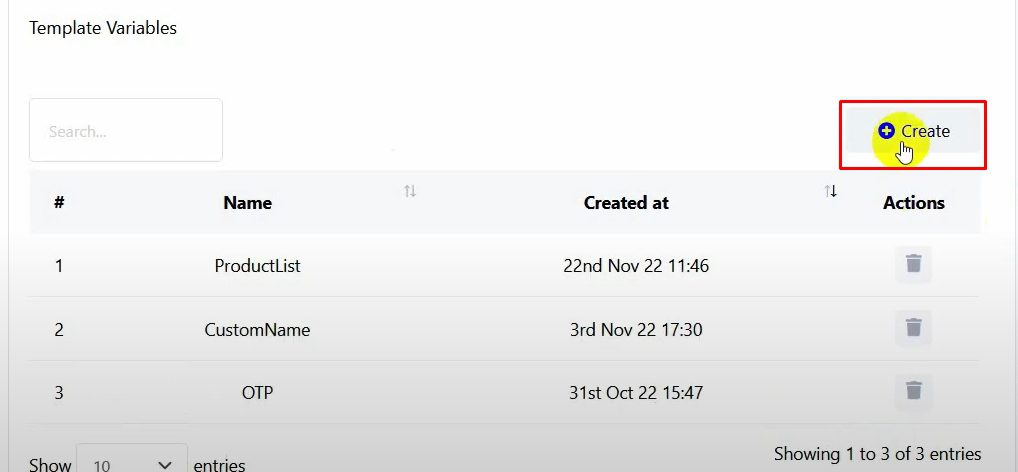
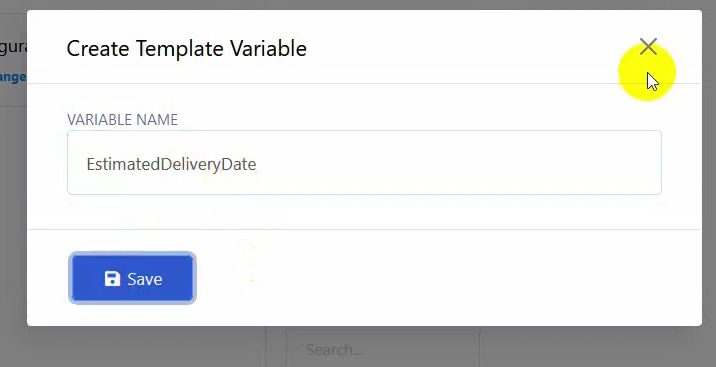
Estimated Delivery Date: This variable will indicate the expected delivery date.
After setting up the variables, click on Create under Message Template.
Name your template and write the message body, incorporating the variables you just created.
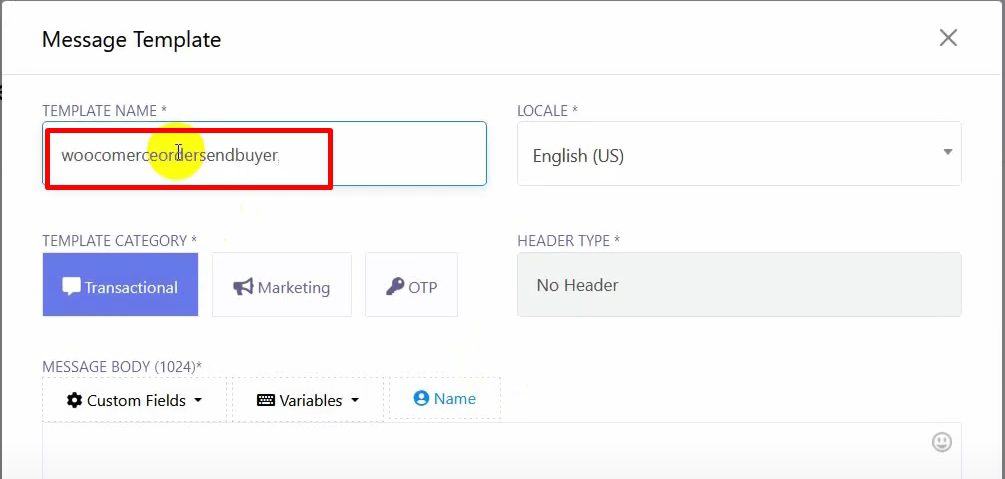
Example message: “Thank you for your order! Your items: {product_list} totaling {total_price} will be delivered by {estimated_delivery_date}.”
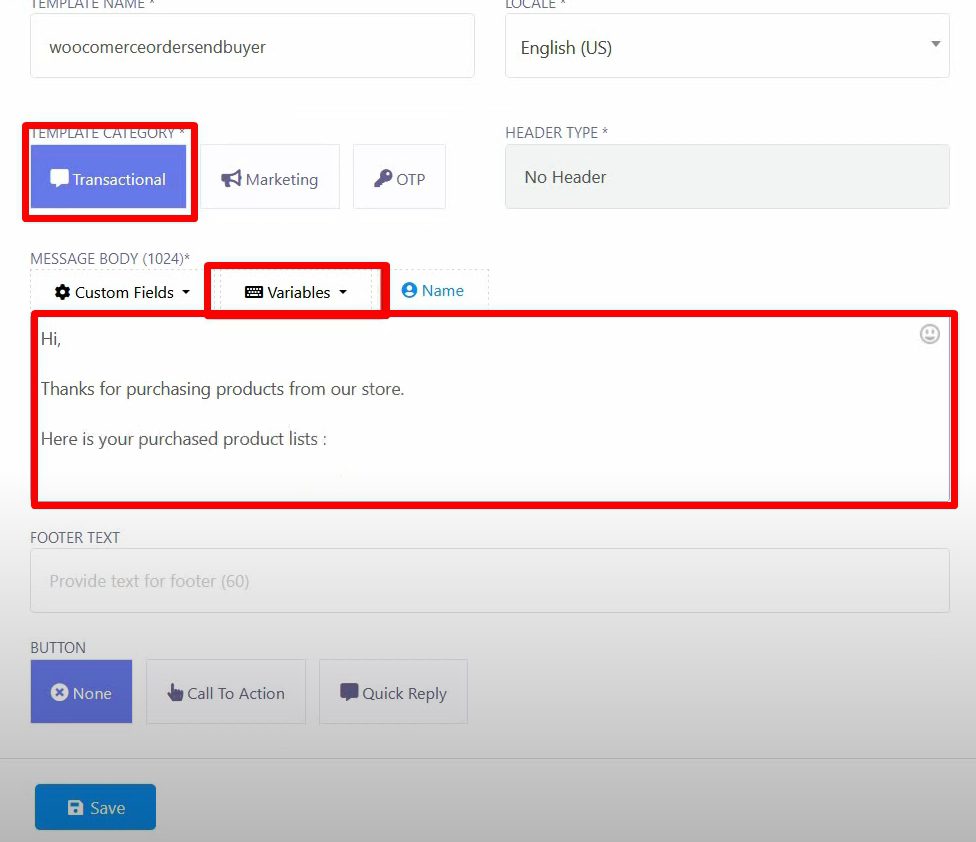
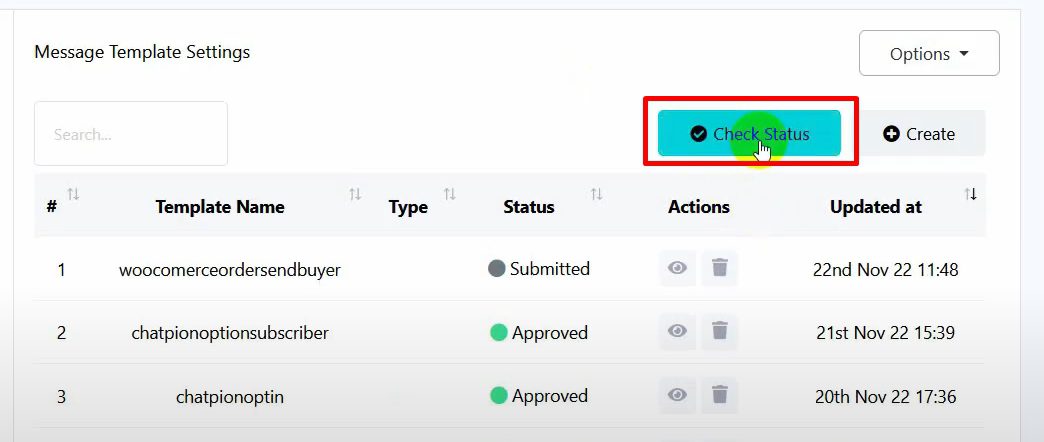
Save the template and check its status to ensure it is approved by WhatsApp.
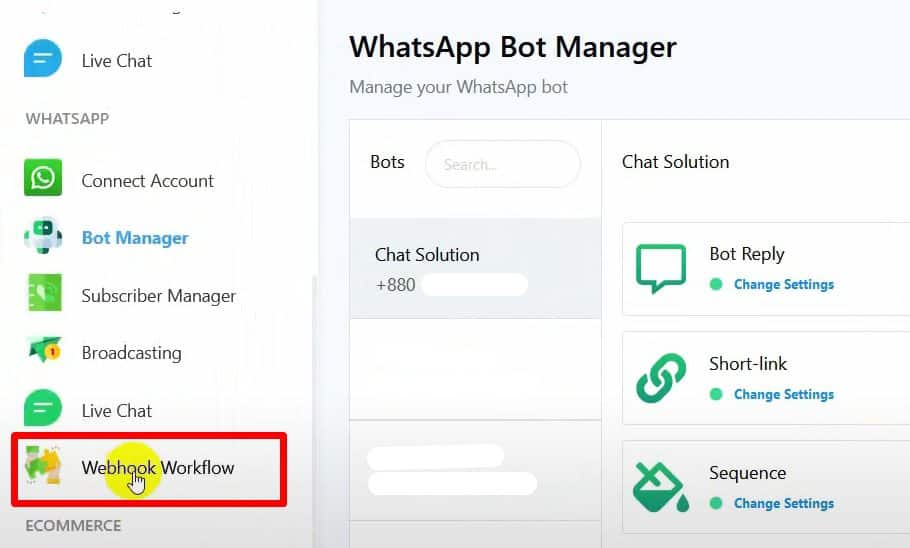
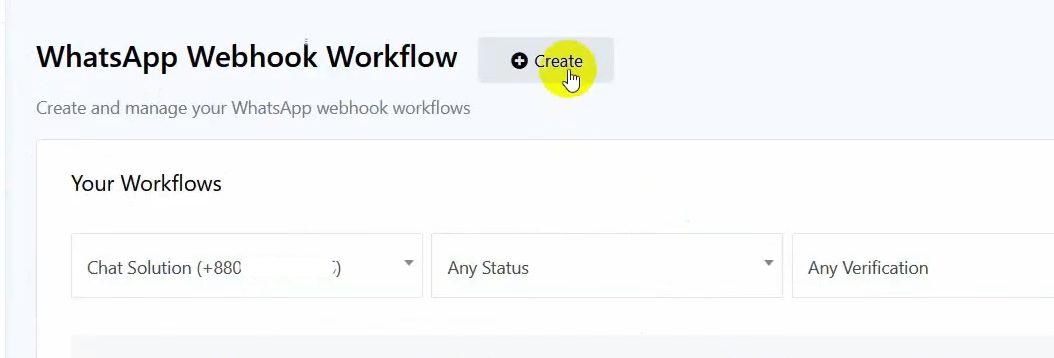
Go to Webhook Workflow and click on Create.
Name the workflow and select the WhatsApp account you’ll be using to send the notifications.
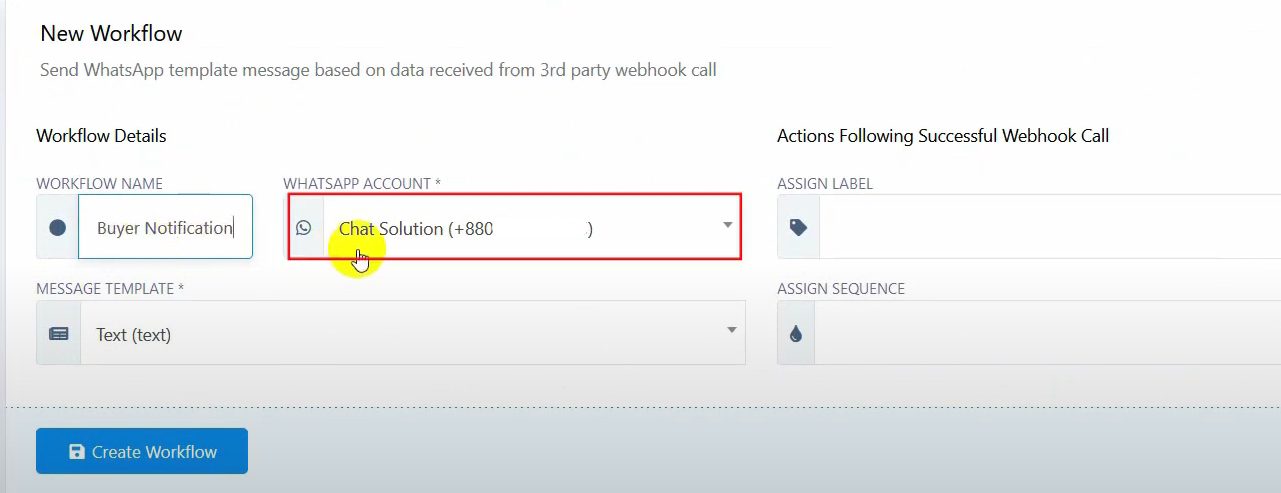
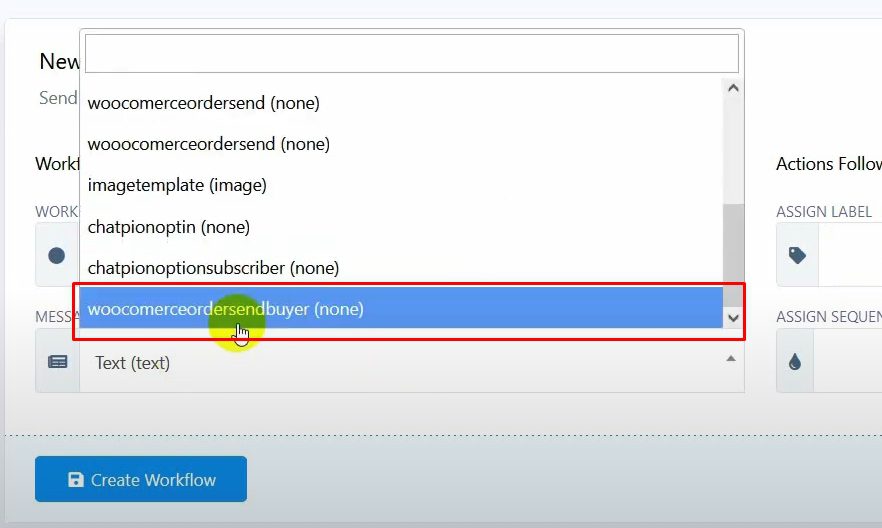
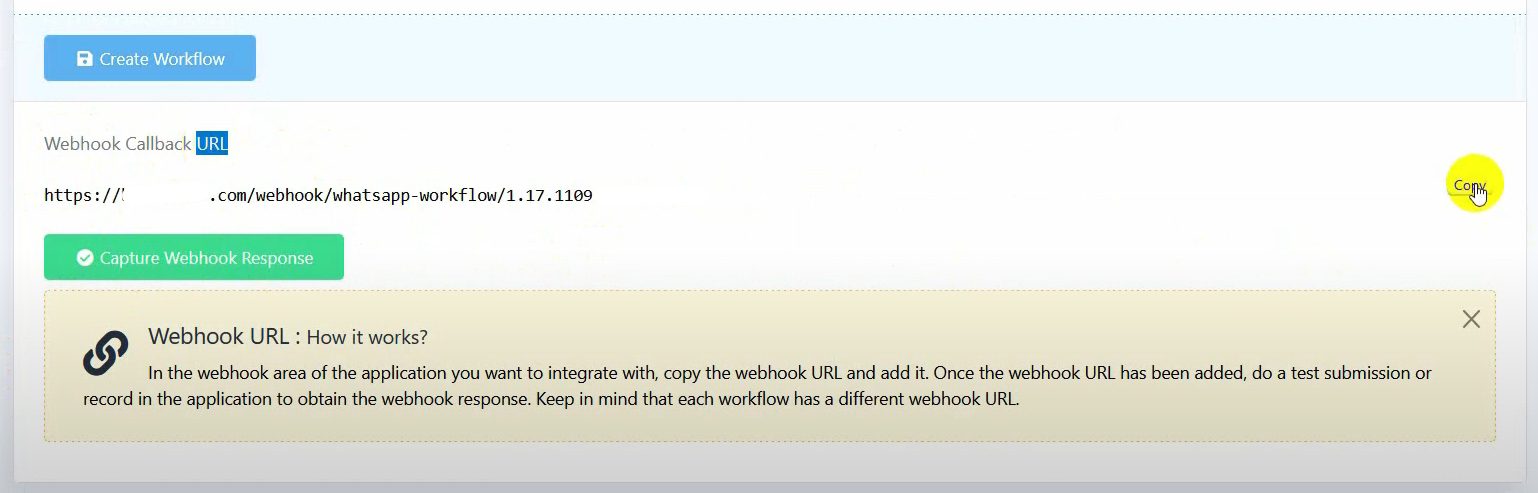
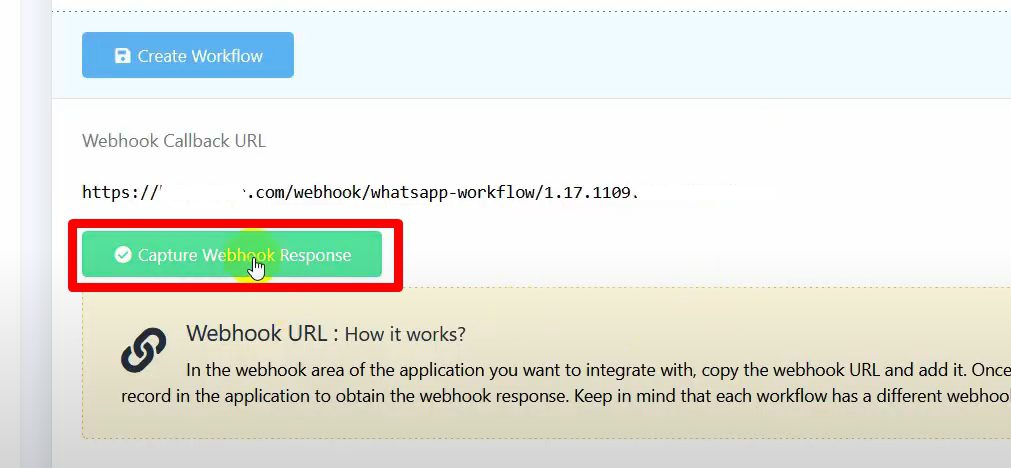
Choose the message template you created earlier and click Create Workflow to generate a webhook callback URL.
Copy the webhook URL provided by BotCommerce.
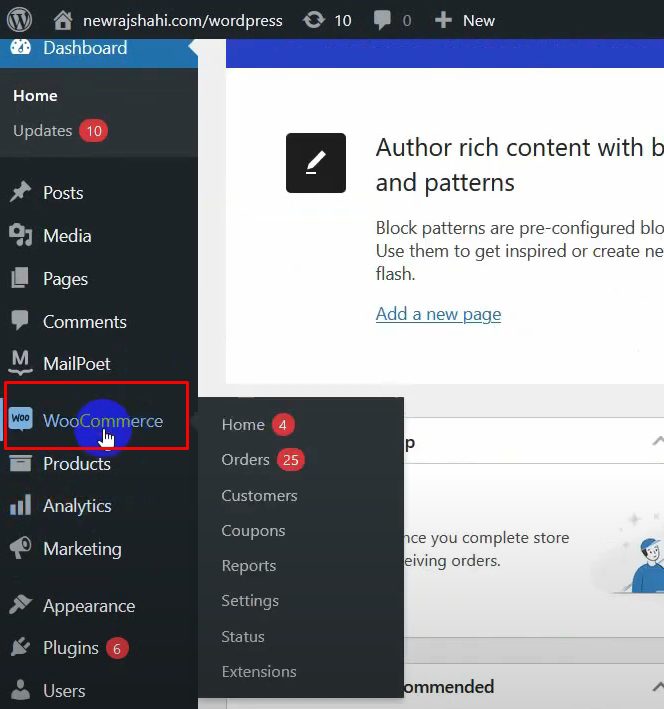
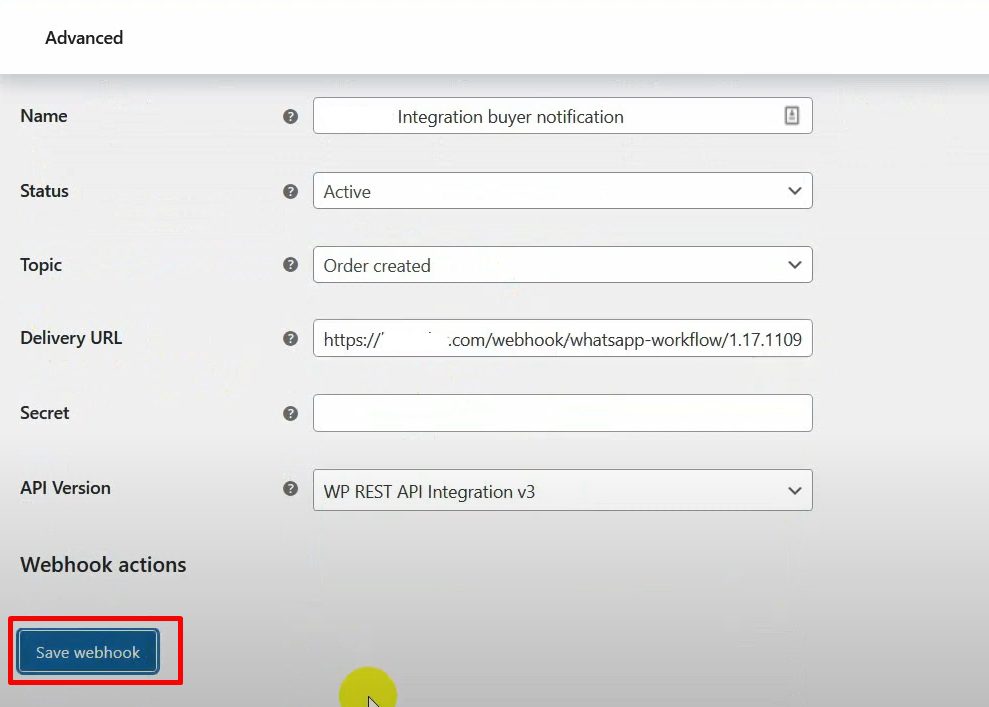
Add Webhook to WooCommerce: In the WordPress Admin Dashboard, navigate to WooCommerce > Settings.
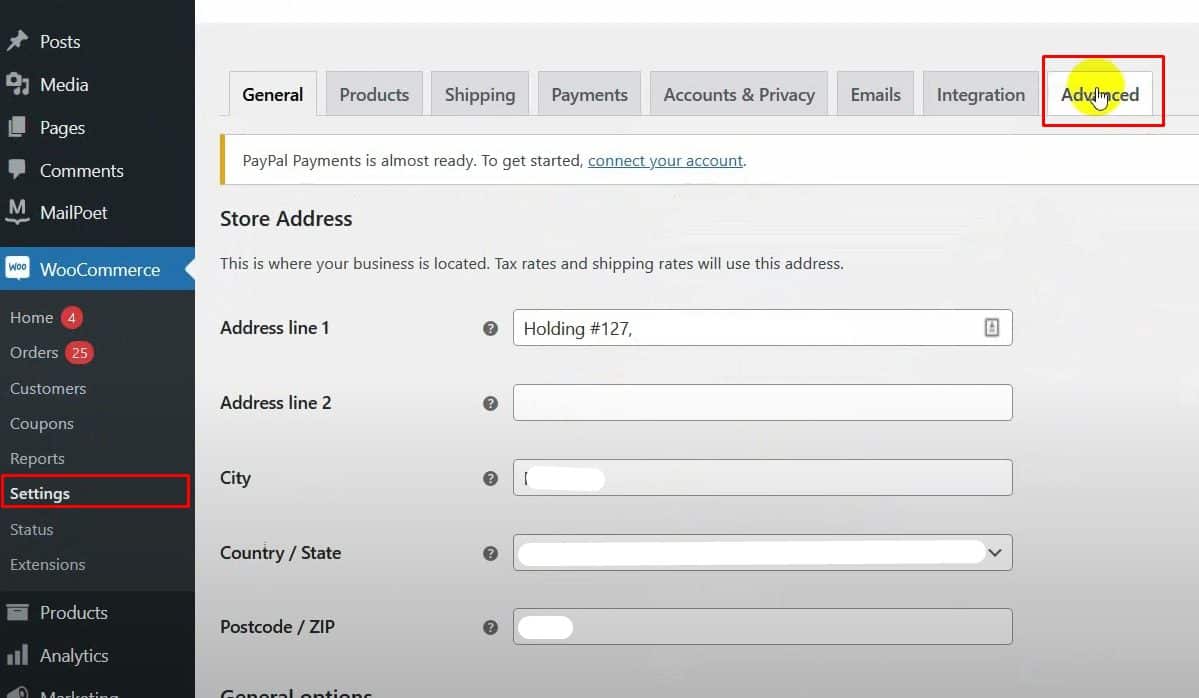
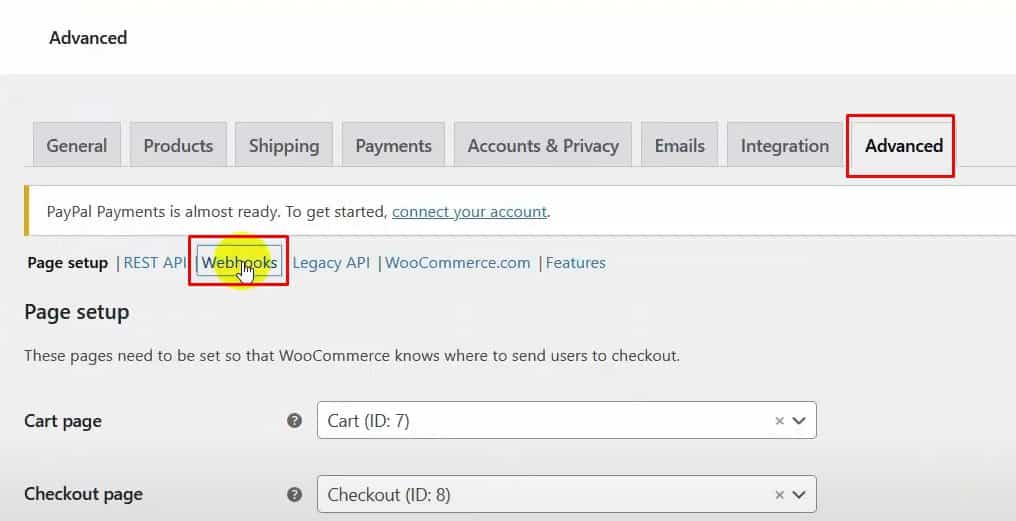
Go to the Advanced tab and click on Webhooks.
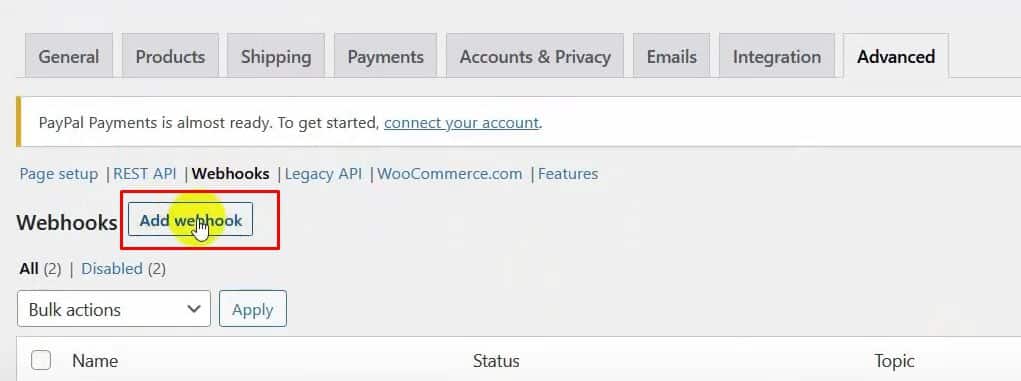
Click on Add Webhook and provide a name for it.
Set the status to Active and choose Order Created as the topic.
Paste the webhook URL you copied from BotCommerce into the Delivery URL field.
Save the webhook.
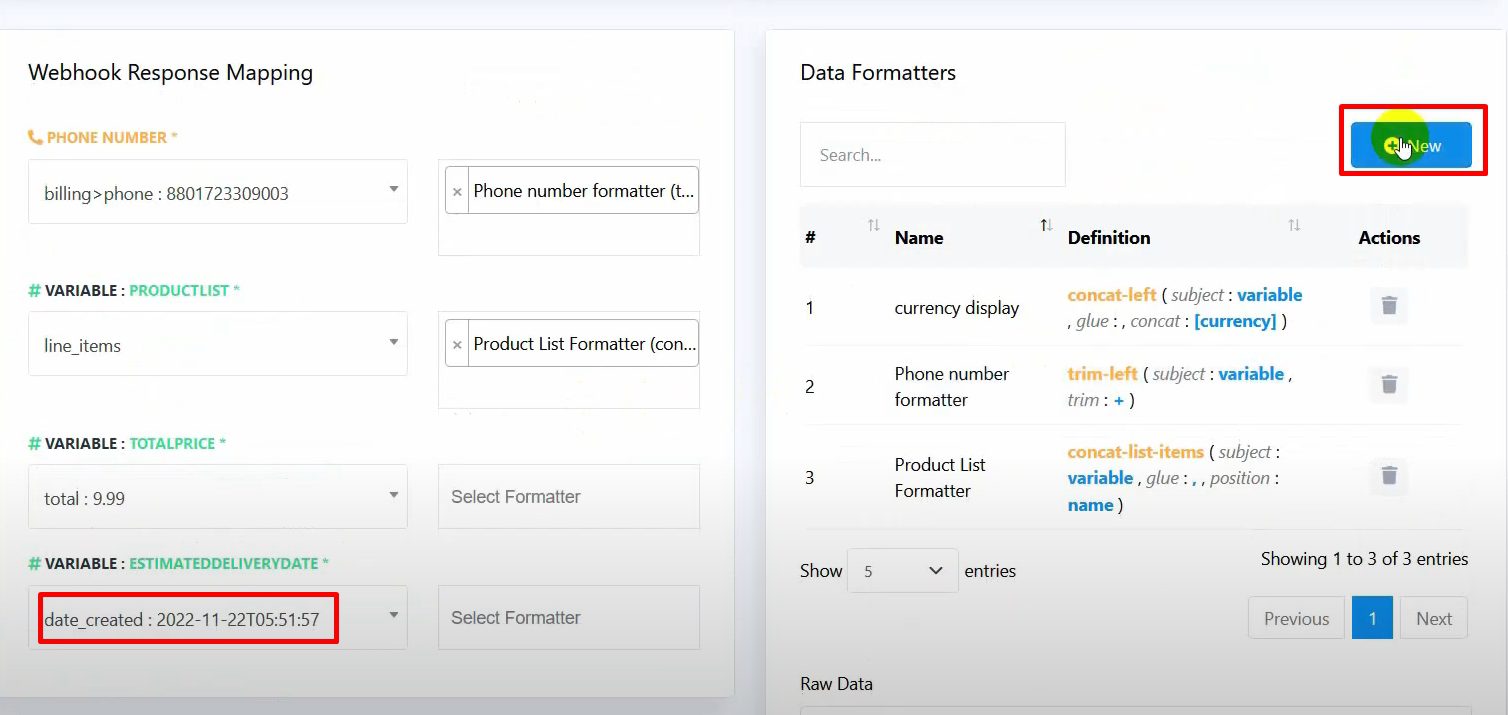
Capture Webhook Response and Map Data: Return to BotCommerce and click on Capture Webhook Response to get sample data for mapping.
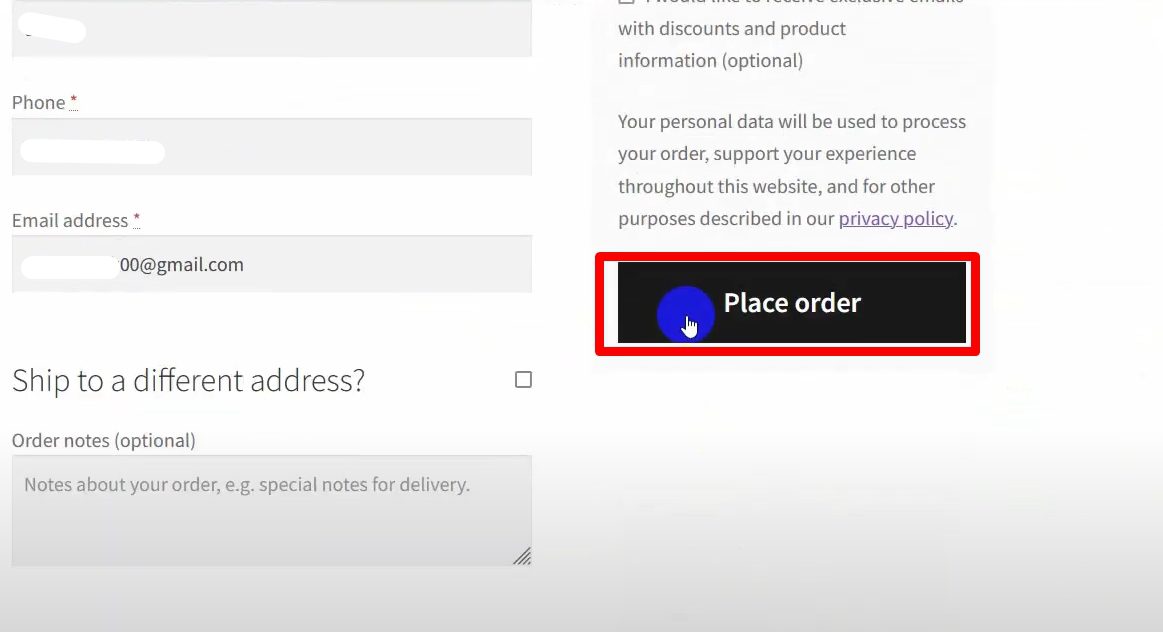
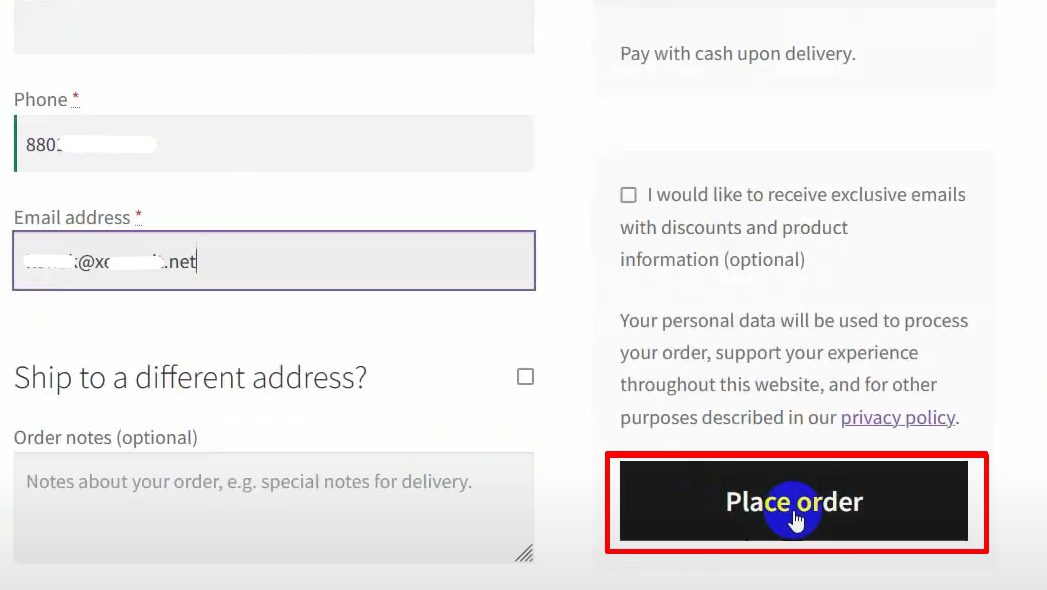
Create a test order on your WooCommerce store to generate sample data.
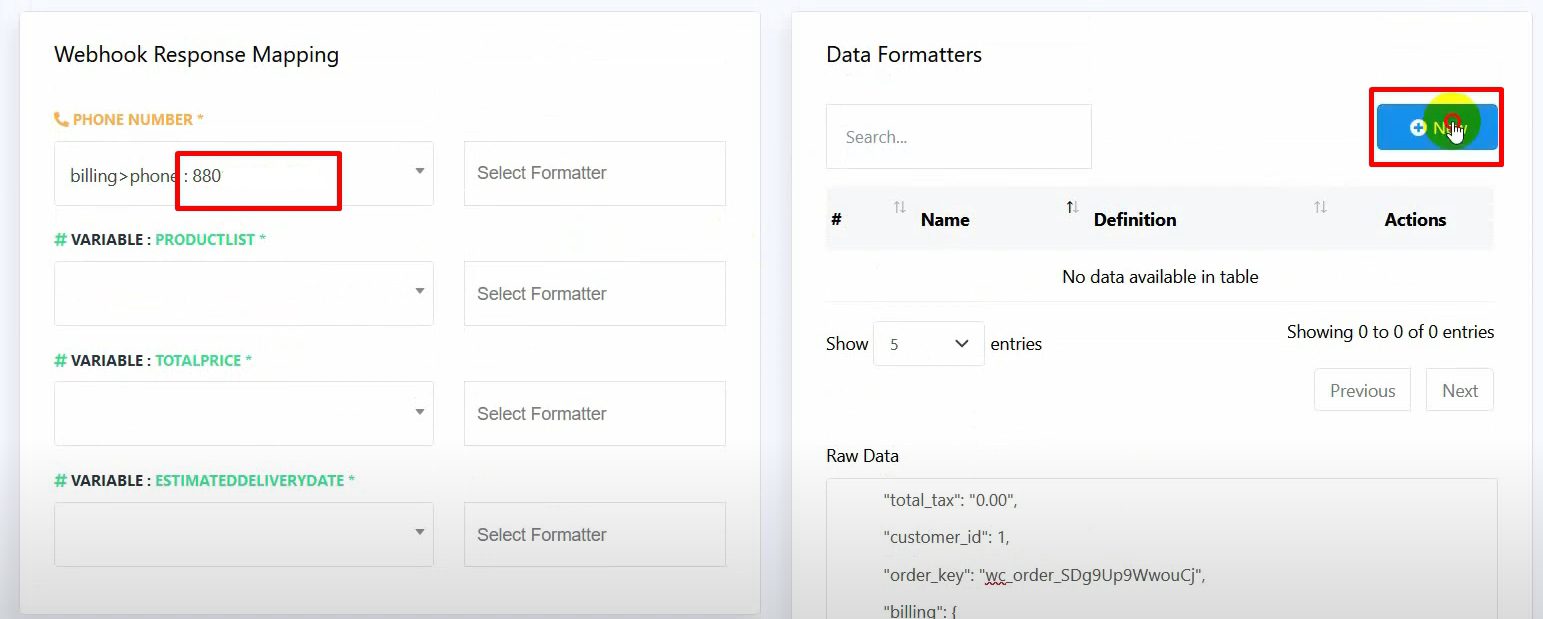
Once the data is captured, configure the webhook response mapping:
Phone Number: Locate the phone number in the raw data under Billing and map it.
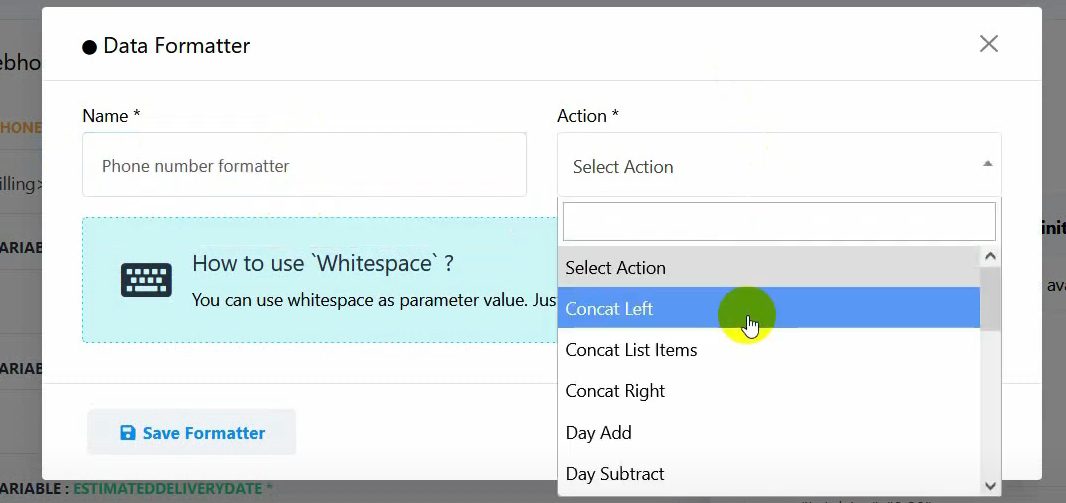
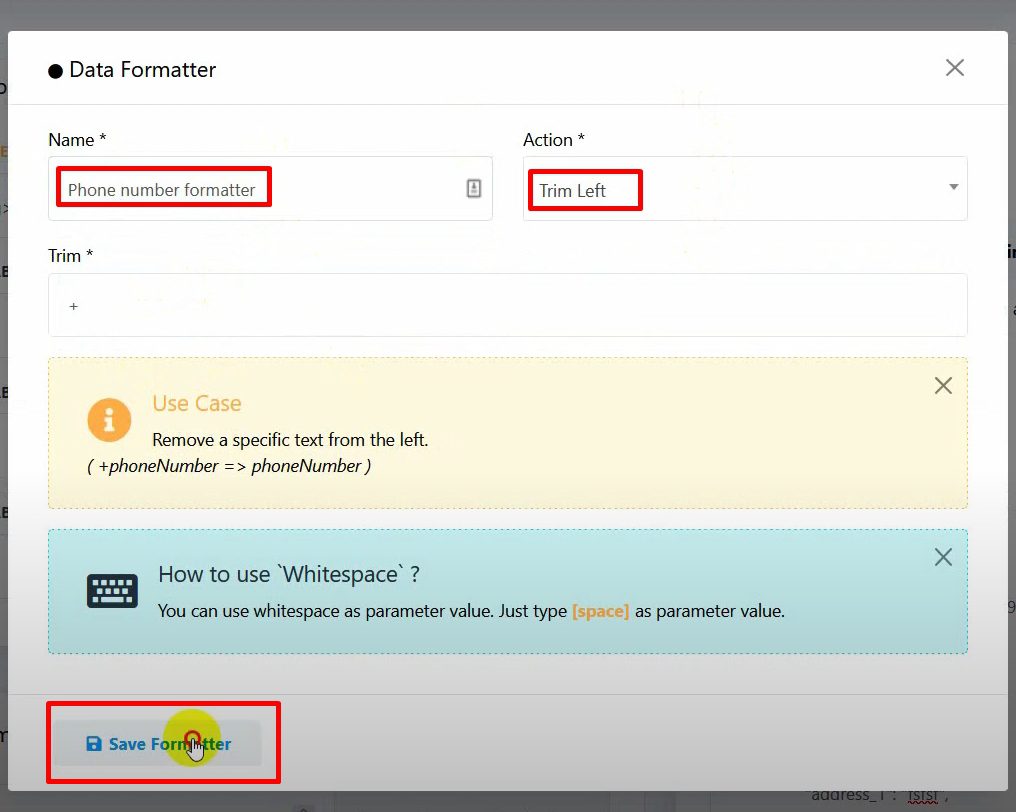
Formatter for Phone Number: Create a formatter to remove the plus sign from the phone number (if it exists).
Select Trim Left and input the plus sign (+) to be trimmed.
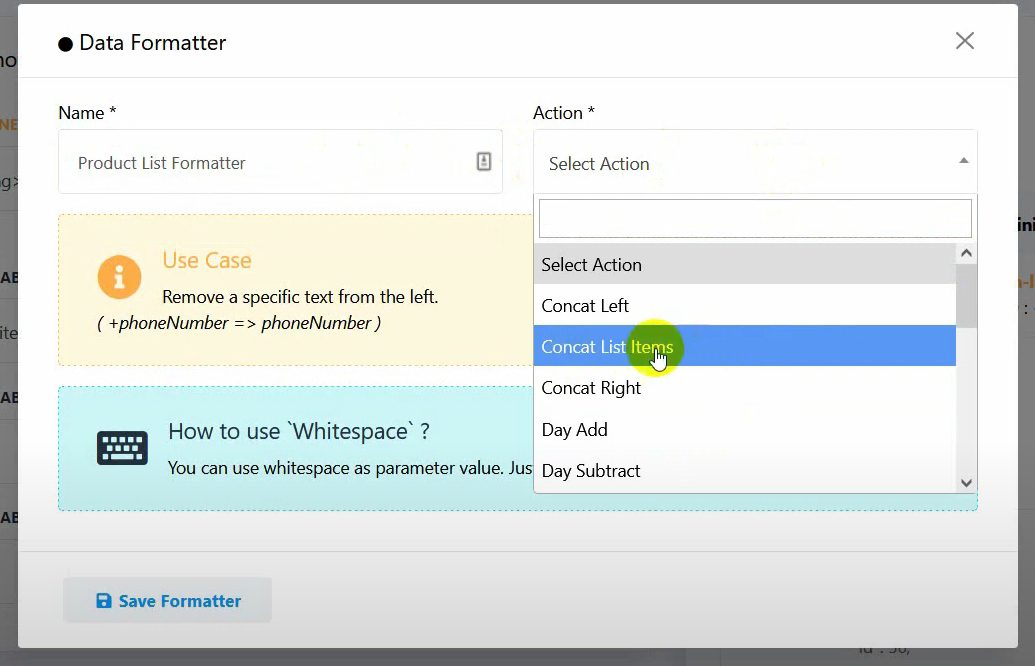
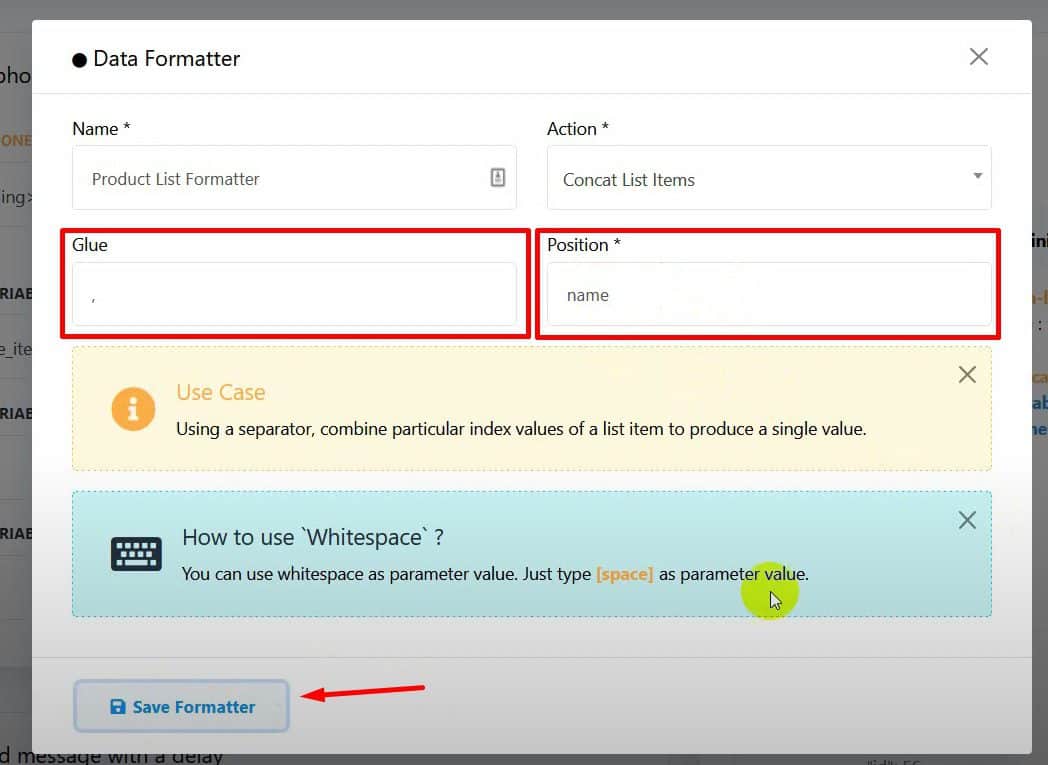
Product List: Select Line Items from the list and use a formatter to concatenate the items with a comma.
Choose Concat List Items and select Name as the position.
Total Price: Map this to the Total field and use a formatter to add a currency symbol.
Select Concat Left and add the currency symbol.
Estimated Delivery Date: Map the purchase date and add a formatter to calculate the delivery date.
Select Day Add and input the number of days (e.g., 7 days) to determine the delivery date.
Configure Additional Workflow Options:
Delay in Minutes: You can set a delay for sending the message (optional).

Conditional Messaging: Use conditions to customize who receives the message (optional).
Save the workflow once all configurations are complete.
Test the Webhook Workflow: Place an order on your WooCommerce store to test the workflow.
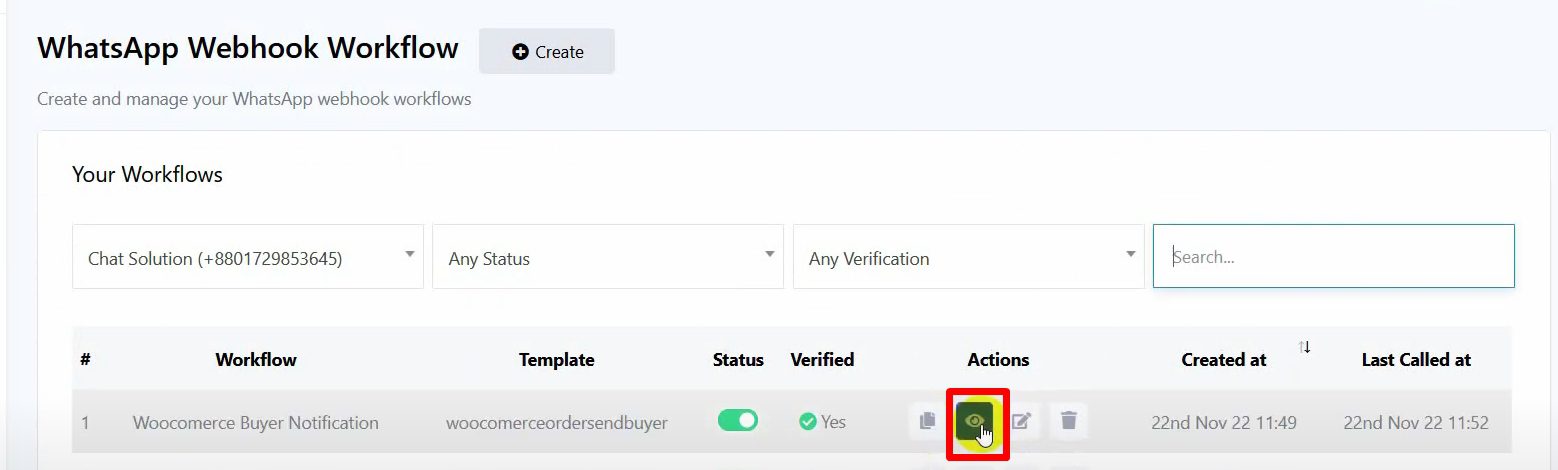
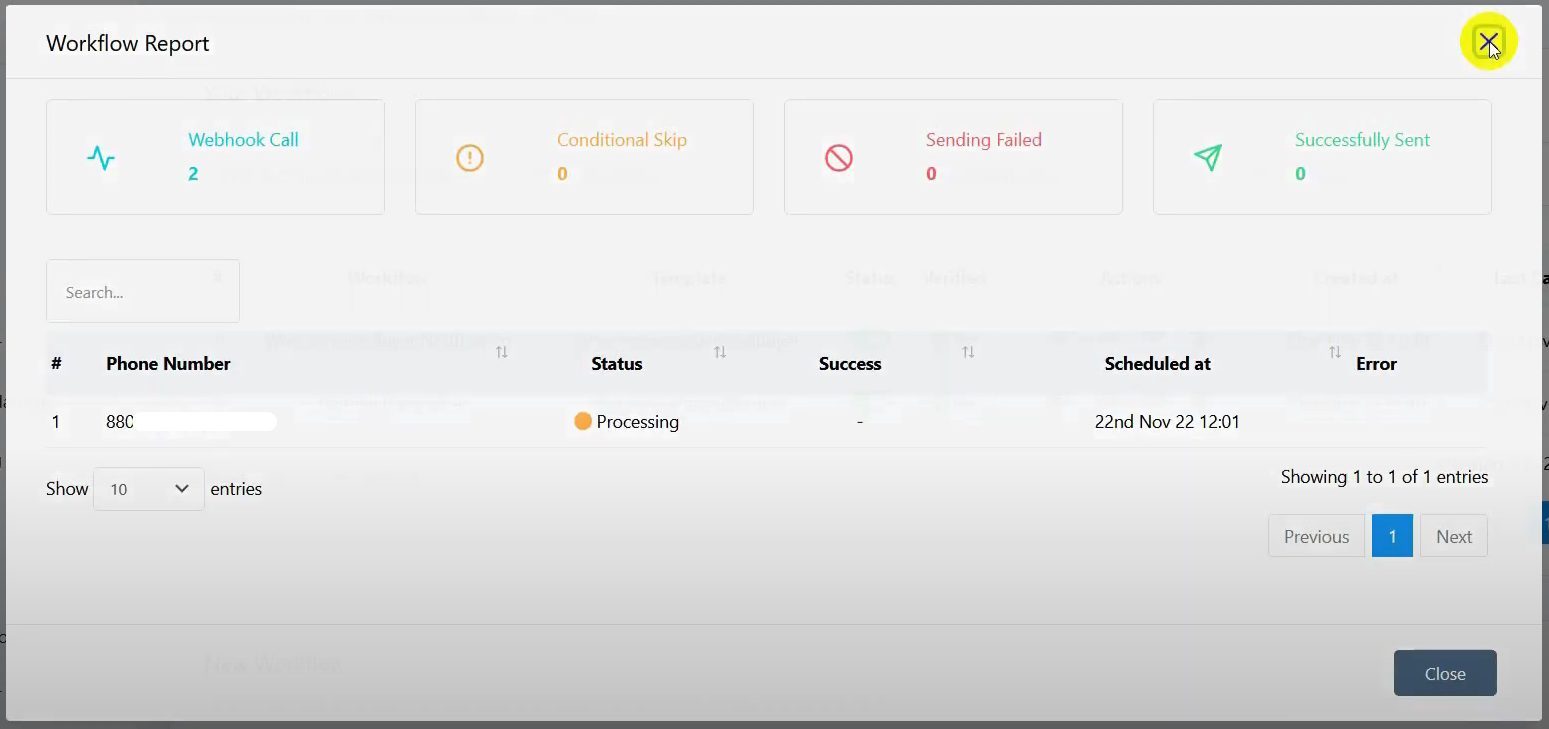
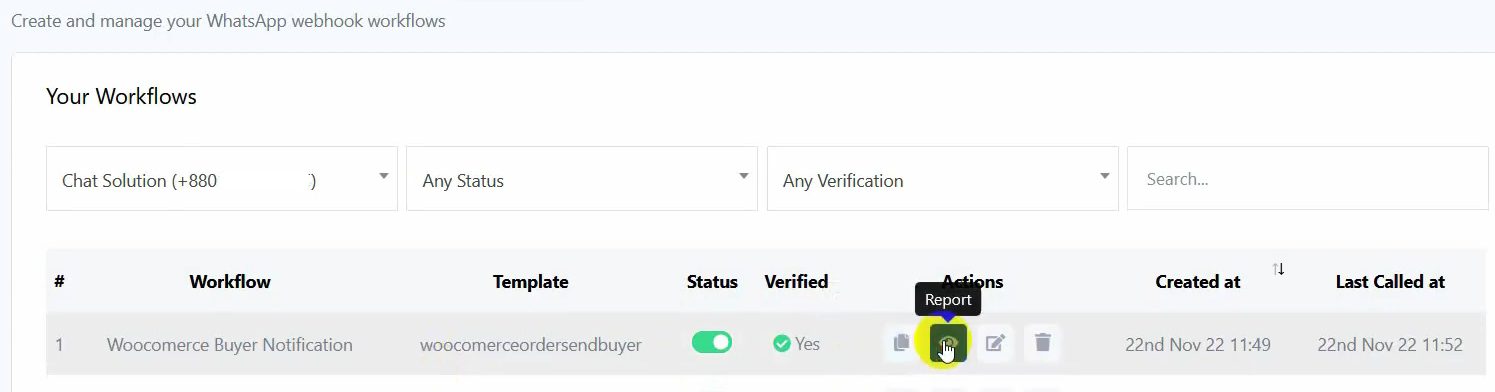
Go to BotCommerce and check the Workflow Report to see if the process was completed.
The WooCommerce webhook may take some time to send data, so check back after a short wait.
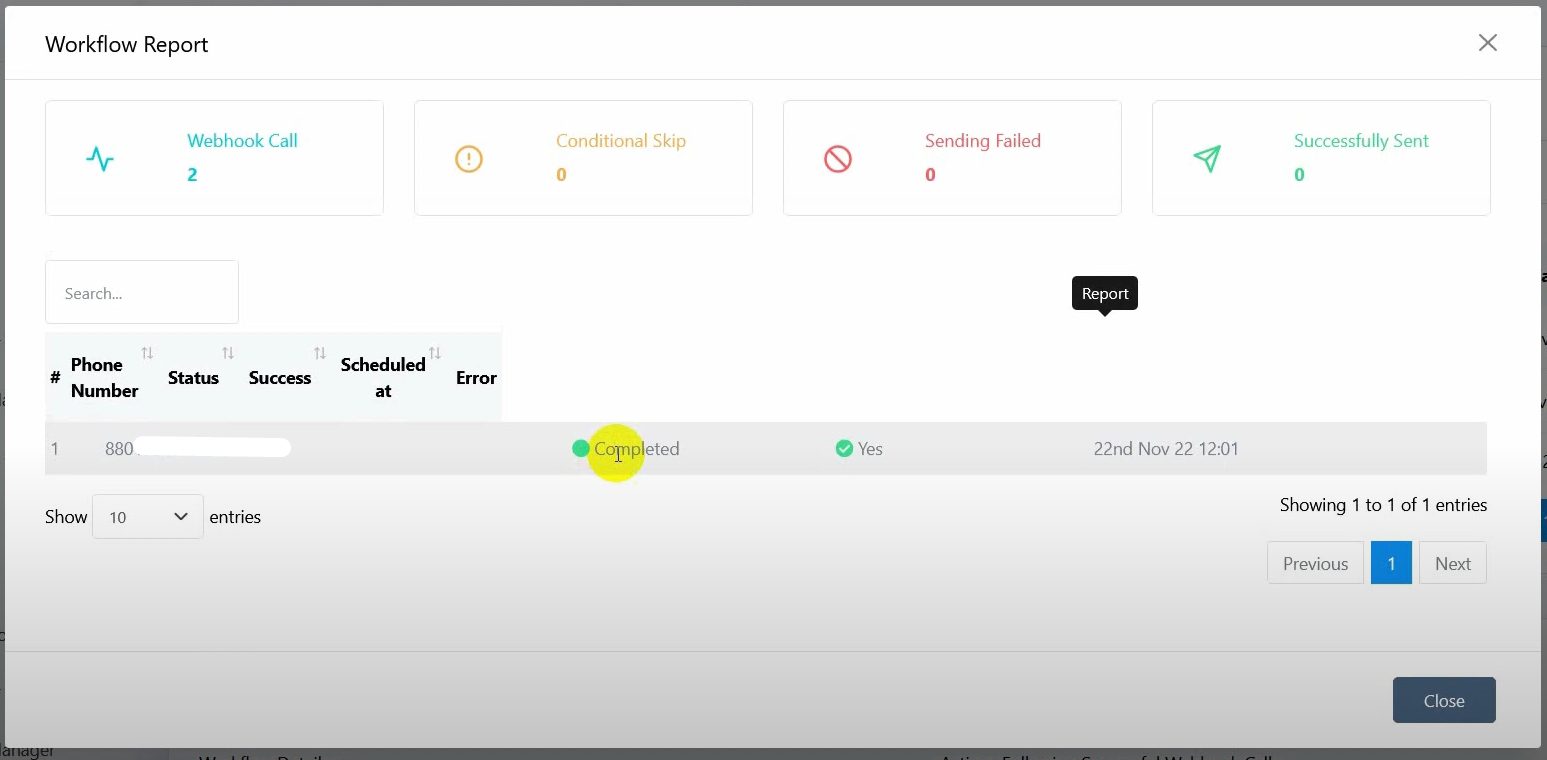
Once the workflow is complete, check the WhatsApp account to confirm that the order notification was received.
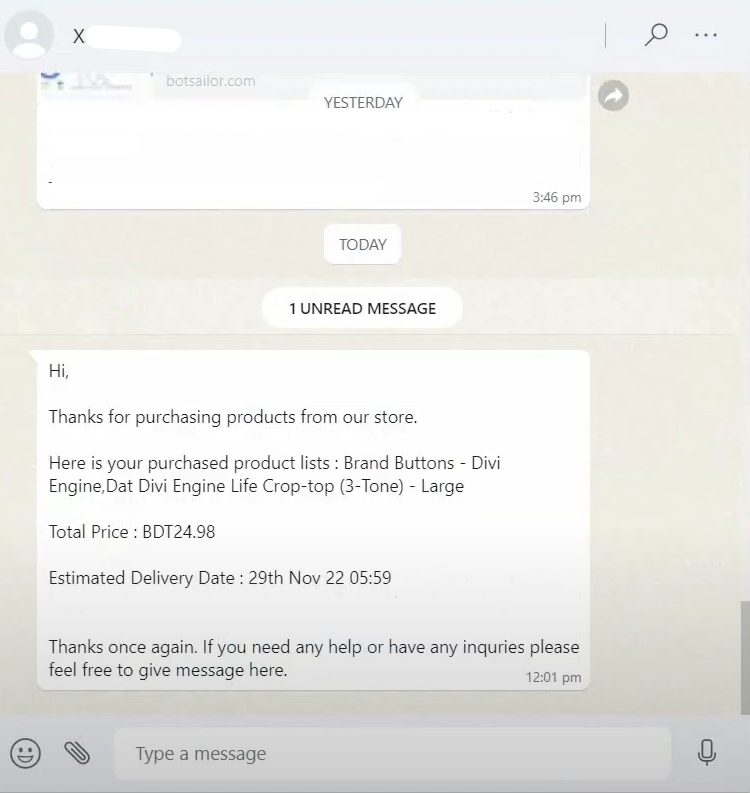
The message should include details such as the product list, total cost, and estimated delivery date.
