WhatsApp catalogs enable sellers to display products, collect orders, and update promotions inside their chats, driving business growth and enhancing customer interaction. With BotCommerce, you can integrate your catalogs with your WhatsApp chatbots and message sequences, providing a seamless shopping experience that will surely boost sales.
Below are the detailed instructions to achieve this.
How it works
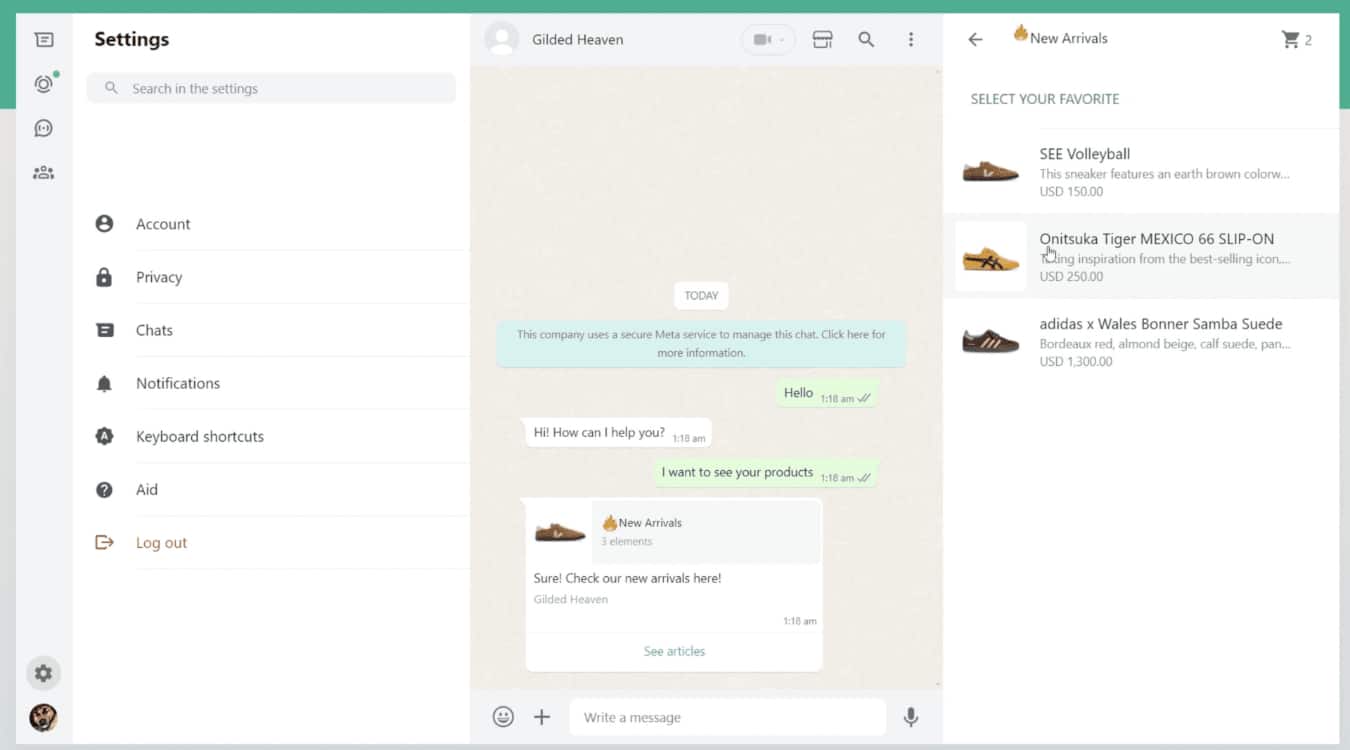
When a user clicks on the catalog link you shared, the catalog will open on their WhatsApp.
They can add products to the cart and proceed to checkout.
Users will receive a checkout link on their WhatsApp.
They can complete the purchase on the checkout page.

You can configure cart settings, including tax percentage and shipping charges.
You can set up an abandoned cart reminder message and select the timing.

You can view catalog orders and change the status of an order from the Catalogue Order within BotCommerce.

Creating a WhatsApp Catalog
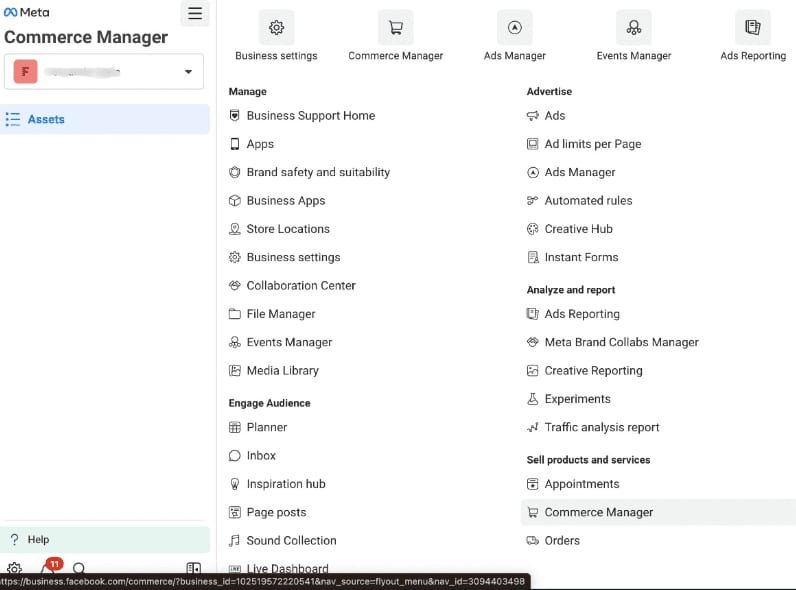
If you do not have a catalog, you need to create it first. Go to business.facebook.com and login. Click on the profile and select your business account. On the left sidebar, select Assets > Commerce Manager.
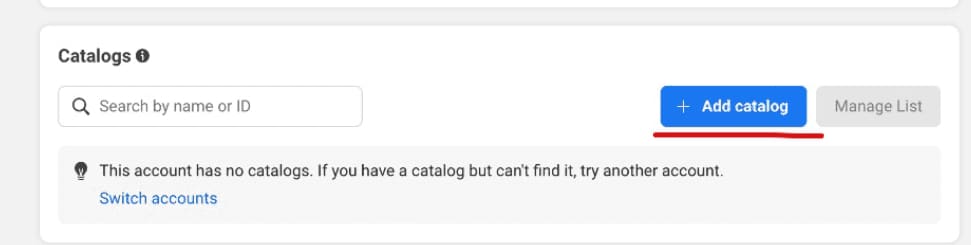
On the Commerce Manager page, scroll down. Click on the Add catalog button.
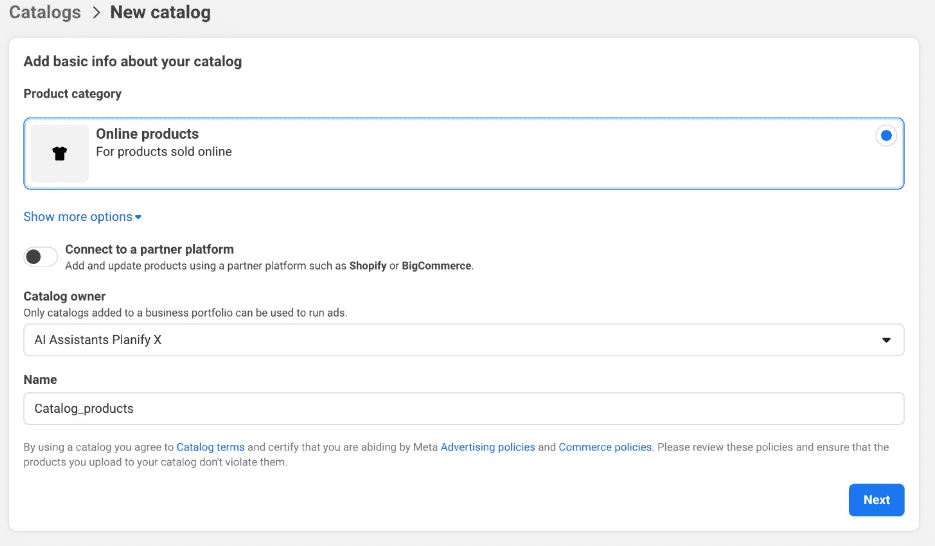
On Product category, choose the one that better describes what you are selling. Here, we used Online Products. Then, select your account and give the catalog a name.
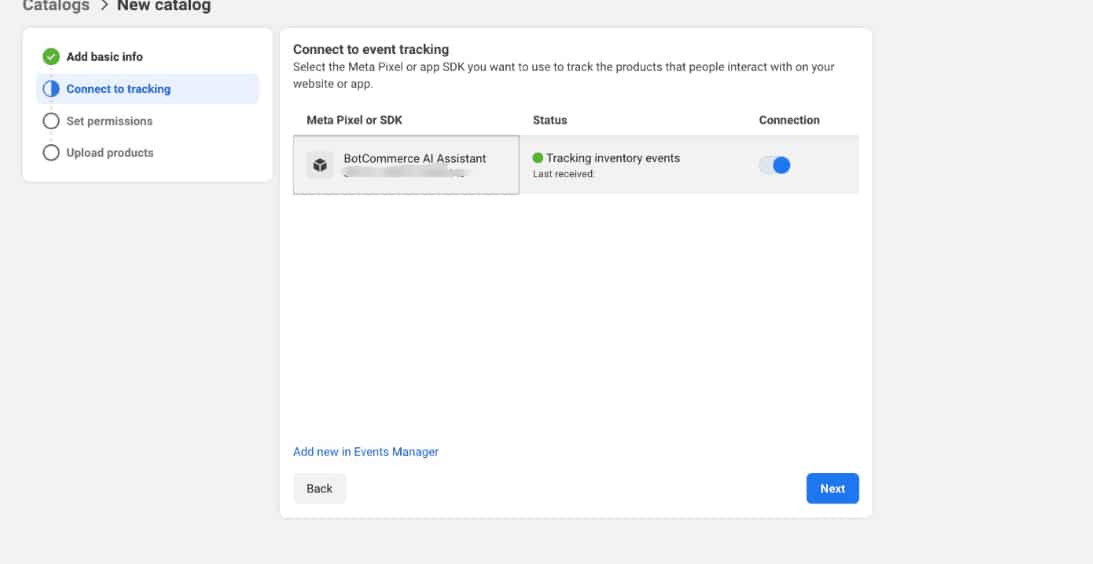
Once all the basic information is set up, it’s time to add a Meta Pixel. Select the app you created to link your WhatsApp account to BotCommerce and enable the connection.
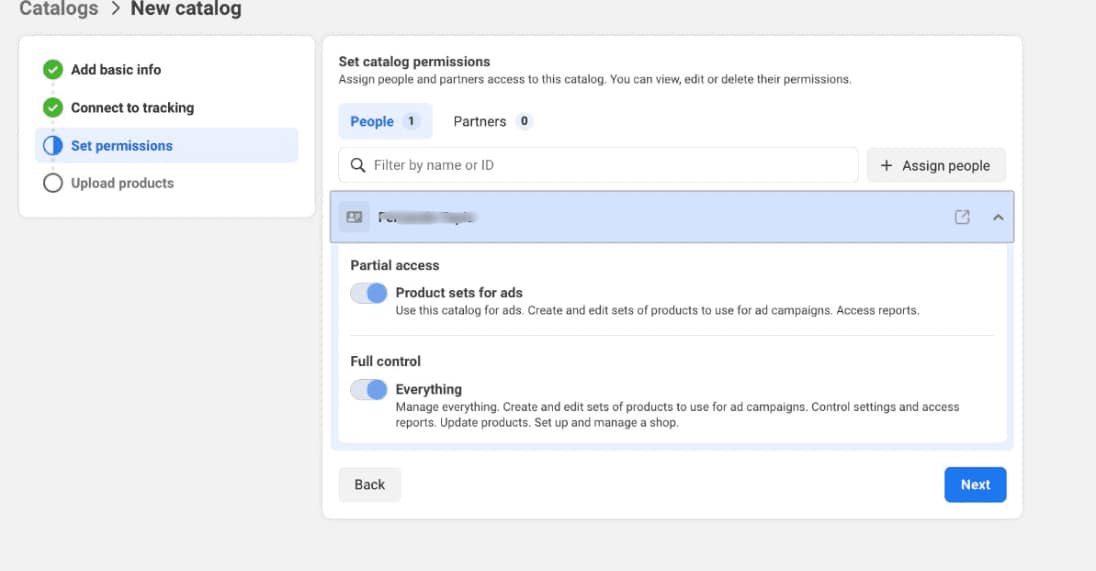
In the next section, you can optionally add a partner to manage your catalogue. Click on Assign people and turn all the permissions on. Then, click on Next.
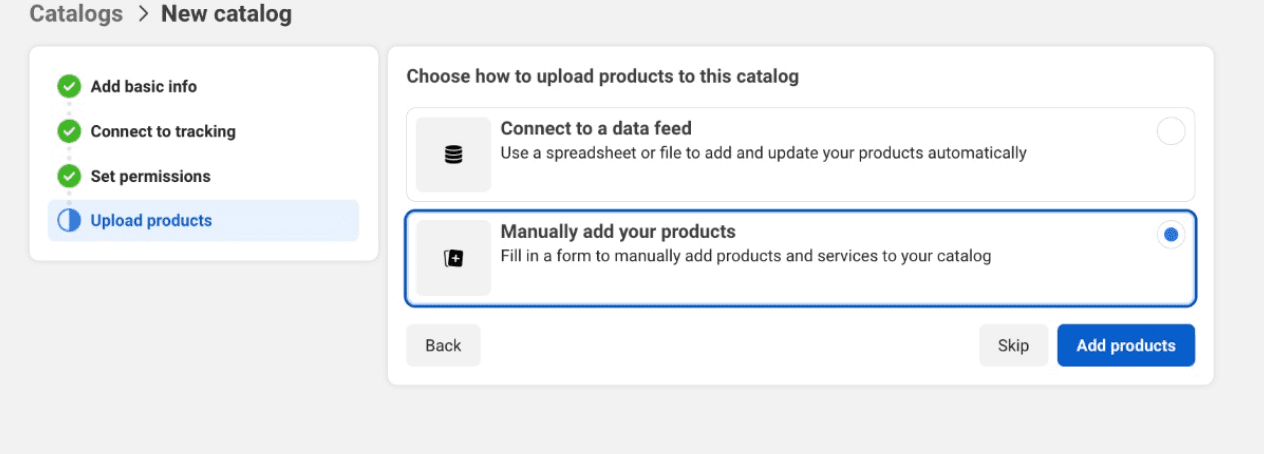
Finally, select MANUALLY as the method to add your products. Click on the Add products button to start uploading them.
Adding and modifying products
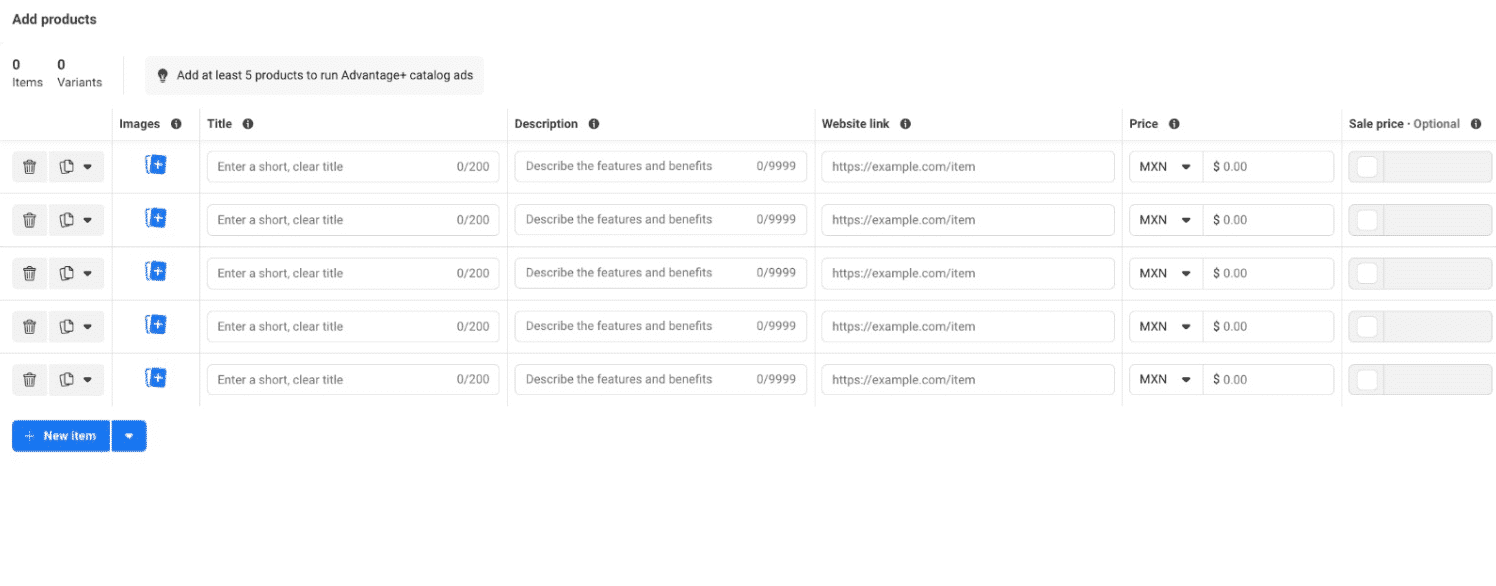
Add your products one by one. You need to provide at least 5 for the catalog to work. Fill the fields as indicated:
Title: Write the product’s name
Images: Provide at least one picture of your product. Aim for a minimum image size of 640 x 640 pixels.
Description: Provide a brief explanation of its features and benefits.
Website link: Add the URL of the product in your ecommerce.
Price: Indicate the price and currency.
Sale price: Optionally, add a discounted price.
Facebook product category: Select the one that best describes the product.
Condition: Indicate if it is new, used, or refurbisehd.
Availability: Turn it on if the product is in stock. You can always modify it later.
Status: Turn it on to show the product in the catalog.
Brand: Optionally, add the product’s brand.
Content ID: This can be a SKU or other dynamic identifier.
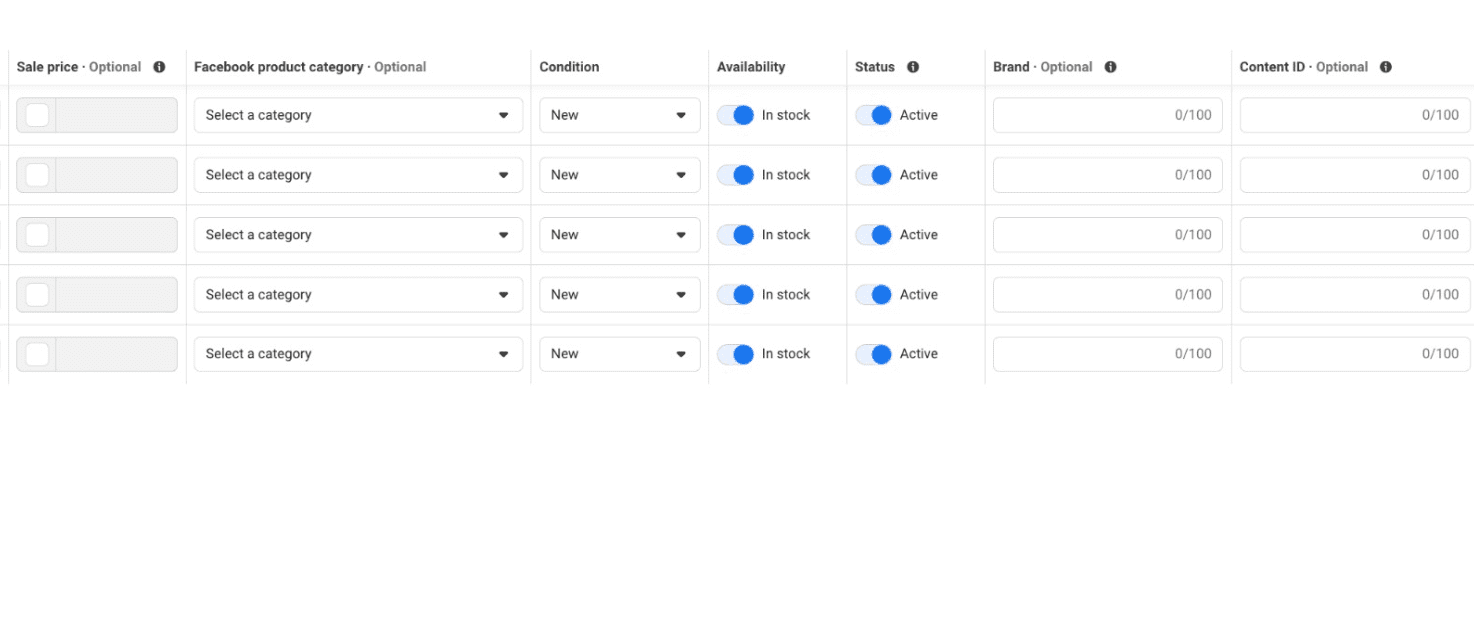
When you are done, click on the Upload item products. After a few minutes, you will see your products listed as in the image below. You can always return to this page to add more products or modify the existing ones.

Generate a new token
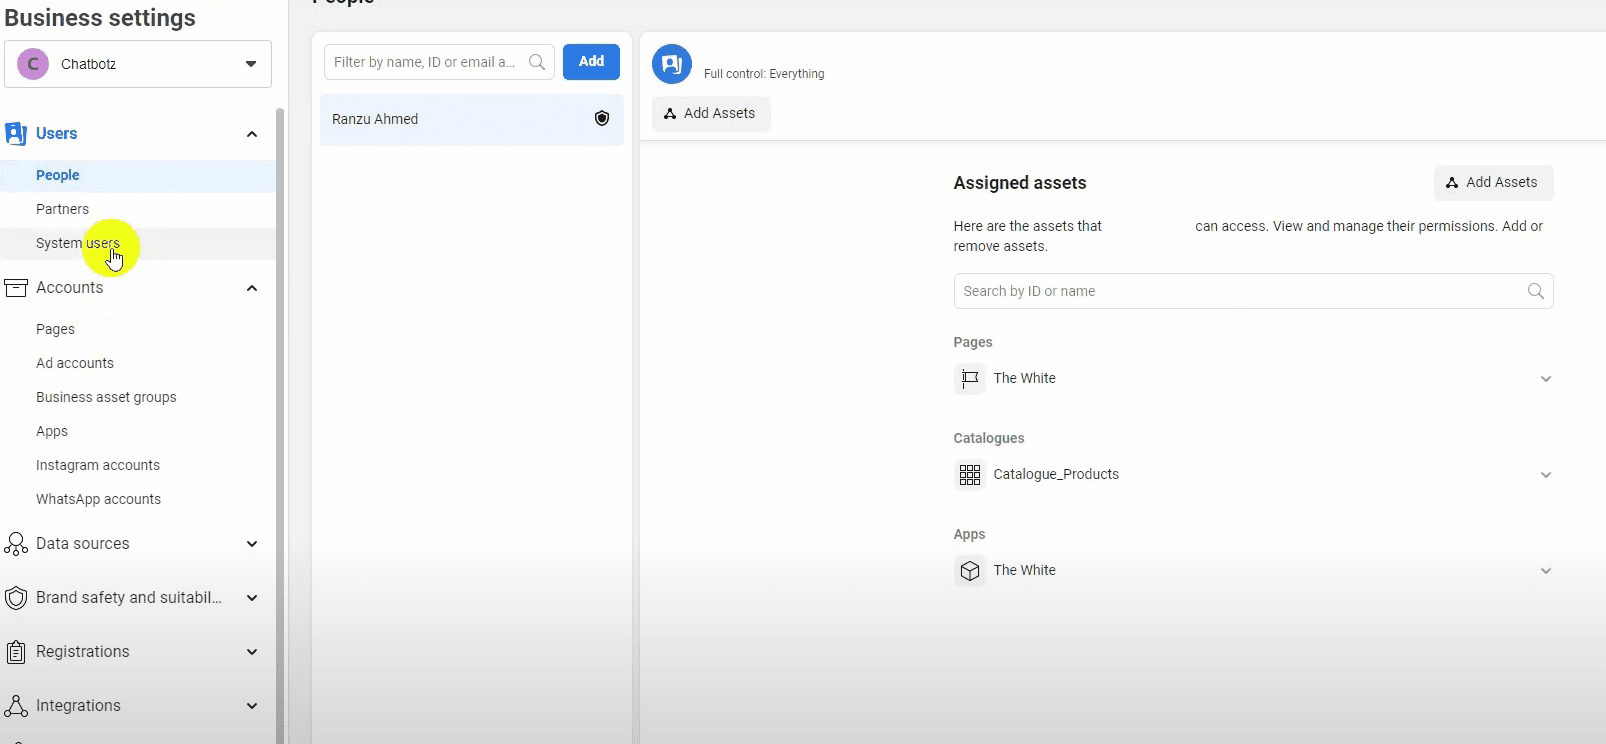
Gonna business.facebook.com/settings.
In the menu on the left, select “System Users.”
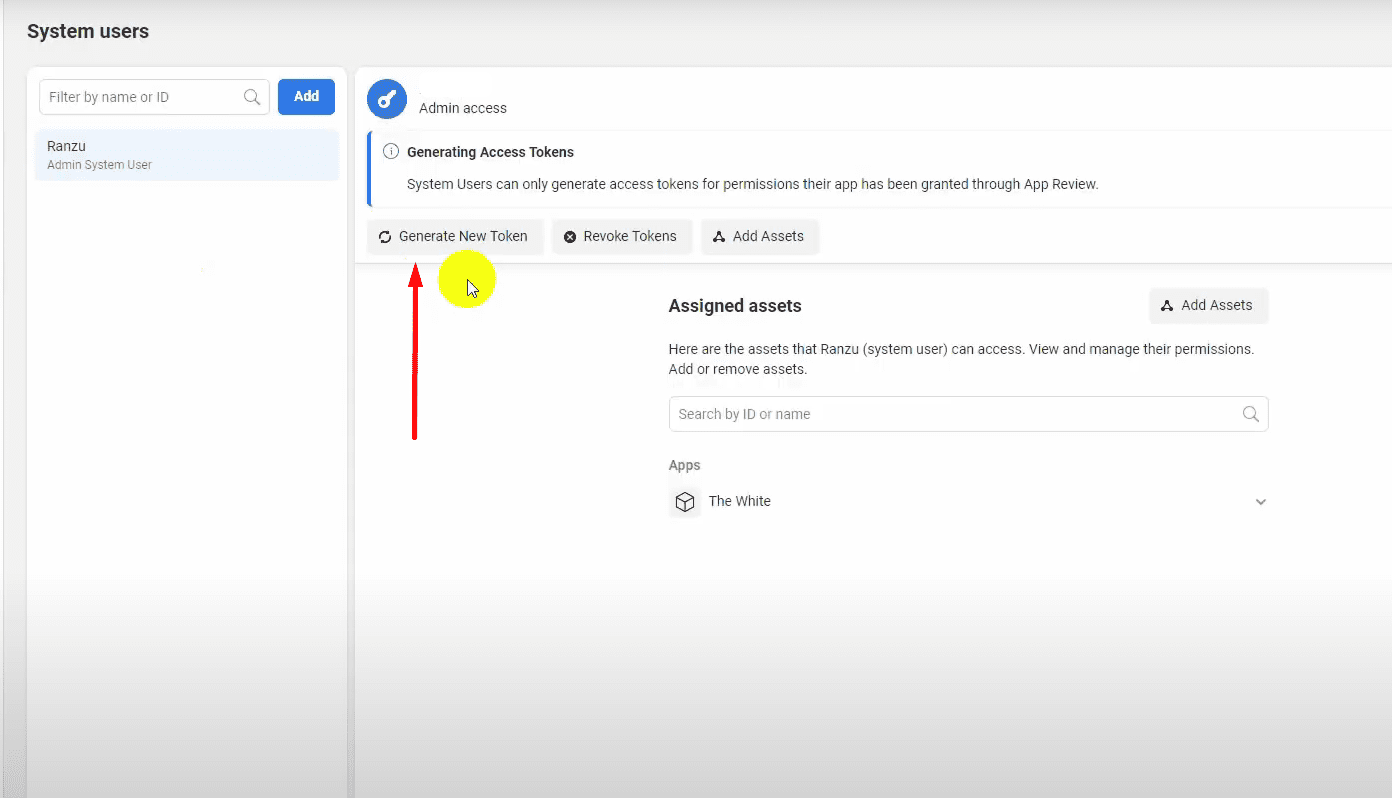
Click the “Generate new token” button.
Select the application you are using.
Choose the token expiration period.
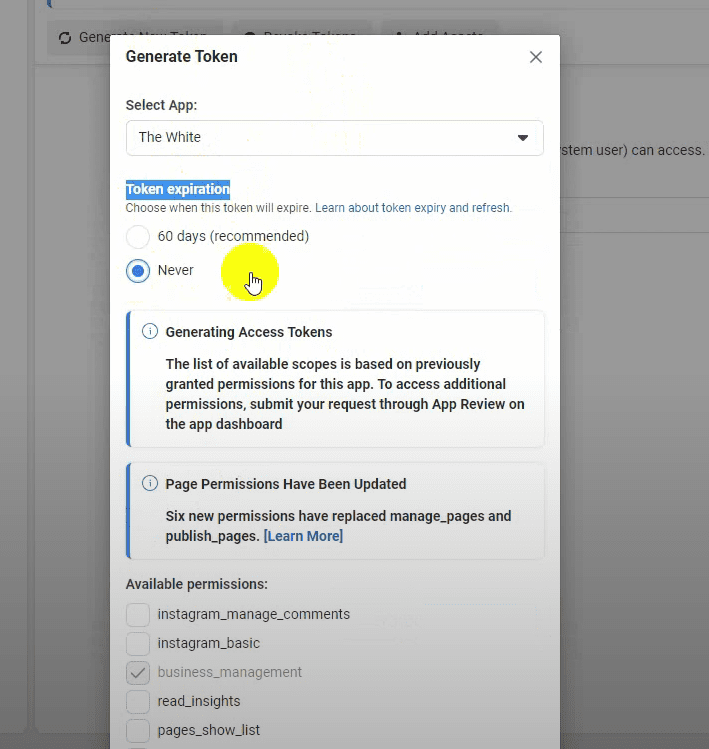
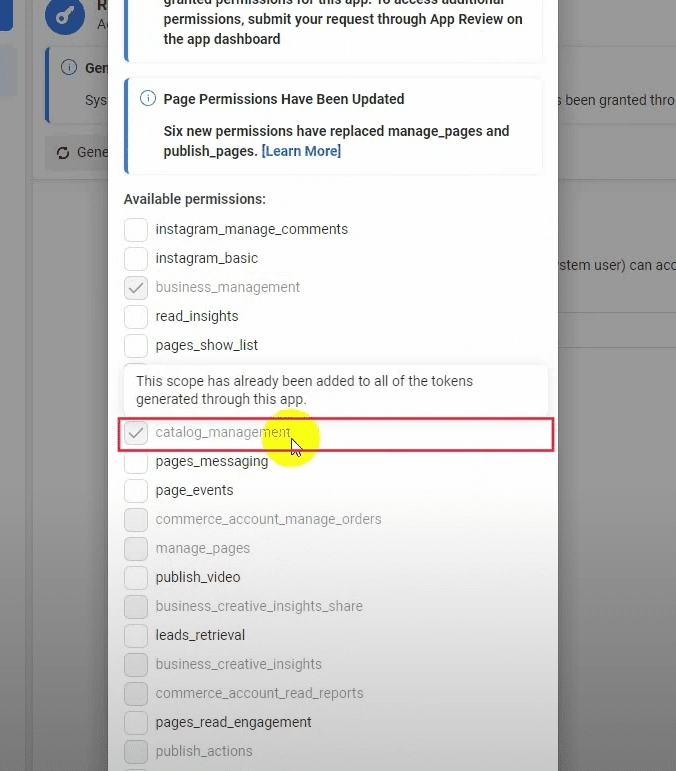
In the permissions section, previously only three permissions were used. Now, add the “Catalog Management” permission.
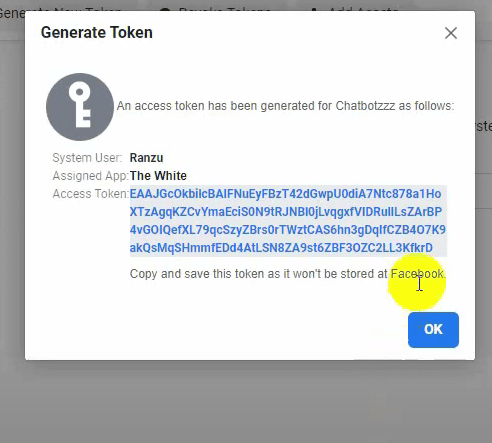
Click the “Generate Token” button.
Copy the new token
Linking the catalog to your WhatsApp account
Now you need to open the WhatsApp Manager. To find it, open the Assets menu once again and click on Business Manager. Select WhatsApp Accounts in the left sidebar, choose the one to which you will link the catalog, and click on the WhatsApp Manager button.

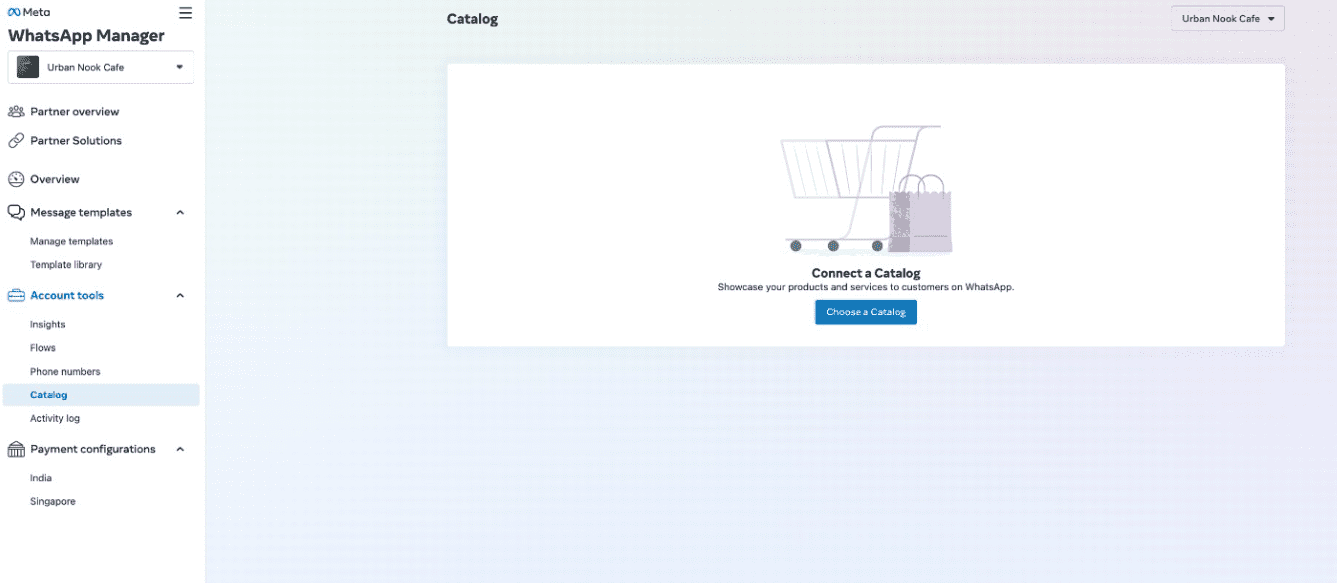
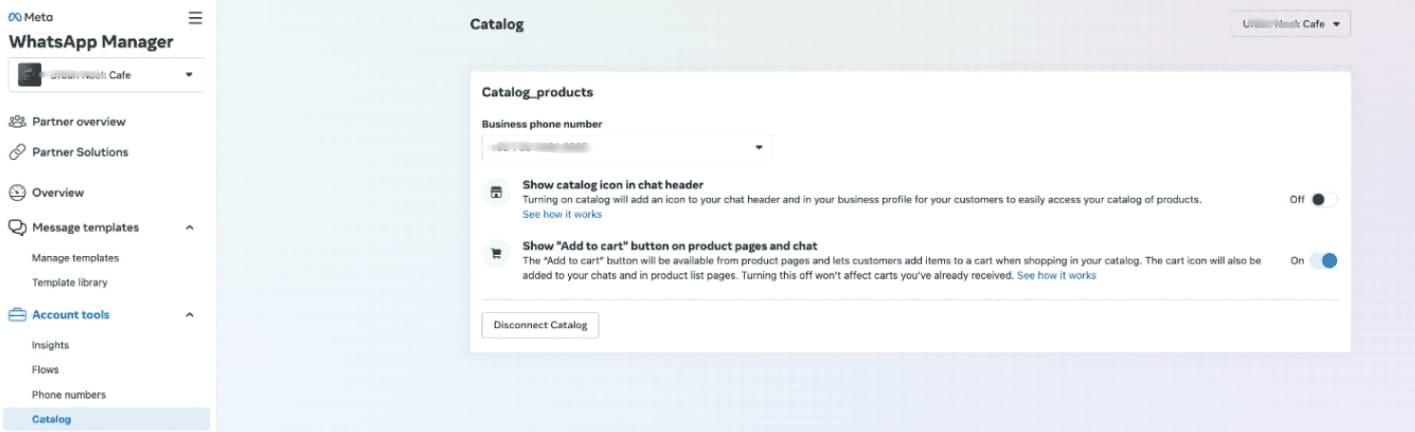
Once inside the WhatsApp Manager, select Catalog on the left sidebar. Click on the Choose a Catalog button.
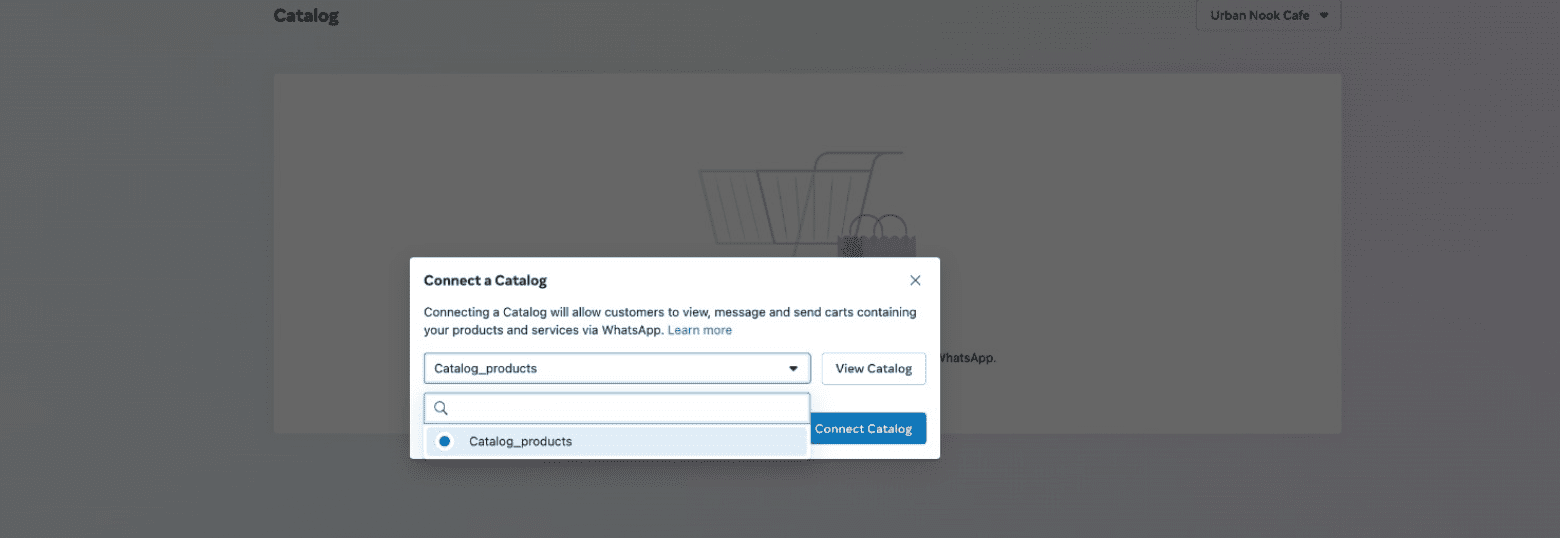
Now, select your catalog by name, Click on Connect.
That’s it! Your catalog is now linked to your WhatsApp business account. Now, you just have to link it to your chatbot.
Adding the catalog to BotCommerce
Open BotCommerce. On the left sidebar, go to the WhatsApp section and click on Connect Account. Scroll down to find the WhatsApp account linked to your catalog. Click the sync button to update the account’s information.

Now, go to the eCommerce Catalog section on the left sidebar. Several minutes after synchronizing your account, you will find your catalog here.
Scroll down to set up its basic settings:
Enable switch: Control if the catalog is publicly visible or not.
See products button: Find all the products that are currently visible in your catalog.
Sync button: Click it every time you make changes in the WhatsApp Catalog to show them here.
Message button: Customize the messages your customers see during checkout. Edit the message for the Checkout URL and the Reminder. You can rewrite these messages to be clear and informative, but remember to keep the actual Checkout URL itself unchanged.
Payment button: Configure Payment Settings and Cart Settings. In Payment Settings you can choose from multiple payment options to best suit your business needs. In Cart Settings, you can configure things like the tax percentage and any shipping charges that may apply.
Send Cart Reminder field: Set up a reminder message that will be sent to customers who leave items in their carts without completing the purchase. You can also choose when this reminder message will be sent.
Assign label field: Add a label to the customers that complete an order to further identify them.
Google Sheet list field: Automatically add the order information to a Google Sheet.
Delete button: If you no longer need this catalog, you can click the “delete” button to remove it completely.

Adding catalog products to your chatbot
You can include your catalog products inside your chatbot sequences, so they are sent as messages when a customer sends a particular keyword or clicks on a button. To achieve this, go to the WhatsApp Bot Manager on the left sidebar. Select the WhatsApp account and go to Bot Reply. Click on the create button. It will redirect you to the Visual Flow Builder.

Double-click on the Start Bot Flow to name it. Then, add a trigger to the Start Bot Flow. To use catalog products on WhatsApp, you need to use an Interactive element. Drag an Interactive template and connect it to the Start Bot Flow. Double-click the template to configure it, then add a header, body text, and footer to your message.
The interactive template allows you to add catalogs through the eCommerce socket. Simply drag a connector from the eCommerce socket, then release it to generate the catalog element. Double-click the catalog element and select your catalog from the list.

The catalog element offers two options for adding products: single or multiple. Drag a connector from the ‘multiple’ socket and release it to create a product section with three products. You can add more products or remove any as needed.
Additionally, you can create multiple sections with multiple products. Double-click the product section to name it, and double-click each product element to select a product from the drop-down list.

If your products do not appear in this list, go back to the eCommerce Catalog section, and click on the See products button. Then, enable the products that appear without an image and click on synchronize. Wait for the product picture to appear. Finally, go back to the Visual Flow Builder and refresh the page.

When you are done, save. If everything was performed correctly, the catalog will be sent whenever a customer triggers your flow.

Managing catalog orders
Keep track of your sales! You can view all your catalog orders at the top of the eCommerce Catalog page under Catalog Orders. Here, you can also change the status of an order if needed.
Click on the Cart button to see order details.

Now you know how to use WhatsApp Catalogs to boost your sales! If you have any additional doubts, do not hesitate to contact us.
