QuickForms has the ability to generate endpoints, then you can use them to make fully customizable forms. You can download the HTML code of your Form to integrate it directly on your webpage or mobile app, and use the form’s backend endpoint to collect data.
Download the HTML
To download the HTML code, follow the next steps:
- In the navigation bar, click “Forms”
- Click on the form name you want to share
- Click on the “Publish and Share” button (the green arrow icon)
- Click on the “Download the HTML” menu.
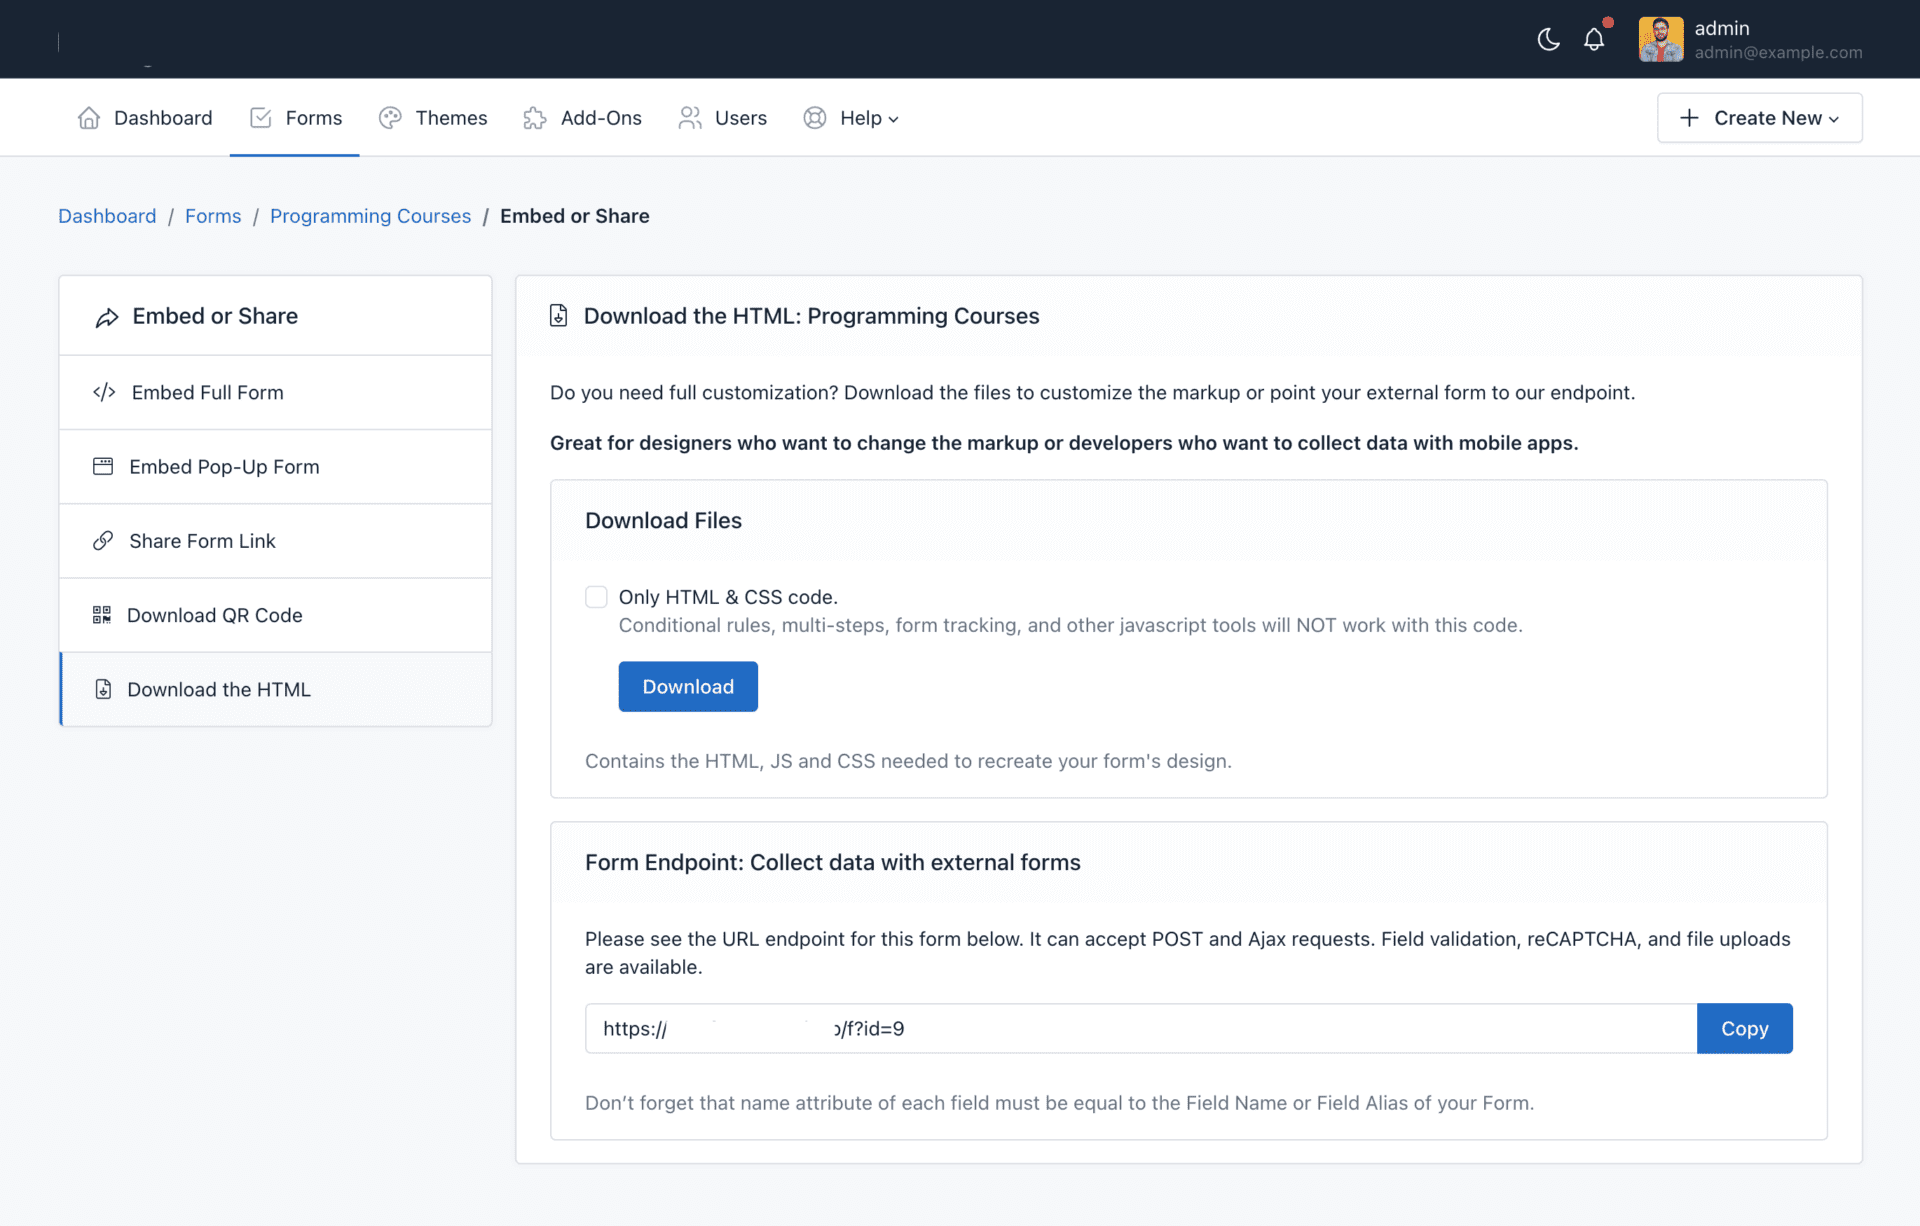
In this page you can see the button to download the HTML code as a ZIP file. Also, you can copy the Form Endpoint directly.
💡 PRO TIP: If you want to replace the “name” attribute of each field, you need to set it as a Field Alias in the Form Builder.
Forming Endpoints
To collect data with the Form Endpoint just copy the URL and change your landing page’s form ACTION url or point a Webhook to this URL. Just take into account two things:
1.- The field alias of each field should be equal to the field name of your form.
2.- If your POST request has an associative array format, you can use a Dot Notation. For example, Elementor Forms sends webhooks as associative arrays with this format:
[
‘fields’ => [
‘name’ => [
´value´ => ‘John’
]
]
]
So, instead of using the alias: ‘name’, we need to use the dot notation. For this example, to capture “John” we need to use the following alias: fields.name.value.
