While platforms such as WhatsApp and Instagram have opened new doors for automation, Facebook Messenger customers remain a gold mine for engagement, especially when it comes to recurring communication and long -term nutrition.
But there is a grip, due to Facebook’s 24-hour messaging policy, you can only convey the message to users within 24 hours of their final interaction-until they choose to get clear updates clearly. This is the place where the broadcast and recurring notifications come in- and makes both seller and buyer incredibly easy to manage. Let us see what the broadcast and RCN really mean, how they work, and how to install them in BotCommerce.
What is Broadcasting?
Broadcasting is the process of sending a bulk message to a segmented group of subscribers. It’s just like sending an email newsletter — but through Messenger.
Instead of reaching out one-by-one, you can:
Blast out flash sale notifications
Send time-sensitive offers
Distribute content (like blog posts or video links)
Share reminders, updates, and event notices
What is RCN?
Facebook Messenger’s default 24-hour rule makes it difficult to broadcast-unless the user has recently interacted. Without that, your broadcast will not be issued. This is the reason why we use RCN as a smart, policy-completion work-round to obtain the consent of the users to get notifications.
RCN stands for Recurring Notification, a feature launched by Meta to help businesses message users by sending messages even after the 24-hour window— provided the user consents via an in-chat prompt. By doing this, you can do broadcasting without breaking Messenger’s strict policy — because the user opts in voluntarily to receive updates under a specific topic (e.g., “Daily Deals” or “Weekly Tips”).
How Facebook Broadcasting (RCN) Works:
- You create an RCN notification topic and assign it to a postback for Facebook Broadcasting.
- In Messenger, the user taps a button linked to this postback.
- Messenger shows a native popup, asking for permission to receive updates.
- If the user clicks Allow, you can legally send them messages under this topic for the next 6 months.
Creating the RCN Subscription Flow
Here’s how to get started with Facebook RCN.
Create a Postback. Navigate to the Facebook Bot Manager. Select an account and scroll down to the RCN Post Back Manager. Click on Create. This postback will be linked to the RCN opt-in button.

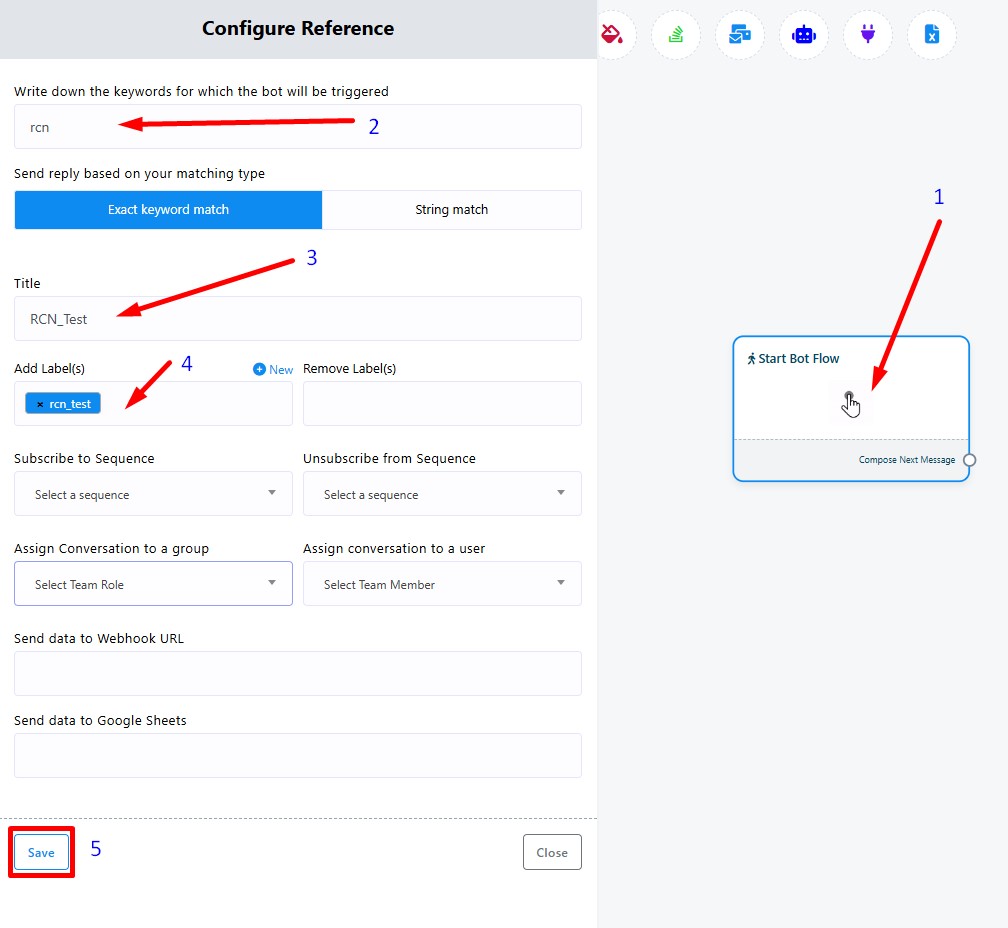
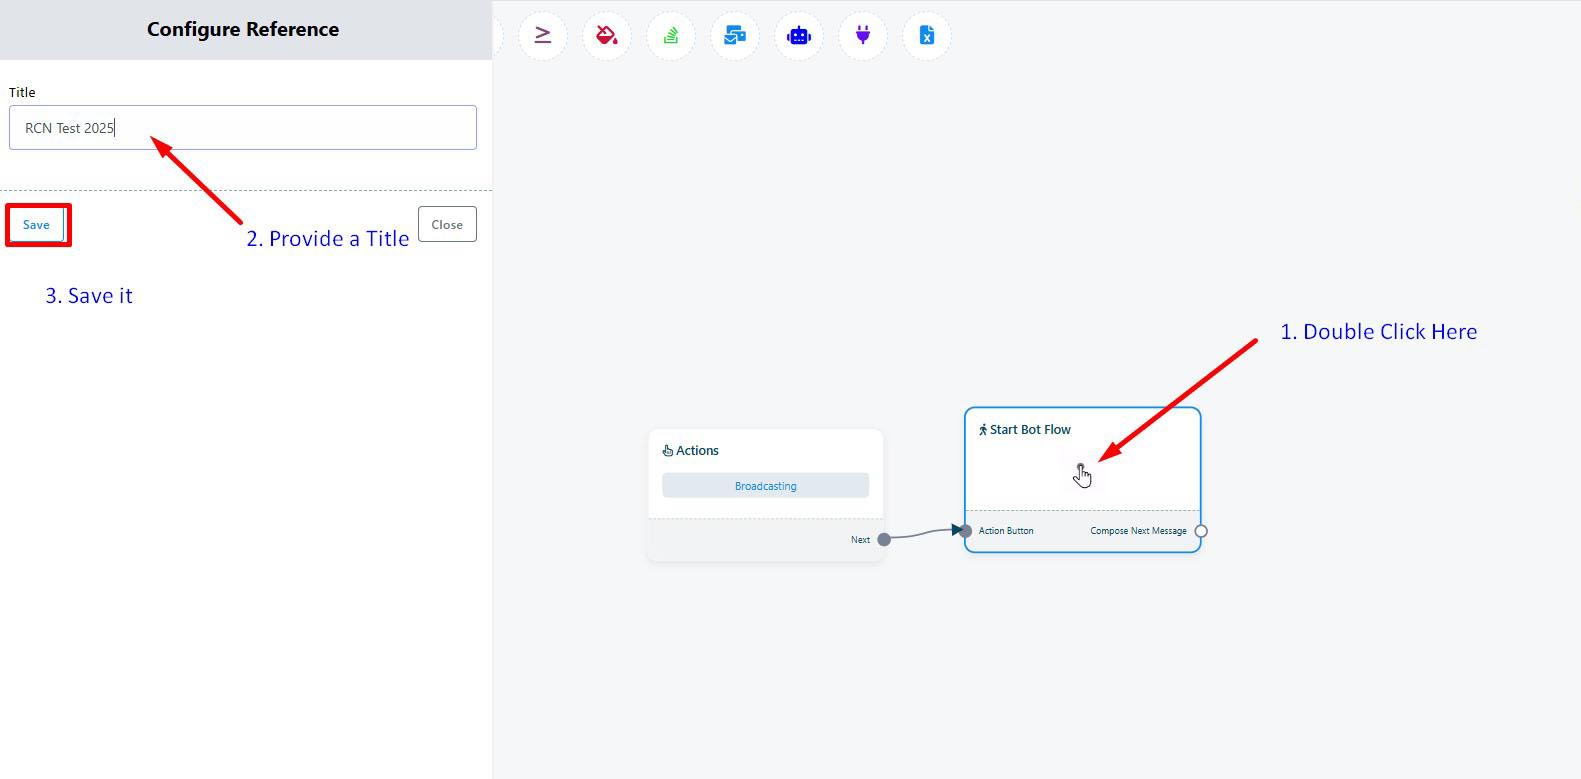
Configure the Start Bot Flow. Double click on the Start Bot Flow section. Type one or more trigger words. Provide a title and create a label for the users that interact with it. Save the configuration.
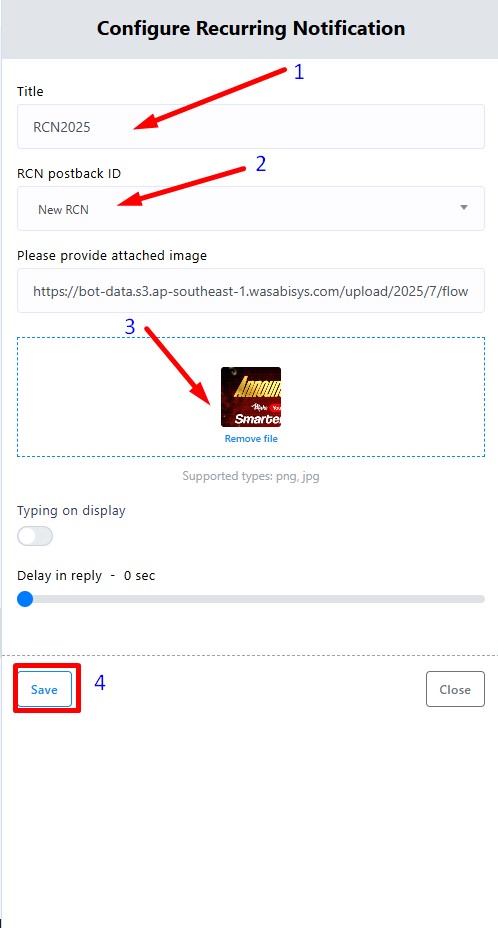
Click on Compose Next Message and take an RCN element. Double click on the RCN to configure it.
Enter a title for the RCN. Select New RCN as the RCN Postback ID. Upload an image and save it.
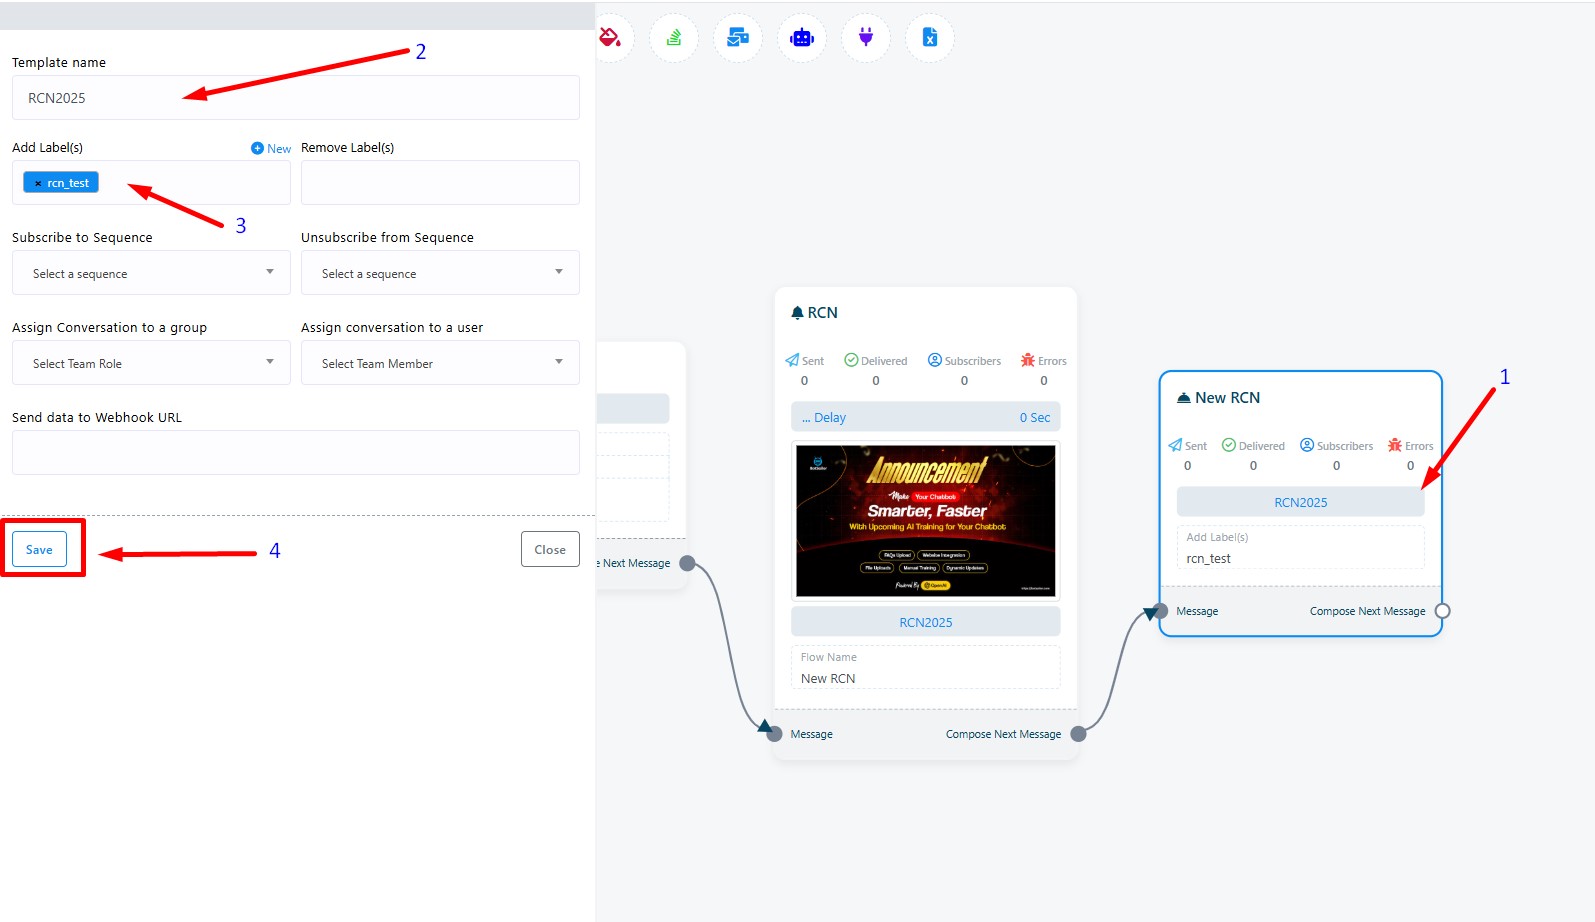
Now, to configure the New RCN element, double click on it. Write down a template name and add the label created earlier. Save the element.
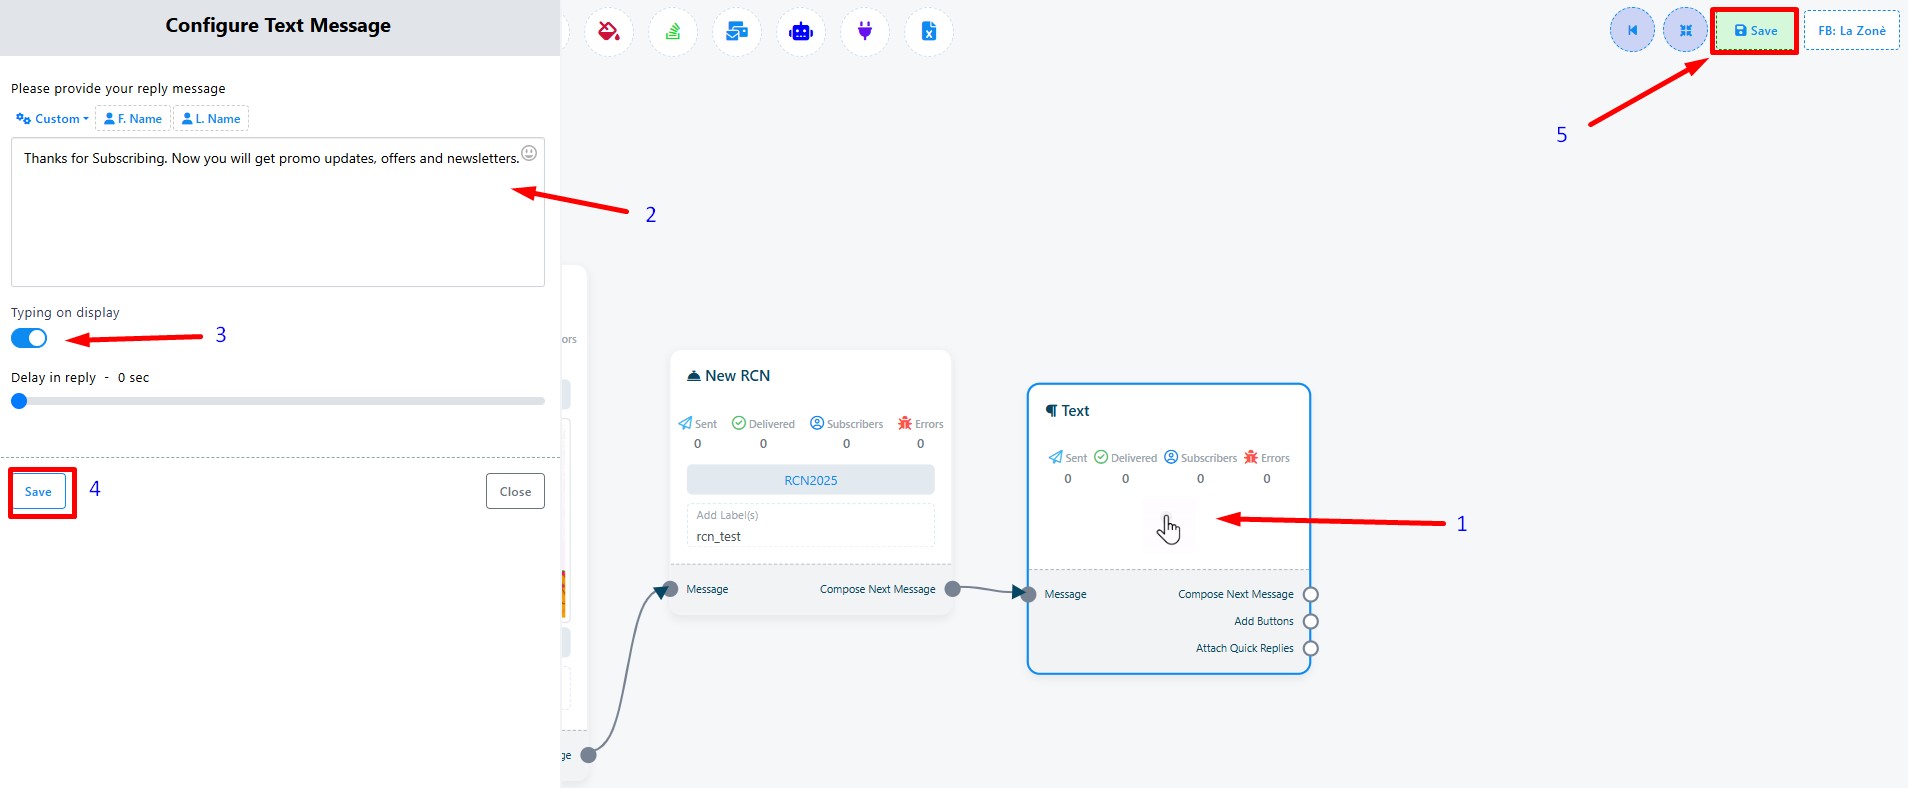
Click on Compose Next Message and take a text element. Double click on it and provide a suitable prompt, for example, a thank you for subscribing note. Optionally, toggle on Typing on Display and save.
Finally, save the RCN Postback Flow. And that’s it! Your RCN subscription flow is ready.
How do users subscribe?
An user has to type the keyword that triggers the RCN Postback. By clicking on the Get Updates button, he or she will be added as an RCN Subscriber (you can recognize them with the label that we created earlier).
And that’s it! You can broadcast to all your RCN subscribers. Your message will land even if they haven’t interacted in weeks. Now, let’s jump into how to do a broadcasting campaign.

Creating a Facebook Broadcasting Campaign
Go to Facebook > Broadcasting. Click on Create.

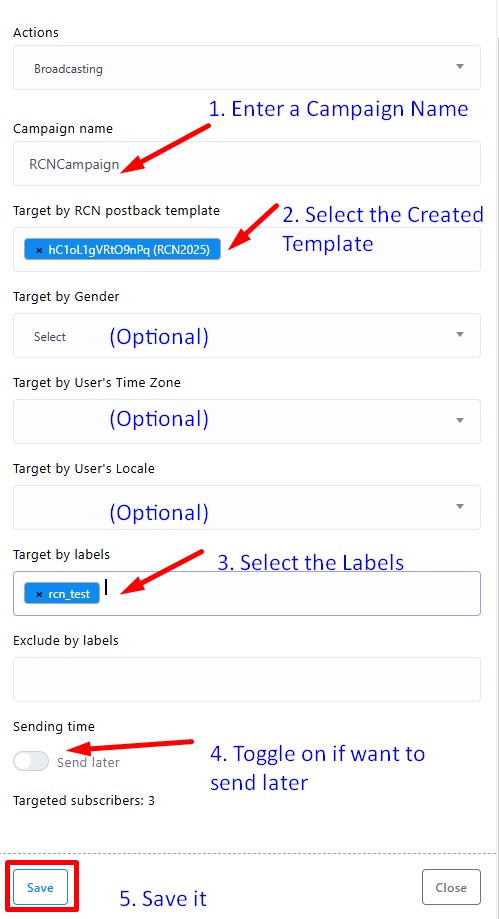
Configure the campaign. Enter a Campaign Name. Select the RCN template we created earlier (RCN 2025 on the example). Add the label we created earlier (rcn_test). Optionally, segment your audience further by selecting a Gender, Time Zone and Locale. Toggle on Sending Time if you want to send later. Finally, save.
Double click on the Start Bot Flow to configure it. Provide a title and save.
Add the elements of the campaign. For example, click on compose next message and take an image element. Upload an relevant image and click on compose next message again. Then, take a text element and provide adequate information about the promotion or sales. Optionally, toggle on the Typing Indicator.
Finally, save the campaign. That’s it — your message will land even if the user hasn’t interacted in weeks.

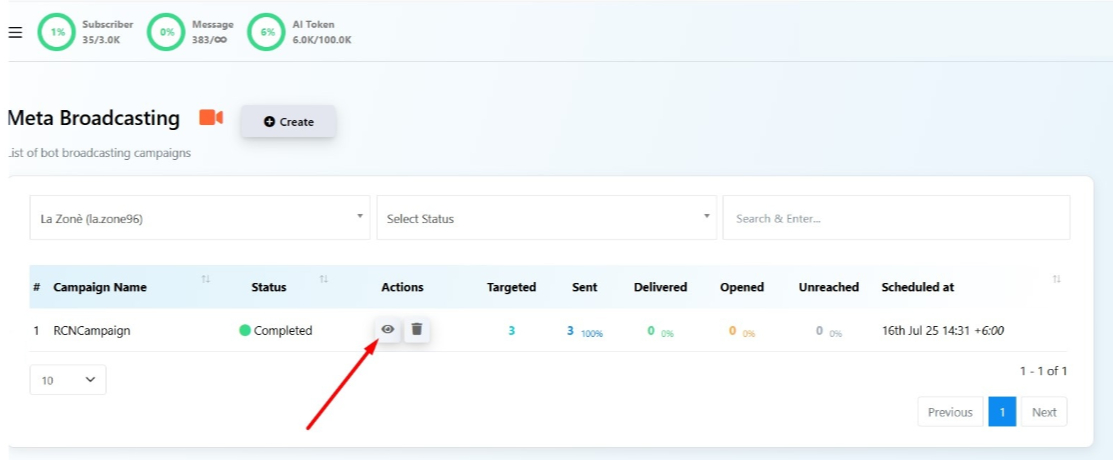
Assessing the Campaign Results
Go to the Facebook Broadcasting Section and look for your campaign. Click on the view icon to assess the report.
And that’s it! Start using BotCommerce for Facebook Broadcasting today with RCN— and let your broadcasts drive results!
