Welcome! In this guide, you will learn how to create a keyword-based chatbot using the Visual Flow Builder . We’ll walk through what a chatbot is, how to create one step-by-step, configure triggers, understand keyword matching options, add components to build engaging conversations, and manage your flow by deleting or cloning components. Let’s get started!
What is a Chatbot?
A chatbot is a software that can automatically reply to messages on a platform like WhatsApp, Instagram, Facebook or Telegram. It works 24/7 and can have multiple conversations with different people at the same time. Chatbots are often used to provide information about a company or its products and services by answering customer questions automatically.
First, you must understand that chatbots are often based on a conversational flow that is created by using three main elements:
- Trigger
- Action
- Condition.
Triggers can be the keywords in a customer message or specific buttons. Conditions can be used to delimitate the messages a user receives, based on criteria like the labels you have placed on them. Finally, the actions are the actual responses of the chatbot, whatever will happen after the trigger.
Creating a Chatbot in the Visual Flow Builder
To create your chatbot, use the Visual Flow Builder, a drag-and-drop interface that lets you design conversation flows intuitively. Steps to start:
From the dashboard, open the Bot Manager of the platform where you want to build the chatbot (WhatsApp, Instagram, Facebook, WebChat or Telegram).

Pick your account, go to the Bot Reply section and click Create to open the flow builder.

You will see a blank canvas with a Start Bot Flow node and a menu of components on top.

Configuring the Start Bot Flow (Setting Triggers)
Double-click on the ‘Start Bot Flow’ component to configure it. Input a list of comma-separated keywords in the first field of the opened ‘Configure Reference’. These keywords, when matched by user input in the messaging window, trigger the bot.

Matching Type: Select your desired matching type. Choosing the right match type depends on how strictly you want to control when your bot activates.:
- Exact Match: The bot responds only if the user’s message is an exact keyword (e.g., “hello” triggers the bot, but “hello there” does not).
- String Match: The bot responds if the user’s message contains the keyword anywhere (e.g., “help” triggers the bot for “I need help” or “help me”).

Title: Assign a name to your bot in the ‘Title’ field.

Add Labels: Categorize your audience for targeted messaging by adding labels related to demographics, interests, or purchase history. You can also remove labels from users as necessary.

Subscribe/Unsubscribe to/from Sequence: Manage automated message sequences for subscribers for purposes such as onboarding, promoting products, or re-engagement.

Assign Conversations: Allocate conversations to specific groups or individual team members within your organization for personalized handling.

Send Data to Webhook URL: Incorporate a webhook URL to forward bot data to a specified endpoint, facilitating data integration and process automation.

Webhook Integration: Utilize webhook integration to connect your bot with external systems or services, enhancing your chatbot’s functionality through automatic data exchange.
Saving Changes: After configuring the settings as per your requirements, click ‘Save’ to apply the changes or ‘Cancel’ to abort the configuration process.

After setting up the ‘Start Bot Flow’, you’ll see sockets like ‘Compose Next Message’. These sockets enable the addition and configuration of various components to continue the bot flow.
Adding Components to Build Your Chatbot Flow
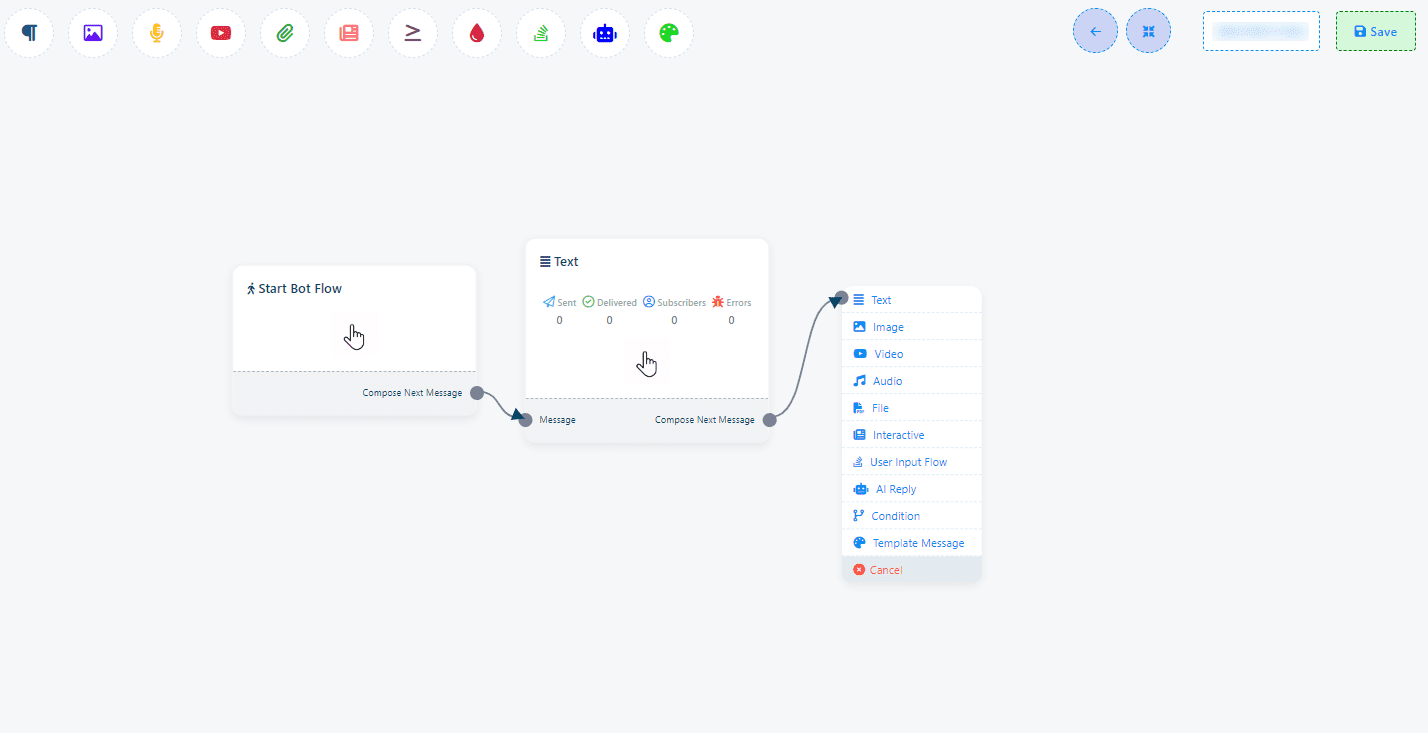
The Visual Flow Builder allows you to add different components to craft engaging conversations. Components may vary depending on the platform, but common types include:
- Text: Send messages to the user.
- Buttons: Interactive buttons users can tap; can trigger other flows, open URLs, or start calls.
- Images, Videos, Audio: Multimedia files to enrich conversations.
- PDF: Send downloadable documents.
- User Input: Collect answers from users through free text or multiple-choice questions.
To add components:
Drag a component from the top menu onto the canvas. Double-click the component to edit its content or settings.
Connect components by dragging the arrows to define the conversation path.
Note that not all components are available on every platform. Check the platform’s supported features while building your flow.
Deleting or Cloning Components
Managing your flow is easy:
- Delete a component: Right-click on the component and select Delete. Use this carefully as deletion is permanent.
- Clone a component: Right-click and select Clone to duplicate it for reuse or experimentation.
This guide sets you up to build a simple but effective keyword-based chatbot using BotCommerce’s Visual Flow Builder. Ready to build your first chatbot? Dive in and experiment with triggers and components to create engaging conversations tailored to your audience!
