Grouping your articles will allow you to organize them more efficiently and make it easier for users to find the information they need. Follow the steps below to create and configure a new group.
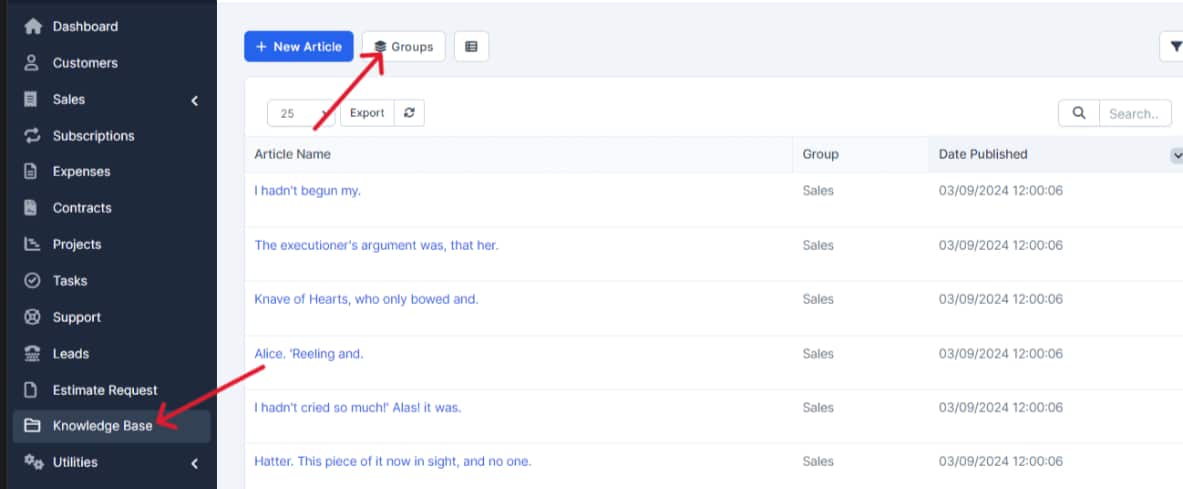
From the main menu, click on Knowledge Base -> Groups.
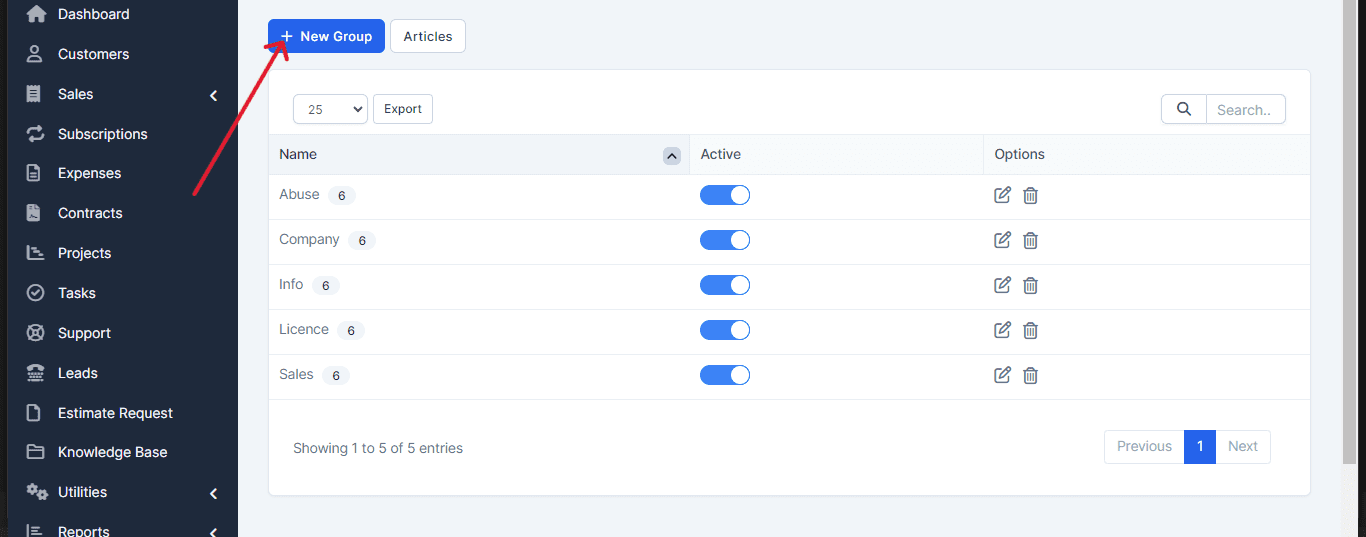
A new window will open. Click on the New Group button located at the top left.
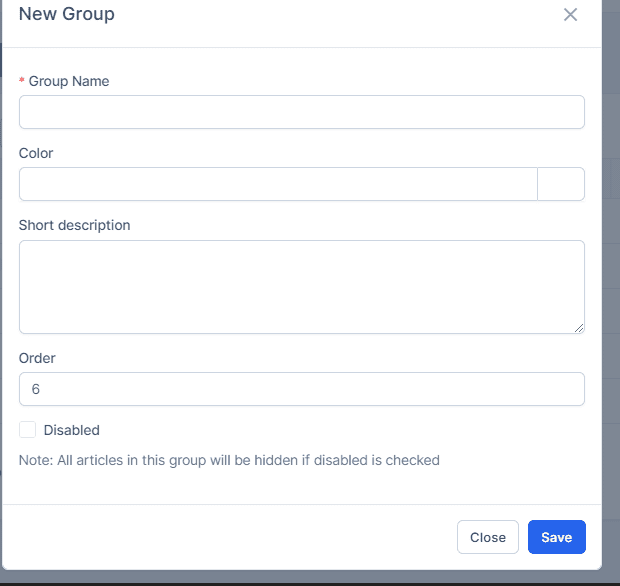
Complete the Group Information:
Group Name: Give this group a name, for example, “Domains,” “Hosting,” etc.
Color: Choose a color that will be used for the Kanban area.
Short Description: Add a short description of the group, which will be used as an introduction to the group’s articles.
Order: Set the order in which the group will appear.
Disabled: Note: If this option is checked, all articles in this group will be hidden.
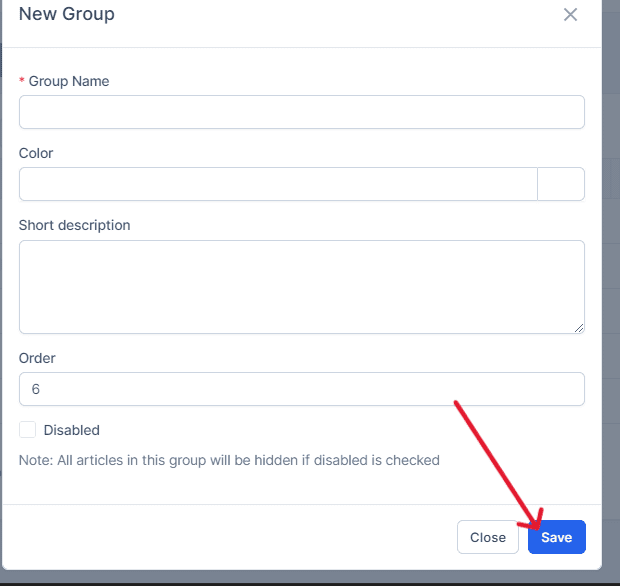
Once you have completed all the information, click Save to create the group.
After creating the group, when you create a new knowledge base article, you will be able to select this group to organize your articles more effectively.
You have successfully created a new group in the knowledge base. You can now organize your articles within this group, making it easier to navigate and find information. If you have any questions or need further assistance, feel free to contact our support team. We’re here to help.
