WhatsApp Message Templates are pre-approved messages that allow businesses to reach customers proactively—even outside the 24-hour messaging window. In BotCommerce, these templates are essential for sending messages through broadcasting campaigns, automated sequences, and even from the live chat when follow-ups are needed.
In this tutorial, we’ll walk you through the two main ways to create WhatsApp Message Templates:
- Using the WhatsApp Cloud API Manager inside Meta’s Business Manager.
- Using the Template Creator built directly into the BotCommerce platform.
Let’s get started so you can start sending powerful, personalized messages at scale.
Using the WhatsApp Cloud API Manager
Log into Facebook Business. Visit business.facebook.com and log in to your account.
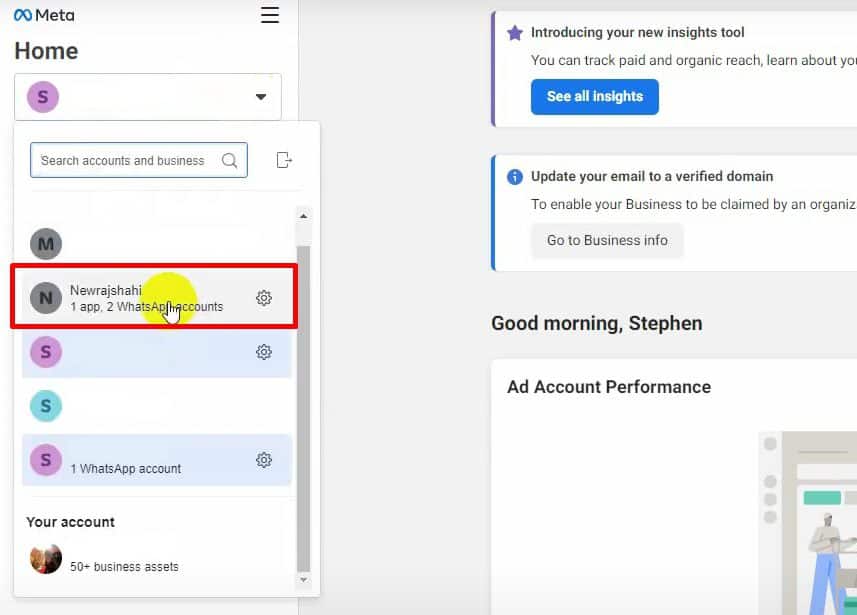
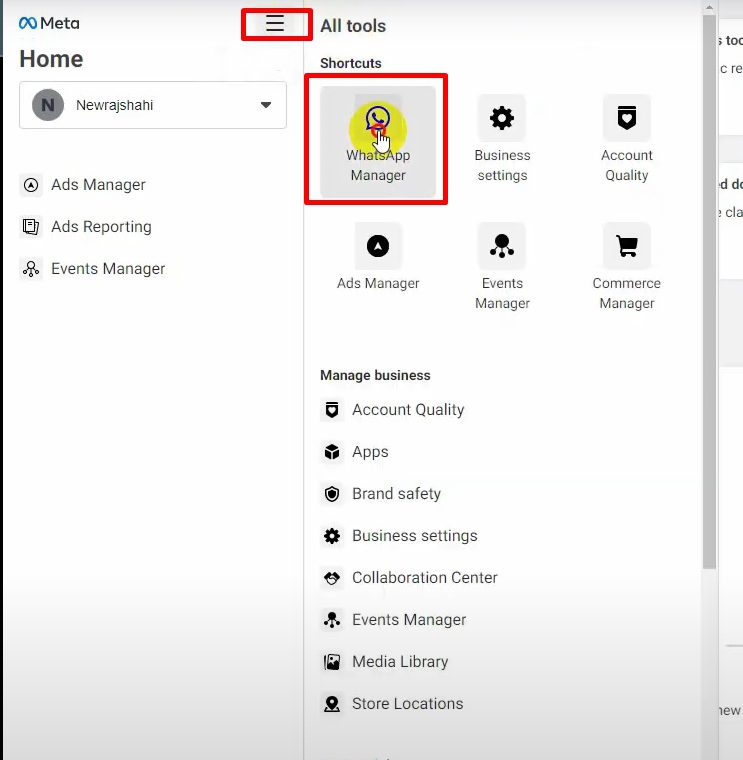
If you have multiple business accounts, select the appropriate one from the drop-down list. Click on the All Tools menu and select WhatsApp Manager.
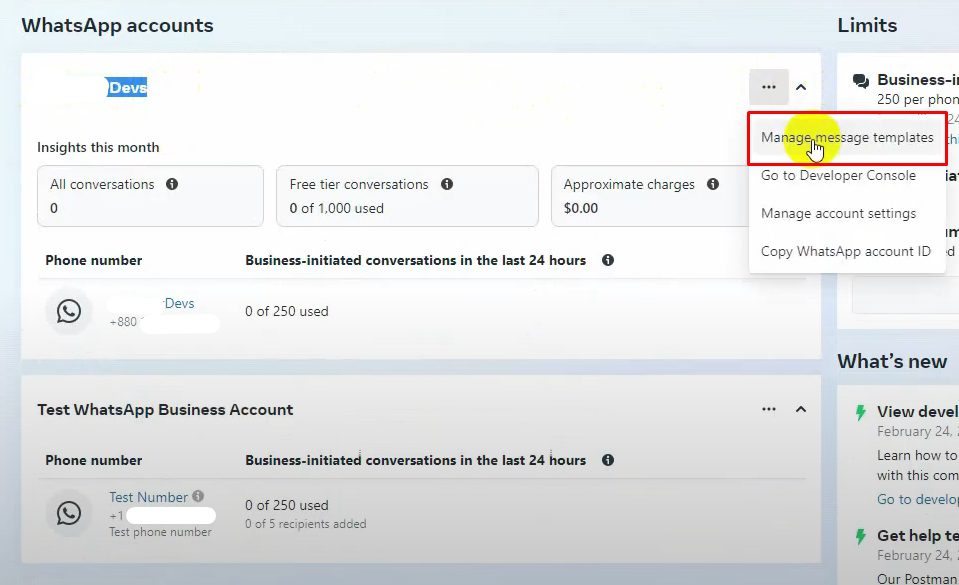
Create a New Message Template. In the WhatsApp Manager, locate your WhatsApp account and click on the three dots menu. Select Manage Message Templates. Click on Create Template to start a new template creation.
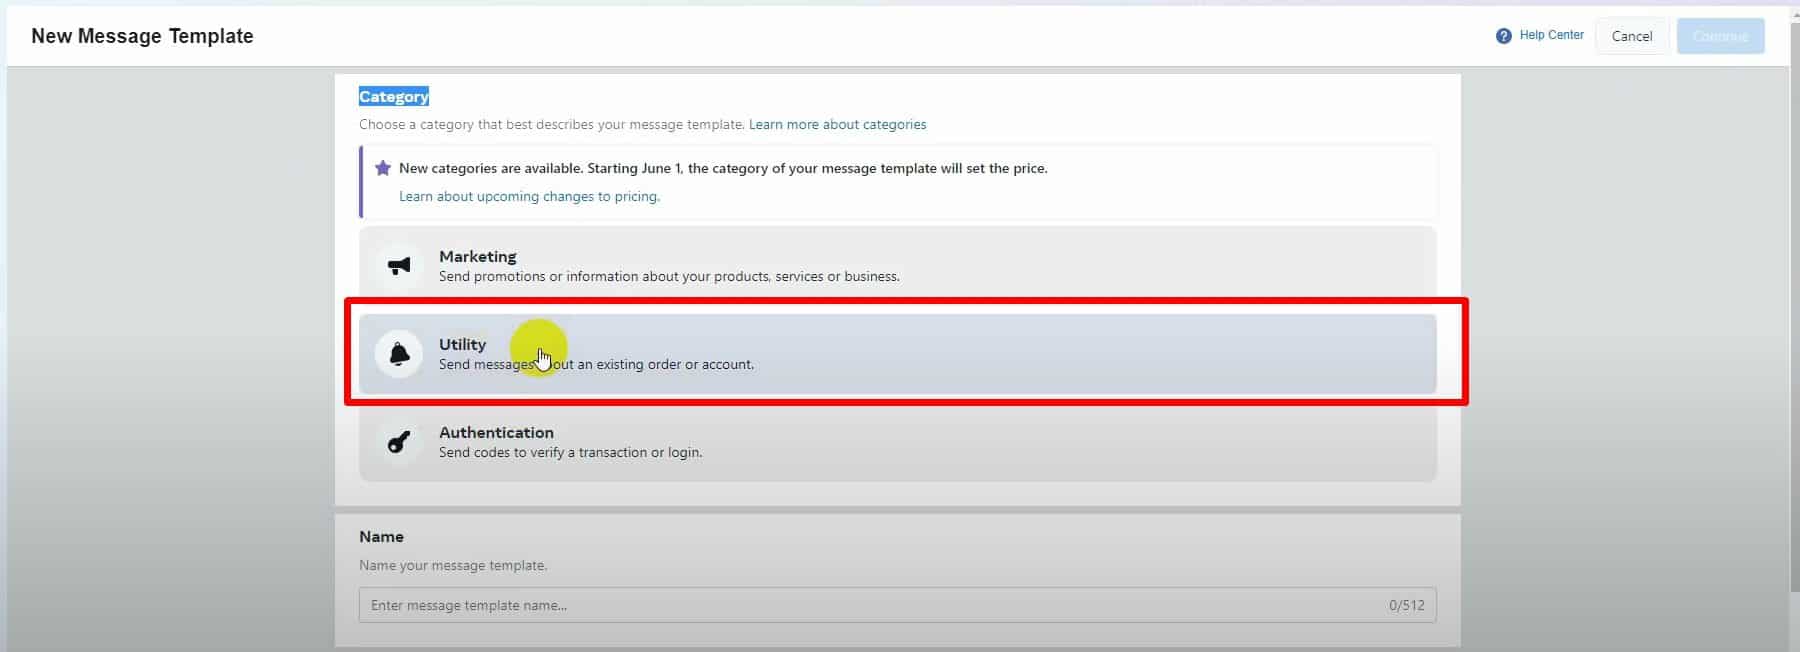
You will see three categories to choose from:
- Marketing: For promotions or product/service information.
- Utility: For messages related to existing orders or accounts.
- Authentication: For sending verification codes or login confirmations.
For this tutorial, select Utility to send order updates.
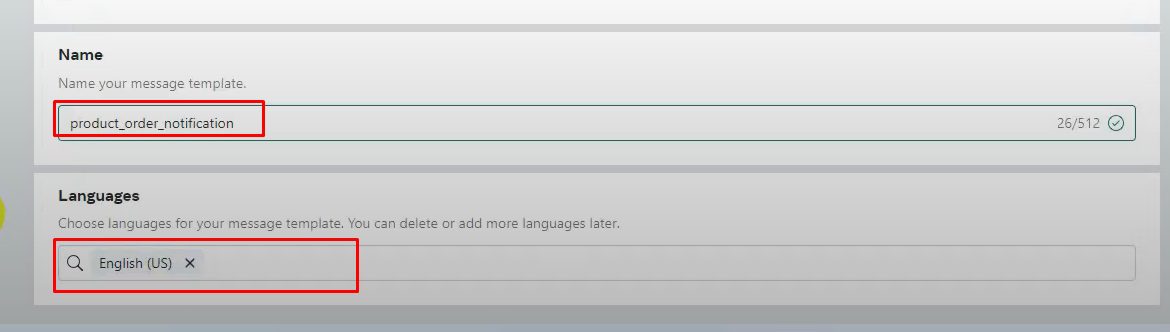
Configure the Message Template. Enter a unique name for your message template. Choose the language in which the message will be sent, and click on Continue to proceed.
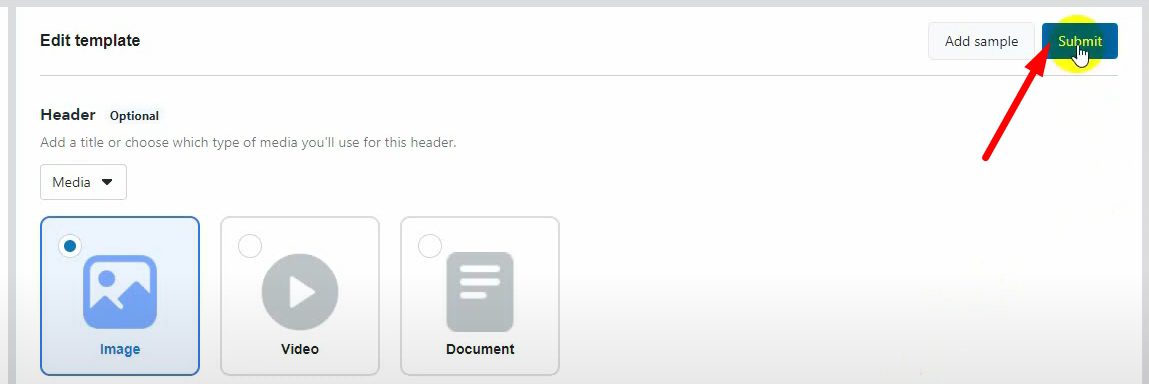
You can add a header to your message, which can be either Text or Media.

If you choose Text, a form will appear for you to enter the header text. If you select Media, you can choose from three options: Image, Video, or Document. For this tutorial, let’s select Image. You will have the option to upload the image when using this template.
Compose the Message Body. Write the body of your message. You can use variables to personalize the content.

Example message body: “Your order {order_number} has been shipped and is expected to arrive by {delivery_date}.”
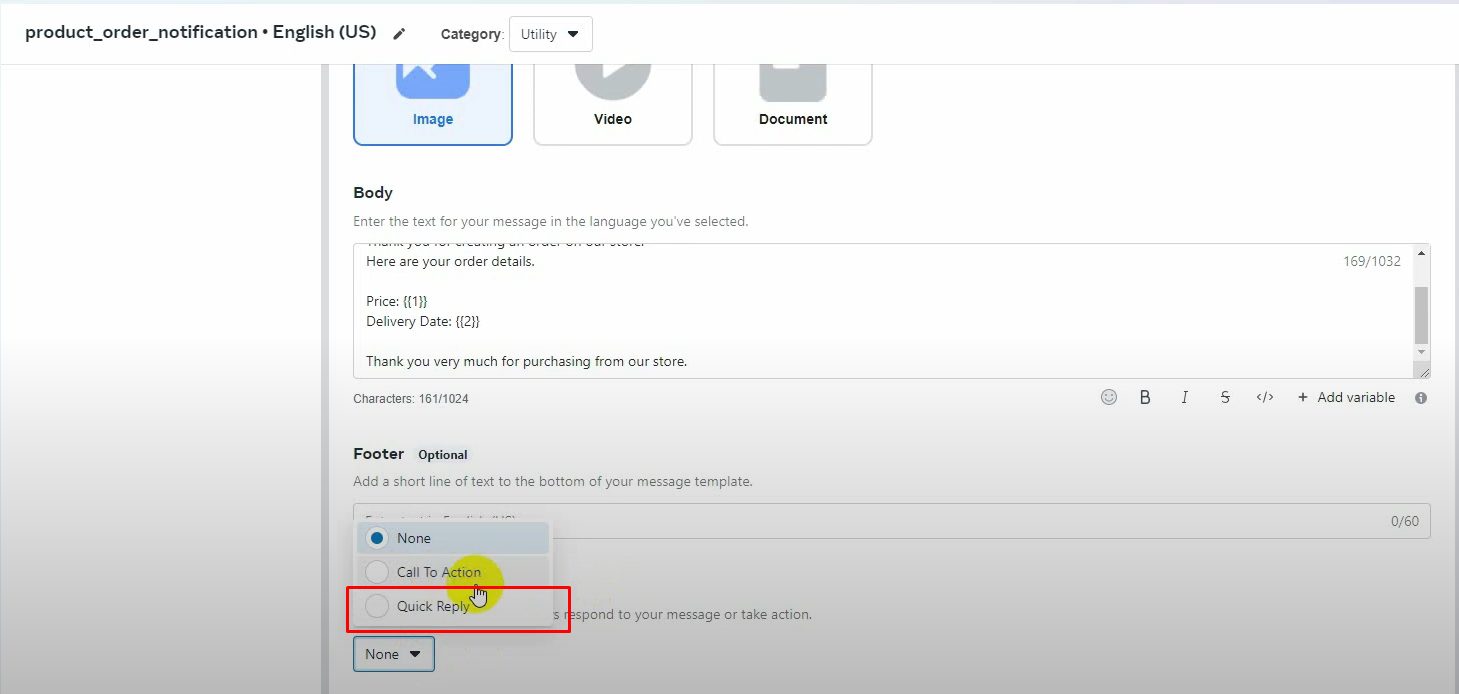
If you want, you can include a footer for additional information.
Add buttons. You can add Call to Action or Quick Reply buttons to your message. For this example, let’s add Quick Reply buttons. Write the text for the button (e.g., “Track Order”). To add another button, click on Add Button. These buttons can be linked to postbacks when using the message template.
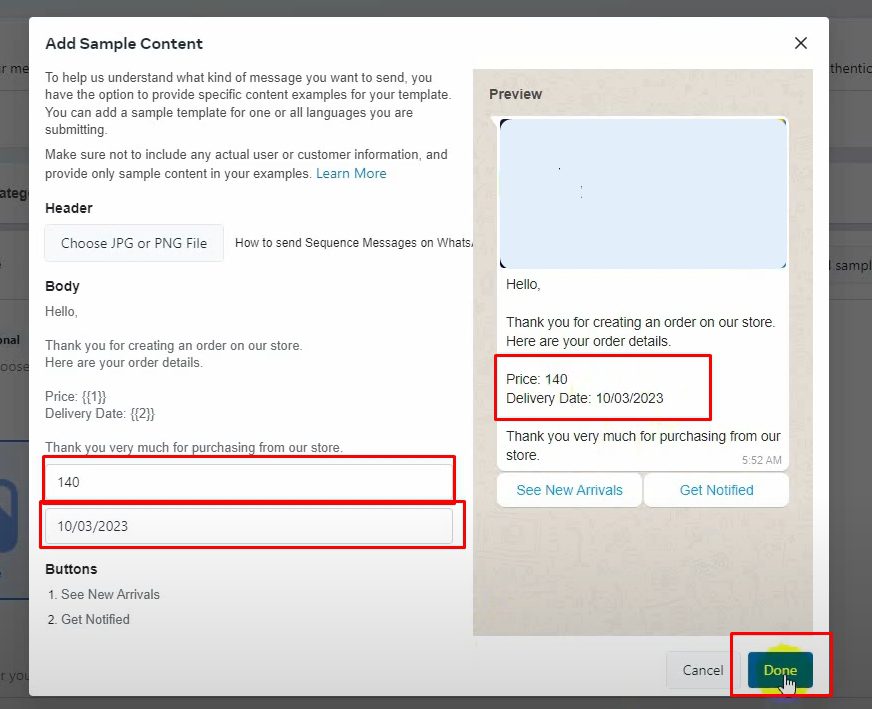
Provide Sample Data. Before submitting the template, you need to add sample data:
- Header Sample Data: If you used an image, provide a sample image.
- Variable Sample Data: Add sample data for any variables used in the message body.
Submit the Template. Once all fields are filled out, click on the Submit button.
The template will be sent to WhatsApp for approval. It will be marked as pending until verified. Refresh the page to check the status. Once approved, you can proceed to the next step.
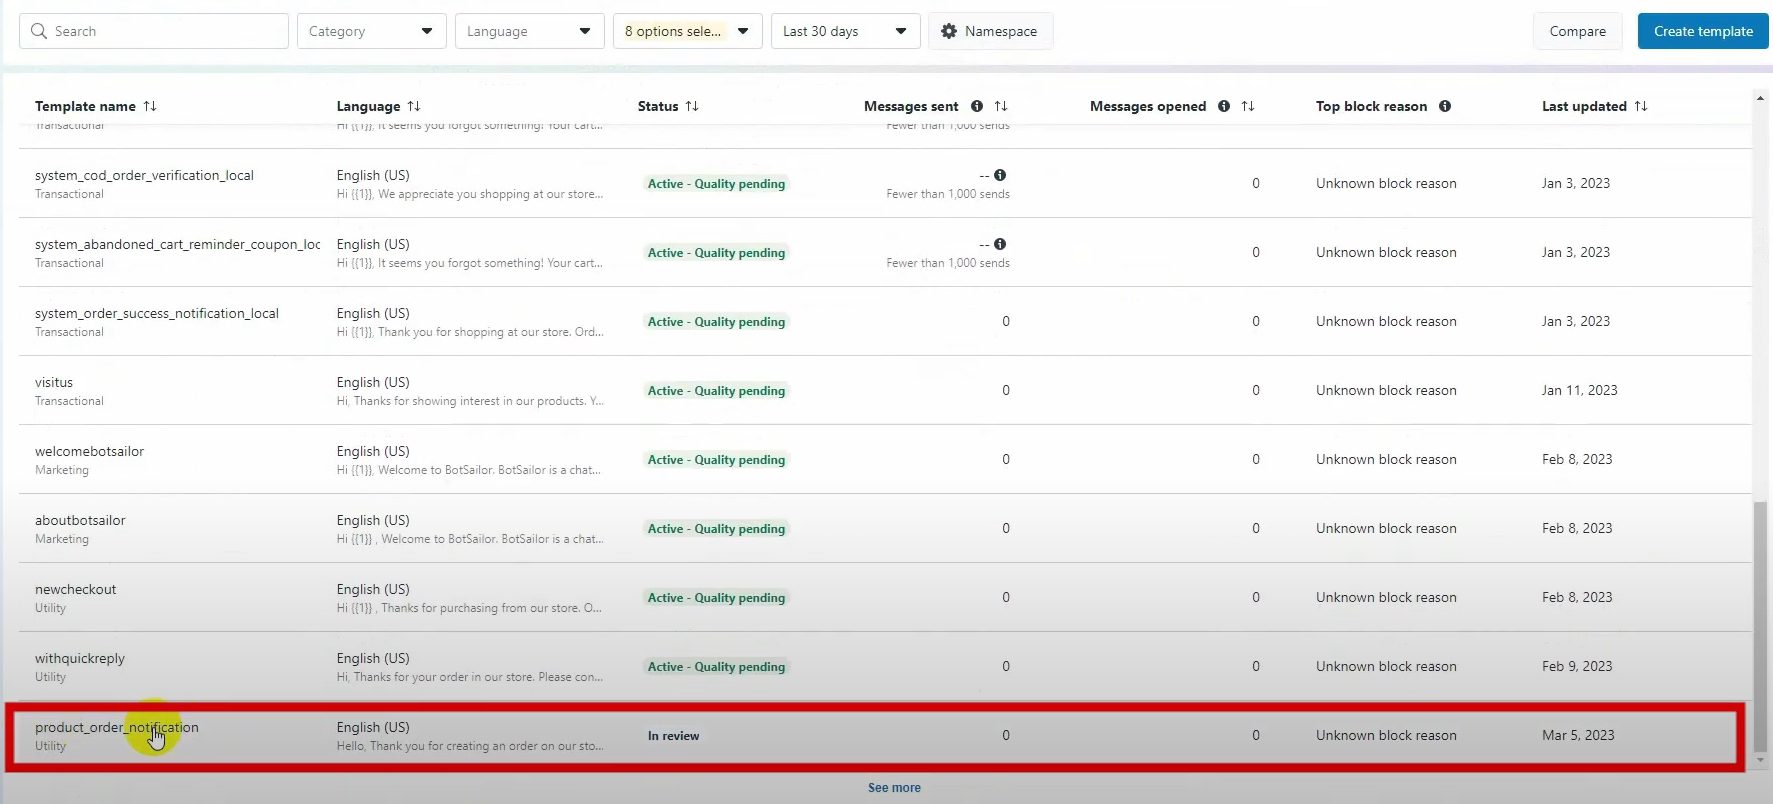
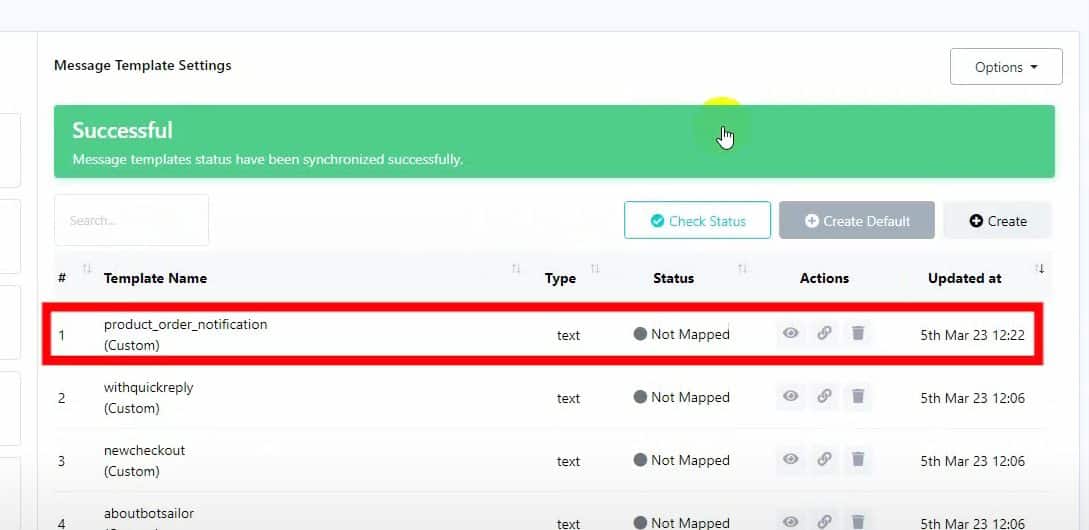
Integrate the Template in BotCommerce. Go to BotCommerce’s Message Templates section.

Click on Check Status to fetch the message template you created on the WhatsApp Cloud API.
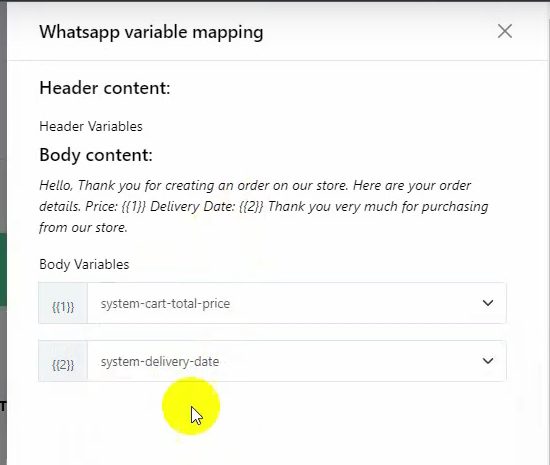
Once the template appears, click on Map Variables. Select the corresponding variables from the list or create new ones if necessary. Finally, click on the Save button.
Your Message Template is Ready. The template is now integrated and ready to be used within BotCommerce.
Using BotCommerce
Creating Templates Manually
Go to the Bot Manager Section. In the BotCommerce dashboard, navigate to the Bot Manager section. Then, click on the Message Template tab to create or edit predefined message templates for use in automated bot responses.
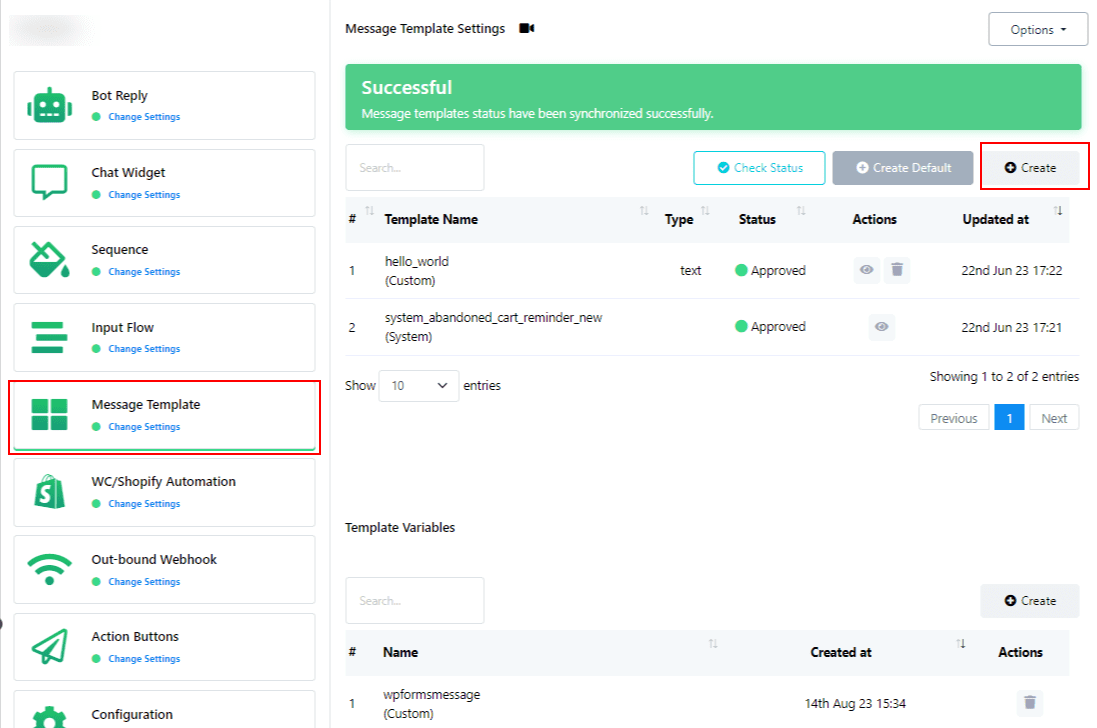
Creating a New Template. Click on the Create button to begin the template creation process. Provide a descriptive name for your template in the Template name field. Choose the language for your template from the available options.
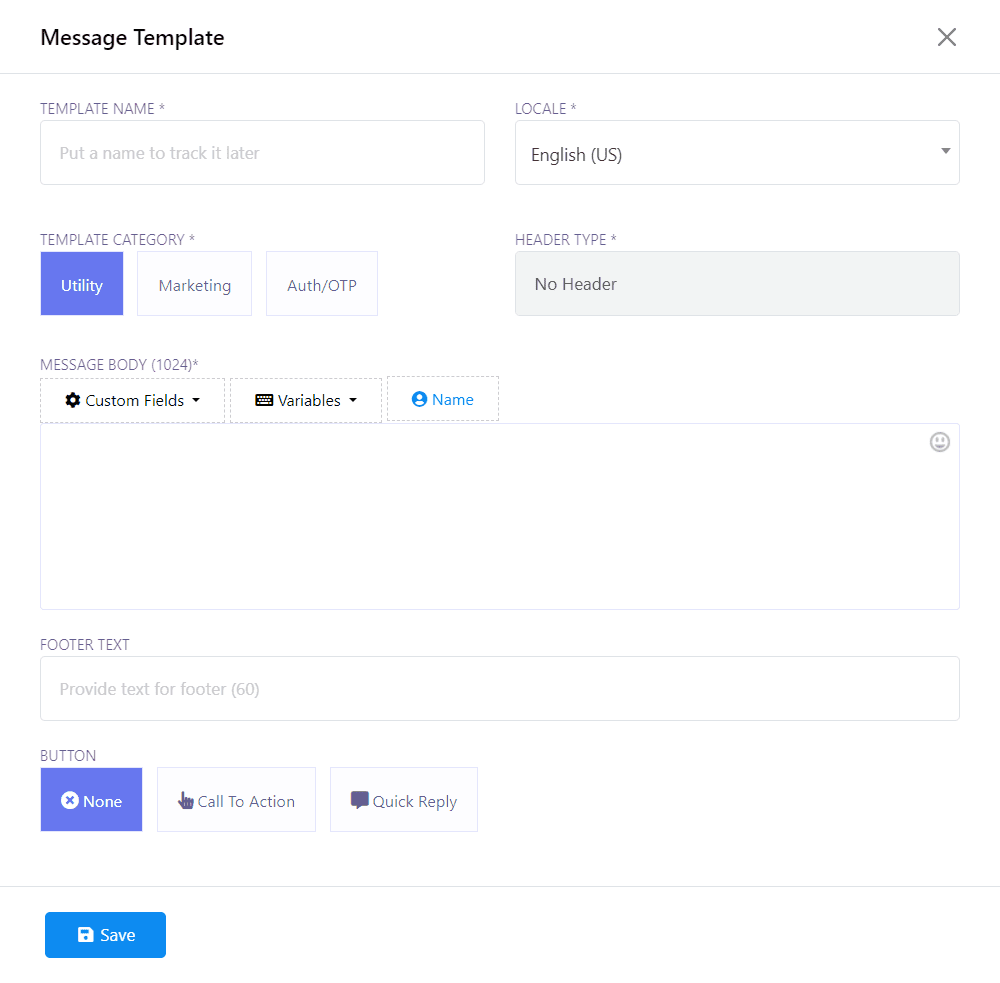
Configure the Template. You will be asked to fill the following fields:
- Template Category: Select the appropriate category for your template: Utility, Marketing, or Auth/OTP.
- Header Type: Specify the type of header for your template: Text, Image, Video or File.
- Message Body: Compose your message within the specified limit of 1024 characters.
- Footer Text: Optionally, include a footer for your template in the designated field.
- Button: Add a button to your template if required, choosing from Call To Action or Quick Reply buttons.
Once all fields are completed, click the Save button to save your template.
Check the status. After saving, check the status of your template using the Check Status button. Initially marked as Submitted, the status will be updated to Approved once reviewed and approved.

Creating Default Templates
Utilize the Create Default button to generate default templates for common scenarios like Order Status and abandoned cart recovery. Remember to get them approved before use.

Using Variables
Use existing template variables or create new ones as needed from the Template Variable section. You can then insert them in your template to later personalize them once you send it.

