You will learn how to create a keyword-based WhatsApp chatbog using BotCommerce by following the next steps:
#
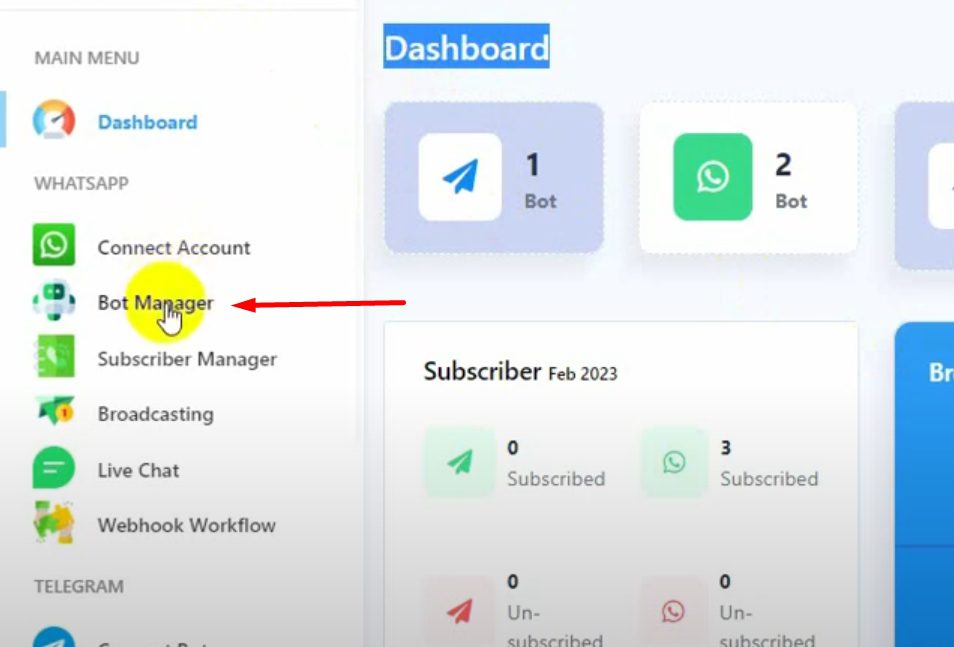
Access the Bot Manager: #
-
- Log into your BotCommerce dashboard.
- Navigate to the “Bot Manager” menu.

- Select the bot account for which you want to create the WhatsApp chatbot.
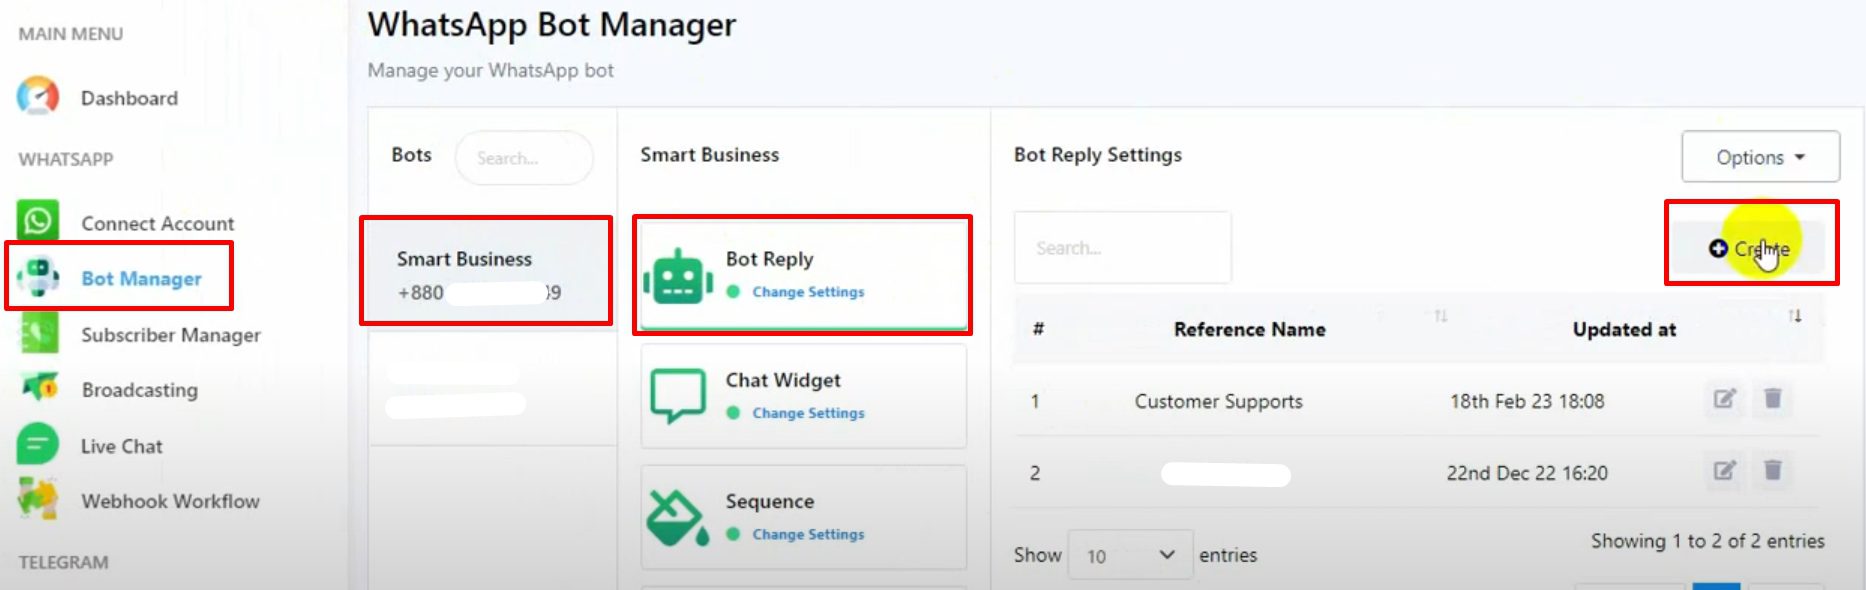
Create a New Bot Reply: #
-
- Click on “Bot Reply” under the selected bot account.
- Click on the “Create” button to open the Visual Flow Bot Builder Canvas.

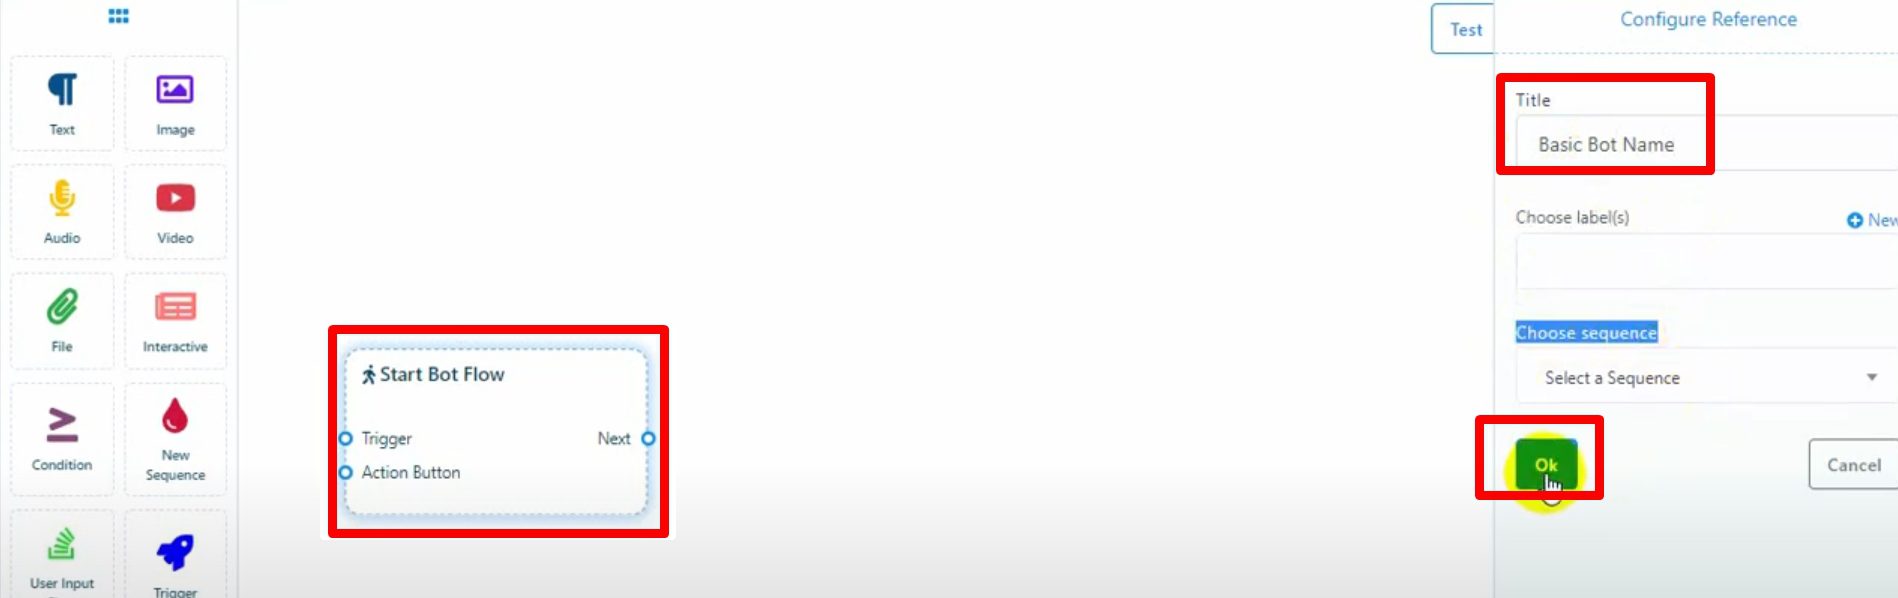
Name Your Bot: #
-
- Double-click on the “Start Bot Flow” component.
- In the configure reference modal, enter a name in the title field and optionally choose a level and sequence.
- Click “OK” to save.

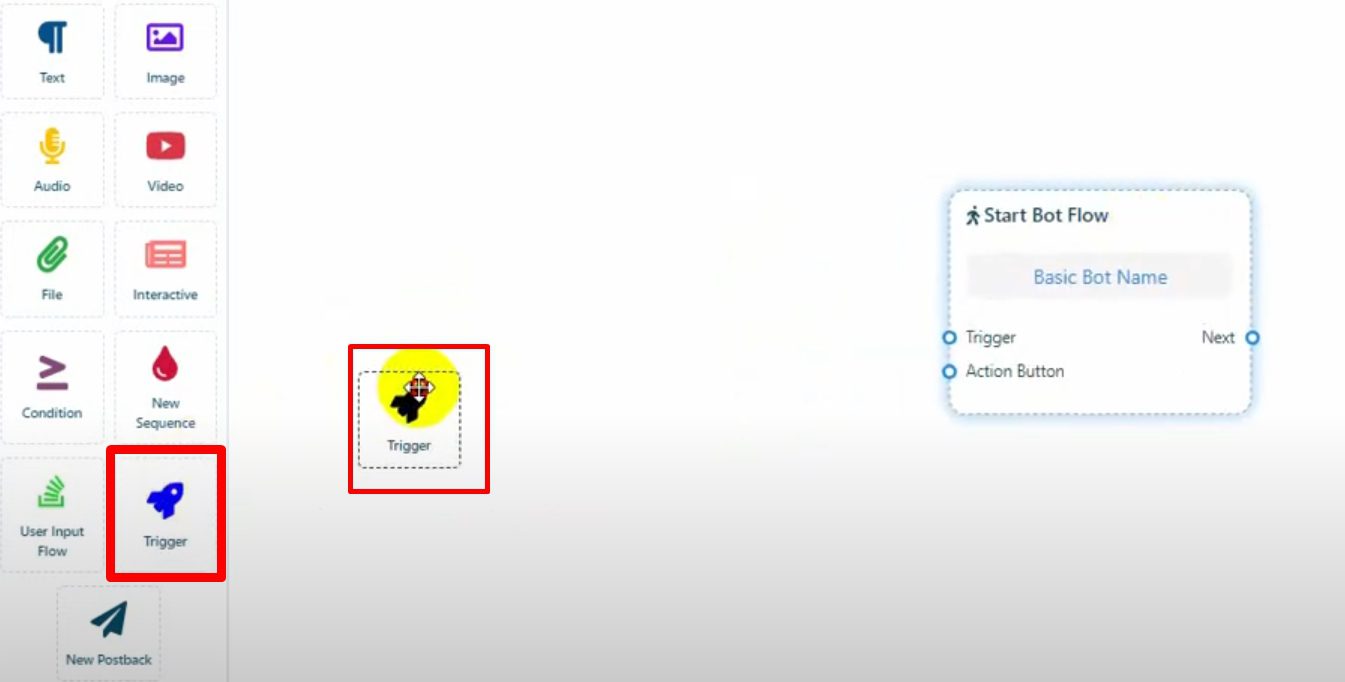
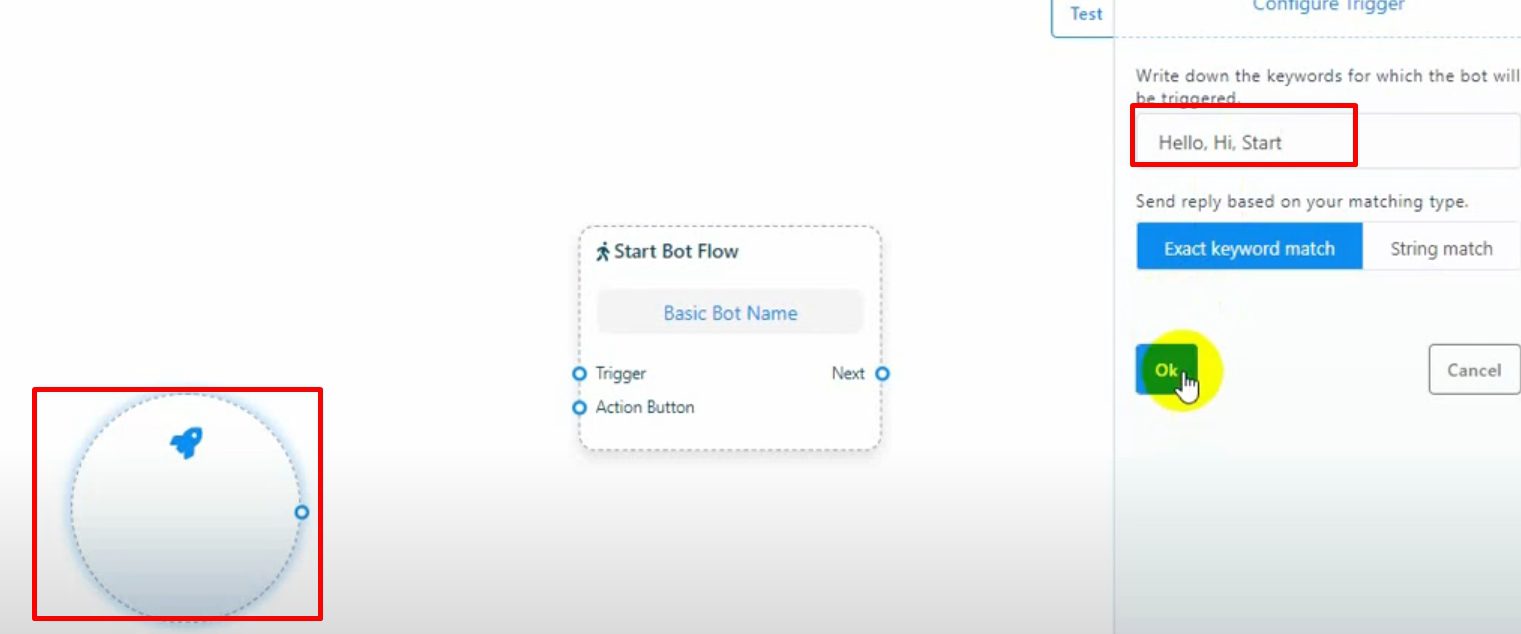
Add a Trigger: #
-
- From the document menu on the left, select and drag the “Trigger” component onto the canvas.

- Double-click on the trigger to open the configure trigger modal.
- From the document menu on the left, select and drag the “Trigger” component onto the canvas.
-
- Enter keywords such as “hello,” “hi,” or “start” to initiate the conversation.
-
- Click “OK” to save.
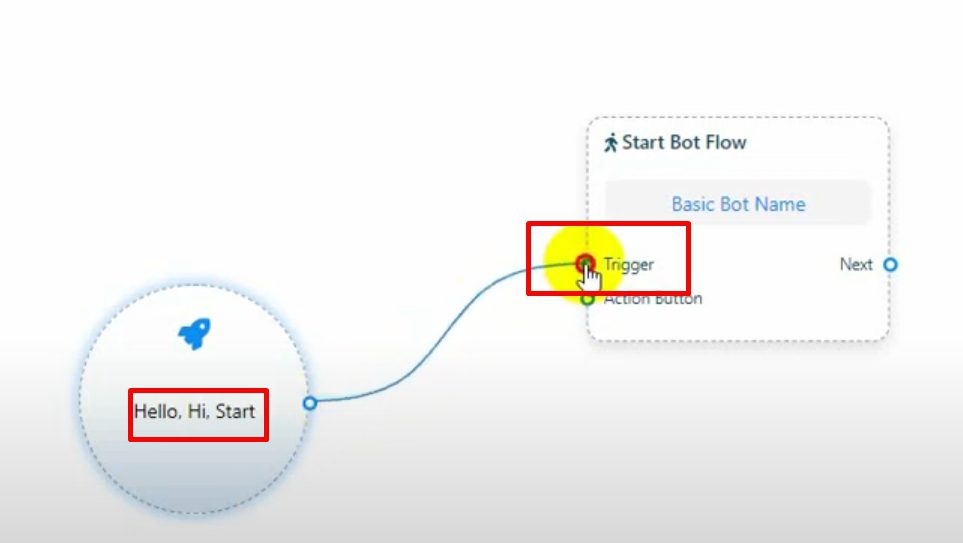
Connect the Trigger to the Bot Flow: #
-
- Drag the cursor from the trigger output socket to the reference input trigger socket of the start bot flow.
- This successfully links the trigger to your bot flow.
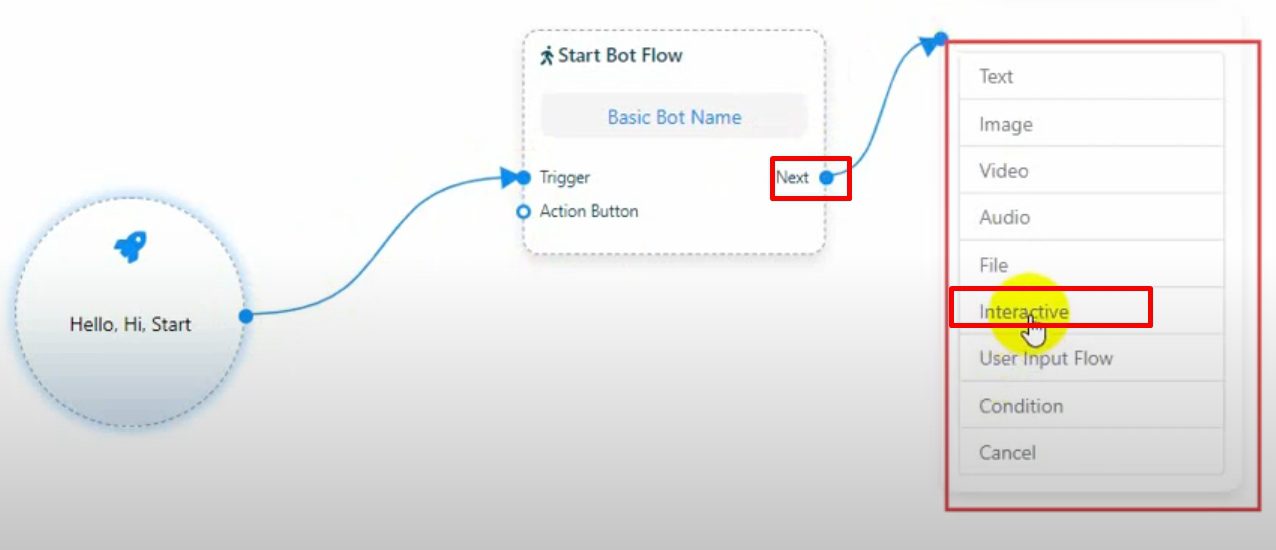
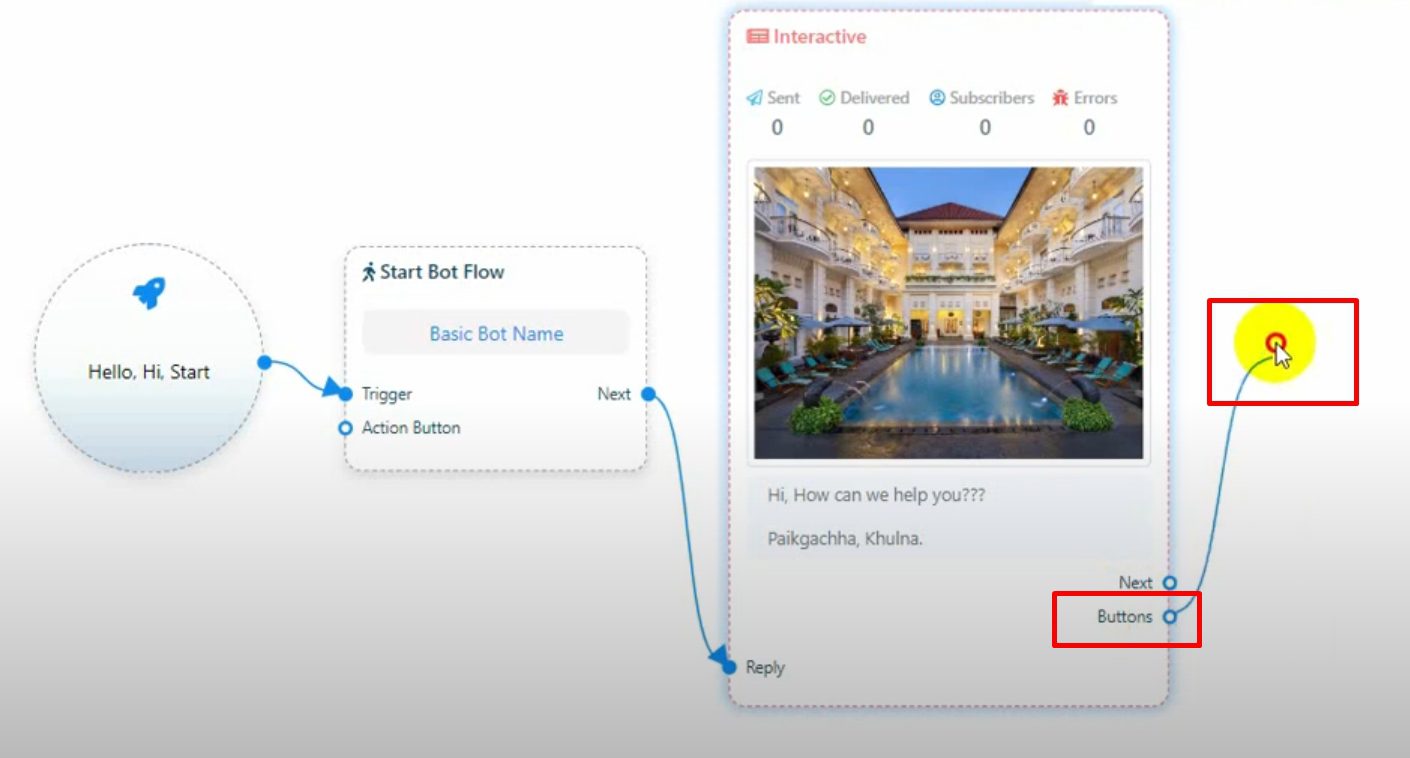
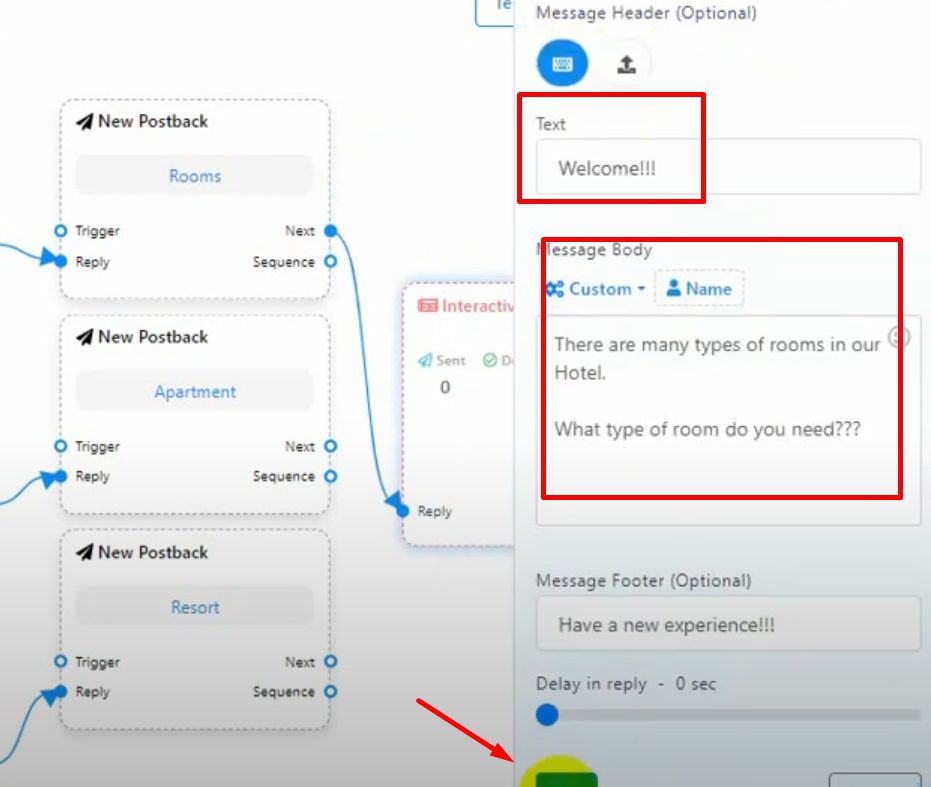
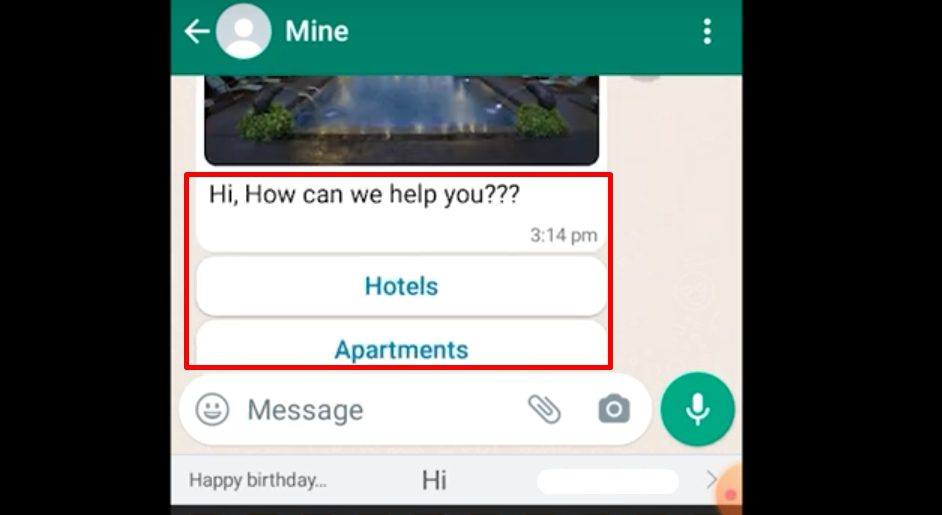
Add an Interactive Component: #
-
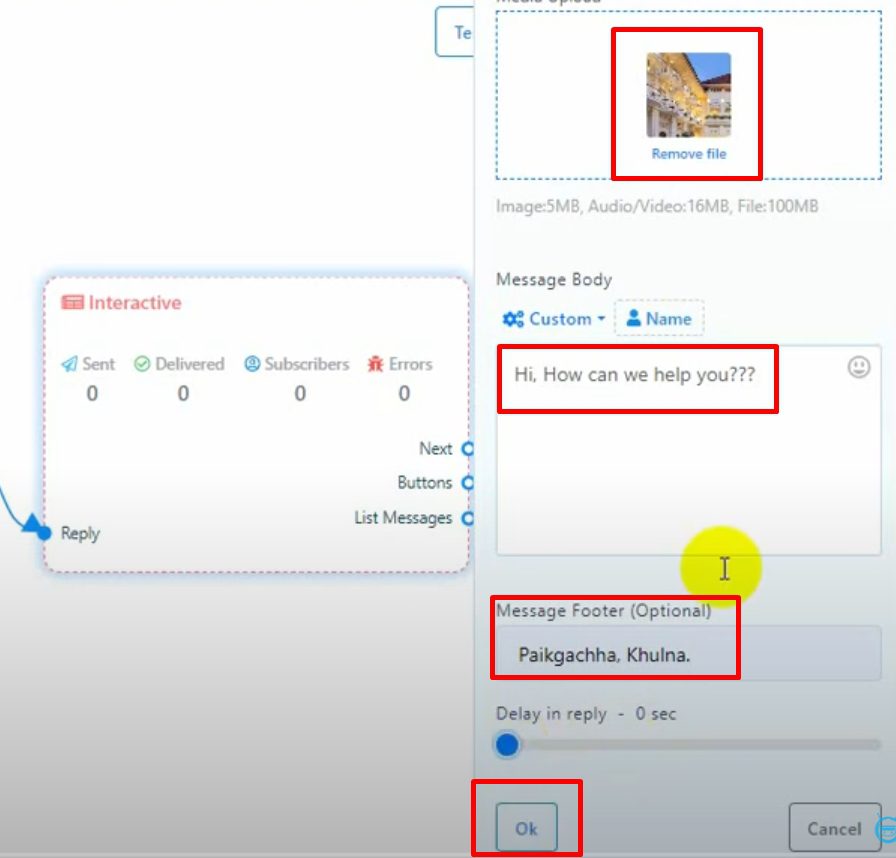
- From the next socket of the start bot flow, drag and drop an interactive component onto the canvas.

- From the next socket of the start bot flow, drag and drop an interactive component onto the canvas.
-
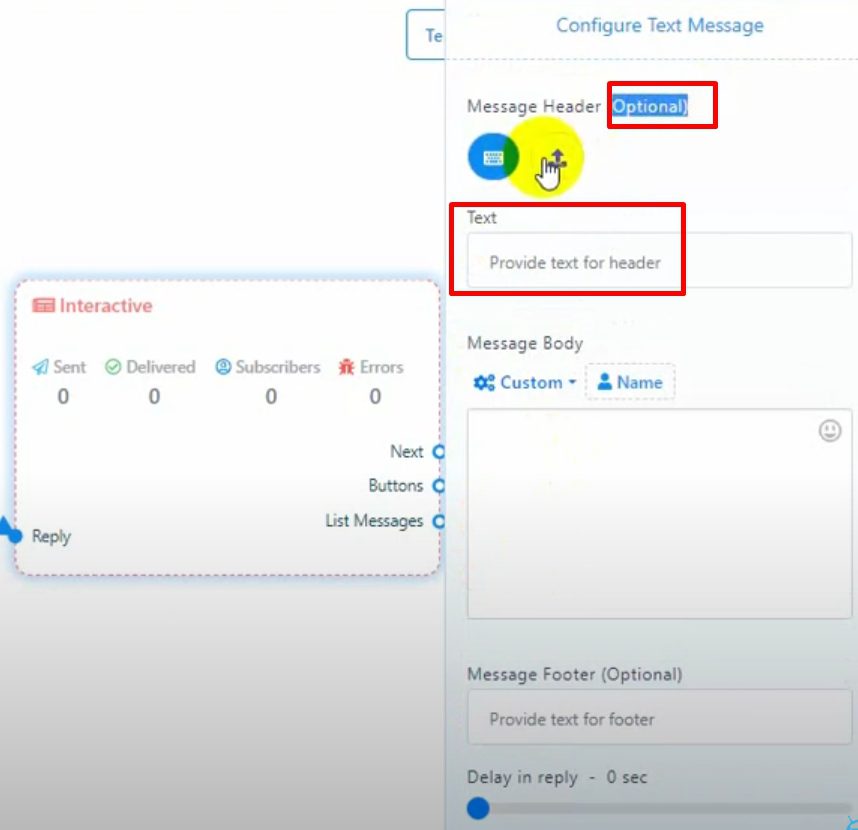
- Double-click on it to open the configure text message modal.

- Double-click on it to open the configure text message modal.
-
- Fill in the message header, body, and footer as needed. You can set a delay time for replies.

- Click “OK” to save.
- Fill in the message header, body, and footer as needed. You can set a delay time for replies.
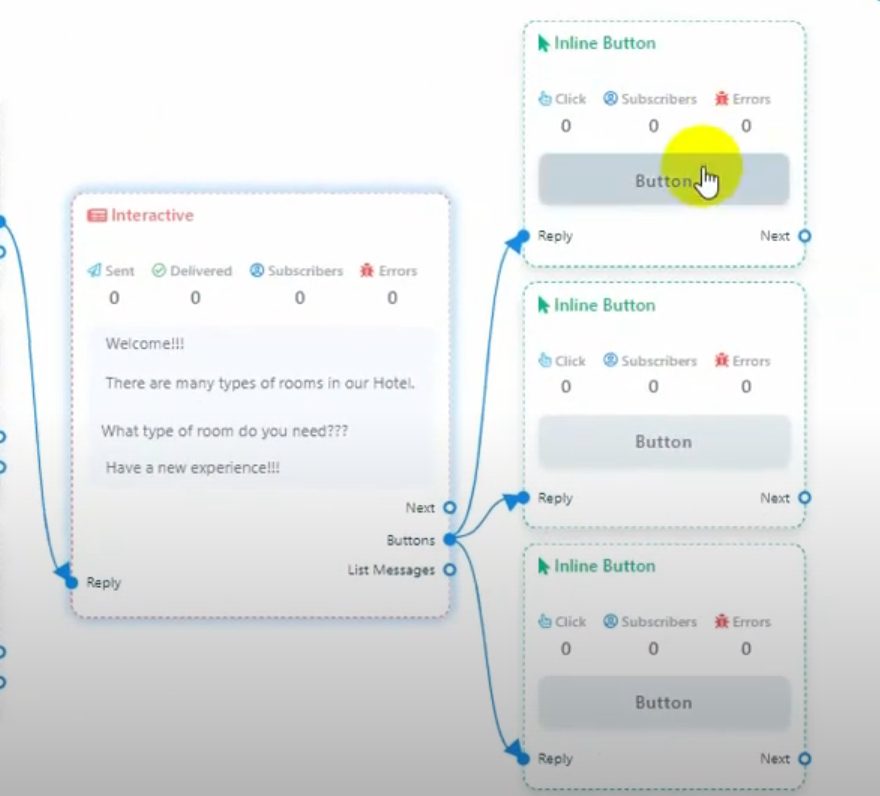
Create Inline Buttons: #
-
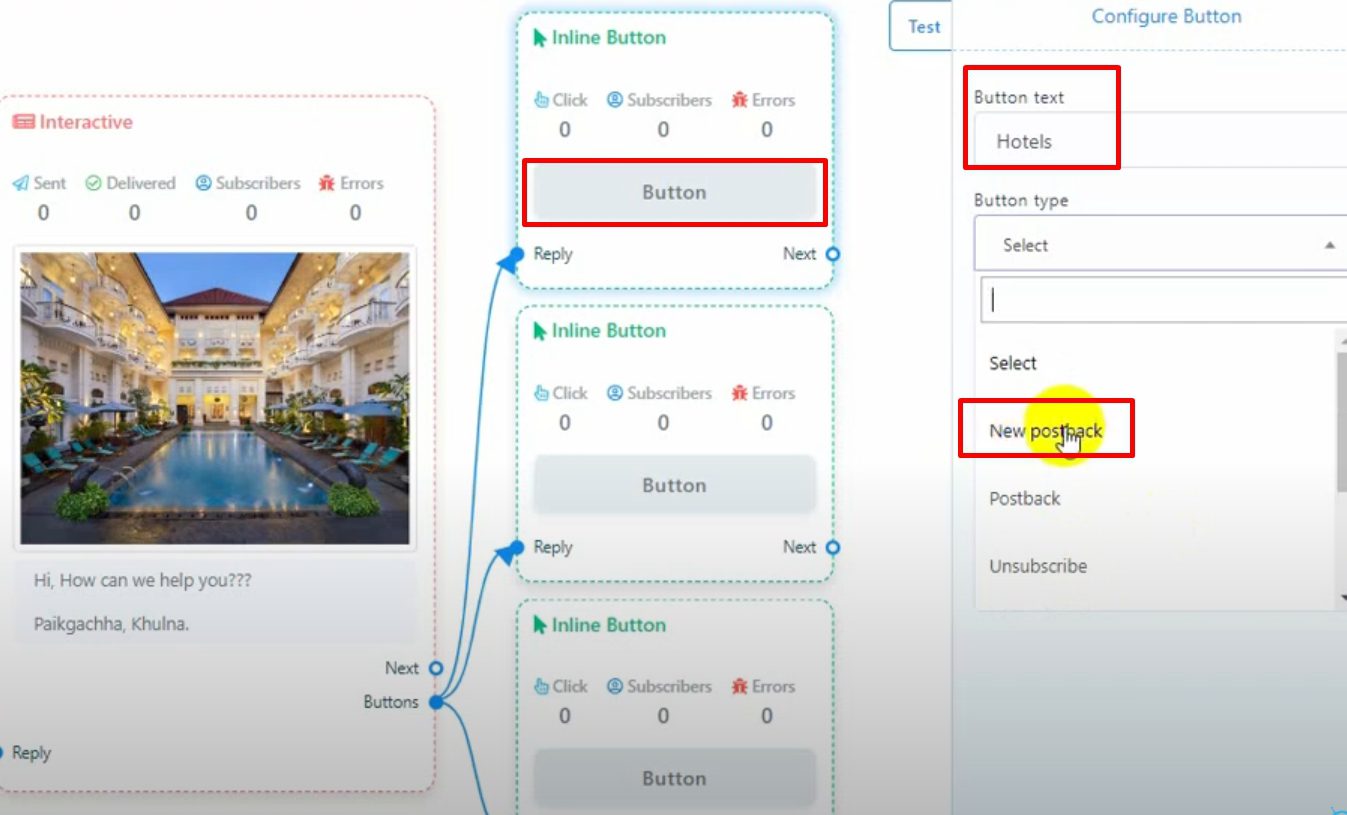
- From the interactive component’s buttons socket, drag and drop the inline button component onto the canvas.


- From the interactive component’s buttons socket, drag and drop the inline button component onto the canvas.
-
- Double-click to configure it, entering a name in the button text field and selecting “New Post Back” as the button type.
- Click “OK” to save.
- Repeat to create and configure additional inline buttons.
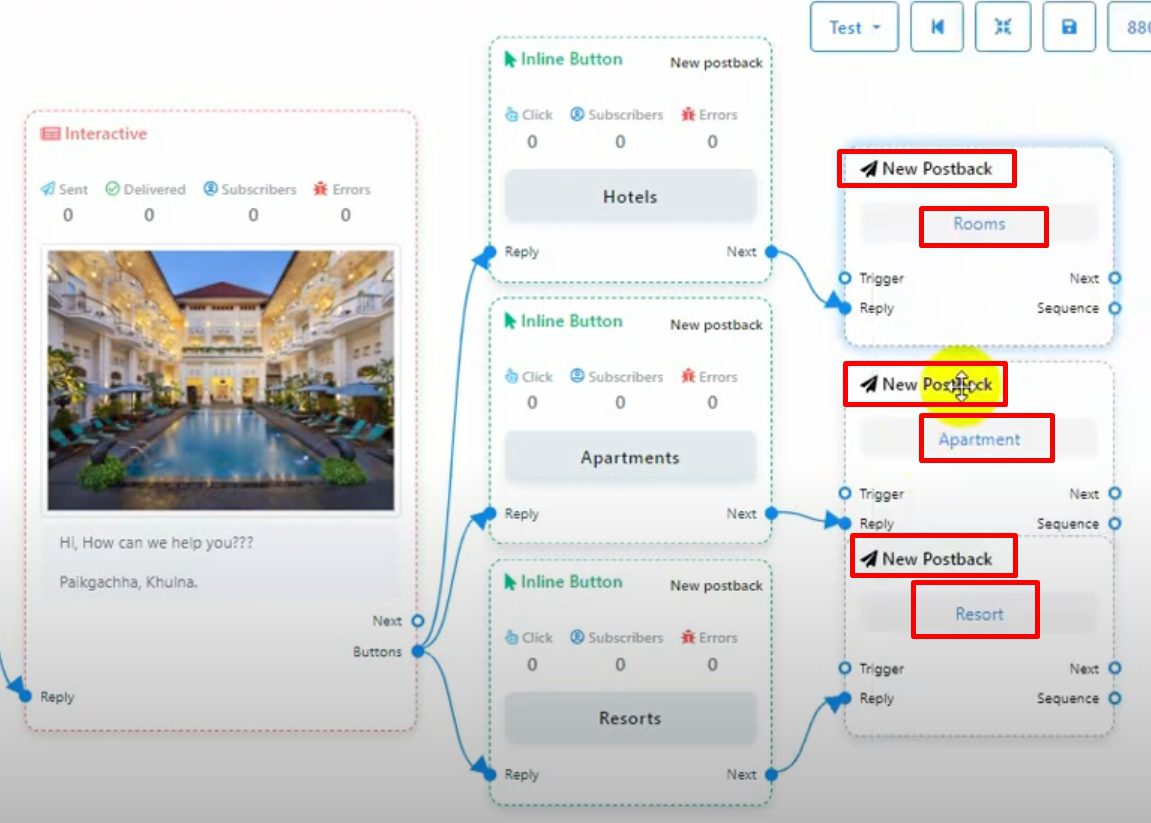
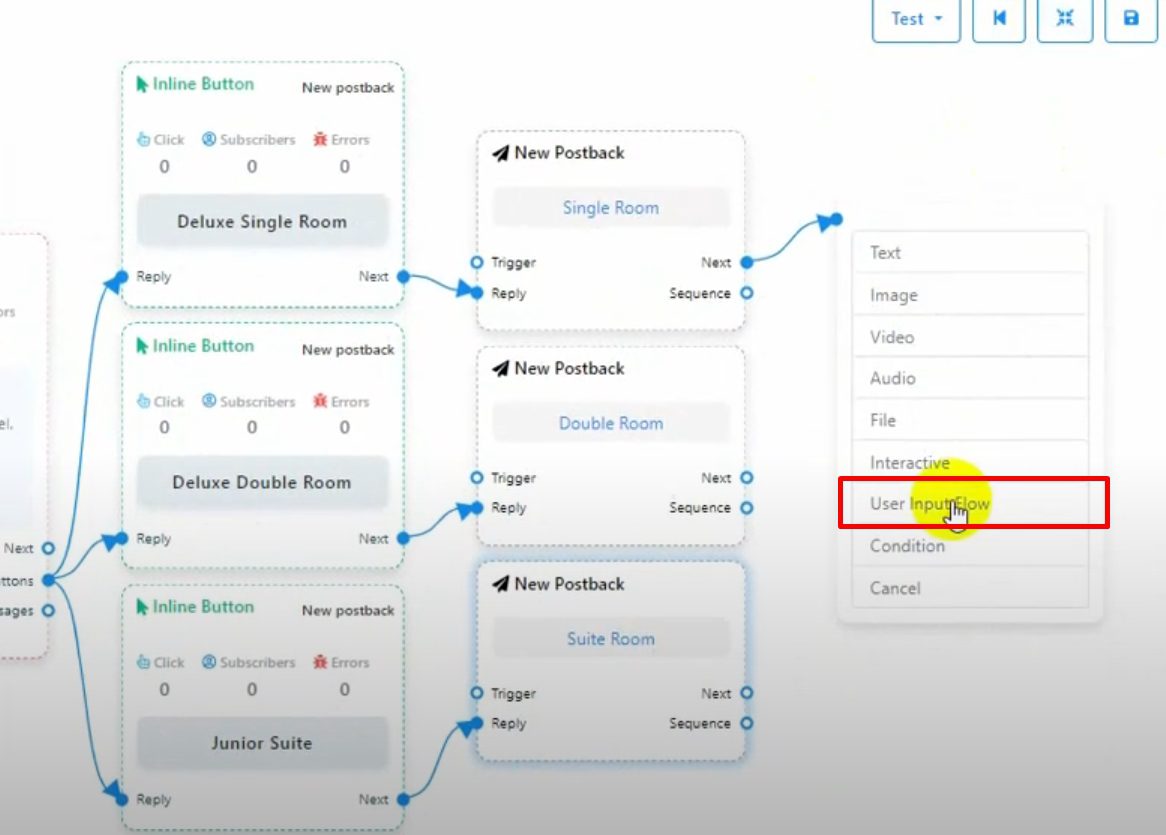
Configure Post Back Components: #
-
- Double-click on each new post back component to configure it.

- Double-click on each new post back component to configure it.
-
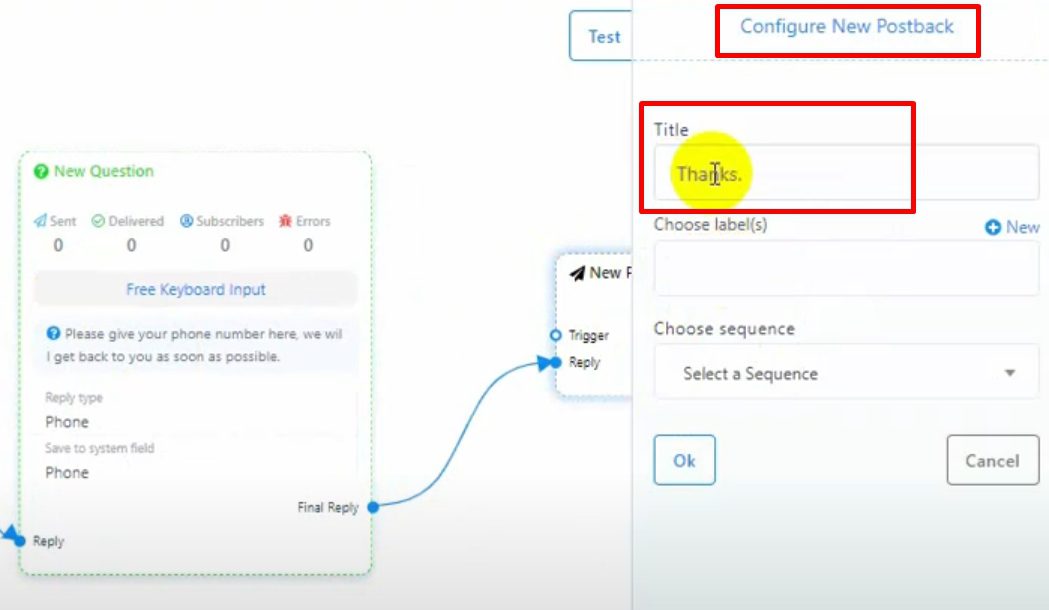
- Enter a title and click “OK” to save.
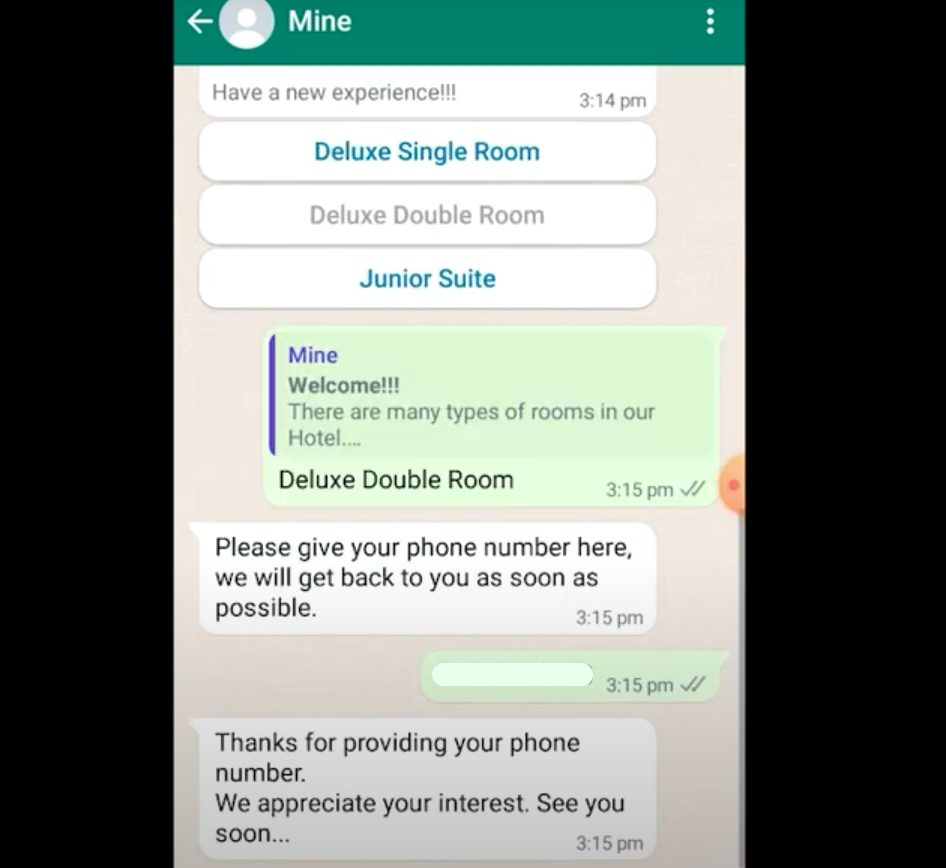
- From the next socket of the new post back, select any component such as text, audio, video, or condition, and configure it similarly.

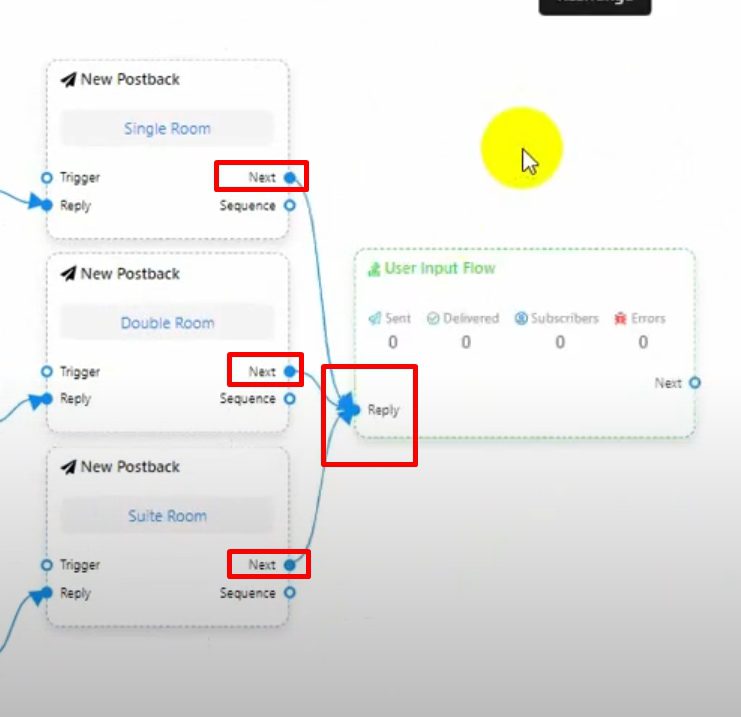
Add a User Input Flow: #
-
- Add a user input flow component connected to your post backs.

- Add a user input flow component connected to your post backs.
-
- Double-click to open the modal form, select “Add New Input Flow,” and name the campaign.


- Double-click to open the modal form, select “Add New Input Flow,” and name the campaign.
-
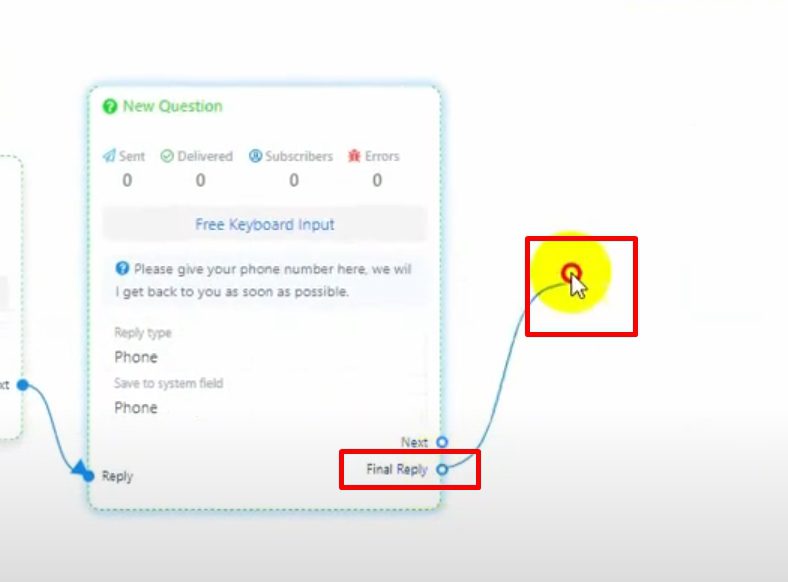
- Click “OK” to save and configure the new question component.
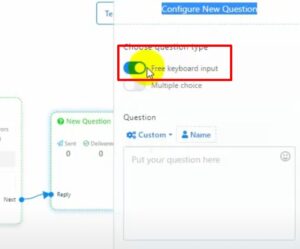
- Select question types (free keyboard input or multiple choice), configure them, and save.

Finalize and Save the Bot: #
-
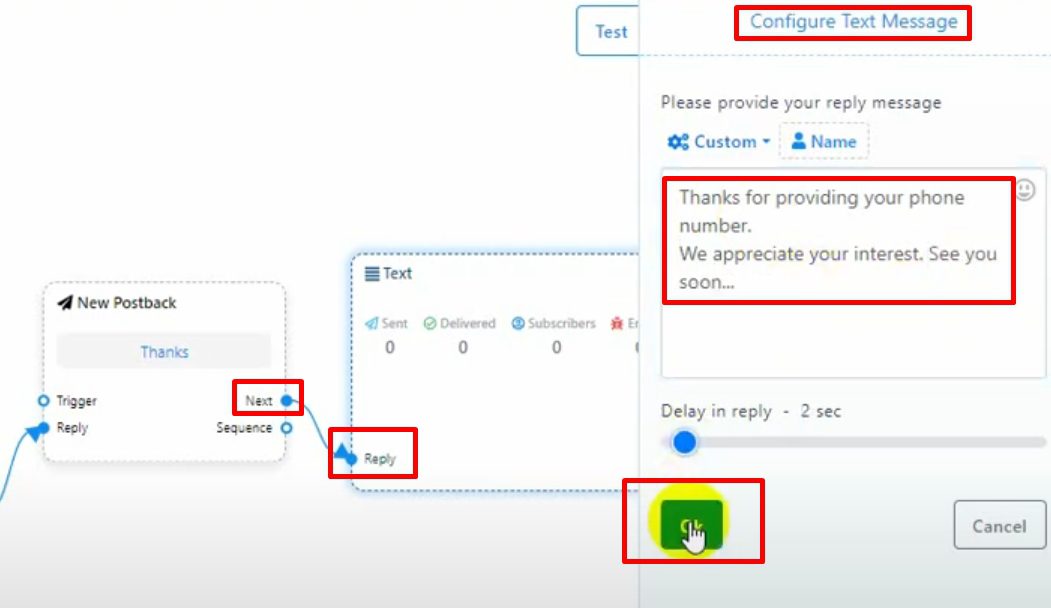
- Add a final message using the text component for the customer’s response.


- Add a final message using the text component for the customer’s response.
-
- Configure and save all components carefully.

- Configure and save all components carefully.
-
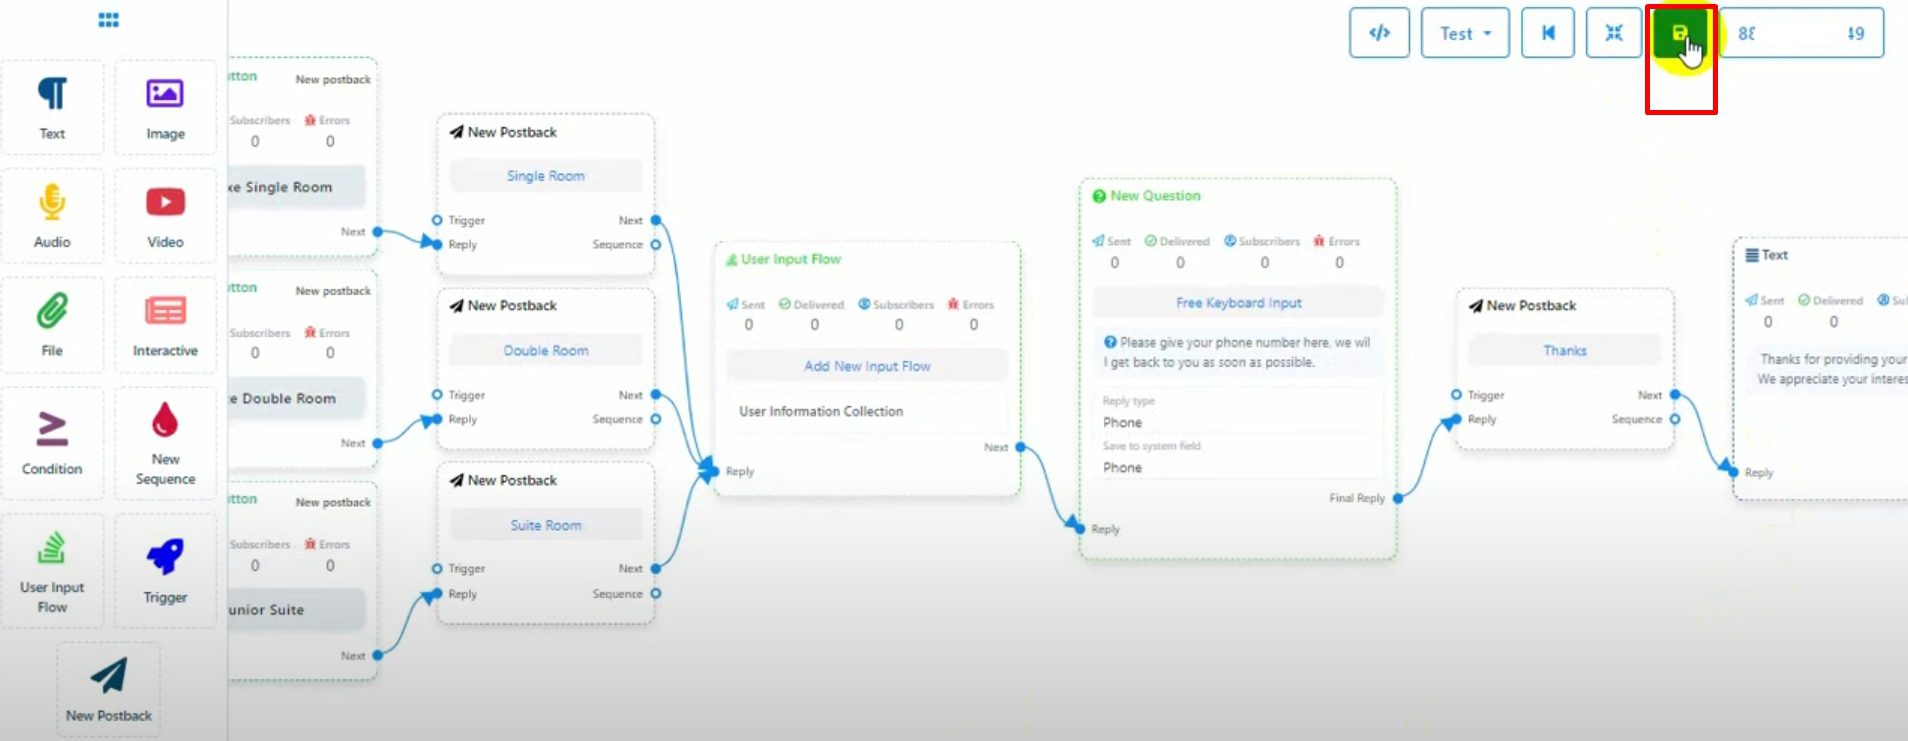
- Click the “Save” button at the top right of the canvas to save your bot.

- Click the “Save” button at the top right of the canvas to save your bot.
#
Test Your Bot: #
-
- Go to WhatsApp and test the bot by sending the configured keyword.


- Verify that the bot replies correctly based on the keyword triggers.
- Go to WhatsApp and test the bot by sending the configured keyword.
By following these steps, you can successfully create a keyword-based WhatsApp chatbot using BotCommerce, enhancing customer interactions with automated responses.