The broadcasting feature in our app facilitates enhanced communication across Messenger, SMS, and Email platforms, fostering stronger connections with subscribers and contributing to effective customer engagement. Here, we will see how to use this feature on Facebook Messenger.
Creating a Campaign
1.- Create a Messenger campaign. Open your dashboard and click on the menu called Broadcasting at the left-sidebar. You will open a page divided into two sections – Messenger Broadcasting and SMS/email Broadcasting. To create a campaign for Messenger Broadcasting, click on the Messenger Broadcasting option.
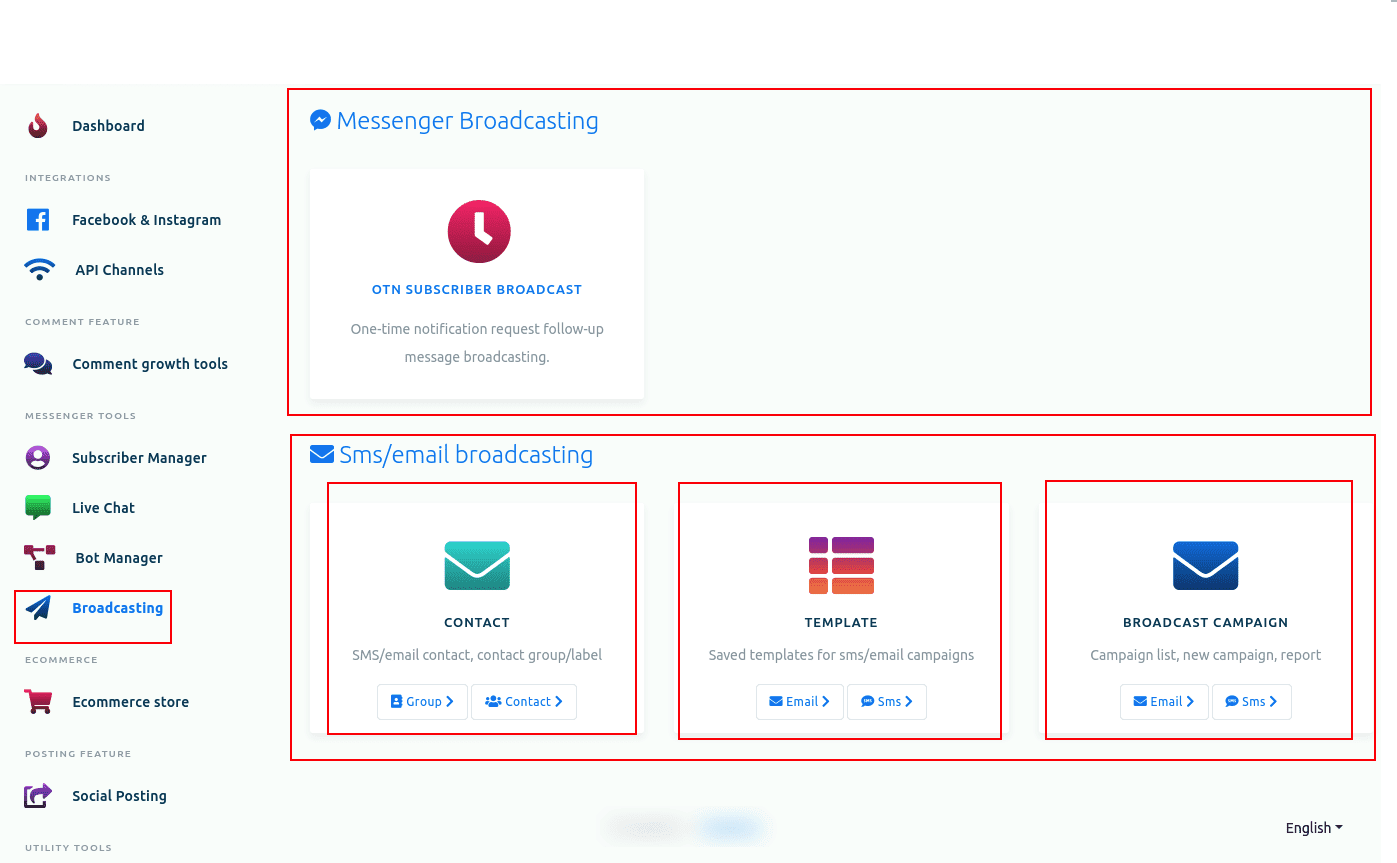
Instantly, a page called OTN subscriber broadcast will appear with a button called Create Campaign. Click on it.

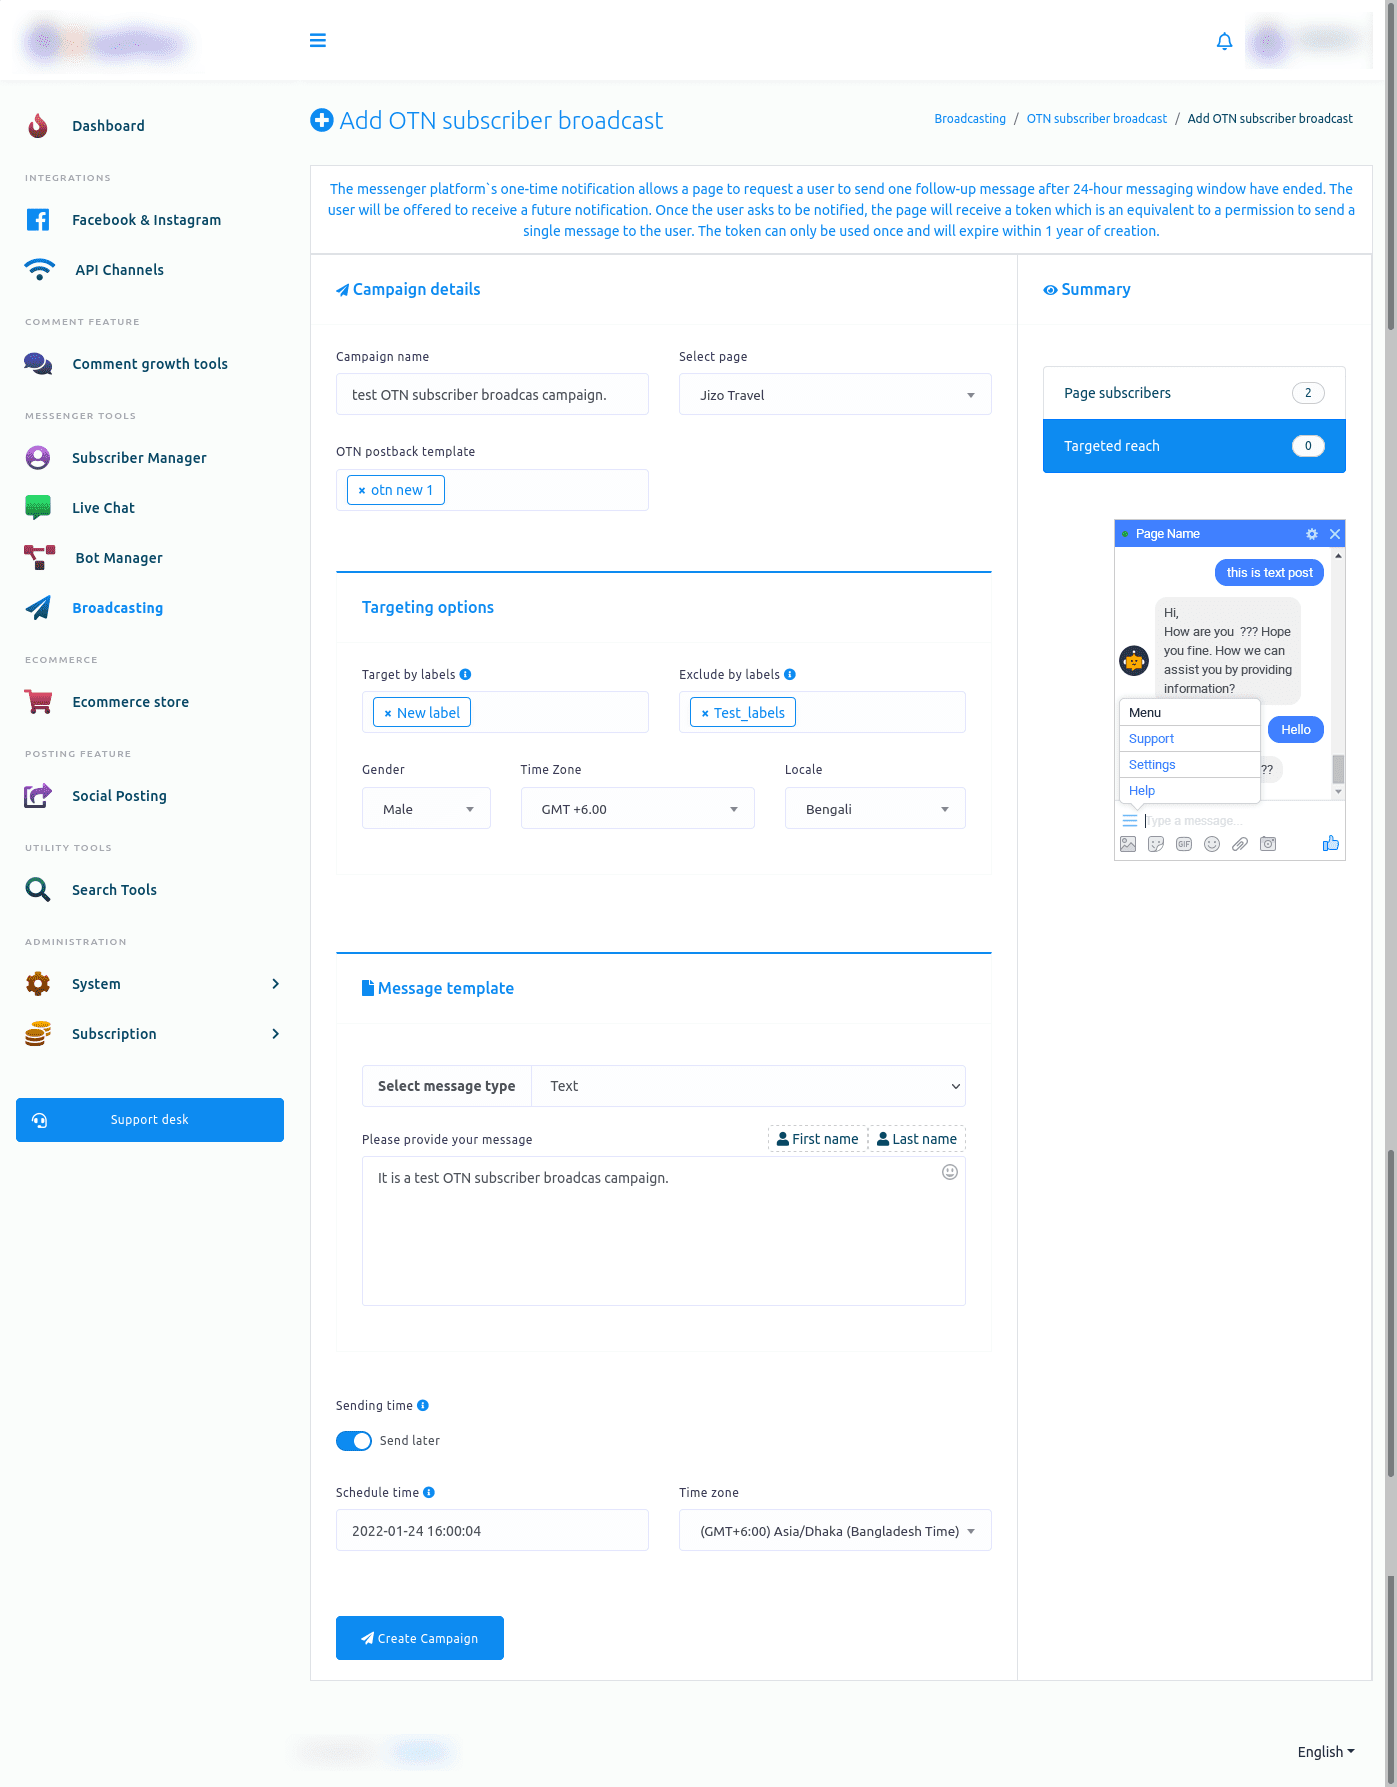
2. Fill the form. You will open a page called Add OTN subscriber broadcast. It contains a form divided into three parts — Campaign details, Targeting options and Message template. Keep reading to see how to fill each one of them.
Filling the OTN Subscriber Broadcast Form
1.- Identify the campaign. Give a name for the campaign in the campaign name field. After that, select a Facebook page from the select page field.
2.- Add a postback template. Click on the OTN postback template field and a drop-down menu of different OTN postback templates will appear. Select one of them.
3. Set the Targeting settings. Scroll to the Targeting options related fields. In the field called Target by labels, you can select labels from a drop-down menu. The message will be sent to the subscribers who are on these labels.
You can also select labels in the Exclude by label fields. The message will not be sent to the subscribers who are on these labels. Moreover, the unsubscribe label will be excluded automatically.
You may also choose a gender in the gender field. If you select male, the message will be sent only to the male subscribers. On the other hand, if you select females, the message will be sent only to female subscribers.
In the time zone field, select a time zone. The message will be sent to the subscribers who live in the selected time zone.
You can also select a locale in the locale field. The message will be sent to the people who fall in the chosen locale.
4. Select a message template. Scroll to the message template related fields. Select a message type. Click on the field and a drop-down menu will appear. In the next section, we will explore each one of them.
Selecting the Message Type
You need to select a message type depending on the features of the message you wish to send in your campaign. There are seven types of messages: Text; Image, Audio, Video and File; Quick Reply; Text With Button; Generic Template; Carousel Message and Media Message.
Text Message Type
If you select text as a message type, you have to provide a text message in the message field. Also, you can include the first name or last name of the subscribers.
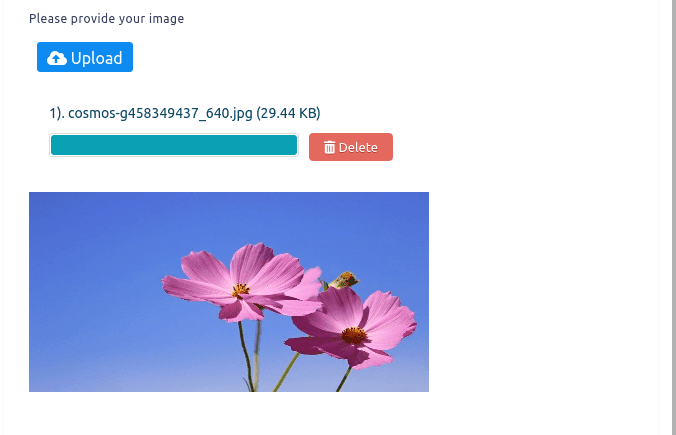
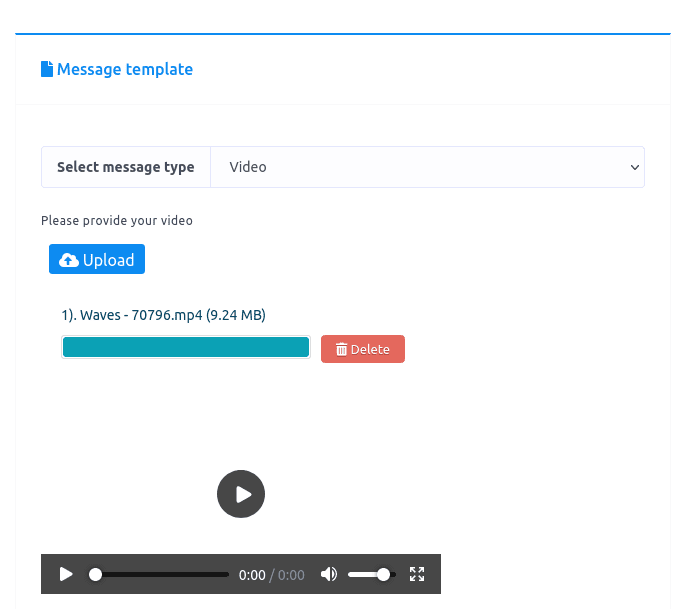
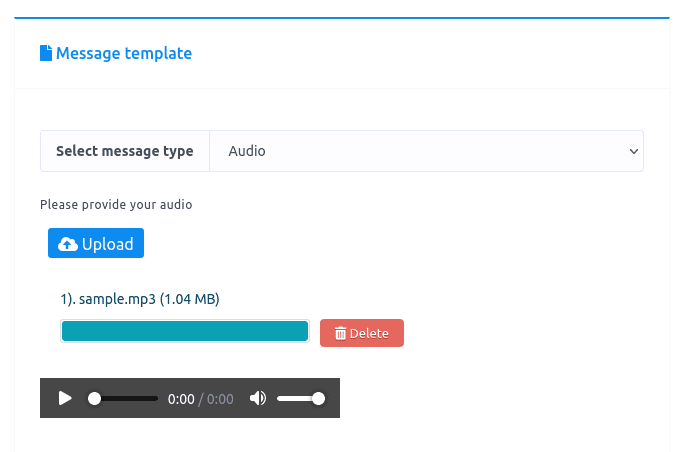
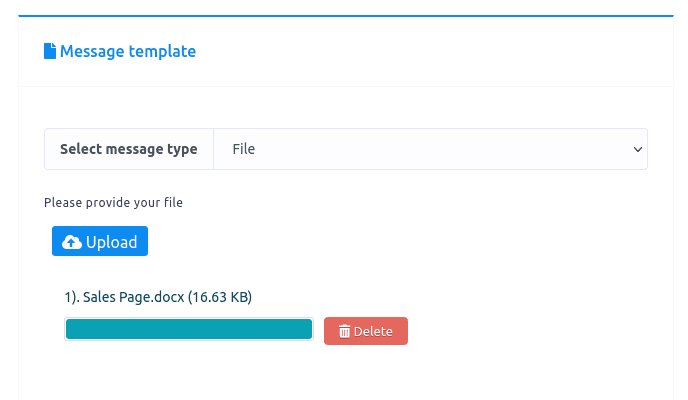
Image, Audio, Video and File Message Type
If you select image, audio, video, or file as the message type, an upload button will appear. Upload an image, audio, video or file for the respective message type.
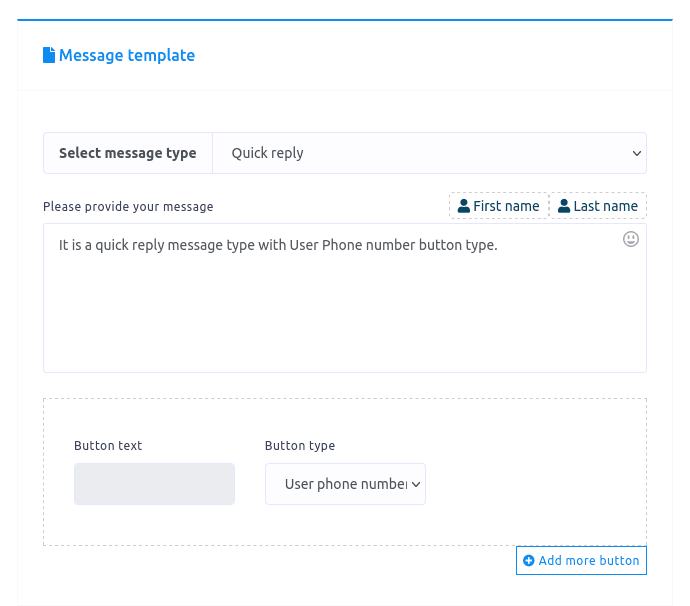
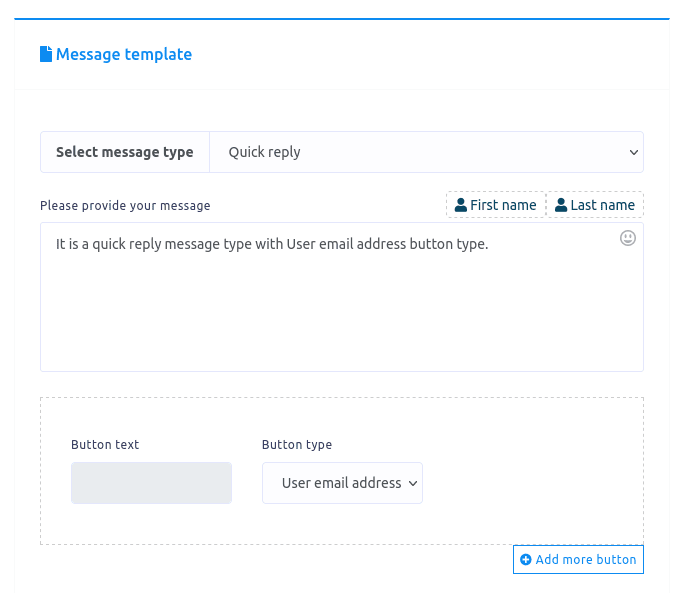
Quick Reply Message Type
On the other hand, if you select quick reply, some fields – message, button text, button type – will appear. Write a text message in the message field. Type a text for the button on the button text field. Select a button type in the button type field. Click on the button type field and a drop-down menu of different button types – Post Back, User phone number, User email address – will appear.

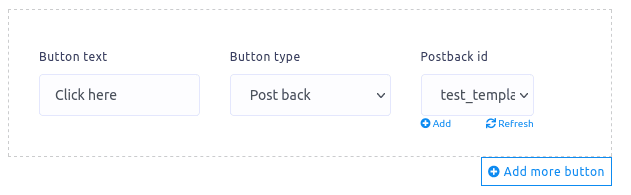
Postback quick reply
If you select postback, another field called postback id will appear. In the postback id field, you have to select a pre-defined postback template. You can also create a postback id by clicking on the add button. You can also add more buttons by clicking on the add more button.
User phone number quick reply
In the quick reply message type, you can select the user phone number as the button type. Just as you select the User phone number as the button type, the Button text field will be disabled.
User email address quick reply
In the quick reply message type, you can select the user email address as the button type. Just as you select the User email address as the button type the Button text field will be disabled.
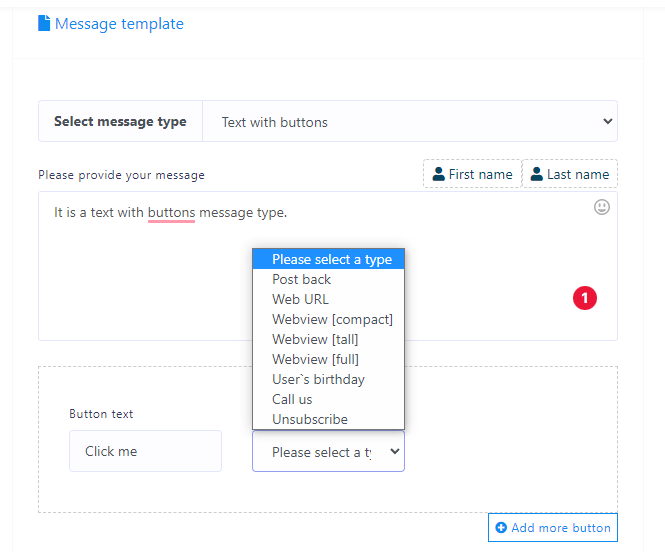
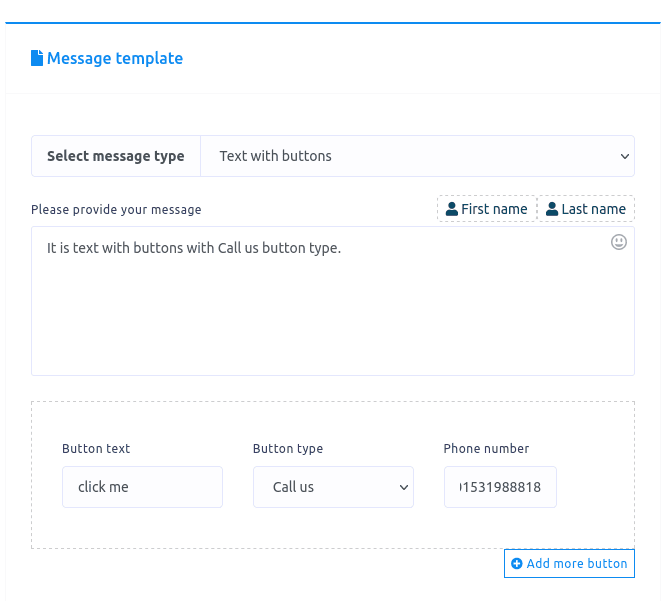
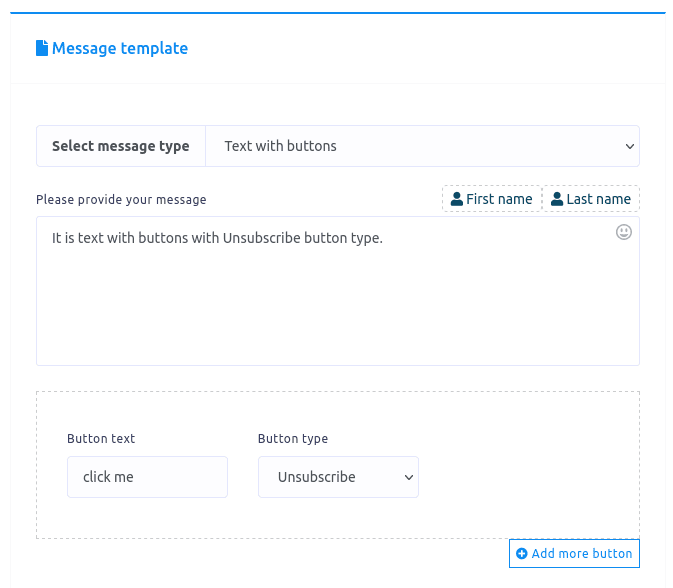
Text With Button Message Type
If you select Text with buttons as a reply type, some fields — Message, Button text and Button type — will appear. Write a message in the message field, write a text for button in the Button text field and select a button type from the button type field. Click on the button type field and a drop-down menu of different button types – postback, weburl, Webview(full), Webview(tall), Webview(compact), User’s birthday, Call us, Unsubscribe – will appear.
Postback text with buttons
If you select postback, a new field called postback id will appear. In the postback id field, you have to select a predefined postback template. Also, you can create a postback template by clicking on the add button under the postback id field.

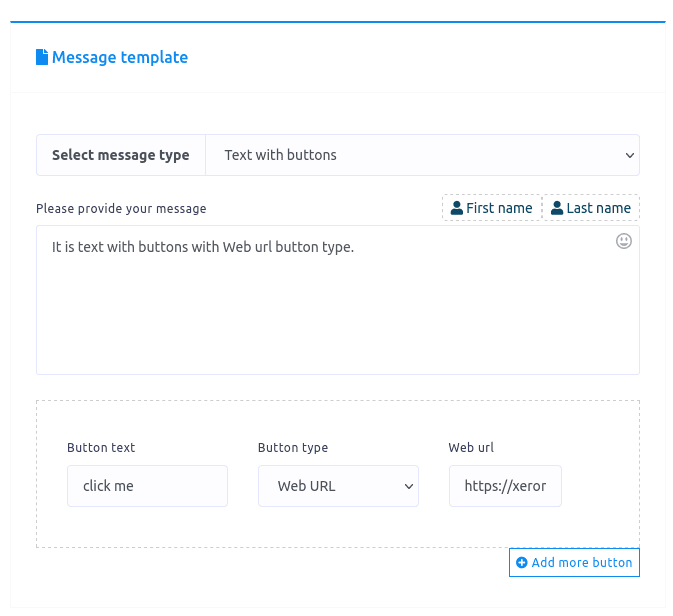
Web url text with buttons
On the other hand, if you select Weburl, Webview(full), Webview(tall) or webview(compact), a new field called Web url will appear. In the Web url field, you have to paste a web url. When a user clicks on the button, the user will be redirected to the Web url.
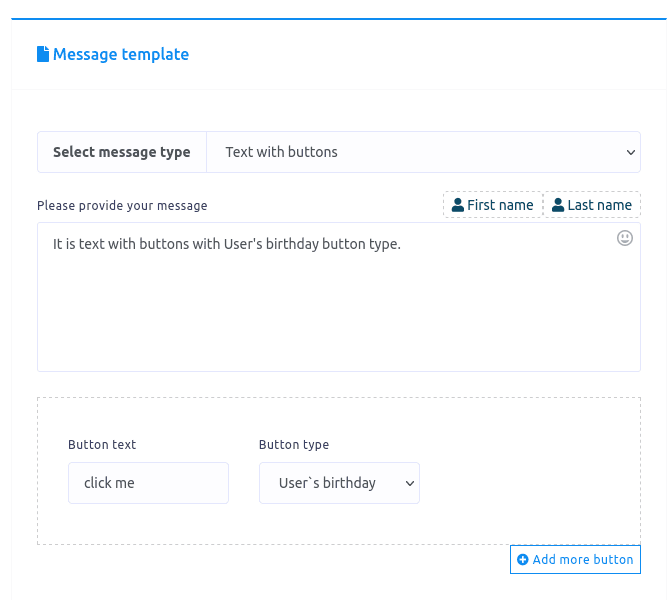
User’s birthday text with buttons
You can also select User’s birthday button type from the drop-down menu of Button type field.
Call us text with buttons
If you select the Call us button type from the drop-down menu, a field called phone number will appear. You will have to provide a phone number. When a user clicks on the call us button, a call to the phone number will be done automatically.
Unsubscribe text with buttons
You can also select the Unsubscribe button type from the drop-down menu. When a user clicks on this kind of button, he or she will be unsubscribed.
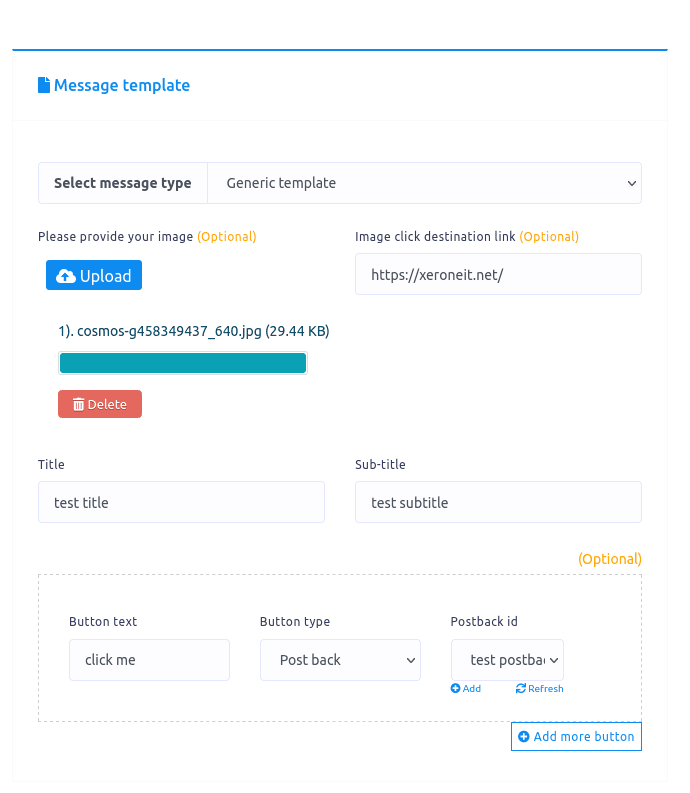
Generic Template Message Type
If you select Generic template as message type, an upload button and some additional fields will appear. Upload an image by clicking on the upload button. Then paste a link in the image click destination link field. When a user clicks on the image, he or she will be redirected to the link.
After that, you have to provide a title and a subtitle. In the button text field, write a text for the button. Finally, select a button type from the drop-down menu. We have already discussed the different types of buttons above.
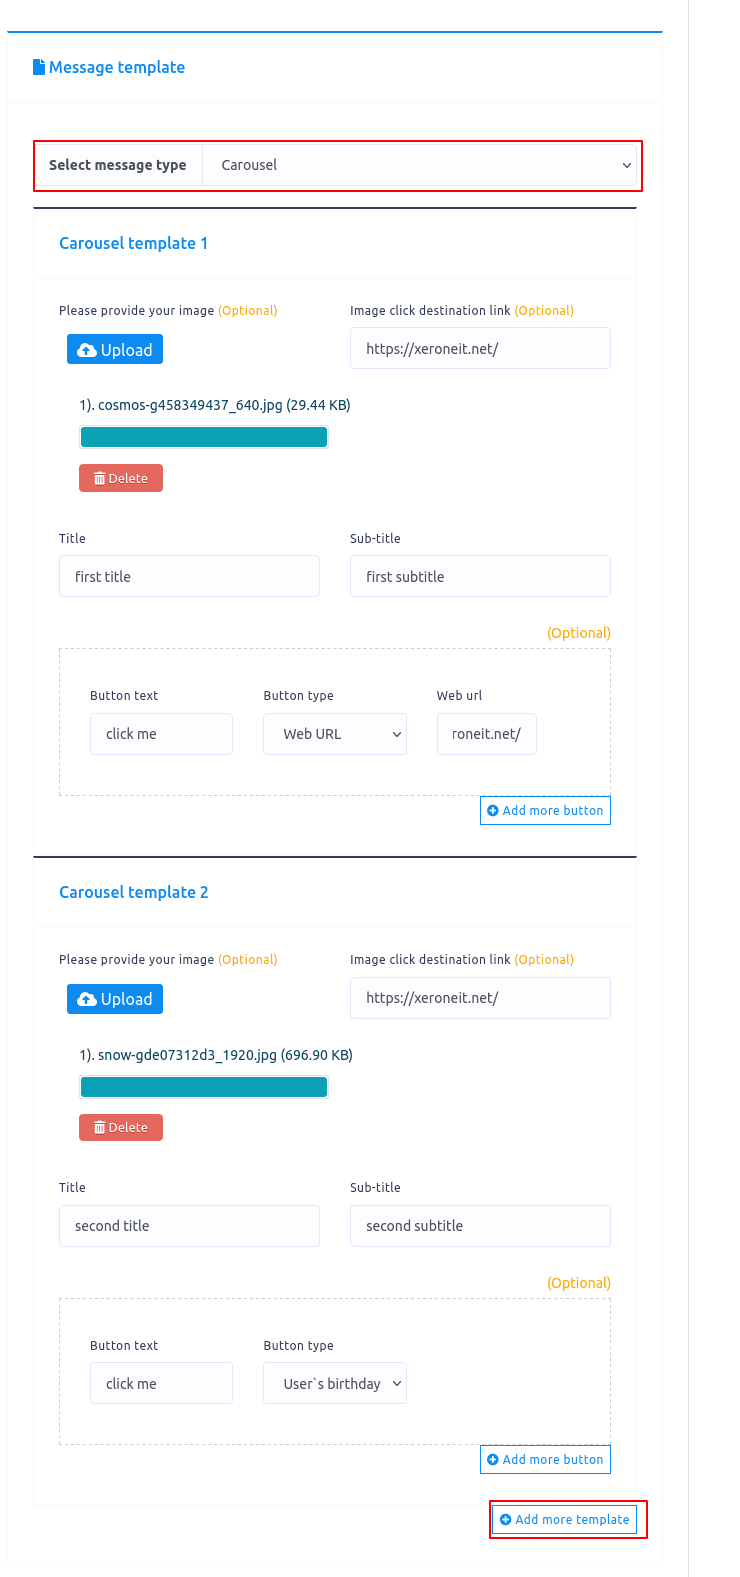
Carousel Message Type
If you select carousel as the message type, the same fields as in the generic template will appear. Just fill them out.
Below the fields, you will see an Add More button and an Add More Template button that will allow you to insert more buttons or templates respectively. To make a carousel, you need at least two templates.
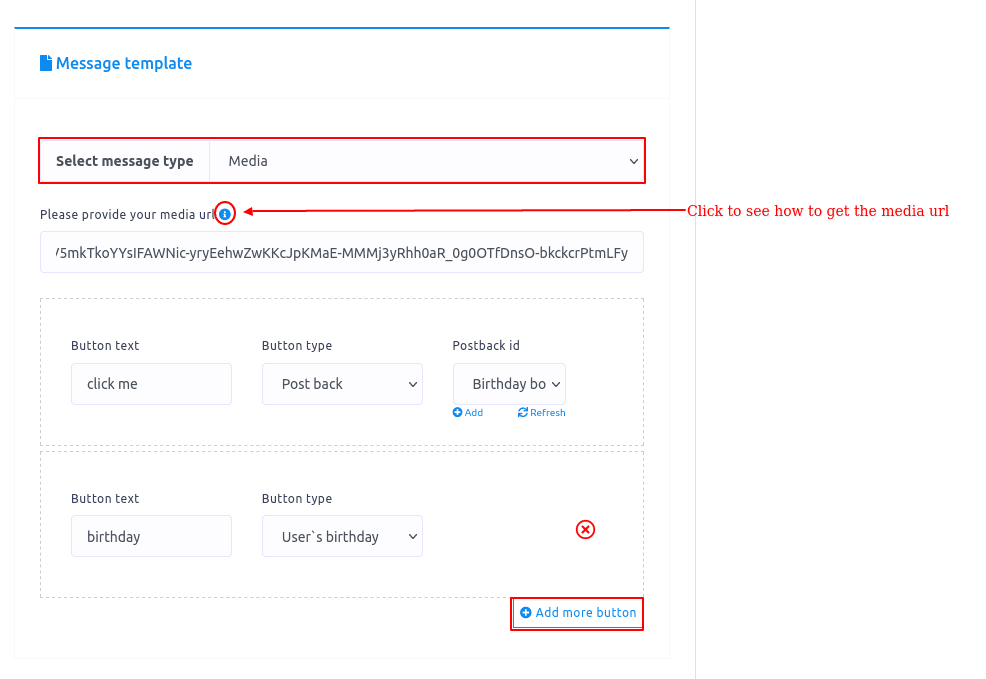
Media Message Type
If you select Media as the message type, some fields – media url, button text and button type – will appear. Now you have to fill-out these fields. Click on the tooltip to see how to get the media url. You can add more buttons by clicking on the button called Add more button.
Programming the Campaign
1.- Schedule the campaign. After you have successfully selected a message time and filled out its respective fields, you will see a Sending Time button. If you want to schedule the post, turn the button on.
2.- Add a date and time. Instantly, two additional fields – Schedule time and time zone – will appear. Click on the schedule time field and a calendar of date and time will appear. From the calendar, select a date and time. In the time zone field, select a time zone.
3.- Save and program. Click on the create campaign button and a successful message will appear. That’s it! The campaign has been created.
If you have additional doubts, you can always schedule a call with one of our experts.
