Want to send WhatsApp leads to Google Sheets, Notion, Gmail, or any other app? This tutorial shows how to connect your chatbot to Zapier and automatically transfer collected data—like email addresses or names—from WhatsApp to any third-party app. In this example, we’ll use email as the destination, but you can replace it with any app supported by Zapier.
Start with a user input flow inside your chatbot. Create a flow with a few questions you want to ask your users—for example, their email. Save this flow for later use.

Set up a Webhook to send the dat. To transfer the collected data to another app, we’ll use an outbound webhook. This sends the user’s responses from BotCommerce to Zapier.
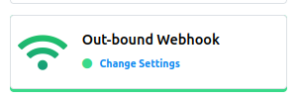
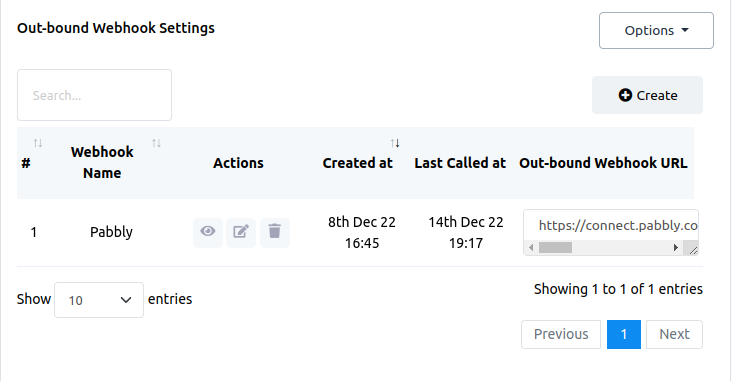
Create a new outbound webhook in Bot Manager. Go to the Bot Manager tab in your dashboard, and click on Outbound Webhook.
Click on “Create” to start a new webhook. A new modal window will open where you can configure it.
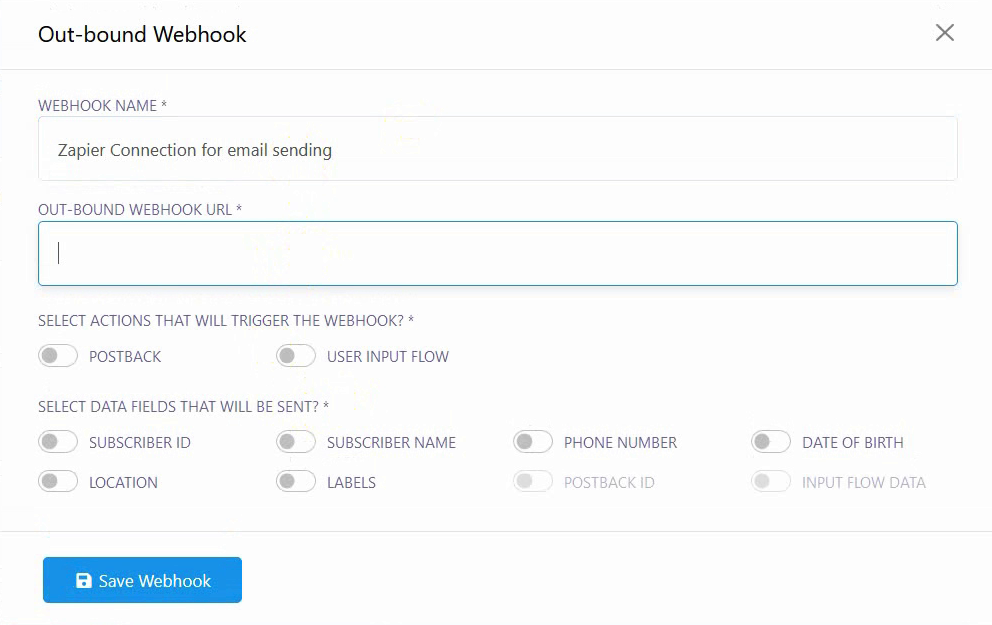
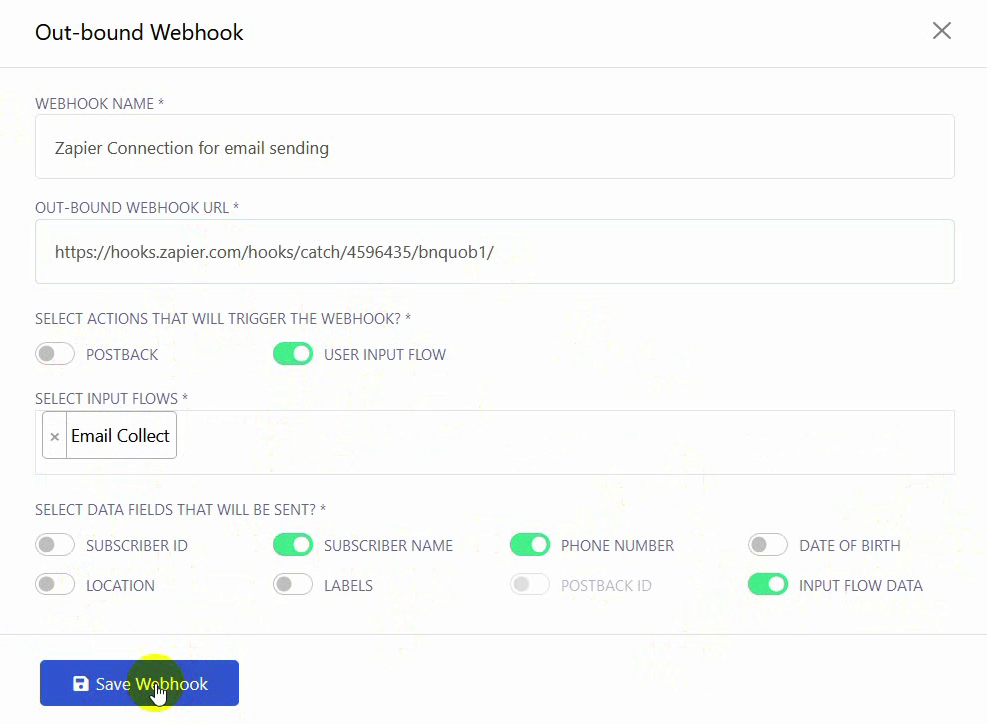
Give your webhook a name. Under Webhook Name, add something descriptive like “Send lead to Zapier”. Now, you need to obtain the Outbound Webhook URL from Zapier.
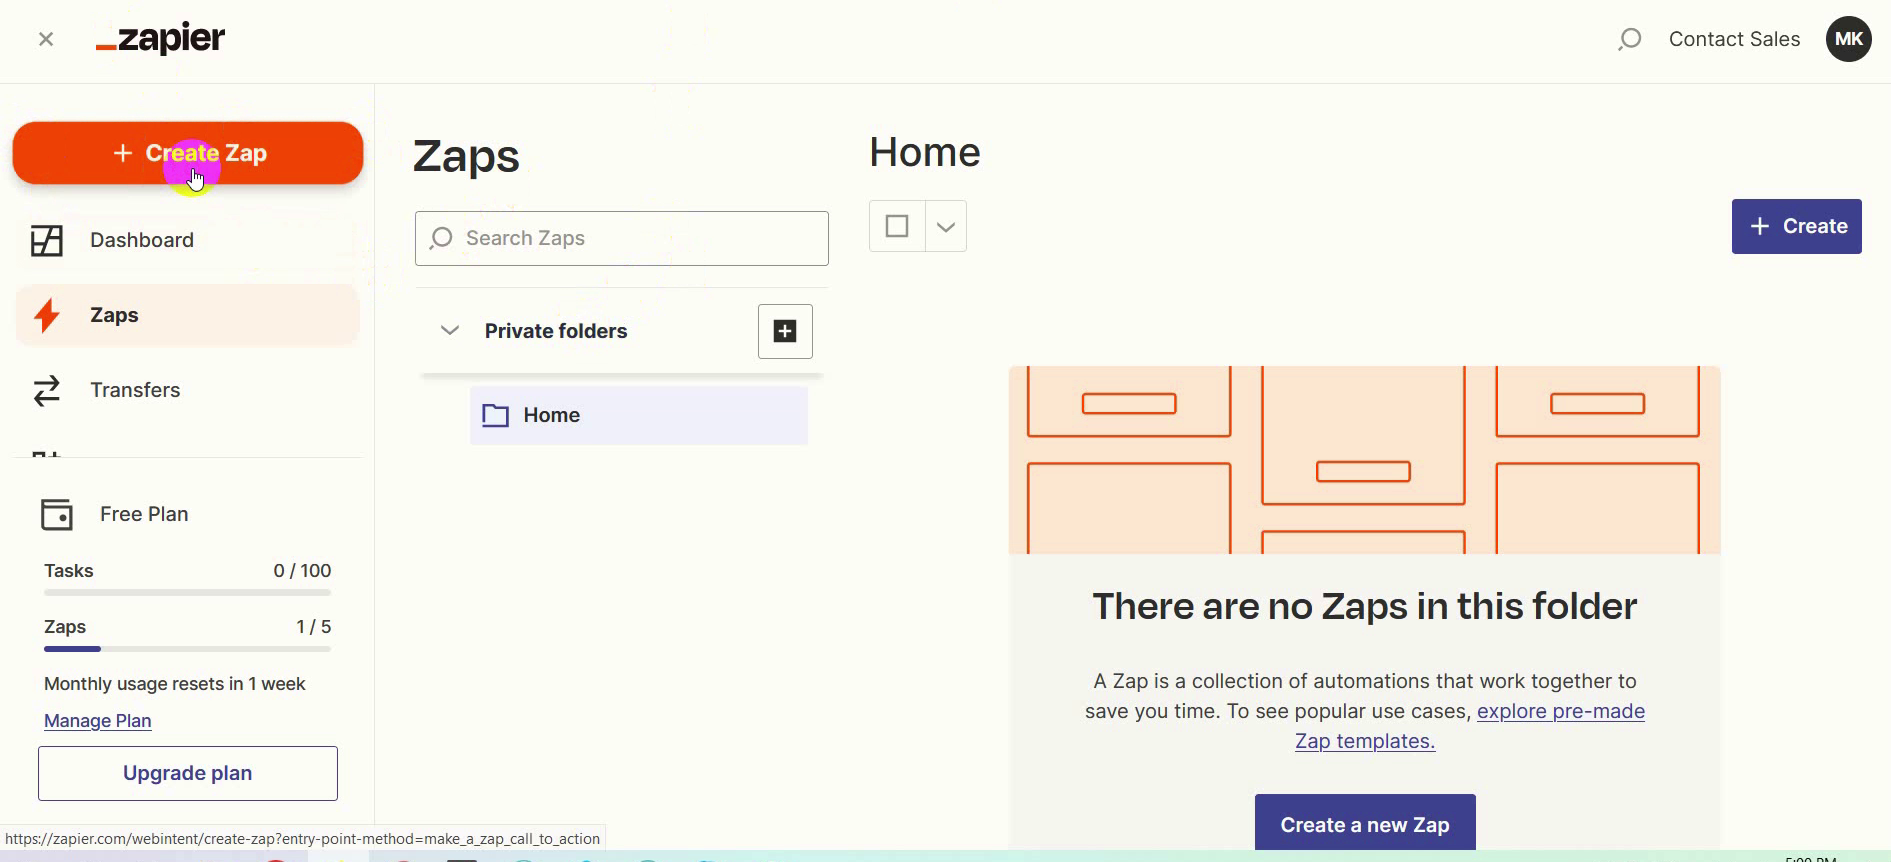
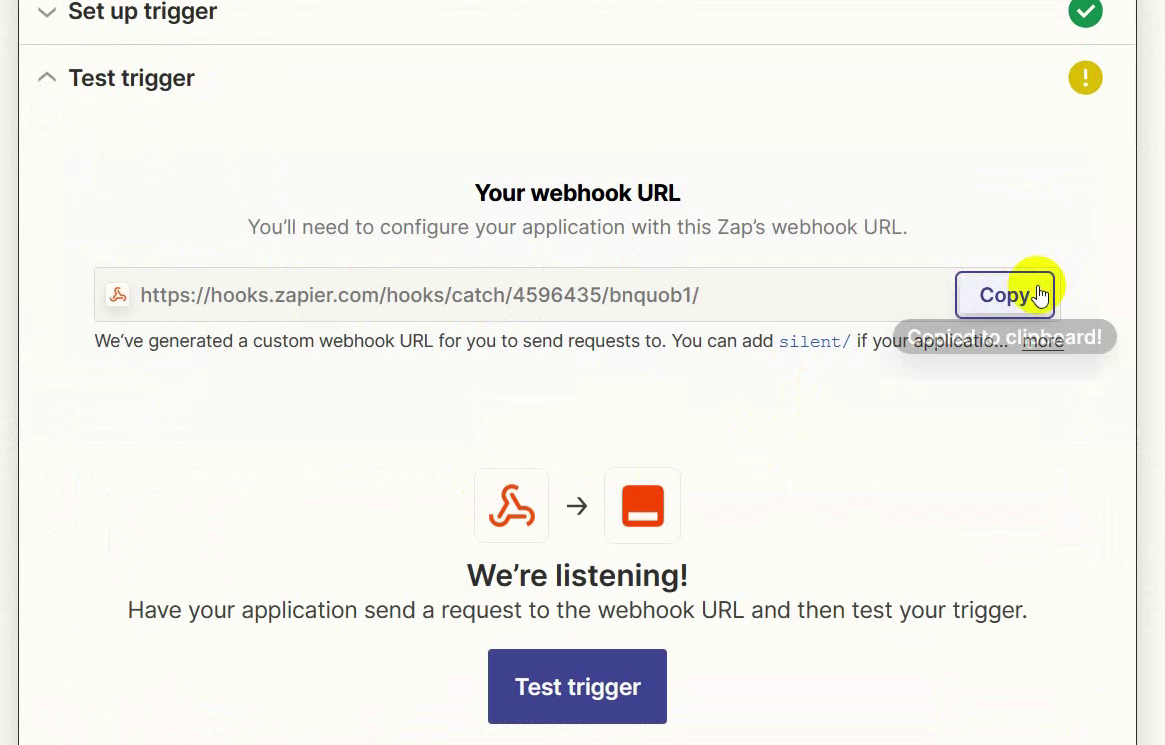
Get your Zapier webhook URL. Open your Zapier account and click on Create Zap. Zapier is the tool that will receive your chatbot data and send it to another app.
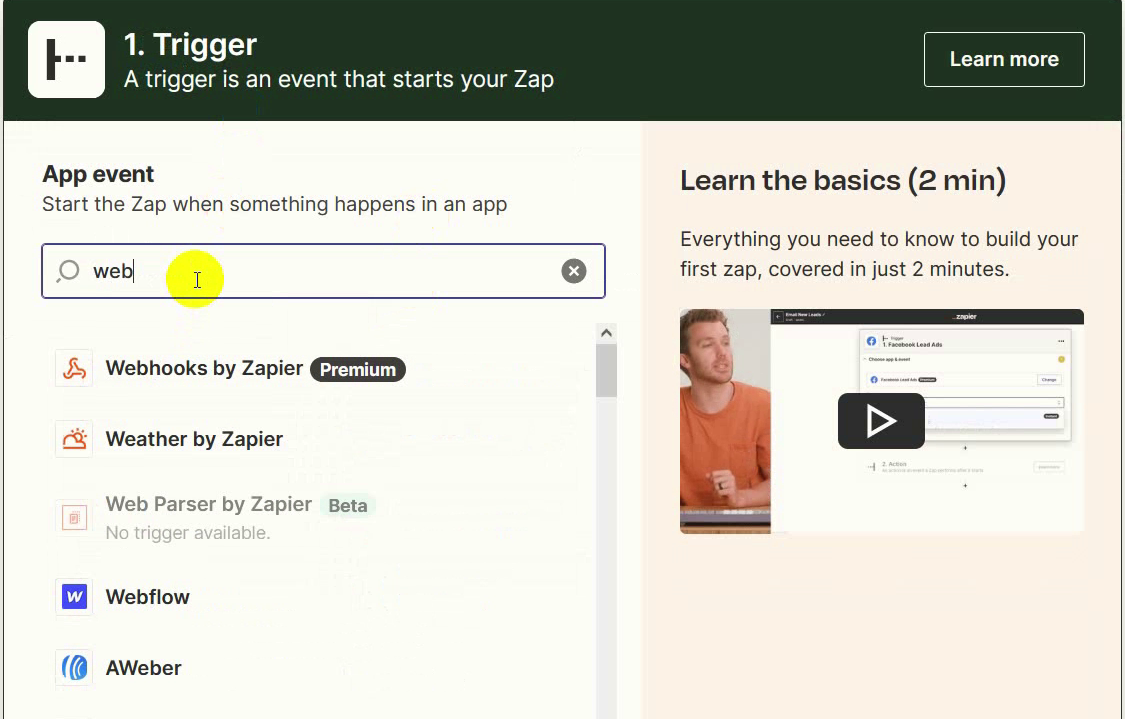
Choose “Webhooks by Zapier” as the trigger app. In the first field (“App Event”), search for and select Webhooks by Zapier.
Choose the trigger event “Catch Hook”. This allows Zapier to “catch” any data sent to the URL it provides. Click Continue.
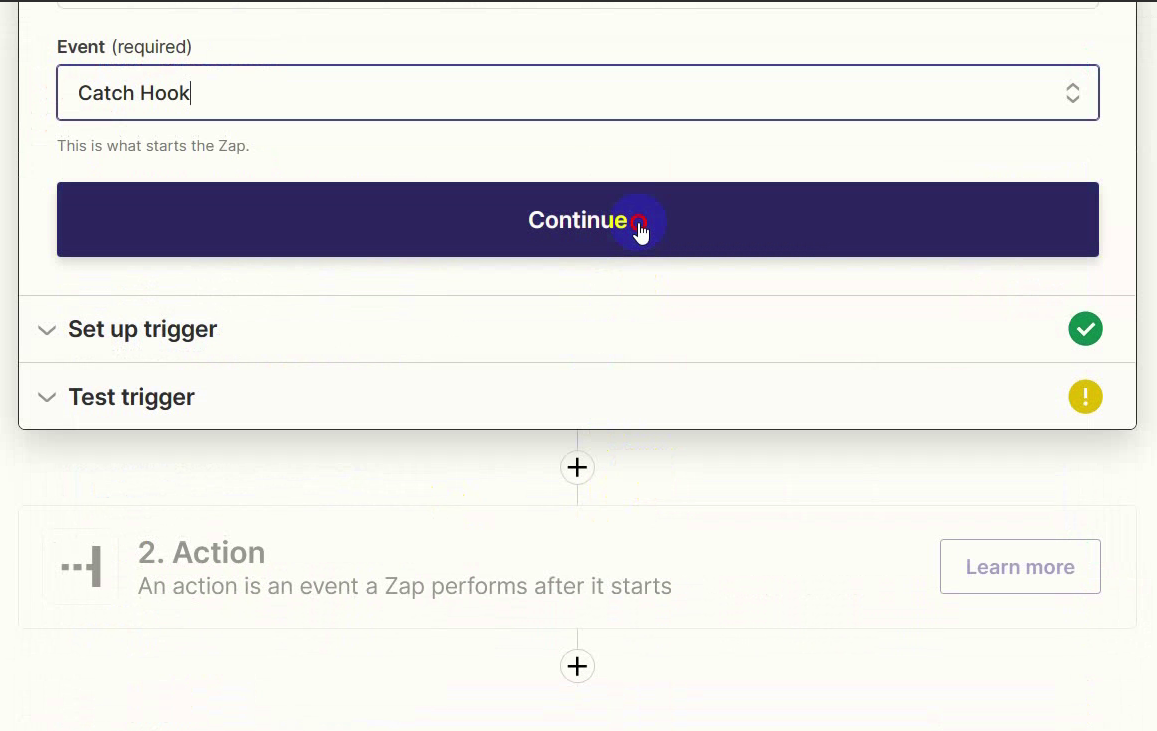
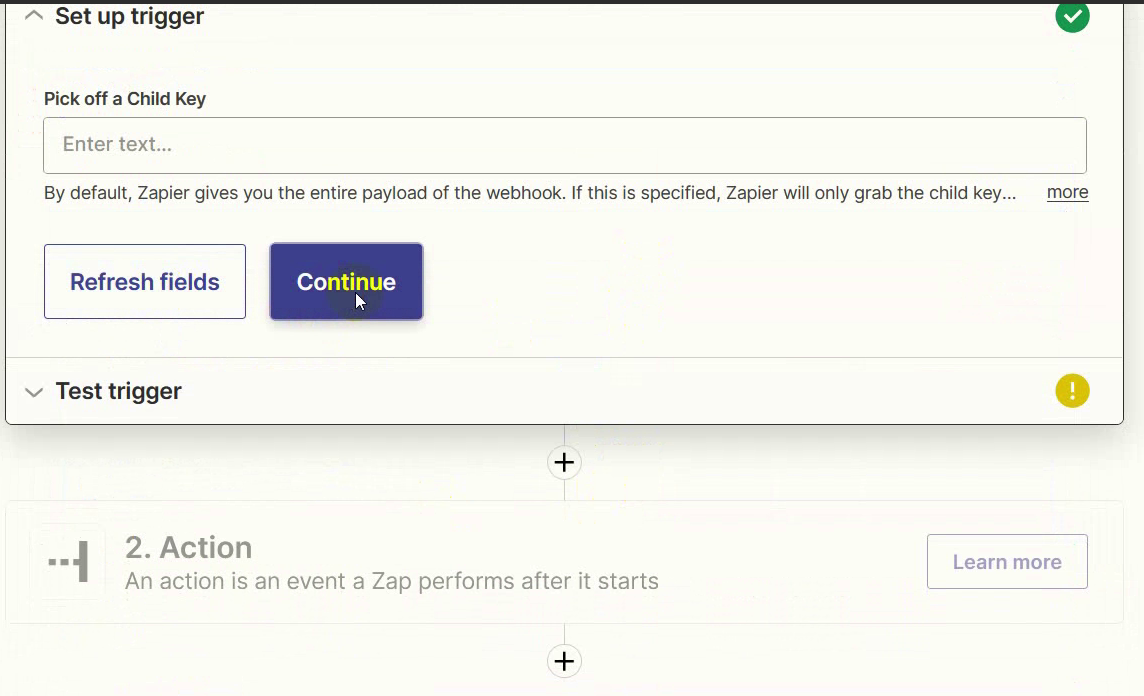
After that, click on the continue button again.
Copy the Webhook URL generated by Zapier. You’ll now see a unique webhook URL. Copy this—you’ll paste it into BotCommerce.
Return to BotCommerce and paste the URL. In your BotCommerce webhook setup, paste the URL you just copied into the Webhook Outbound URL field.
Choose the user input flow and data fields. Select the input flow you created earlier. Then, under Data fields to be sent, select:
- Subscriber name
- Phone number
- Input flow data
Click Save Webhook when done.
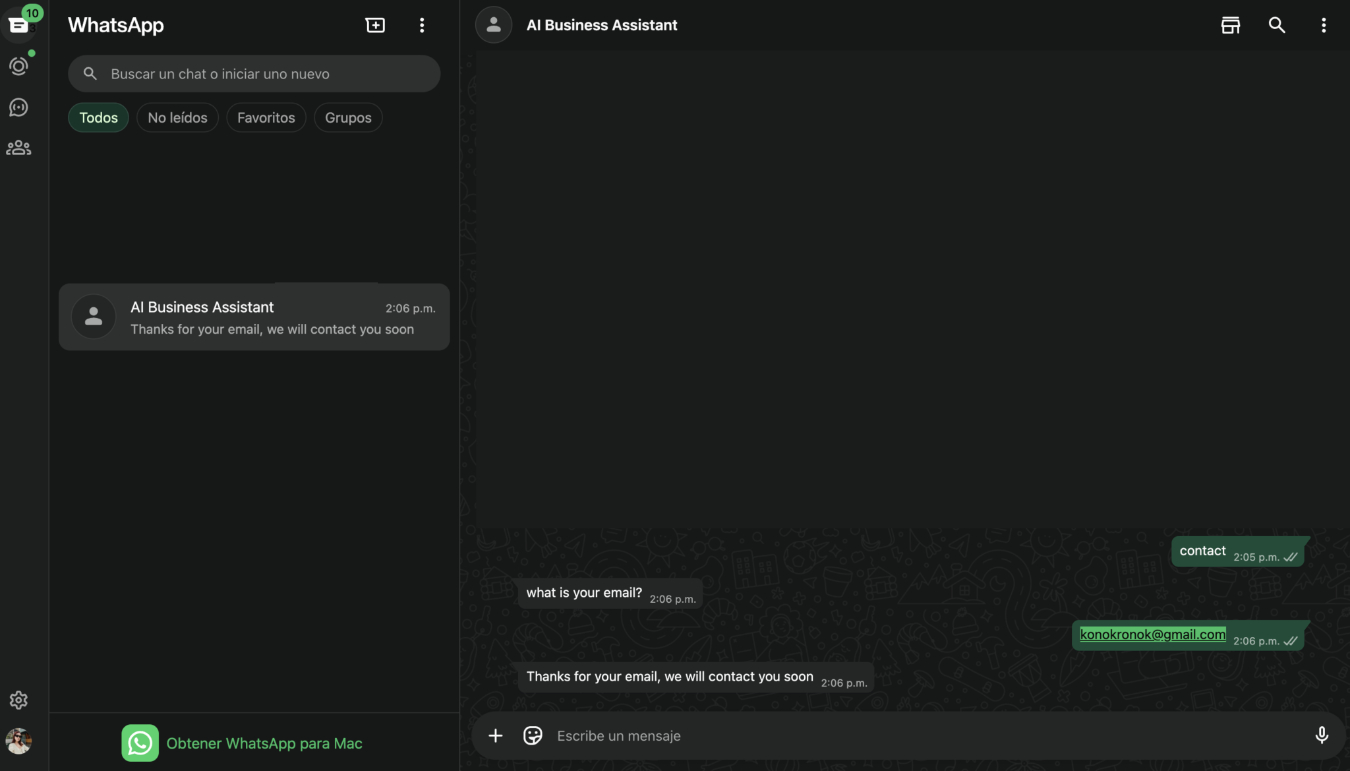
Send a test response from the chatbot. Go to WhatsApp and trigger the chatbot by typing the keyword that starts your input flow. Answer the questions to simulate a real user.
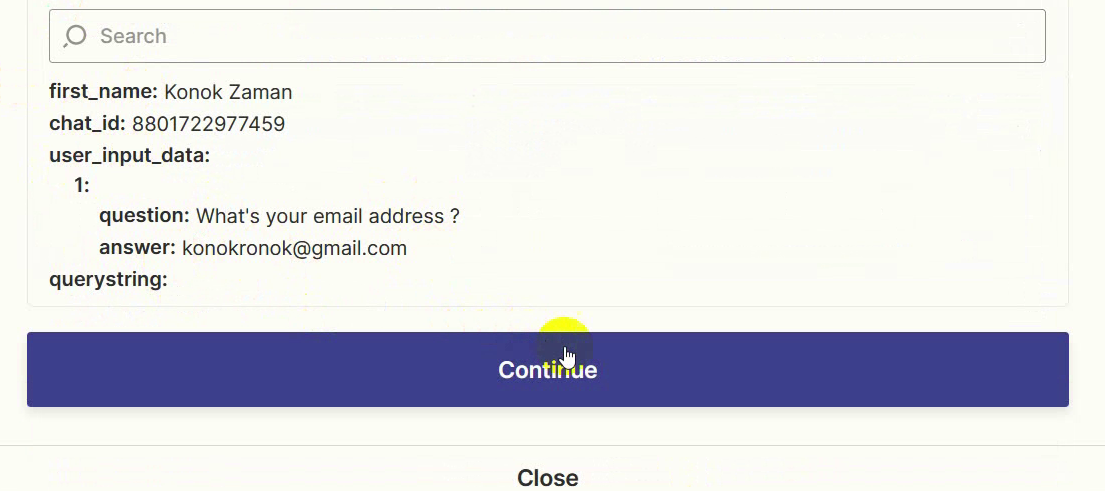
Go back to Zapier and test the trigger. In your Zap setup, click Test Trigger. You should now see the test user data (name, phone number, answers) pulled from the chatbot.
Choose the action app (example: Email by Zapier). Now it’s time to define what happens with the data. In this example, we’ll send an email. Choose Email by Zapier as the destination app.
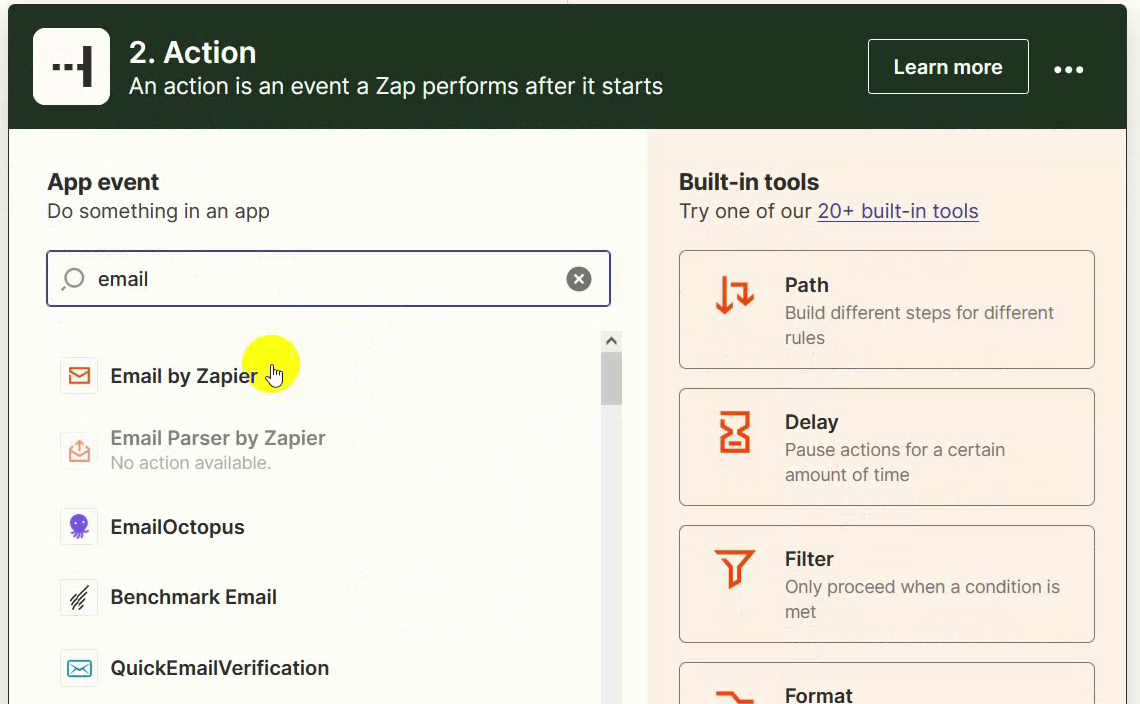
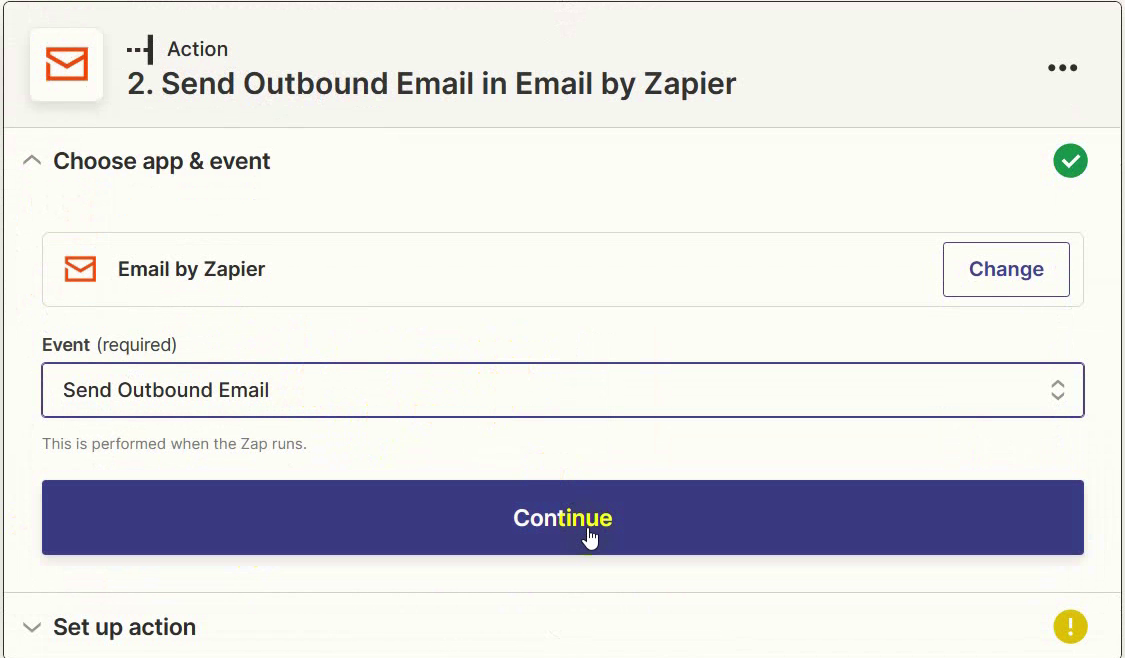
Choose “Send Outbound Email” as the event. This lets you send an email to the lead collected through WhatsApp. Click Continue.
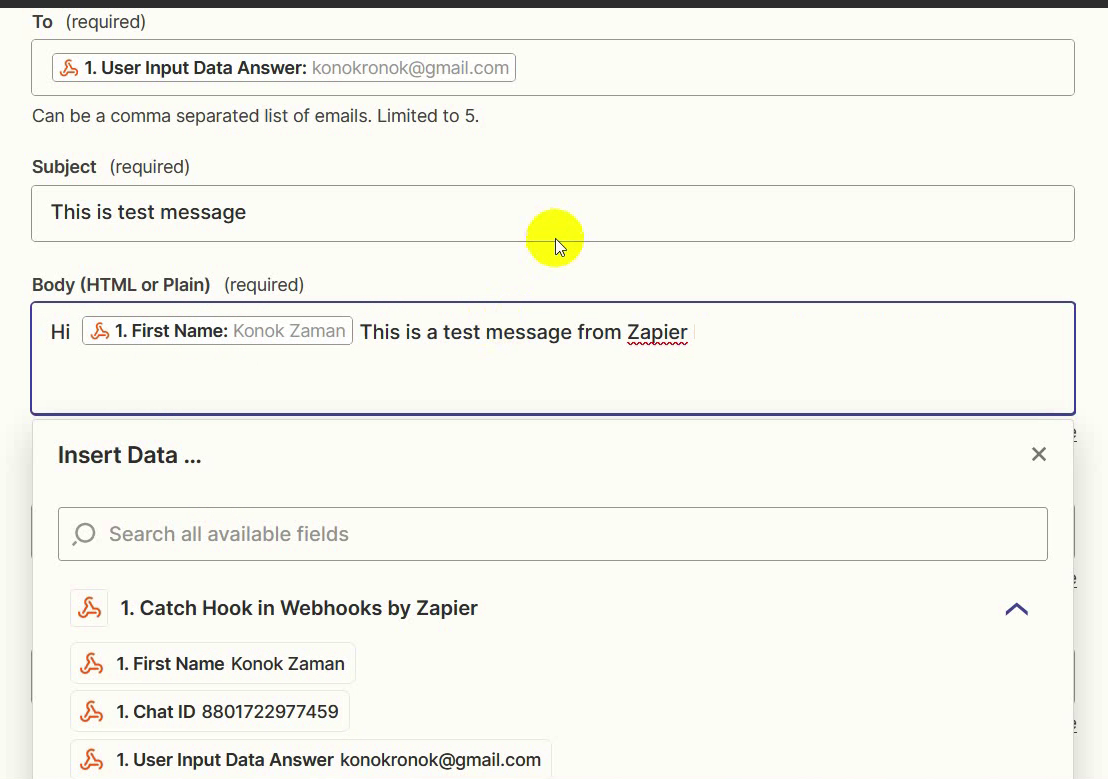
Map the collected data to the email fields. Under To, select the user’s email address from the chatbot input flow. Write a subject and email body, and use other collected fields to personalize the message—for example, include the user’s name.
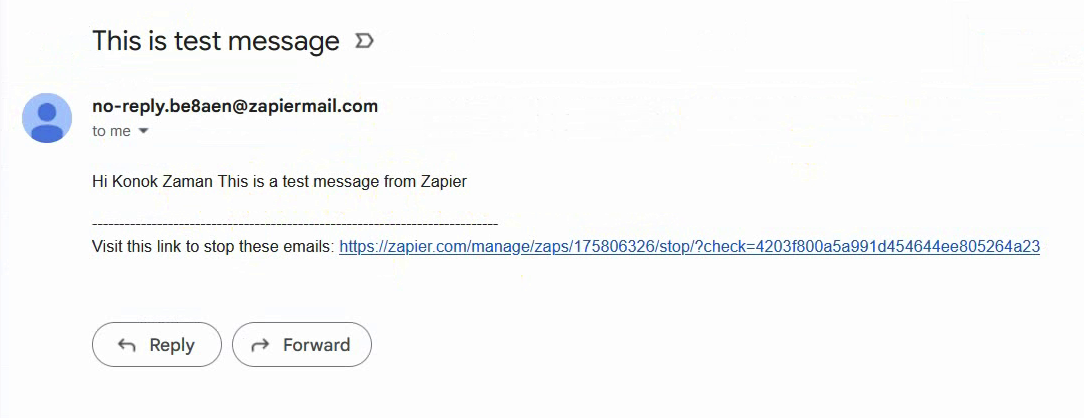
Test the email action. Click Test Action to send a test email using the info you provided.
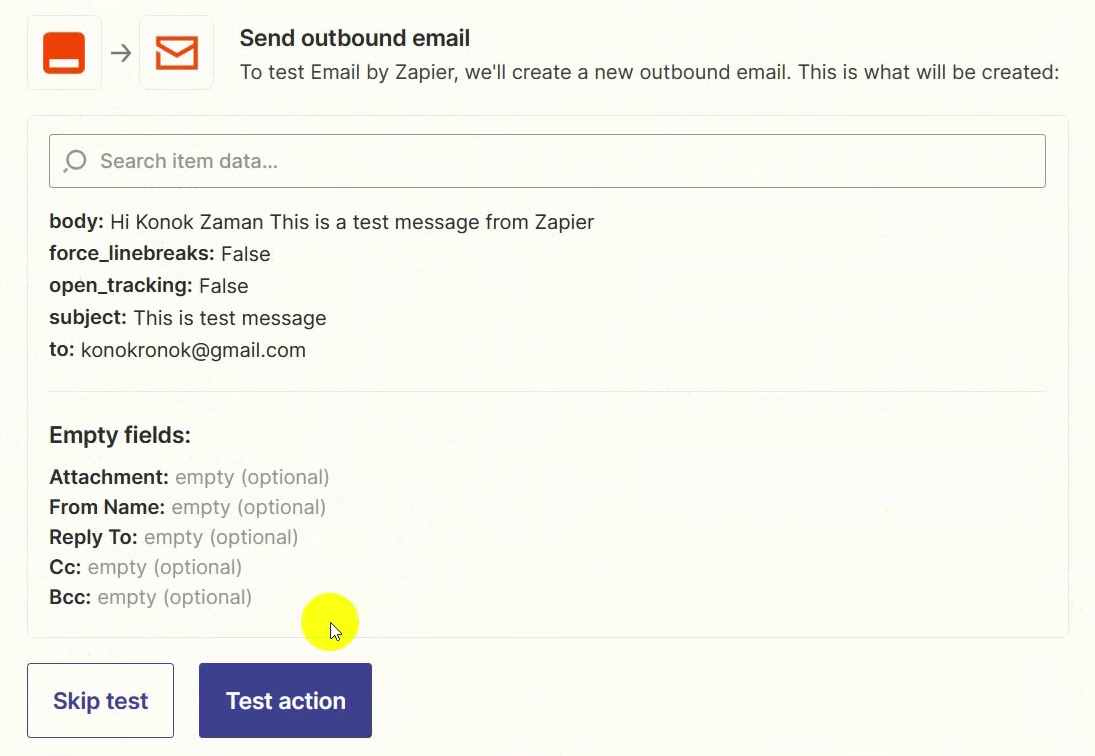
If everything is working, you should receive the email at the test address.
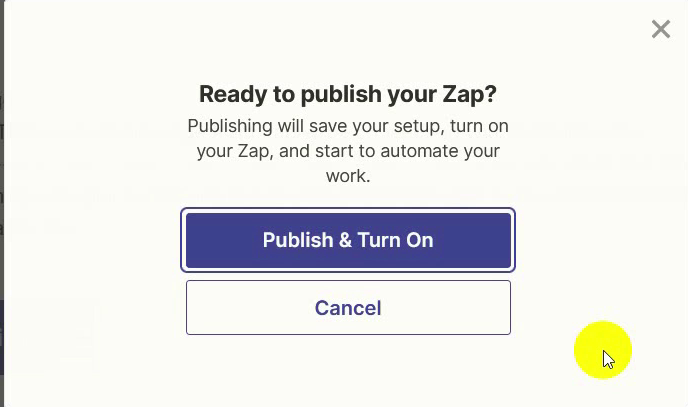
Turn on your automation. Once your test works, click Publish Zap to activate the automation. From now on, every lead that submits their info through WhatsApp will be automatically sent to the app you chose—whether that’s email, Google Sheets, Notion, or any other tool.