Following these steps will effectively integrate your WhatsApp Business account with the app.
You will need a Facebook Business Account and a phone number you do not wish to use for any other purpose to complete this tutorial. Once connected to the cloud, you’ll be unable to open it normally in WhatsApp, and will be obligated to use our Live Chat to see and manage your conversations.
Creating an app #
Accessing Facebook Developers: First, sign in to the the Facebook account where you have the Business Portafolio connected. Then, on the same browser, open a new tab. Visit https://developers.facebook.com/ and click on ‘My Apps’.

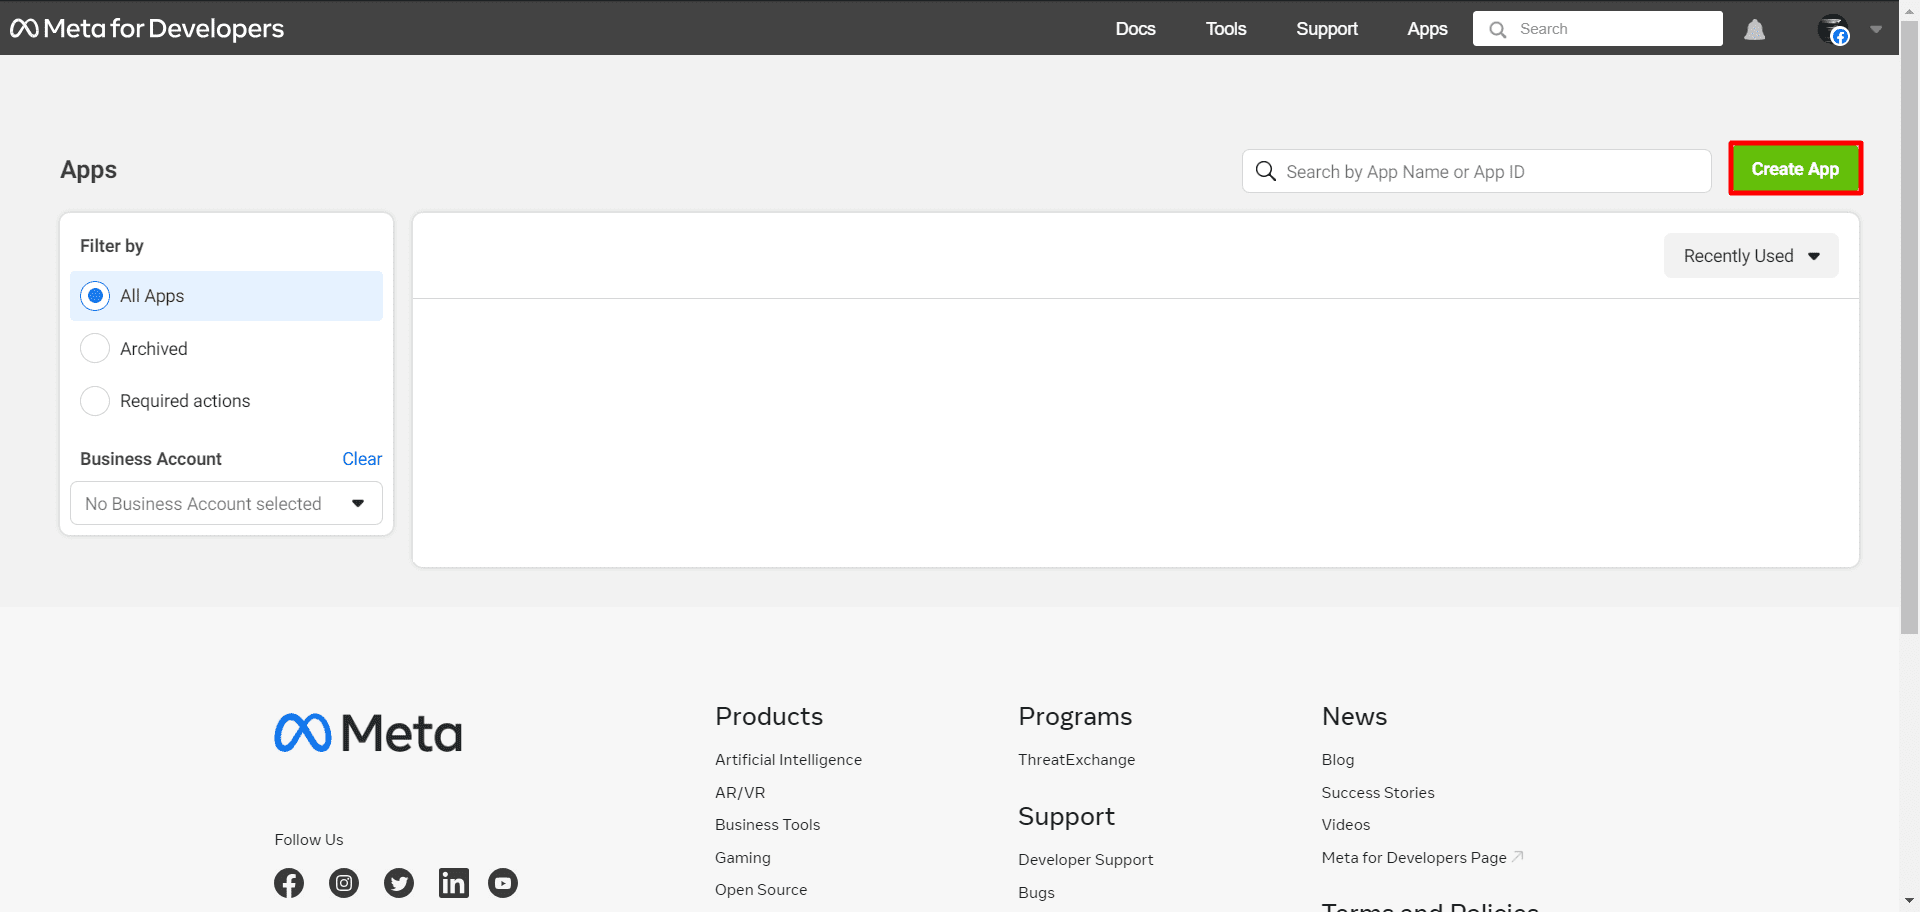
Creating the Application: You will see a page with a ‘Create App’ button alongside your predefined apps. Click on ‘Create App’.
Selecting Use Cases: In the Use Cases Screen, select Other. If the option is given, select a Meta Business Portfolio to connect the app. You can also do this later. Click on Next.

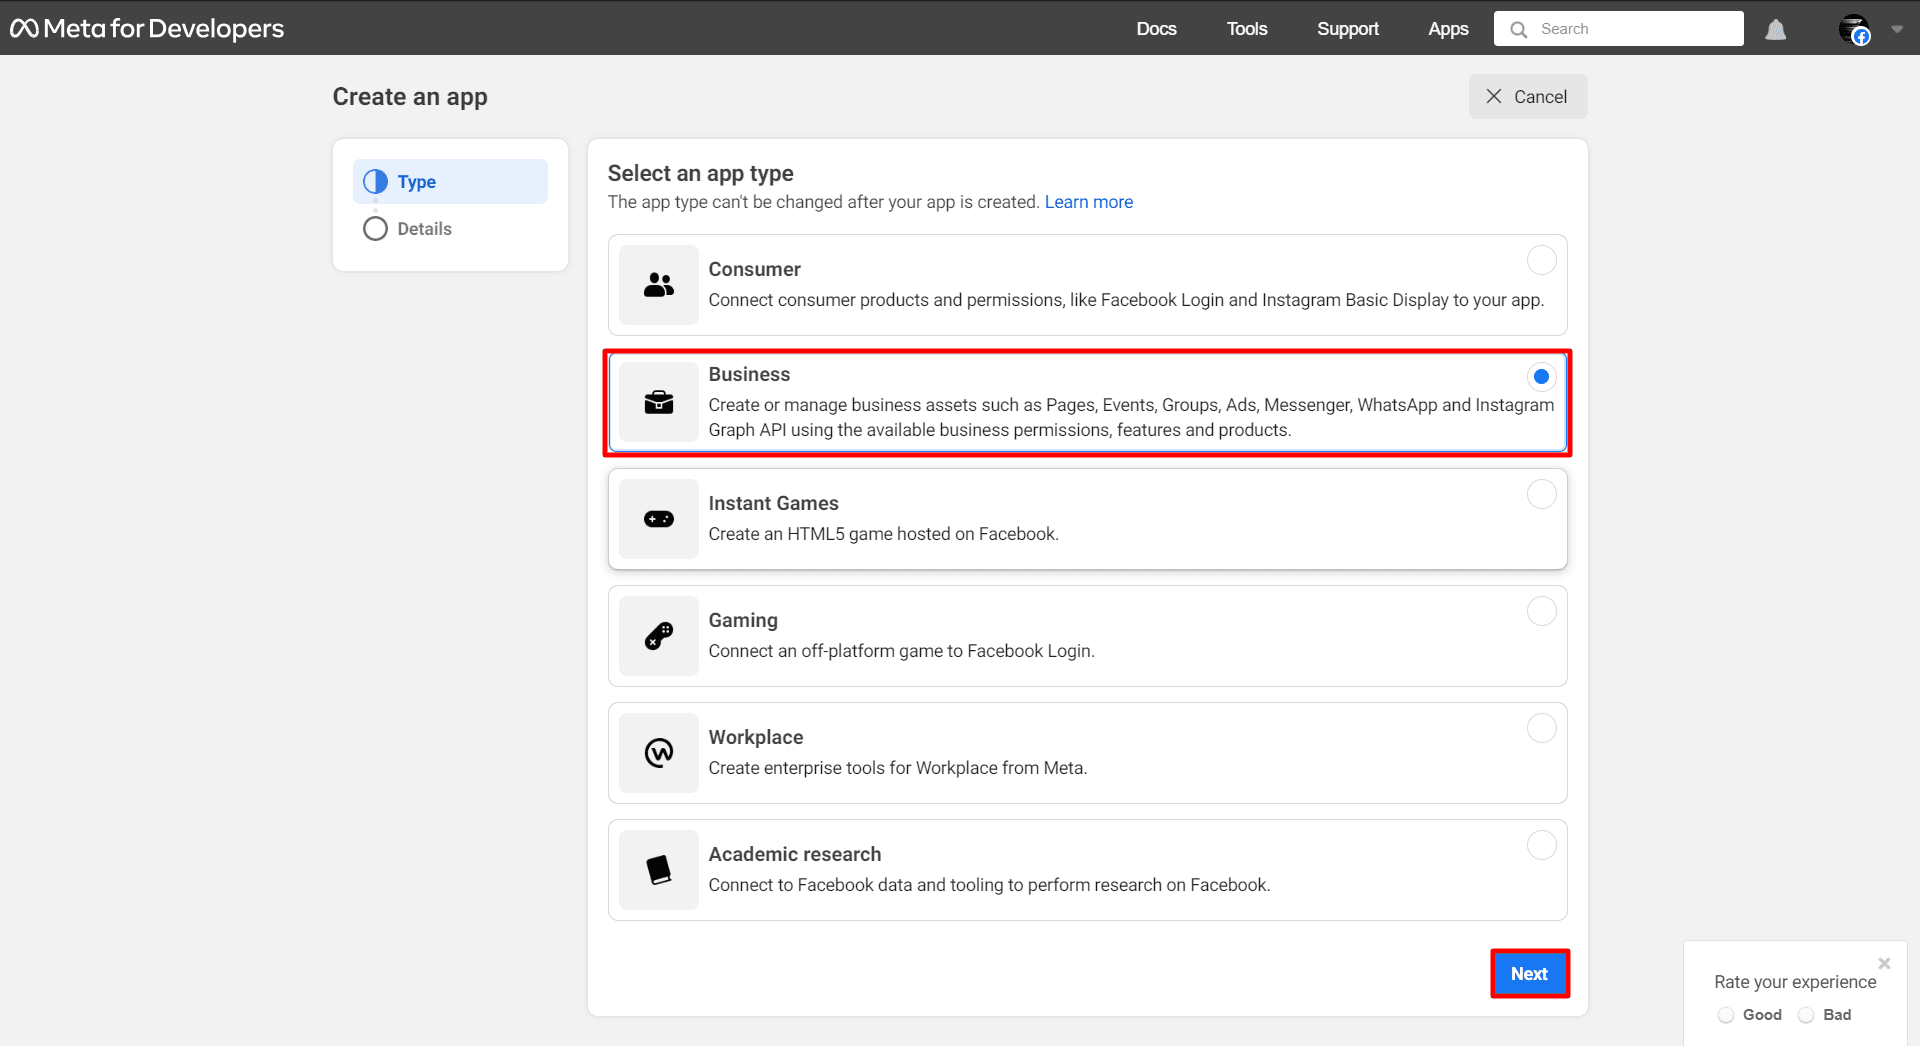
A page titled ‘Create an App’ will appear with a list of app types. Select ‘Business’ as your application type, then click on the ‘Next’ button.
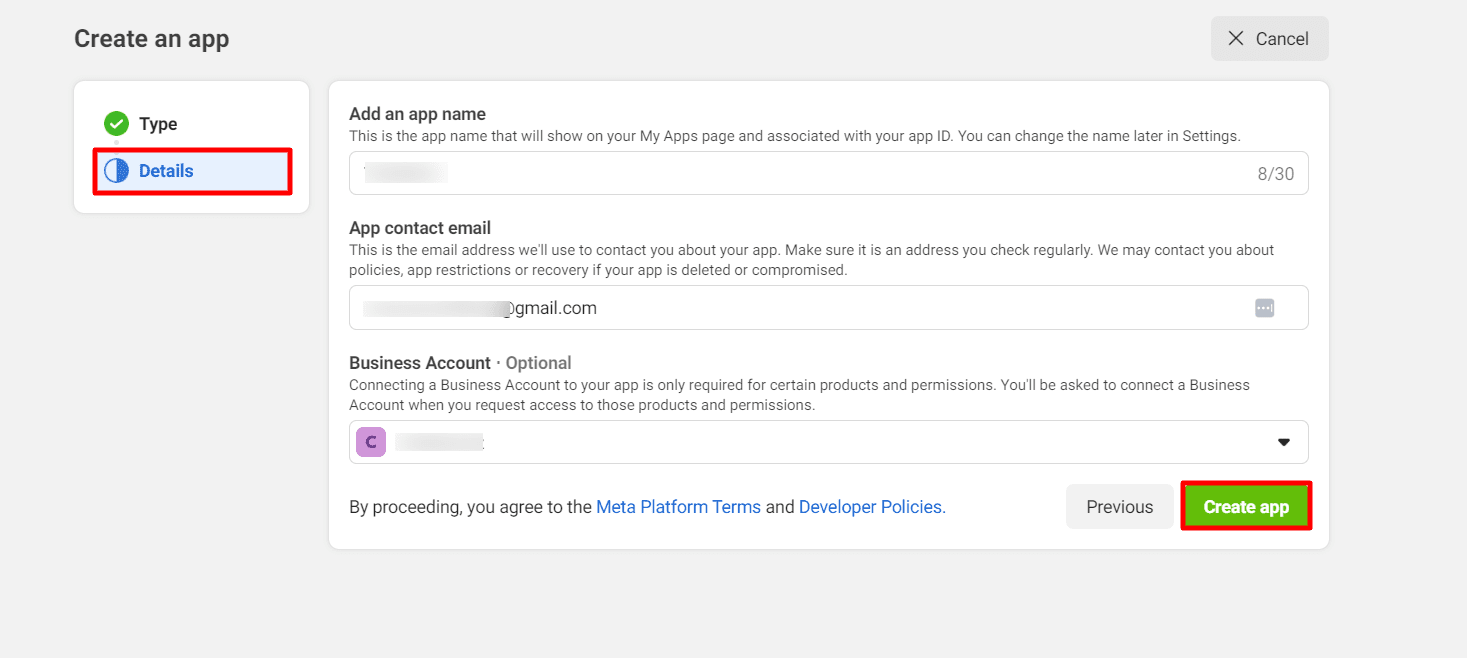
A form will appear which you must fill out with basic information:
-
- Add a name for your application.
- Provide an email address.
- Optionally, in the ‘Business Account’ field, select an existing business account.
Click on ‘Create App’.
A pop-up form will appear asking for your Facebook password. Re-enter your Facebook password and click on ‘Submit’.
You will be taken to the product page. Here, you must add WhatsApp to your application. Scroll down to the WhatsApp section and click on the setup button.

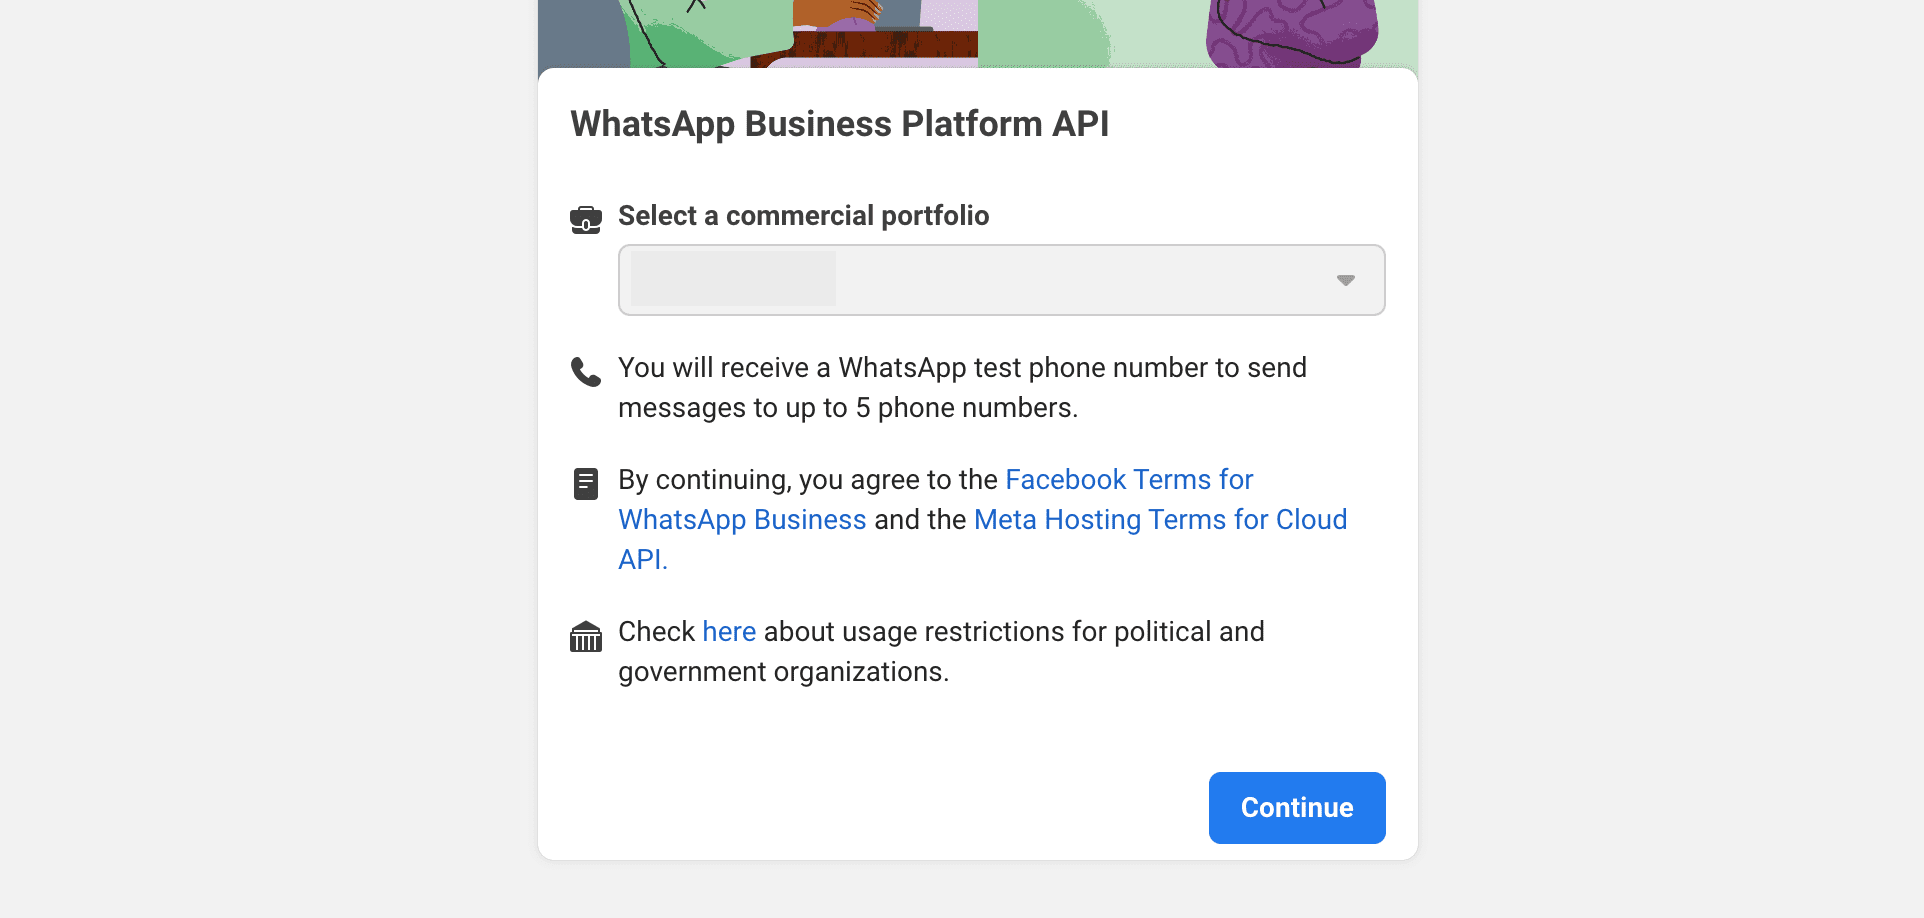
After clicking on “Set up,” you will be asked again to add a Business portfolio. If you haven’t selected one before, do it now. Click on Continue. The Quick Start Page will appear.
Adding a phone number to the app
In the sidebar menu, select ‘API Setup’. Scroll down to Step 5, and click on the ‘Add phone number’ button.

A modal form will open where you must provide profile information that will be visible to people on WhatsApp.
- WhatsApp Business Profile Display Name: Enter a display name.
- Timezone: Select your corresponding timezone.
- Business Category: Click on the ‘Category’ field, and a dropdown list of different categories will appear. Choose the category that best describes your business.
- Business Description: This field is optional. You can write a description of your business if you wish.
After completing the profile information and clicking on the ‘Next’ button, another modal form will appear. In the first field, enter the phone number you wish to associate with your WhatsApp Cloud API account.
💡 PRO TIP: If this phone number is already linked to a WhatsApp account, you need to delete that account first. Wait several minutes, and then come back to this step to try again.
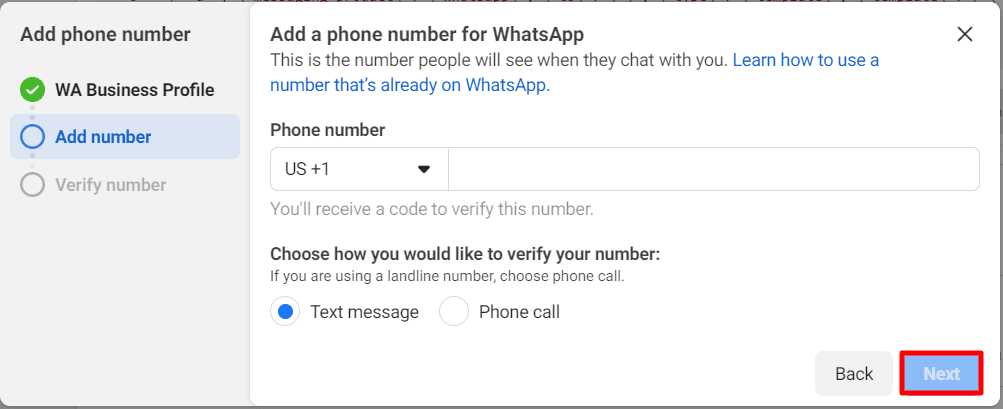
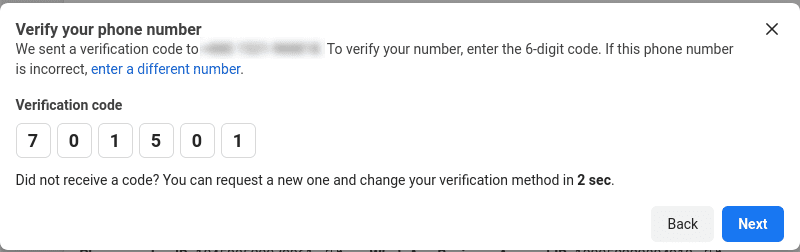
Choose how you would like to verify your phone number: via text message or phone call. Select your preferred option. Then, add the code you received.
Adding a payment method
Go all the way down to Step 6 – Add a Payment Method. Remember that starting from February 1st, 2022, Facebook has globally implemented a new pricing model for WhatsApp messages. With this new structure, WhatsApp Business Accounts are charged per conversation depending on who initiates it: you (business-initiated) or your customer (contact-initiated). Under this pricing model, you receive free benefits including Message Templates within a 24-hour messaging window and 1000 monthly conversations. Click on Add a payment method.
A new page called Settings of the Company will open. It is inside the Business Meta Account you linked to your app in the steps before. You will be automatically directed to the WhatsApp section of this page. Go to the Settings tab and click on the Payment settings button.

On the next page, click on Add Payment method. Add your credit or debit card information and save.

Collecting the access token
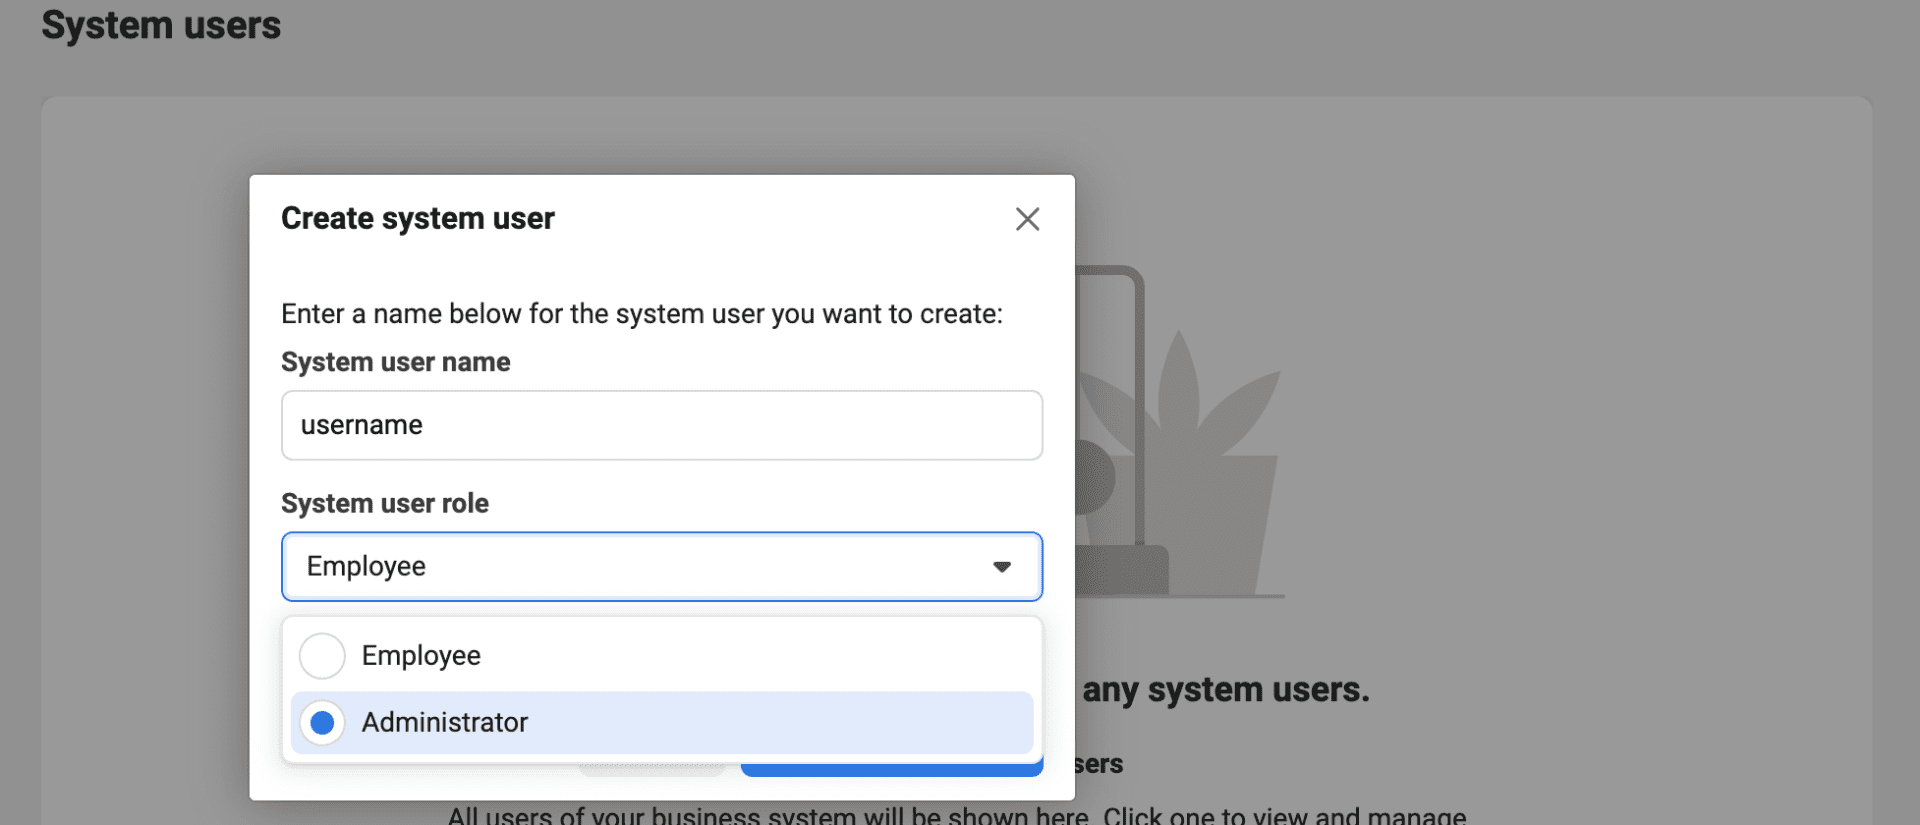
You have to collect a permanent access token to connect your bot. To obtain it, you need to set-up a new user. Go back to the Settings of the company page inside your Meta Business Account. In the left menu, click on Users > System Users.

Click on the Add Button. In the modal form, write a username and choose Admin as the user’s role. Then, click on Add.
Select the user you just created, and tap on the three dot menu at the top right corner. Click on Add assets.

In the modal form, open the Apps section on the left menu, select the app you previously created, turn on the Full Control Permission. Click on Assign assets to save.

Now you have to generate an access token. Click on the Generate new token button.

On the permissions window, select Never for the token’s expiration date.

Turn on the following permissions Business Management, Catalog Management, WhatsApp Business Messaging, and WhatsApp Business Management.

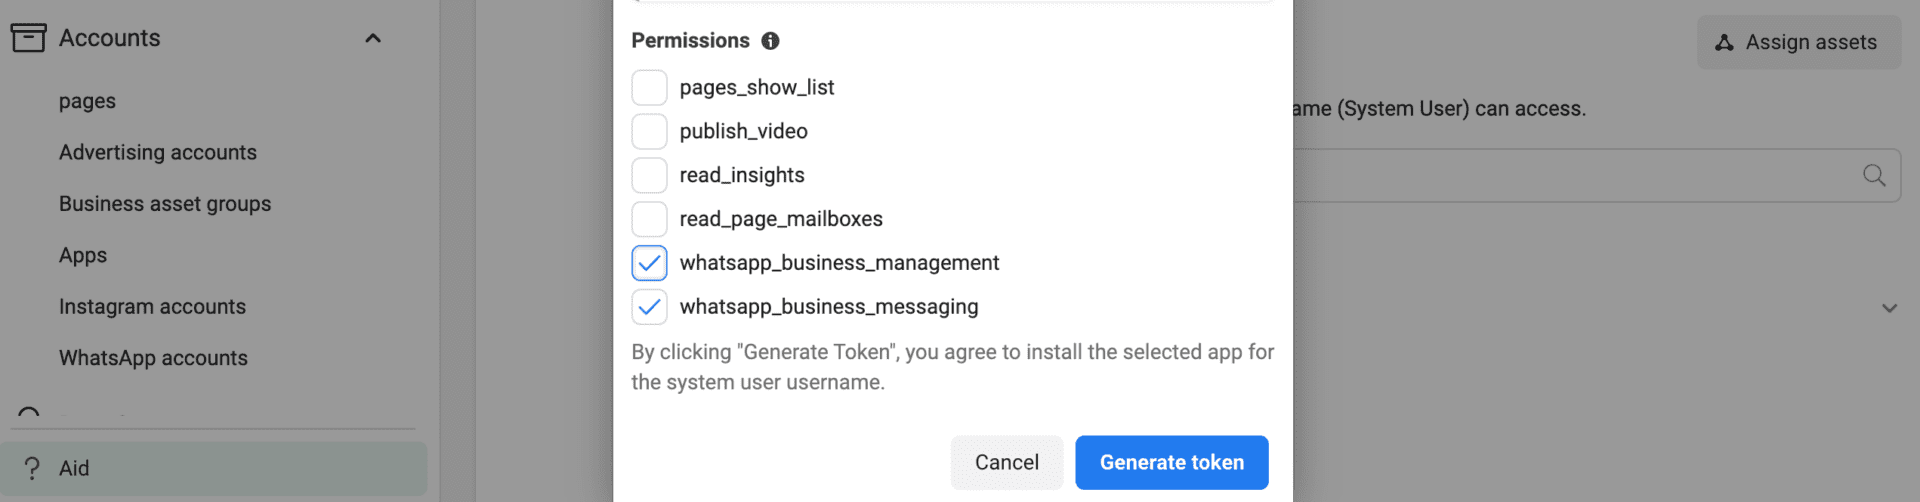
Click on Generate token. In the next screen, you will find the Permanent Access Token. Copy it, paste it as text in another document and save it. It will no be stored on Facebook, and you will need it later in this and other processes.
Go to “WhatsApp account” in the left sidebar, choose the account you created for your bot, copy the ID and save it too.

Configuring the Webhooks for Your WhatsApp Bot
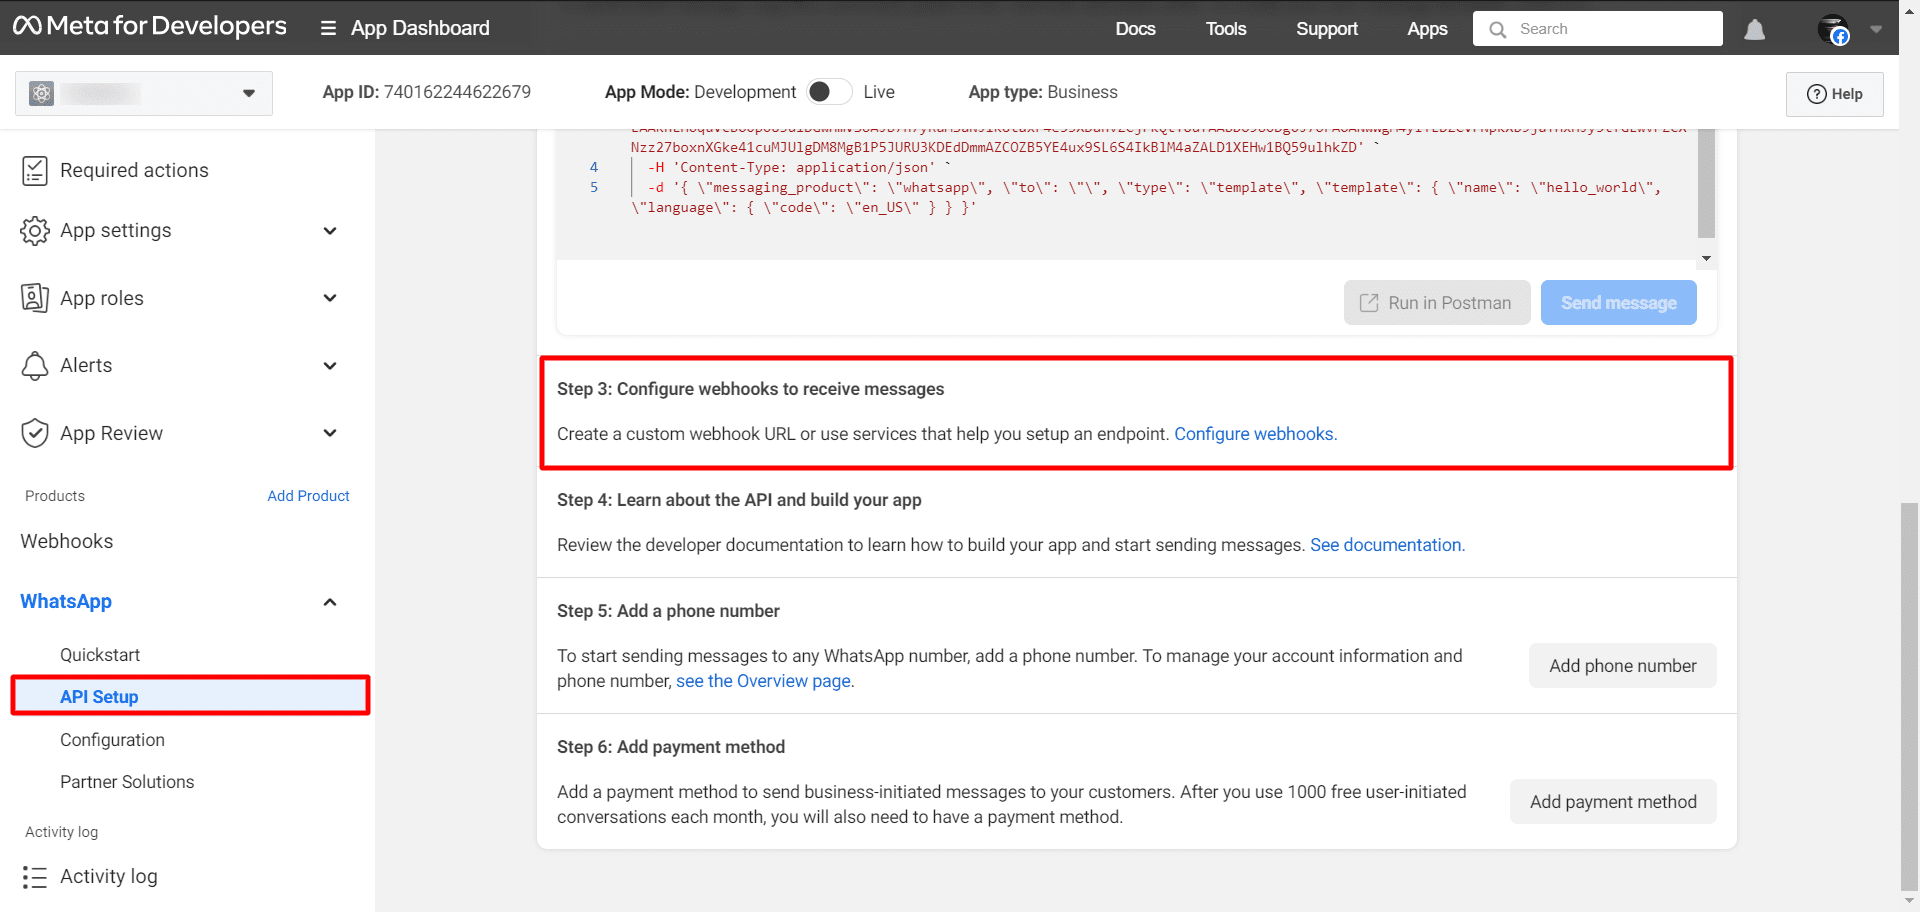
Go back to the Meta Developers Page. In the API setup menu, proceed to step 3 and click on the ‘Configure webhooks’ link.
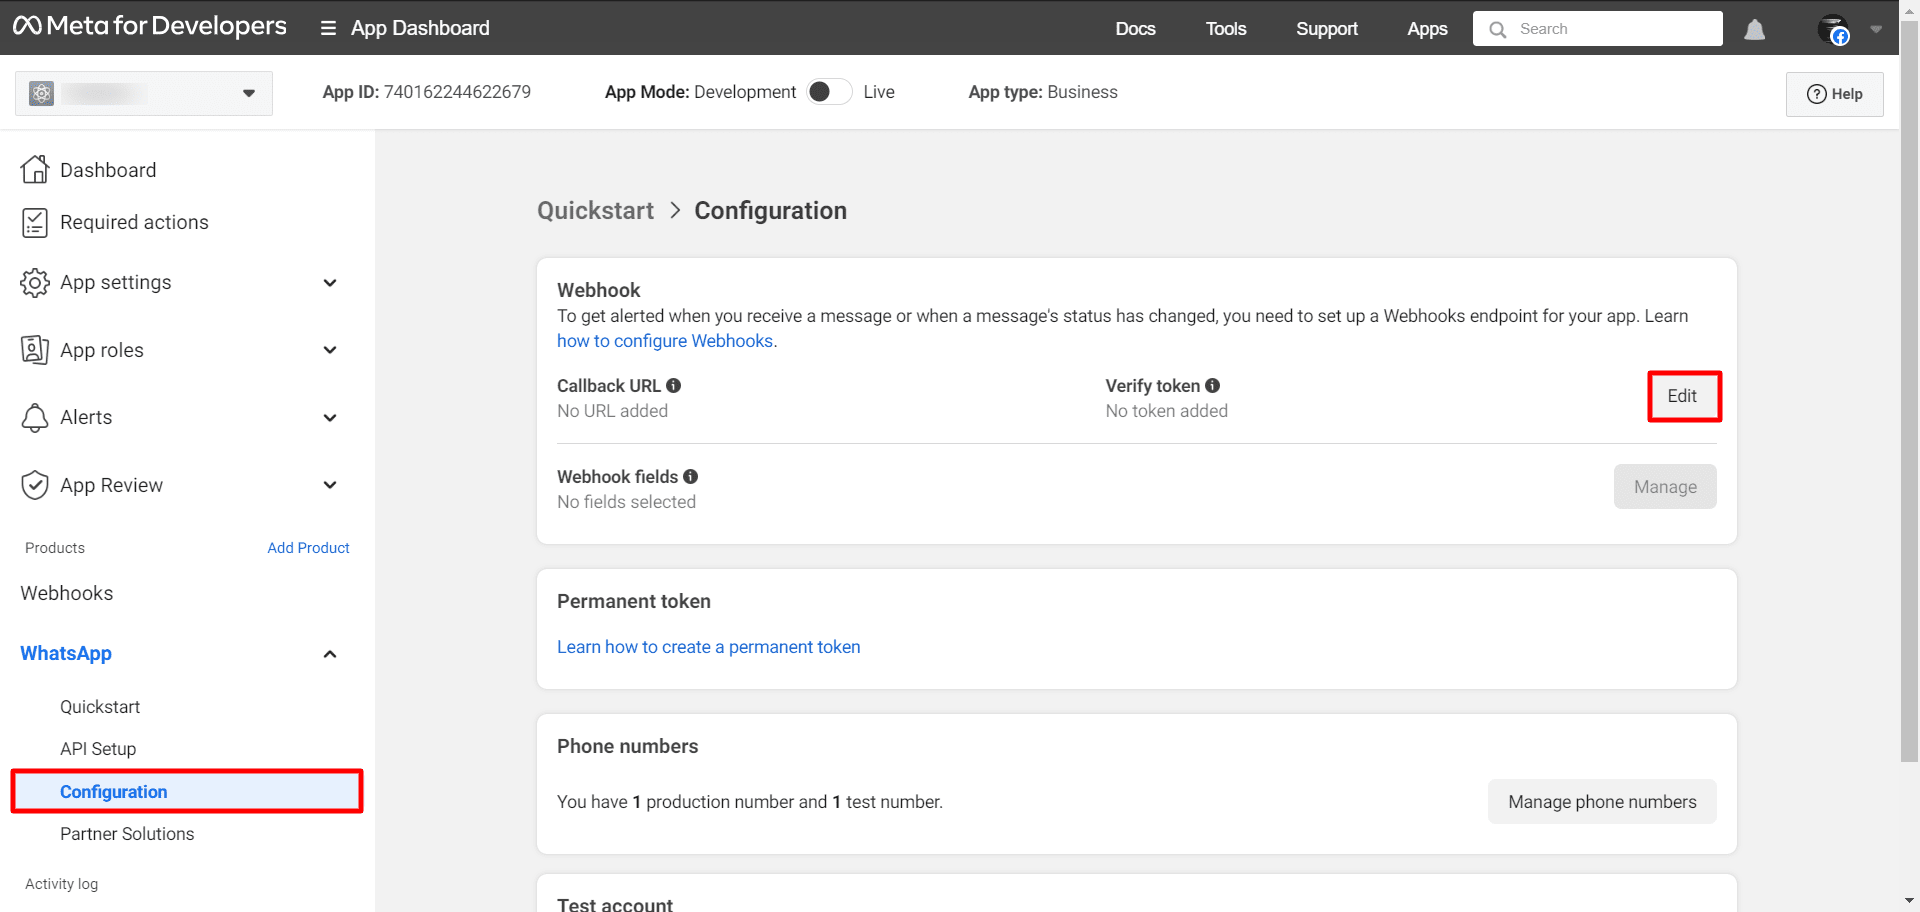
In the webhook section, you’ll find an edit button. Click it to open a modal form with two fields: Callback URL and Verify Token.
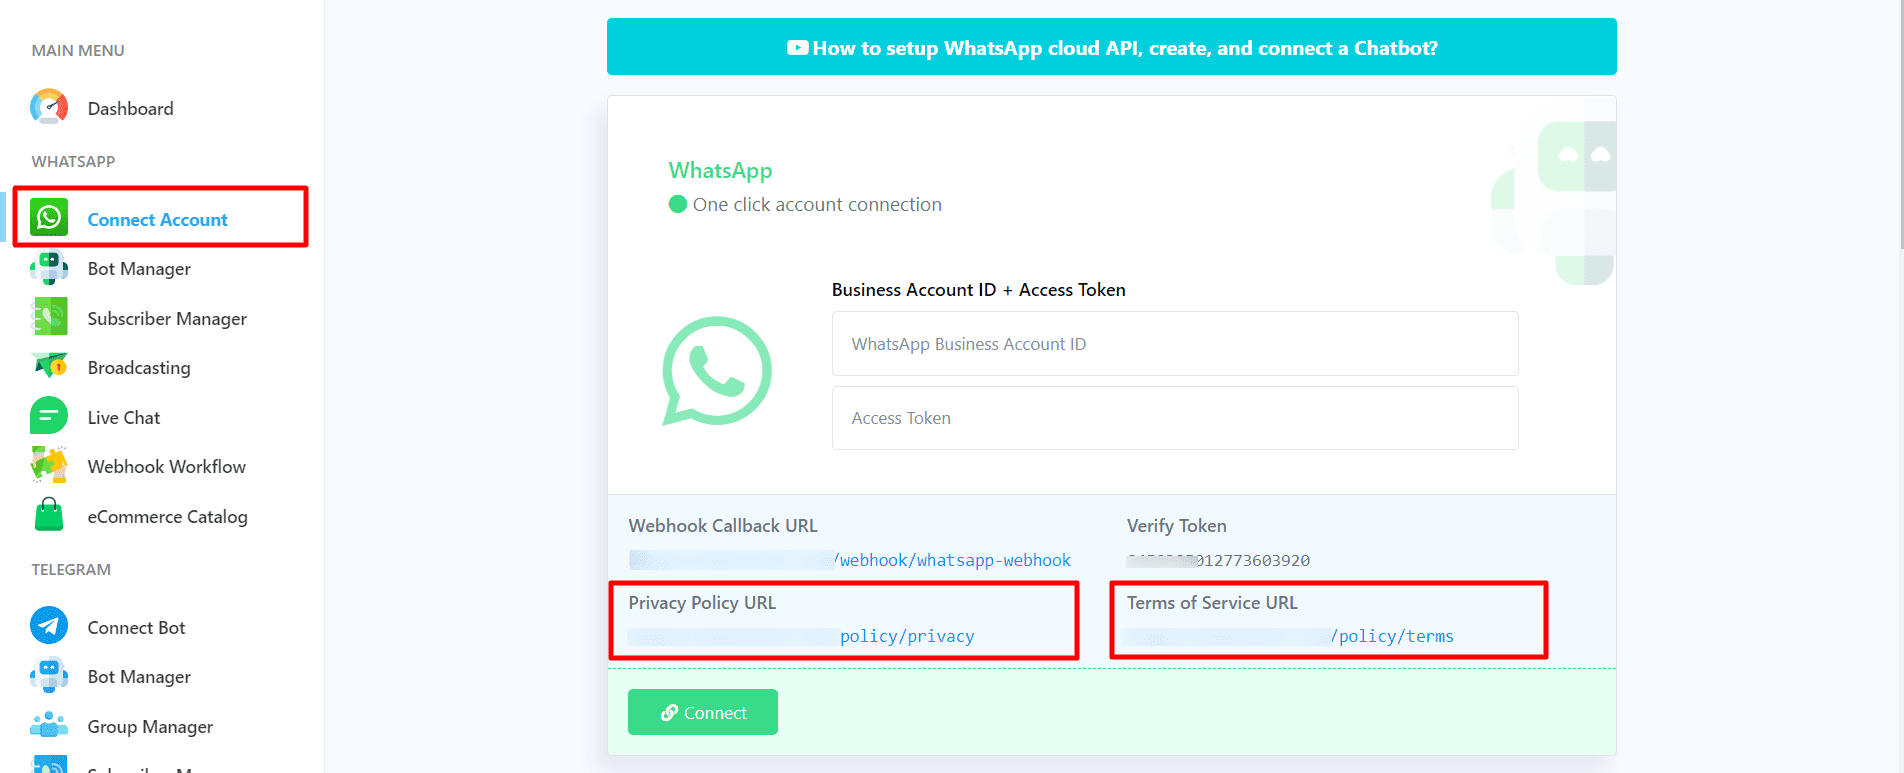
To get these, log in to your account on our app and navigate to the dashboard. In the left sidebar, under the WhatsApp section, select the ‘Connect WhatsApp’ option. The ‘Connect WhatsApp’ page will appear, displaying your Webhook Callback URL and the unique verify token of your account. Copy them.
Return to the Configuration page and paste the Webhook Callback URL and the verify token into their respective fields. Then, click on the ‘Verify and Save’ button.

To select webhook fields, scroll down to the webhook fields. Subscribe to the Message webhook field by turning on the switch.

Switch to Live Mode. Turn on the switch at the top of the page to turn your app into Live Mode. You will be asked to set up your Privacy Policy and Terms of Service first. Click on the ‘Basic’ option and add the Privacy Policy URL and Terms of Service URL provided by this app. These URLs can be found on the ‘Connect WhatsApp’ page.

After adding them, click on the ‘Save Changes’ button.

Finally, switch from developer mode to live mode by toggling the corresponding switch. To finish, return to the API Setup page by clicking on its menu in the left sidebar.

Connecting WhatsApp
Go back to the ‘Connect WhatsApp’ page. Once again, you can access by clicking on the ‘Connect Account’ option at the left sidebar.
Enter your WhatsApp Business Account ID and the permanent access token you collected before (when you created the System User in Meta).

Click on the ‘Connect’ button. A successful message should confirm the completion of the process.

If you are unable to connect the account, go back and check every step is performed correctly. You can also hire an expert to help you.