Getting your Telegram account connected to BotCommerce is easier than you might think! In just a few steps, you’ll create a new bot with the help of Telegram’s BotFather, grab the token you need, and integrate it into your BotCommerce account. Let’s get started!
Start a chat with BotFather
Open Telegram: Launch the Telegram app on your device.
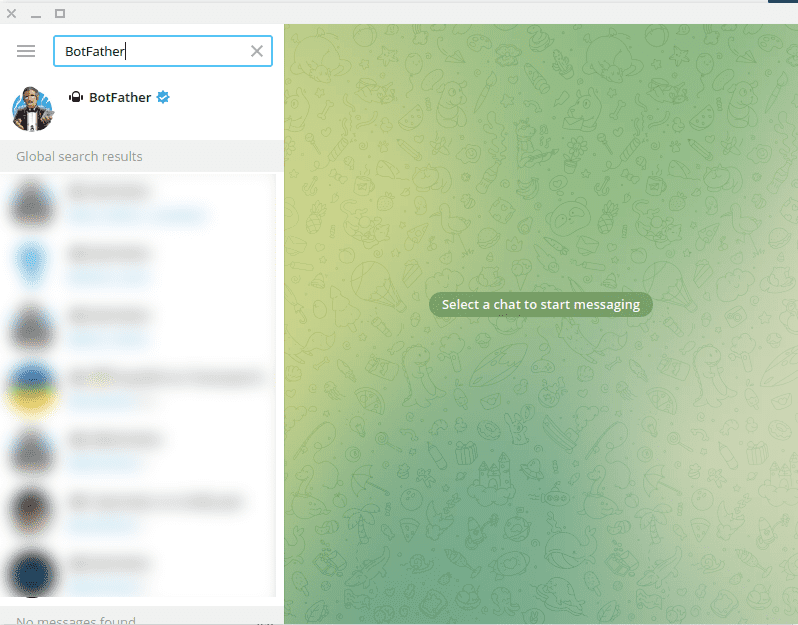
Search for BotFather: Use the search bar in the app and enter the keyword “BotFather.” Make sure to select the verified BotFather account to avoid confusion.
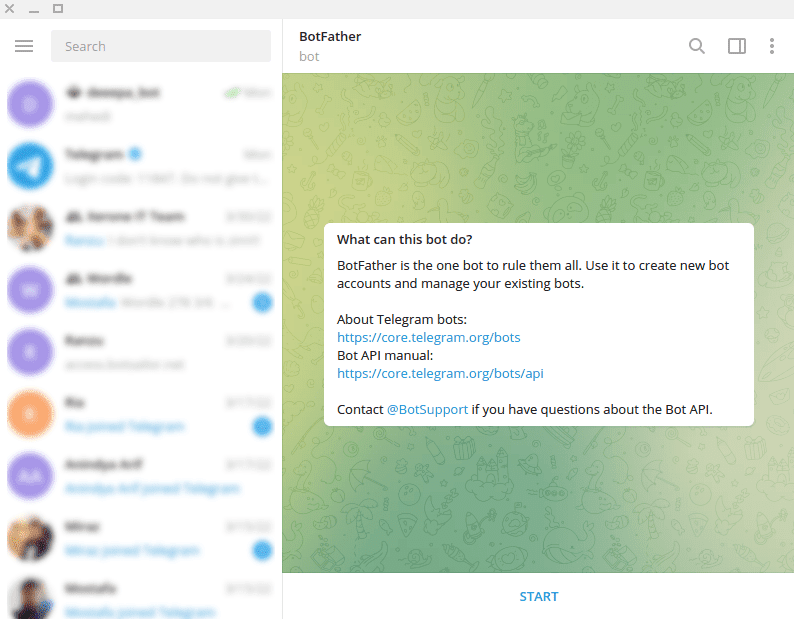
Start conversation: You will immediately see a message with two links and a “Start” button labeled START. Click this “Start” button to begin the conversation with BotFather.
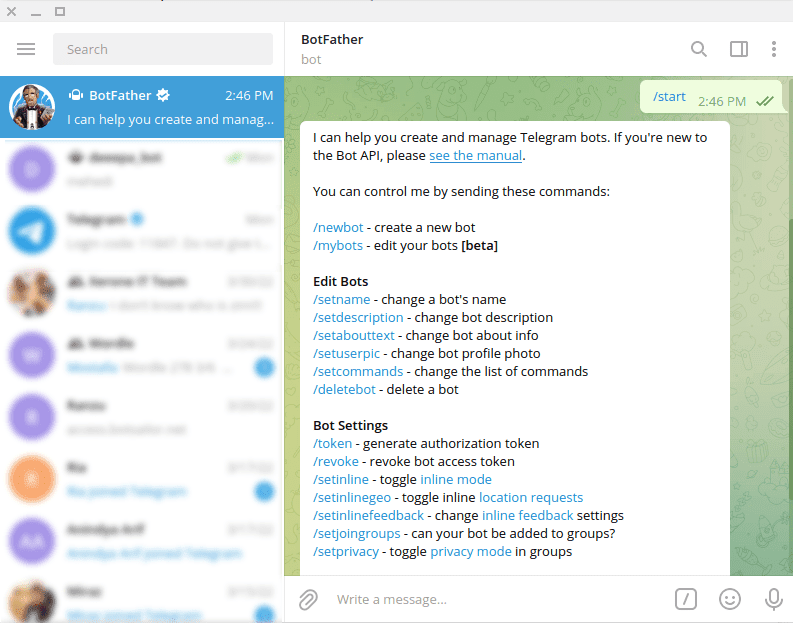
Create New Bot: Without delay, BotFather will send you another message with multiple options. Now, click on the /newbot option to start the new bot creation process.
Create a bot using BotFather
Selecting a name: BotFather will initially ask you to choose a name for your bot. Select a unique name that adequately represents your bot.
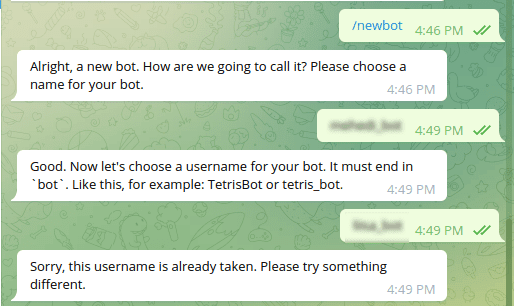
Choosing a username: BotFather will then ask for a username that must end with “bot”. Please provide a username that meets this criteria.
Username Check: BotFather will check for username availability. If the username is already in use, you will be prompted to choose another one. Continue this process until you find an available username.
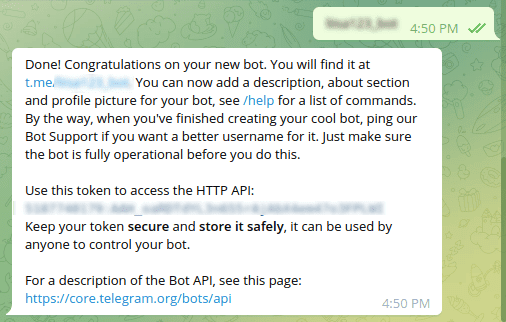
Token Assignment: Once your username is approved, BotFather will congratulate you and provide you with the token to access the HTTP API. This token is critical to creating and operating your bot.
Token Security: It is critical to keep your token safe. The token allows full control over your bot, so you should keep it in a safe place and not share it.
Token Usage: Copy the provided access token to start building your bot and using the HTTP API capabilities.
Connect your bot to the app
Follow these steps for a successful integration and take advantage of the video tutorial for a detailed visual guide to the process.
Access the connection menu: Navigate to the ‘Connect Bot’ menu in BotCommerce.
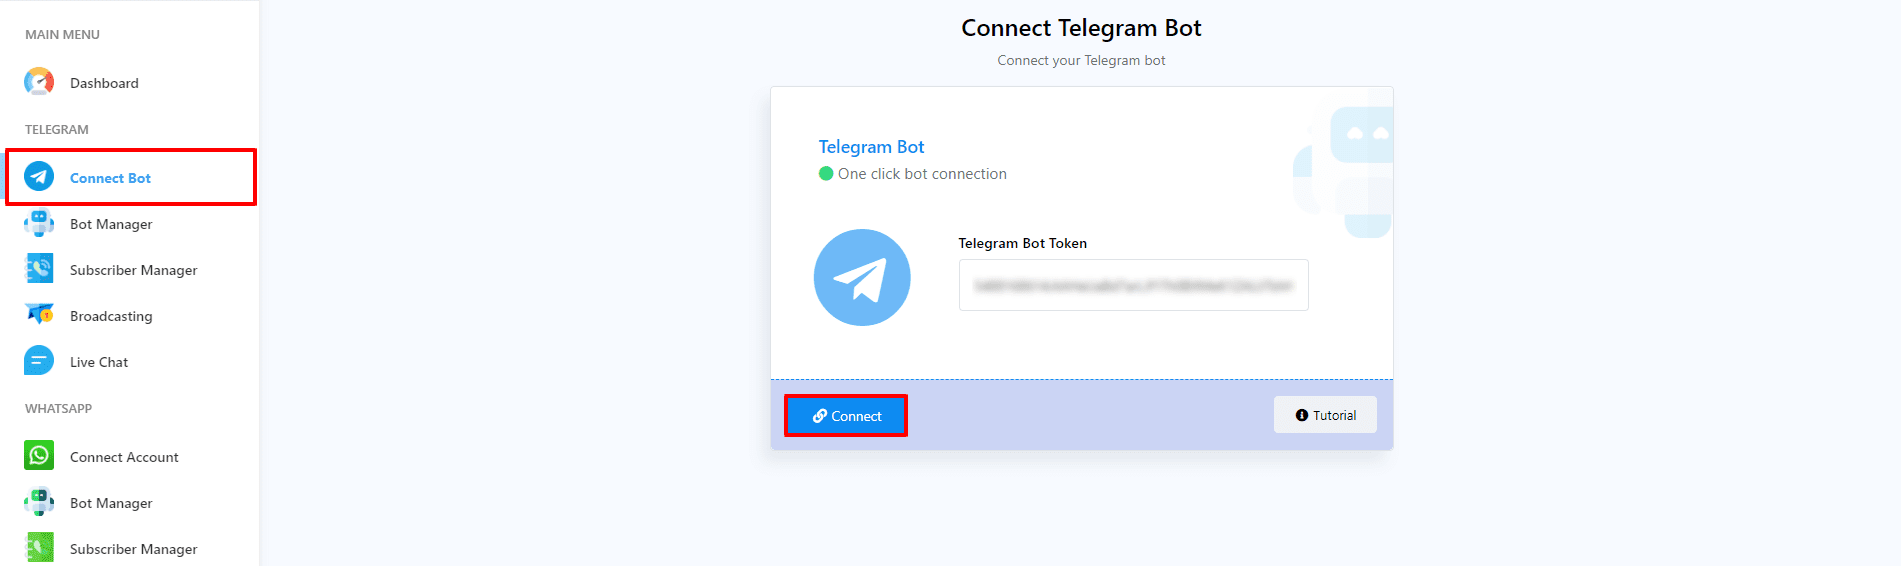
Enter Bot Token: Enter the token you received from BotFather in the field labeled “Telegram Bot Token”. Make sure to enter the token correctly to avoid connection issues.
Connecting the bot: After entering the token, click the “Connect bot” button. You will immediately receive a confirmation message indicating that the bot has been successfully connected.
Managing bot status: After connecting, a box will appear displaying your bot’s name and username. To deactivate your bot, toggle off the radio button labeled “active.” To reactivate it, simply toggle this button back on.
Disconnect and Sync: You can disconnect your bot at any time by clicking the ‘Disconnect’ button. Additionally, to sync your bot’s information, use the ‘Sync’ button.
Additional Resources: For a deeper understanding of the process, we recommend watching the provided video tutorial, which offers detailed visual instructions.
Congratulations! You’ve successfully created and connected your Telegram to BotCommerce. Now, you can manage your bot’s status and customize its features.
