This guide will teach you how to connect SocialPoster with n8n to receive WhatsApp messages in your automation workflows. Once connected, you can forward those messages to an AI agent from OpenAI to reply back automatically.
Why use an OpenAI Assistant instead of SocialPoster’s built-in AI? SocialPoster’s built-in AI only allows you to set a single static prompt. That works for basic responses, but lacks flexibility. OpenAI’s assistants are far more powerful — you can upload documents, provide real-time data via APIs, manage conversation threads, and fine-tune their personality and tone. Using n8n as a bridge, you can unlock this potential while still using WhatsApp through SocialPoster.
Setting up the Global Webhook
You’ll first configure SocialPoster to send all incoming WhatsApp messages to your n8n webhook. That way, every time someone writes to your WhatsApp number, your n8n workflow can capture and process the message.
Start by building a new workflow in n8n. Go to your n8n instance, create a new workflow, and add a Webhook node.

Configure the Webhook node. Click on it to edit it. Use the following settings:
- HTTP Method: POST
- Path: (any name you like, e.g. waziper-incoming)
Obtain the Test URL. n8n will now show you a Test URL. Copy it. You’ll need it in the next step.

Go to SocialPoster and Find the Webhook Setting. From your SocialPoster dashboard, locate the Webhook configuration.
In the left-hand menu, go to: WhatsApp > API. Select your account and scroll to the section titled POST – Set Receiving Webhook. This is where SocialPoster lets you define a Global Webhook. That means all incoming WhatsApp events (messages, status changes, disconnects, etc.) will be forwarded to the specified URL.

Prepare the Webhook URL. To activate the global webhook, you need to open a URL in your browser. This URL tells SocialPoster where to send the data (your n8n webhook), which instance to use (your WhatsApp session) and your access token
The URL structure looks like this:
https://socialposter.planifyx.com/api/set_webhook?webhook_url=ENCODED_URL&enable=true&instance_id=YOUR_INSTANCE_ID&access_token=YOUR_TOKEN
Let’s break that down:
- webhook_url: The URL where messages will be sent (from n8n)
- enable=true: Enables the webhook
- instance_id: Your WhatsApp session ID
- access_token: Your personal access token from SocialPoster
In the URL provided by SocialPoster, all the fields are set except for the webhook_url, we need to replace it with the Test URL provided by n8n. However, you cannot paste your n8n webhook directly — it must be encoded first.
As seen on the example, your n8n Test URL look something like this:
https://n8n.planifyx.com/webhook-test/8e981c32-c4a7-445d-b7c5-356d0a1bf7dd
Your encoded version should then be:
https%3A%2F%2Fn8n.planifyx.com%2Fwebhook-test%2F8e981c32-c4a7-445d-b7c5-356d0a1bf7dd
You can use sites like urlencoder.io to encode your URL. Then, add it to the one provided by SocialPoster. The final URL must look like this:
https://socialposter.planifyx.com/api/set_webhook?webhook_url=https%3A%2F%2Fn8n.planifyx.com%2Fwebhook-test%2F8e981c32-c4a7-445d-b7c5-356d0a1bf7dd&enable=true&instance_id=666CD7A500E29&access_token=645d74db13147
Paste the Final URL in Your Browser. Paste the resulting activation URL in any browser like Google Chrome and click on Enter. If it works, you’ll see a message like this:

Test It! Now, send a message from any number to your connected WhatsApp account. If everything is correct, your n8n webhook will receive the message instantly and you’ll see the data in JSON format inside n8n.

Congrats! You’ve connected SocialPoster to n8n successfully.
⚠️ IMPORTANT: Once you exit test mode and activate your n8n workflow, n8n will give you a new production webhook URL, like: https://n8n.planifyx.com/webhook/waziper-incoming. At that point, repeat the same process: Encode the new URL, build the final link again and open it in your browser to update the webhook. We’ll detail this step further in this article.
Creating an OpenAI AI Assistant
Set up your intelligent AI assistant. Go to https://platform.openai.com/assistants and click Create Assistant.

Configure your Assistant. Give it a name, select a model (we recommend gpt-4o) and paste your written prompt on the System Instructions field. You can also add files to complete the training, and use additional tools like API connections. Check OpenAI’s documentation to explore their full potential. Changes will be saved automatically.

Test it! Once you have finished uploading the training, write on the chat and ask your AI Assistant questions. Modify the system instructions and uploaded data as needed until it is able to answer them correctly.

Once it’s ready, copy your Assistant ID. You will find it under it’s name.

Connect OpenAI to n8n
Add an OpenAI node on n8n. Drag the OpenAI Assistant node to your workflow. Set the action to Message an Assistant.

Open the node to configure it. Under credential to connect with, select Create New Credential. You will be asked for an OpenAI API Key.

Get your OpenAI API Key. Go back to OpenAI and on the left sidebar, select API Keys. Create a new key with all the permissions.

Copy it. Once you close this window, you will not be able to see it again.

Paste the key on N8N. Leave the default URL as it is. Do not save yet. First, you need to add credit to your OpenAI account.

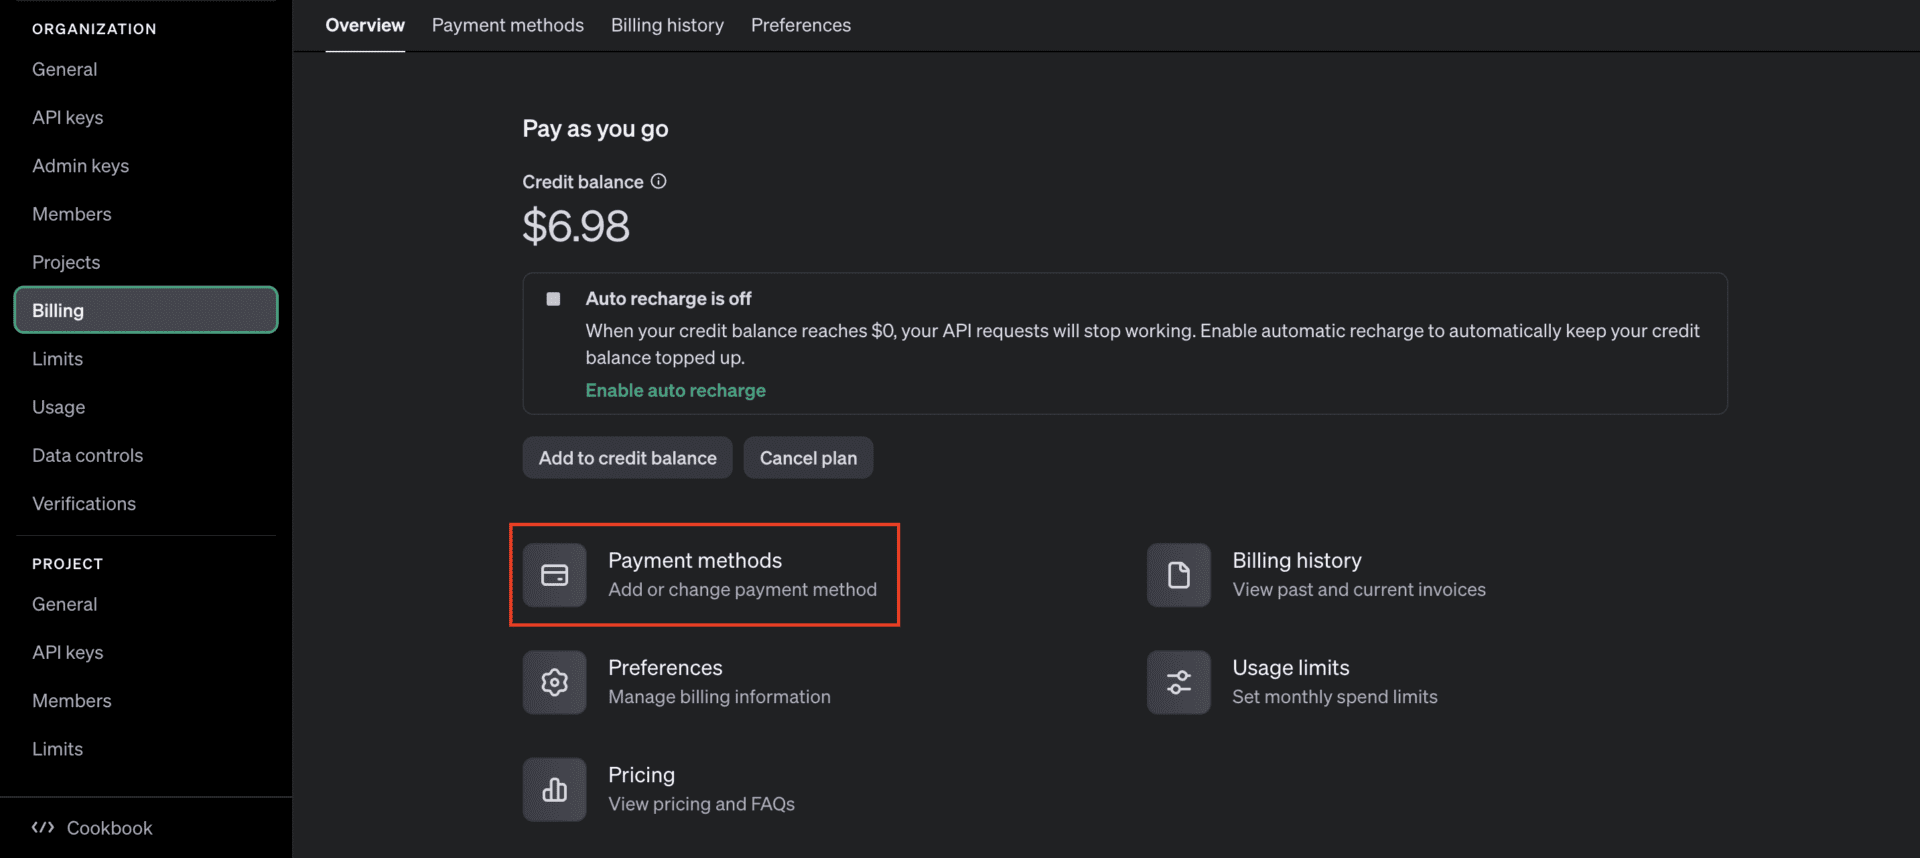
Go to the OpenAI’s settings section. Click on the settings icon located on the top right corner.

Add Payment Method. In the Billing section, click ‘Add a payment method’. Enter your credit card or payment details and save them. You can add several payment methods and set one of them as default.
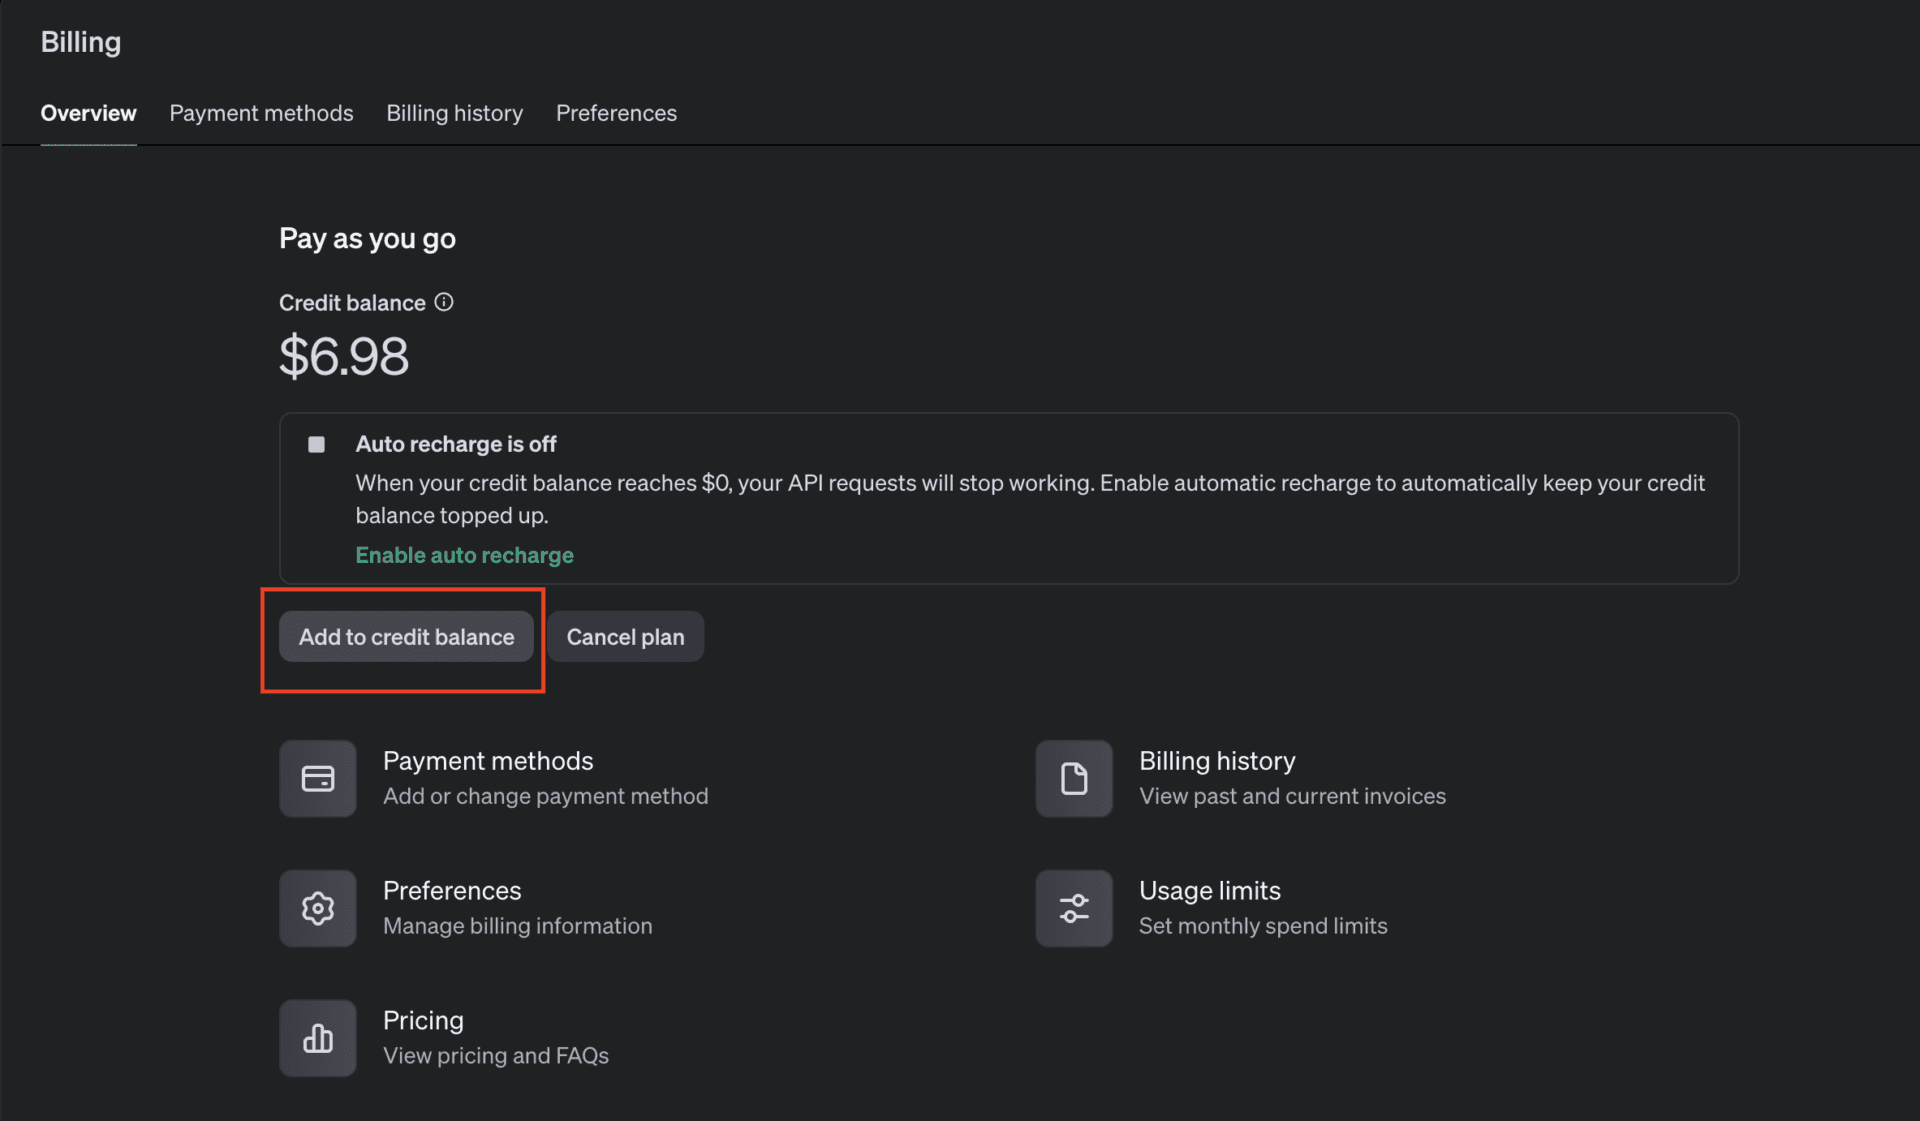
Add Credit. Go back to the Billing Overview page. Click on the ‘Add to credit balance’ button. Select the amount of credit you want to add. Options usually range from USD $10 to $500, depending on your requirements. Then, confirm your payment. Once processed, the credit will be available in your account.
Save the OpenAI connection in n8n. Click on the Save button. If done right, the connection must appear to be successful.

Now, configure the Assistant node. Under Assistant, select by ID and paste the Assistant ID you copied before from OpenAI.
On Source for prompt, select Define Below. Then, drag the message item from the input sent from WhatsApp as shown on the image below. This way, the OpenAI Assistant will get the user’s message.

Click on Test Step. If everything was done correctly, you should get a response from the AI Assistant.
💡 PRO TIP: If you see a “no prompt specified” error, go back to the Webhook node, run the test again by sending a WhatsApp message, and then test the OpenAI node individually. This refreshes the data and lets n8n know where to pull the prompt from.

Send the response back via SocialPoster
Add a new HTTP Request node to your n8n workflow. As the method, select POST. You will be asked for a Resource URL.
To obtain the Resource URL, go back to SocialPoster’s API section. Once again, select ypur account and look for the section called Send Text. Copy the Resource URL and paste it on n8n.
Copy the POST request body structure as well. It is the one shown on the image below.

In your n8n HTTP Request node, enable the “Set Query Parameters” option. Set the format to “Using JSON.” Then, paste the code provided by SocialPoster.
For the “number” parameter, drag in the “from_contact” field from the data received by the original Webhook — this is the phone number of the user who sent the message. That way, the response will always update dynamically and be sent to the correct user.

Next, replace the “message” string with the output from the OpenAI node, as shown in the image. This ensures that the AI-generated response is what gets sent back to the user.

Finally, click on Test Step. If everything is set up correctly, you should see the output status marked as Success.

You should also receive the AI-generated response on WhatsApp, sent to the same number you used to message the account where your chatbot is installed.

Test the full workflow
Click Test Workflow in n8n. Now send a WhatsApp message to your connected number.

If everything is working n8n will receive the message. It will send the message to your OpenAI Assistant The assistant will reply n8n will send that reply back to WhatsApp.

If while testing you encounter the error “Problem in node ‘OpenAI’ – no prompt specified” and the message is not sent, follow these additional steps:

Click on the OpenAI node to configure it. In the Prompt field, replace the current content with the following:
{{ $node["Webhook"].json.body.data.message.body_message.content }}
This tells n8n exactly where to get the message content from — in this case, the incoming Webhook.

Save your changes and run the test again. This time, it should work correctly.

Publish the workflow
Now, let’s activate your Workflow! Turn it on.

Now it’s time to register the Production URL for the global webhook. Go back to the editor, open the Webhook Trigger step, and copy the Production URL.

Repeat the same process as before — but this time, use the Production URL (encoded). That means copying the Receiving Webhook URL from SocialPoster and replacing the webhook_url parameter with the encoded version of your Production URL.
Example:
Production URL:
https://n8n.planifyx.com/webhook/8e981c32-c4a7-445d-b7c5-356d0a1bf7dd
Encoded:
https%3A%2F%2Fn8n.planifyx.com%2Fwebhook%2F8e981c32-c4a7-445d-b7c5-356d0a1bf7dd
Final activation link:
https://socialposter.planifyx.com/api/set_webhook?webhook_url=https%3A%2F%2Fn8n.planifyx.com%2Fwebhook%2F8e981c32-c4a7-445d-b7c5-356d0a1bf7dd&enable=true&instance_id=666CD7A500E29&access_token=645d74db13147
Paste it in your browser and press Enter. You must see a success message.

Write to your WhatsApp number. Now that your workflow is live and the webhook updated: The message is received in n8n, the assistant replies through OpenAI, and the response is sent back to the same user on WhatsApp.
And that’s it — your AI-powered WhatsApp chatbot is now live using OpenAI + SocialPoster + n8n.
