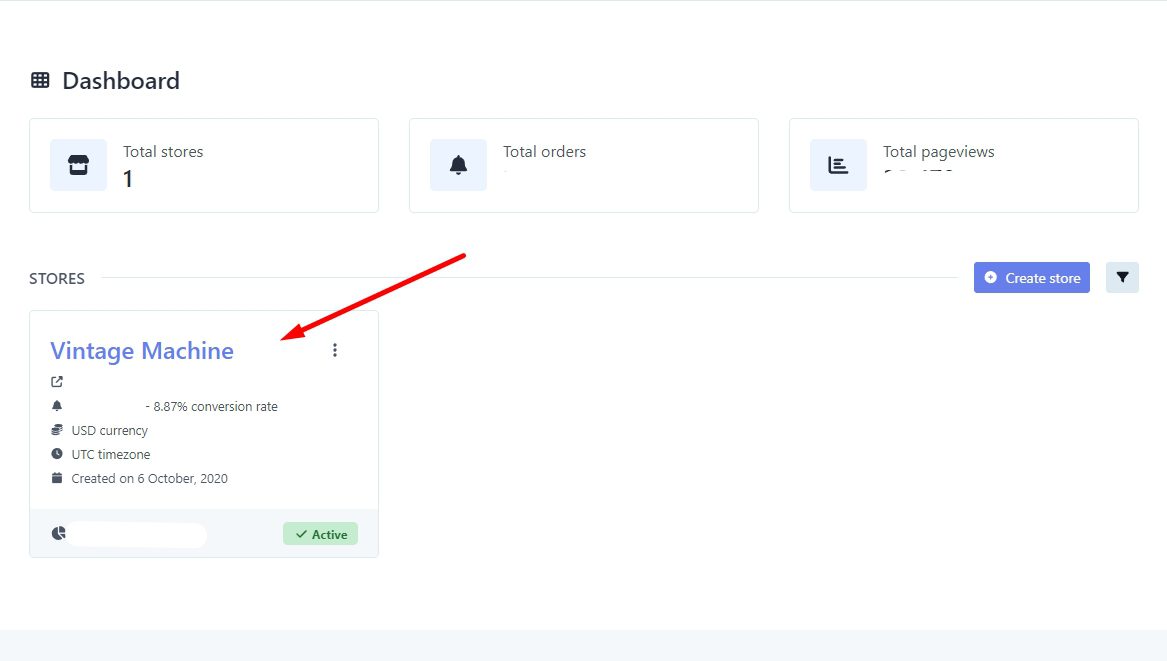
1.- Access Your Dashboard. Navigate to your dashboard where you manage your online store. Select the specific page you wish to customize. This will take you to the associated statistics page for that particular page.
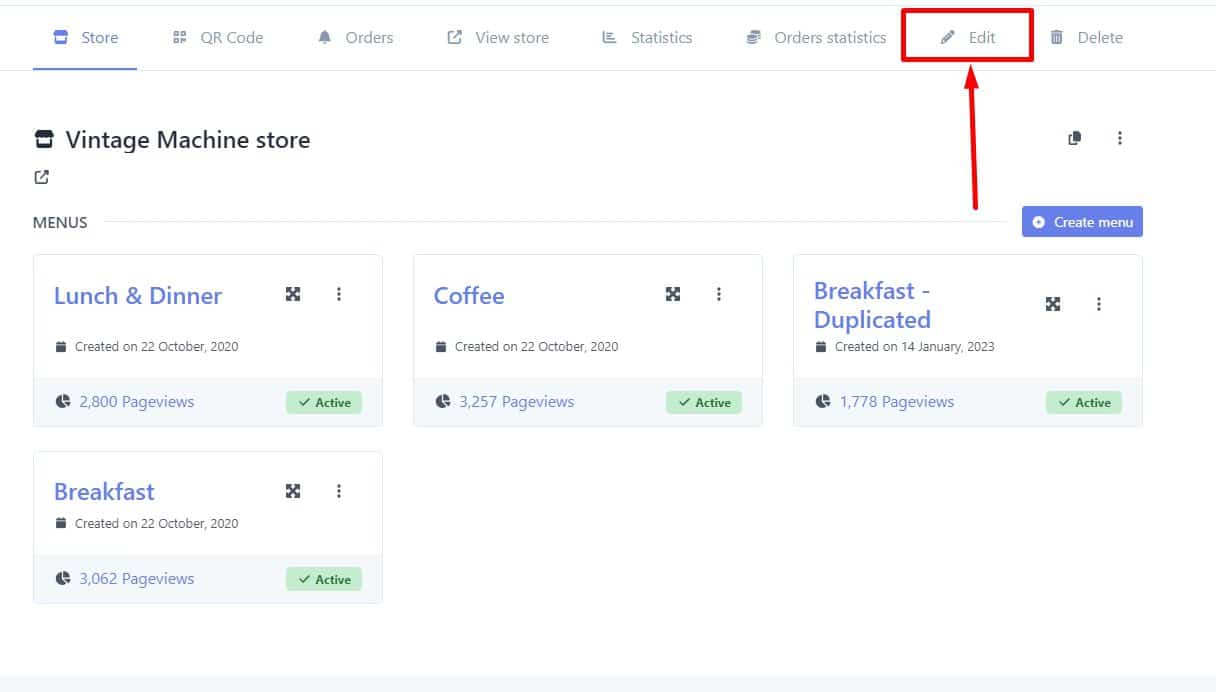
2.- Select the “Edits” Option. On the statistics page, find and click on the “Edit” option located in the top right corner.
3.- Access Payment Processor Settings. Once on the editing page, click on “Ordering” and scroll down to the bottom, where you’ll find four buttons corresponding to different payment methods.
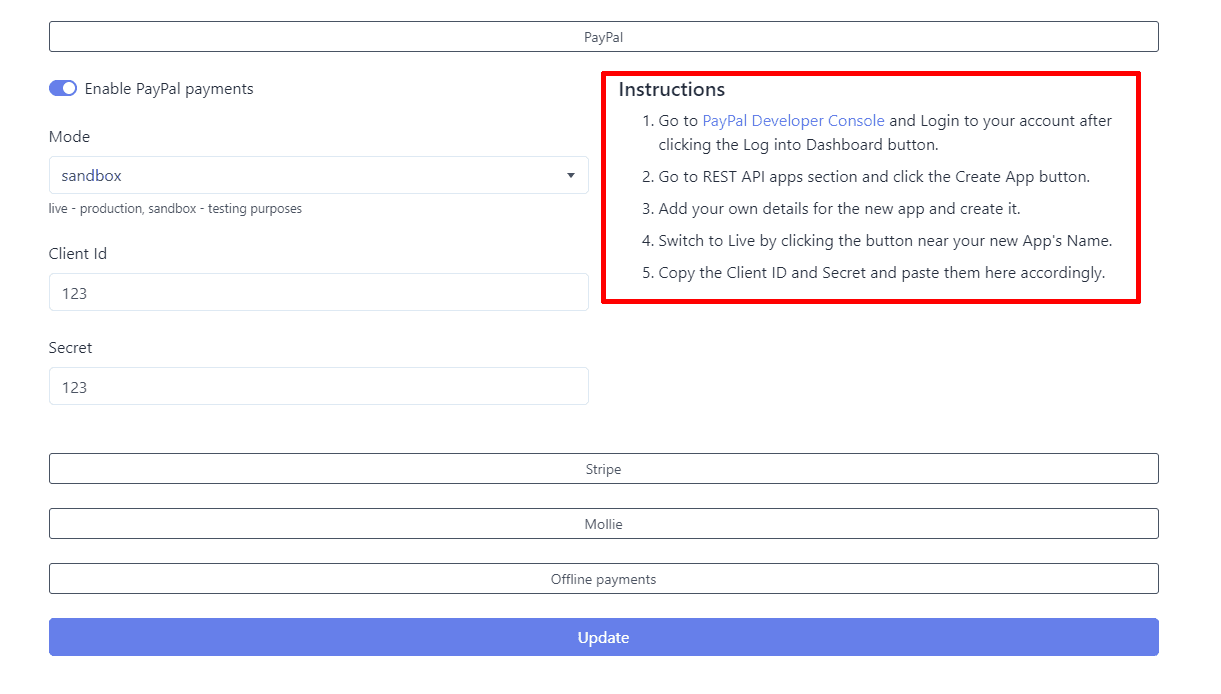
Configuring PayPal
a) Click on the PayPal button. Activate PayPal payments.
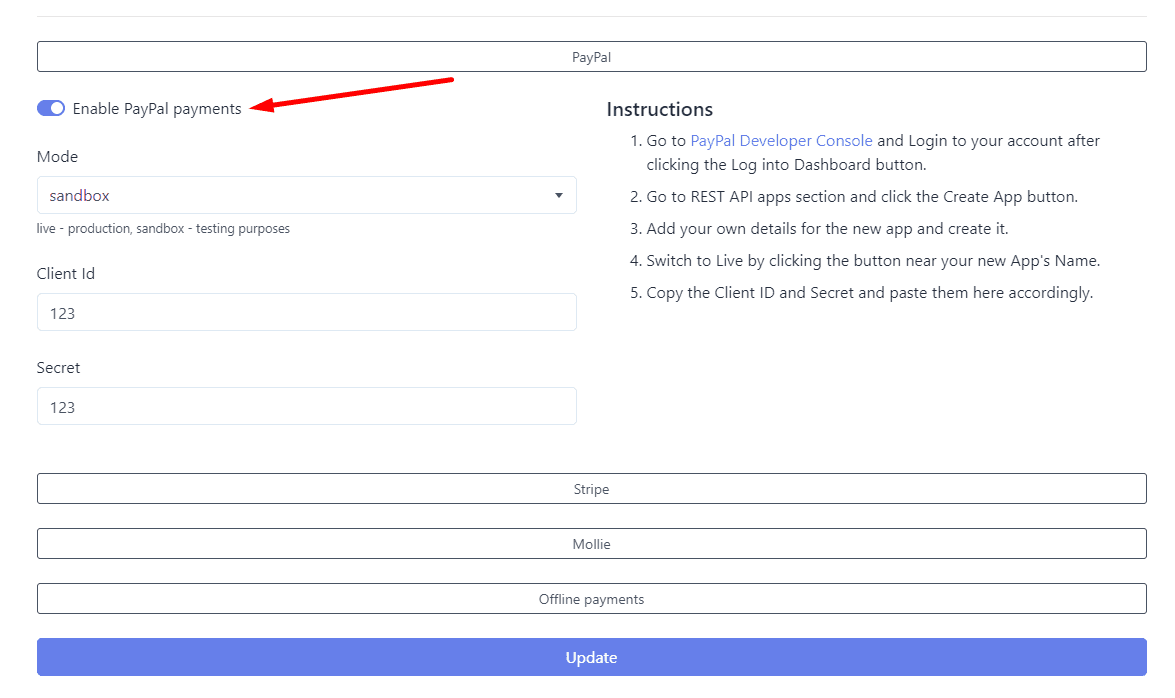
b) Select the mode. Follow the instructions provided.
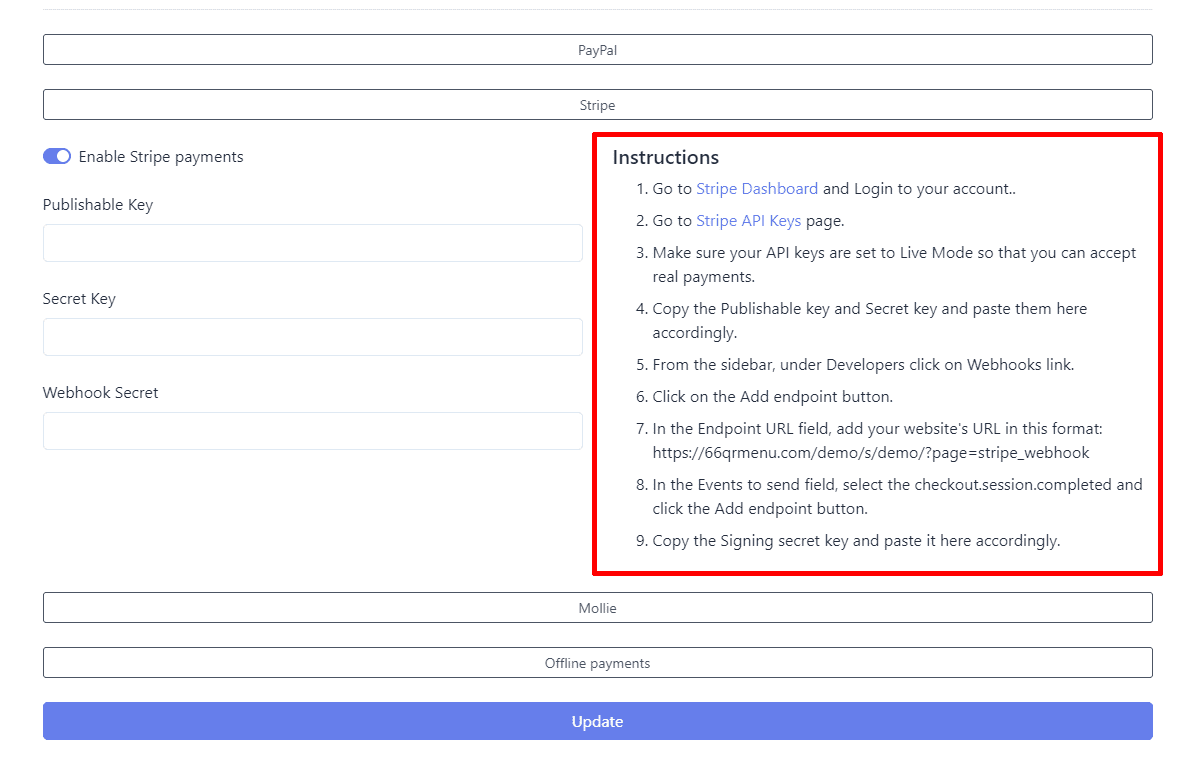
Configuring Stripe
a) Click on the Stripe button.First, activate Stripe payments.
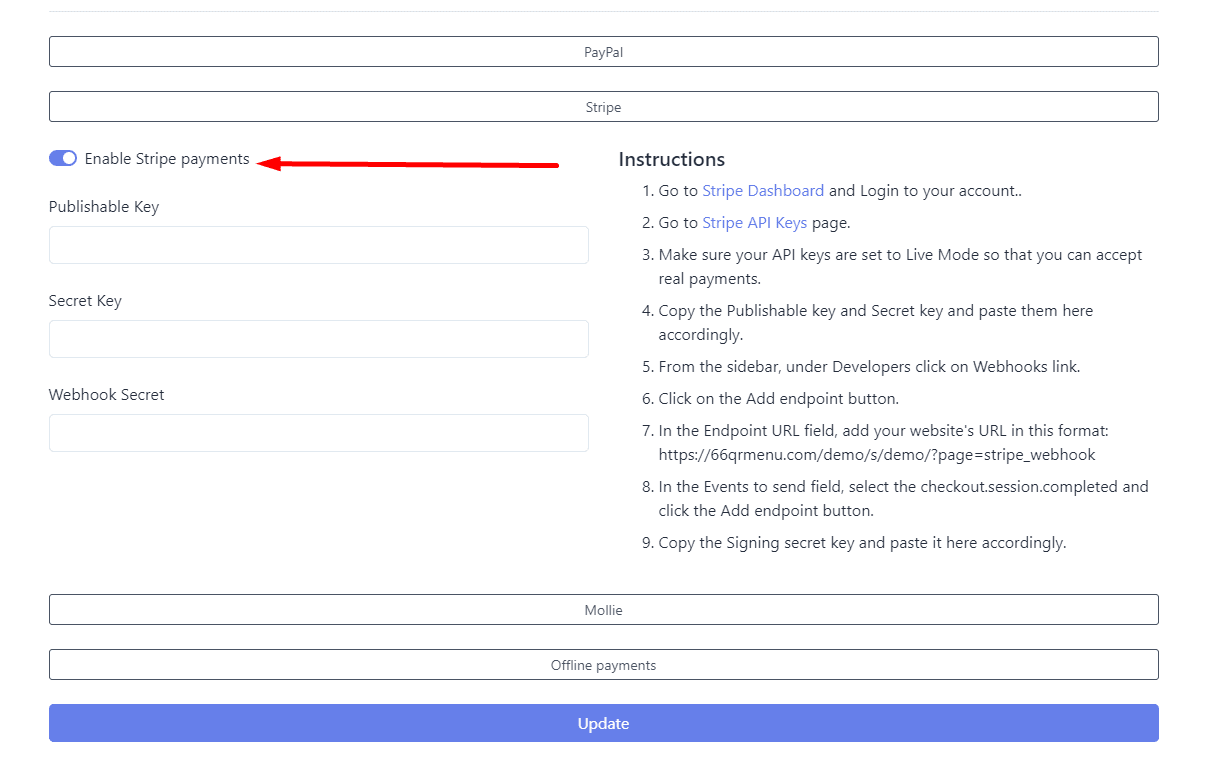
b) Select the mode. Follow the instructions provided.
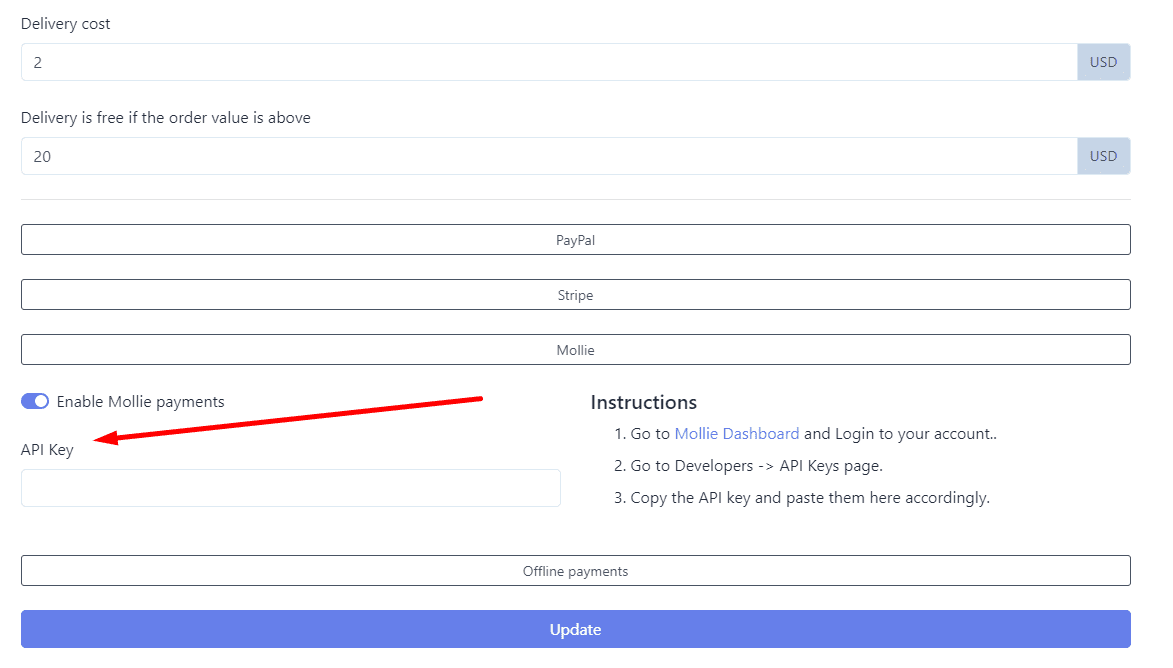
Configuring Mollie
a) Click on the Mollie button. First, activate Mollie payments.
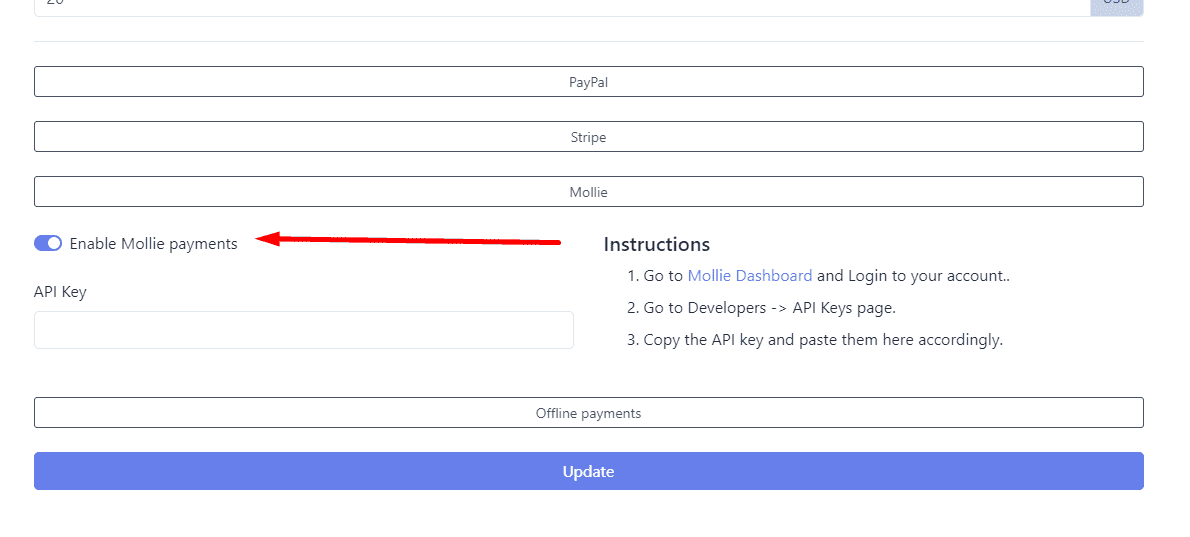
b) Follow the steps outlined to obtain the API key and place it in the designated space.
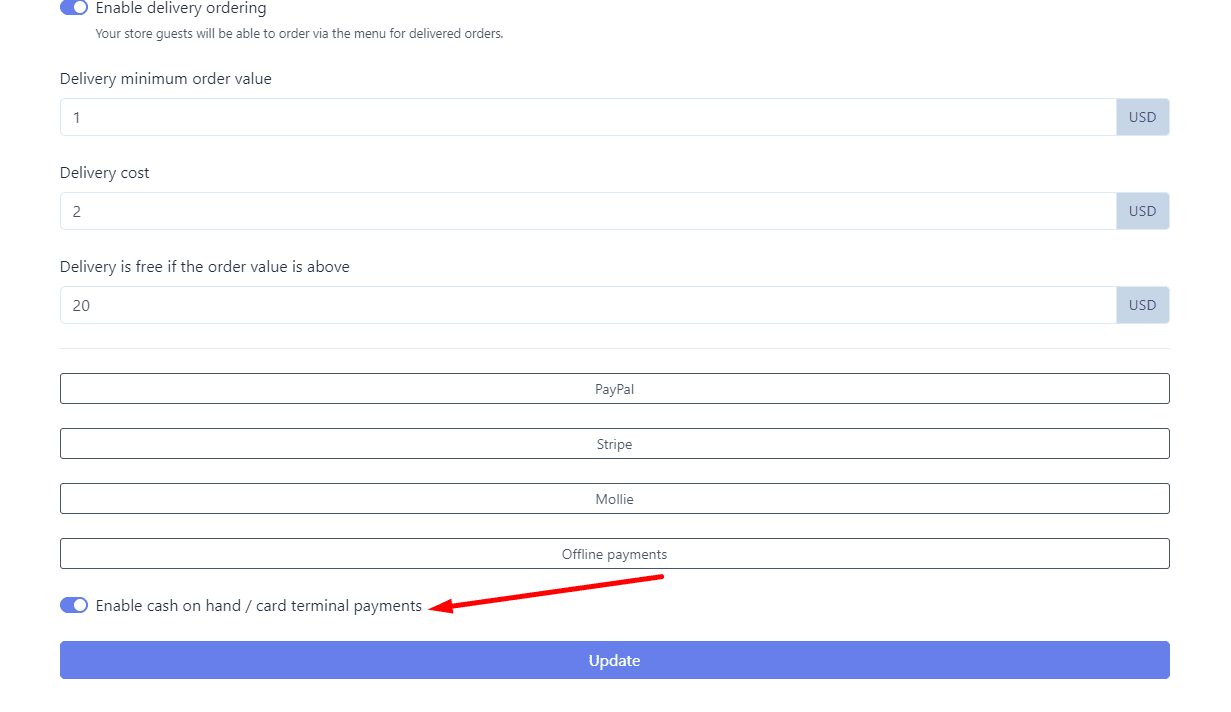
Remember to also keep the cash option active.
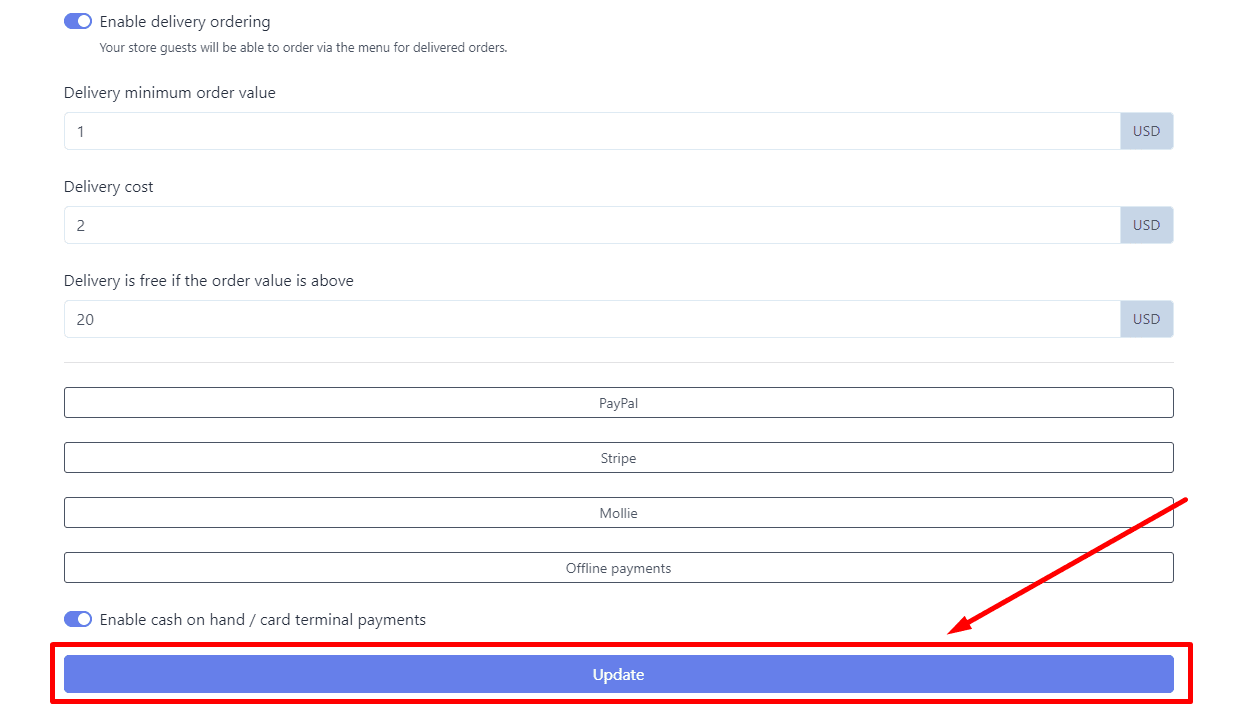
5.- Save Your Changes. Don’t forget to click on “Update” to save your settings.
By following these steps, you’ll have successfully configured your payment processors, ensuring smooth and secure transactions for your customers.
If you have any questions or need further assistance, feel free to contact us. We’re here to help.
