This component lays the foundation for your bot’s functionality, with an emphasis on keyword activation, match types, and various additional settings to refine your bot’s interactions across WhatsApp, Instagram, Facebook, and Telegram.
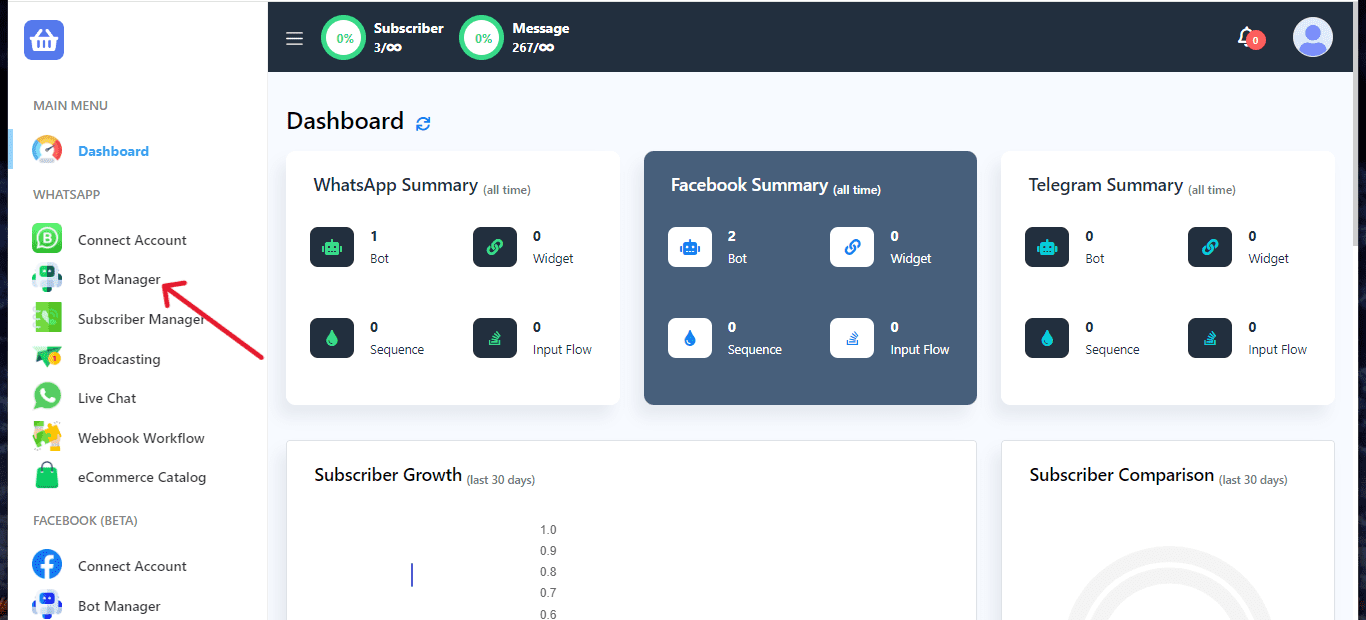
Navigate to the Bot Manager
Access the Bot Manager from the dashboard’s left side menu and proceed to the ‘Bot Reply’ option.
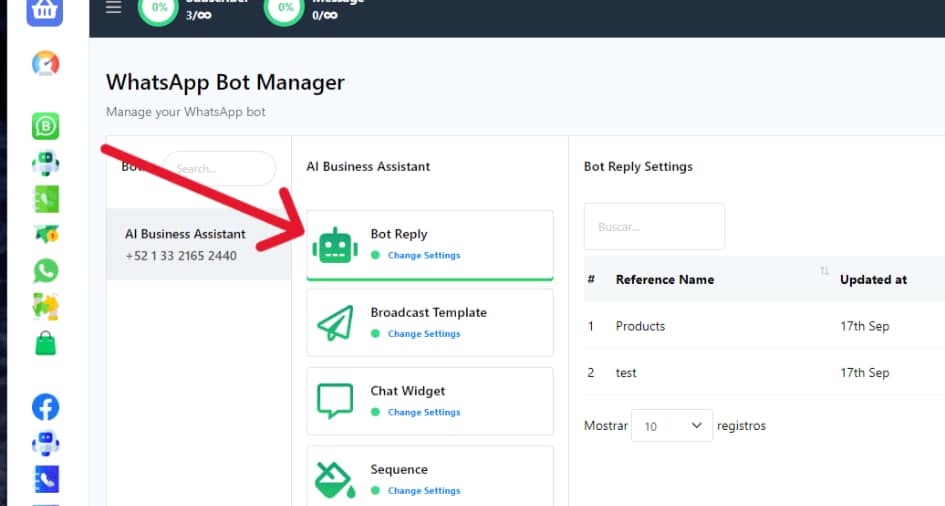
Locate and click on the ‘Create’ button in the upper right-hand corner, ensuring the ‘Bot Reply’ option is selected.
Configuring the Start Bot Flow
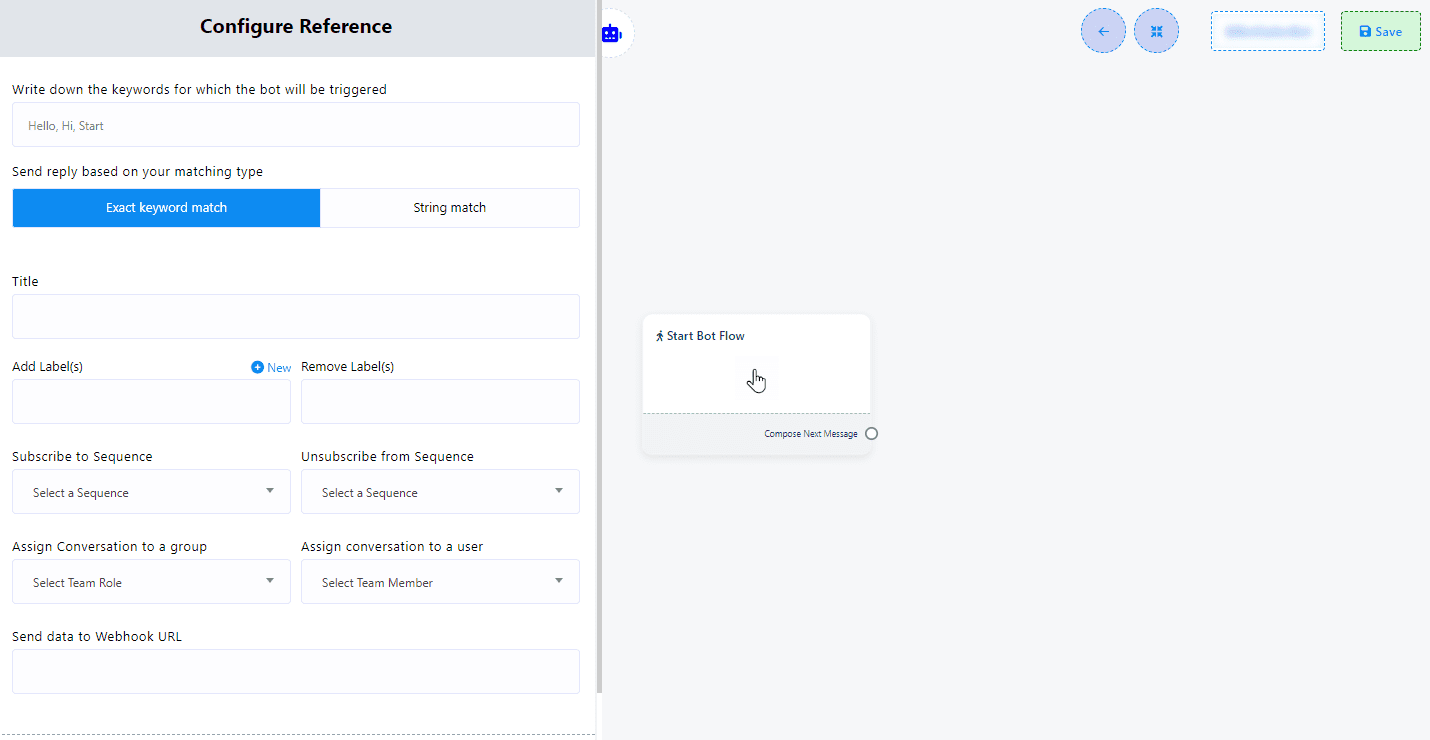
Keyword Triggering: Double-click on the ‘Start Bot Flow’ component to configure it. Input a list of comma-separated keywords in the first field of the opened ‘Configure Reference’. These keywords, when matched by user input in the messaging window, trigger the bot.

Matching Type: Select your desired matching type — ‘Exact Keyboard Match’ (default) for exact keyword matches or ‘String Match’ for partial keyword matches.

Title: Assign a name to your bot in the ‘Title’ field.

Add Labels: Categorize your audience for targeted messaging by adding labels related to demographics, interests, or purchase history.
Remove Labels: Remove labels from users as necessary.

Subscribe/Unsubscribe to/from Sequence: Manage automated message sequences for subscribers for purposes such as onboarding, promoting products, or re-engagement.

Assign Conversations: Allocate conversations to specific groups or individual team members within your organization for personalized handling.

Send Data to Webhook URL: Incorporate a webhook URL to forward bot data to a specified endpoint, facilitating data integration and process automation.

Webhook Integration: Utilize webhook integration to connect your bot with external systems or services, enhancing your chatbot’s functionality through automatic data exchange.
Saving Changes: After configuring the settings as per your requirements, click ‘Save’ to apply the changes or ‘Cancel’ to abort the configuration process.

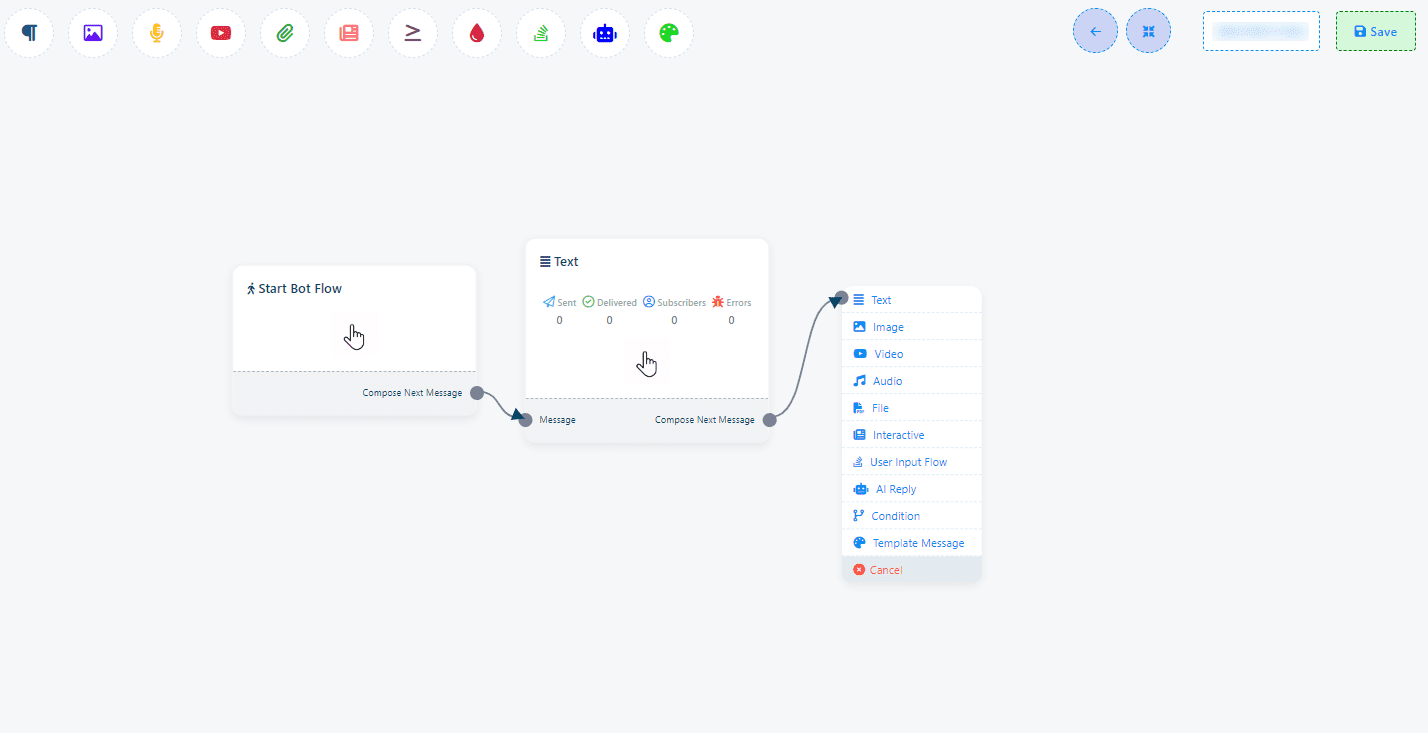
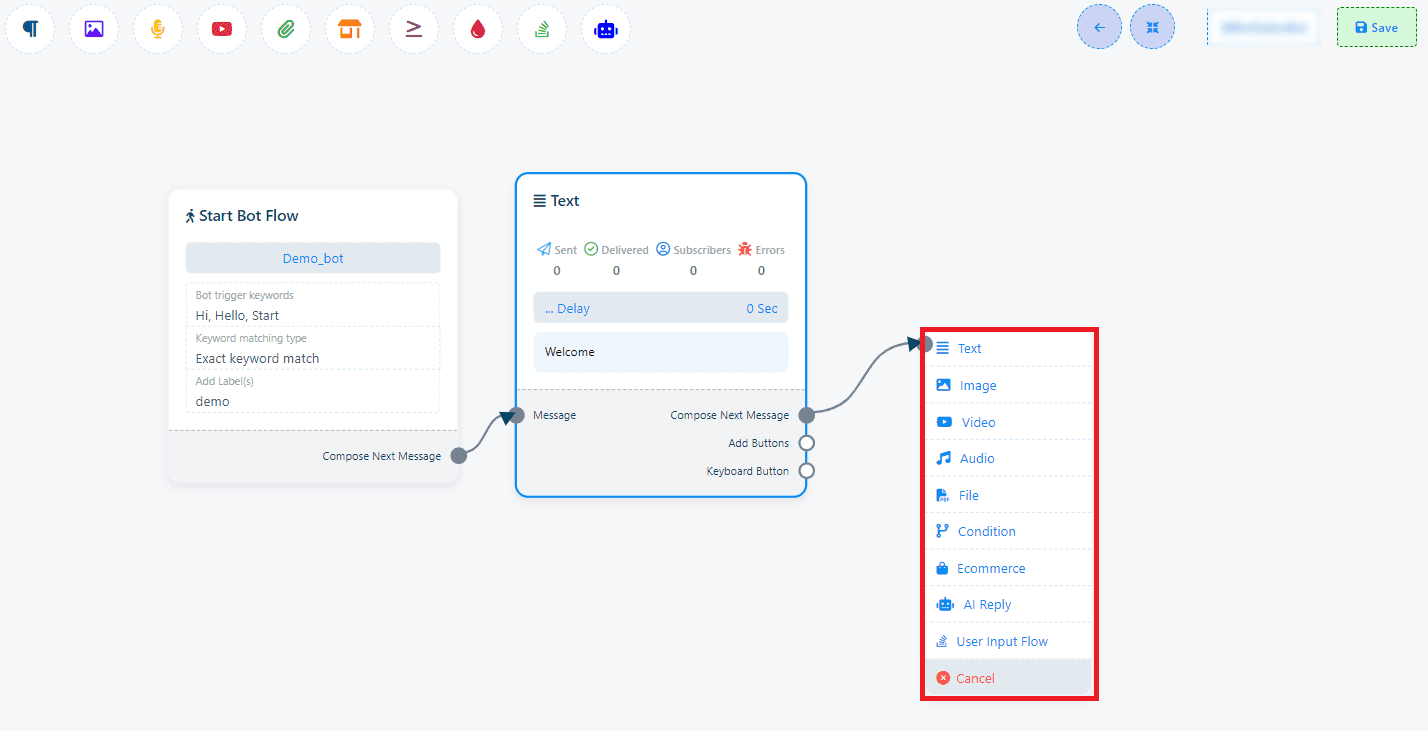
After setting up the ‘Start Bot Flow’, you’ll see sockets like ‘Compose Next Message’. These sockets enable the addition and configuration of various components to continue the bot flow.
Adding Components to the Chatbot
Without Dragging: Add components directly from the sockets of any existing component by dragging the cursor and selecting from the displayed menu.
Component Selection and Cancellation: Choose your desired component from the menu that appears or click ‘Cancel’ to dismiss the menu without adding a component.
Advanced Configuration
Add components:
Use the “Compose Next Message” connector to add multiple response components, such as text, images, audio, video, or files.
Using the Text Component: Enter your response message and set a “Response Delay” if needed to simulate the pace of the conversation.
Simplification of the sum of components:
Dragging directly from a component’s output socket into the editor can automatically link new components, such as buttons, to the parent component.
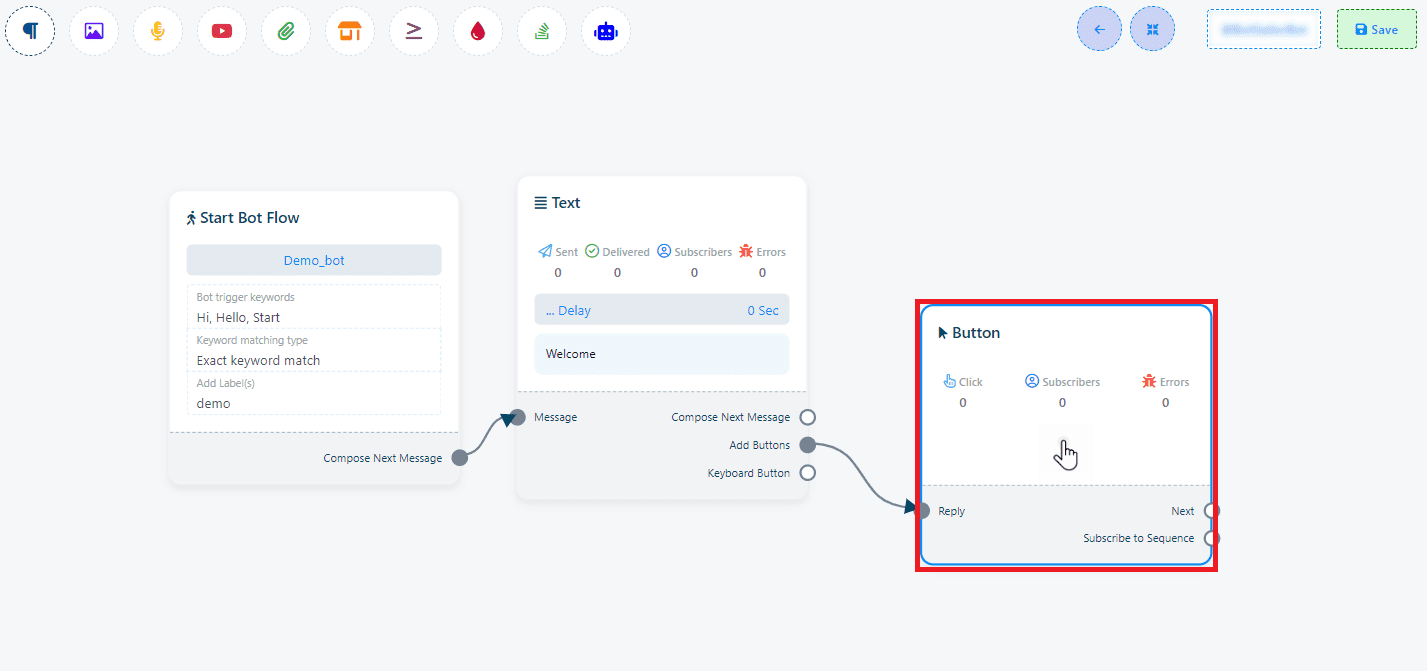
Note: The Button component is not directly accessible from the top menu, but can be integrated into your bot flow via the methods described above.
This approach allows for a flexible and efficient method of expanding your bot’s capabilities and interaction flow.
“Follow these steps to apply the same process on Instagram, Facebook, and Telegram.”