Access the Bot Manager #
- Navigate to the “Bot Manager” from your dashboard.

Initiate Bot Reply Setup #
- Select your bot, click on “Bot Reply,” and then hit “Create” to start configuring your bot flow.
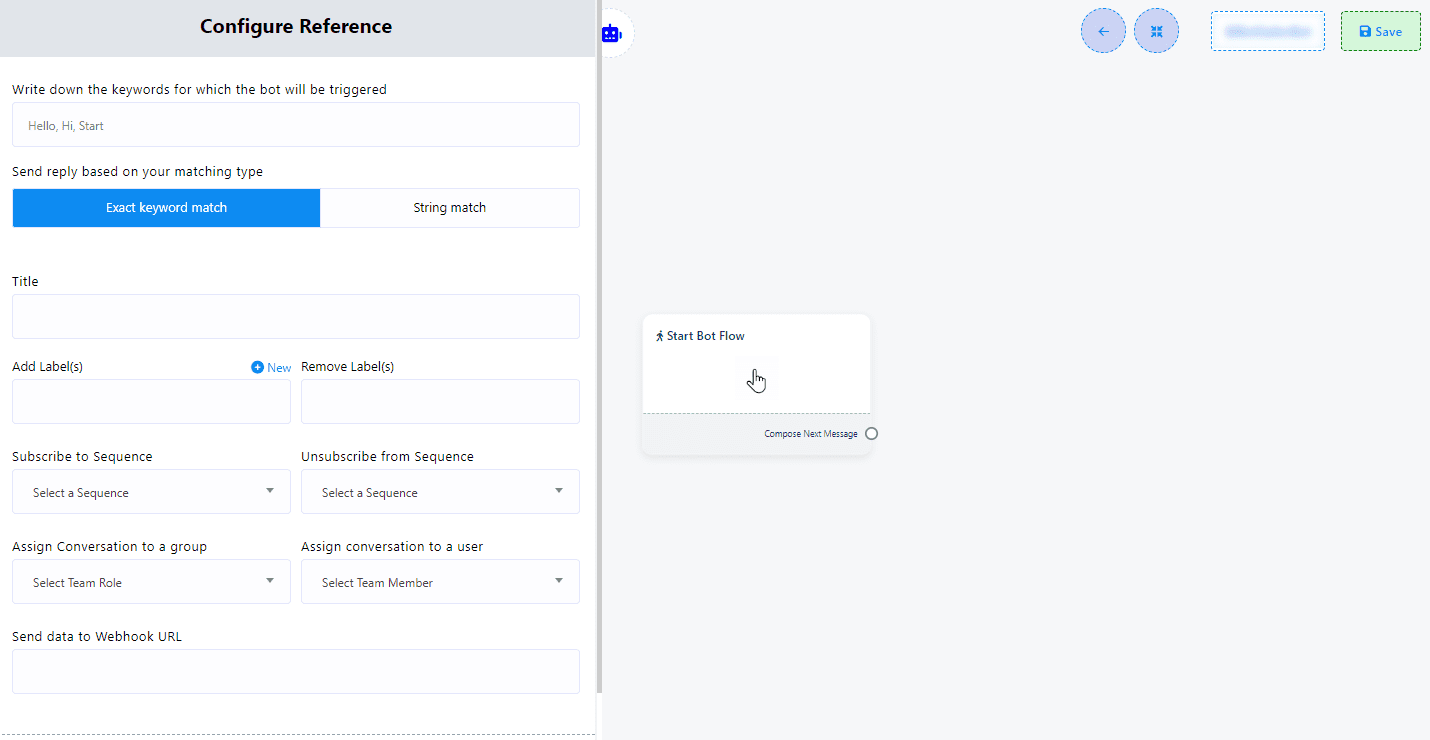
Configuring “Start Bot Flow” #
- Double-click on “Start Bot Flow” within the Editor to open the configuration sidebar.
- Keyword Triggering: Enter comma-separated keywords that, when matched by user input, will activate the bot.

- Matching Type: Choose between “Exact Keyboard Match” (default) and “String Match” to define how precisely the user input should match the keywords.

- Title: Provide a meaningful title for your bot flow.


Enhancing Bot Interaction #
- Add Labels: Categorize your audience for targeted messaging by clicking “+ New” to create new labels.

- Subscribe/Unsubscribe to/from Sequences: Manage automated message sequences for engaging users over time.

- Assign Conversations: Direct conversations to specific groups or team members for personalized handling.

- Webhook Integration: Use the “Webhook” option to link your bot to external services for data transmission and enhanced functionality.


Save Your Configuration #
- Click the “Save” button to apply your settings or “Cancel” to exit without saving.
Advanced Setup for “Compose Next Message” #
1. Adding Components:
- Use the “Compose Next Message” socket to add various reply components such as text, images, audio, video, or files.

- Text Component Usage: Enter your reply message and set a “Delay in reply” if needed to simulate conversational pacing.

2. Simplifying Component Addition:
Directly dragging from a component’s output socket onto the editor can automatically link new components, such as buttons, to the parent component.
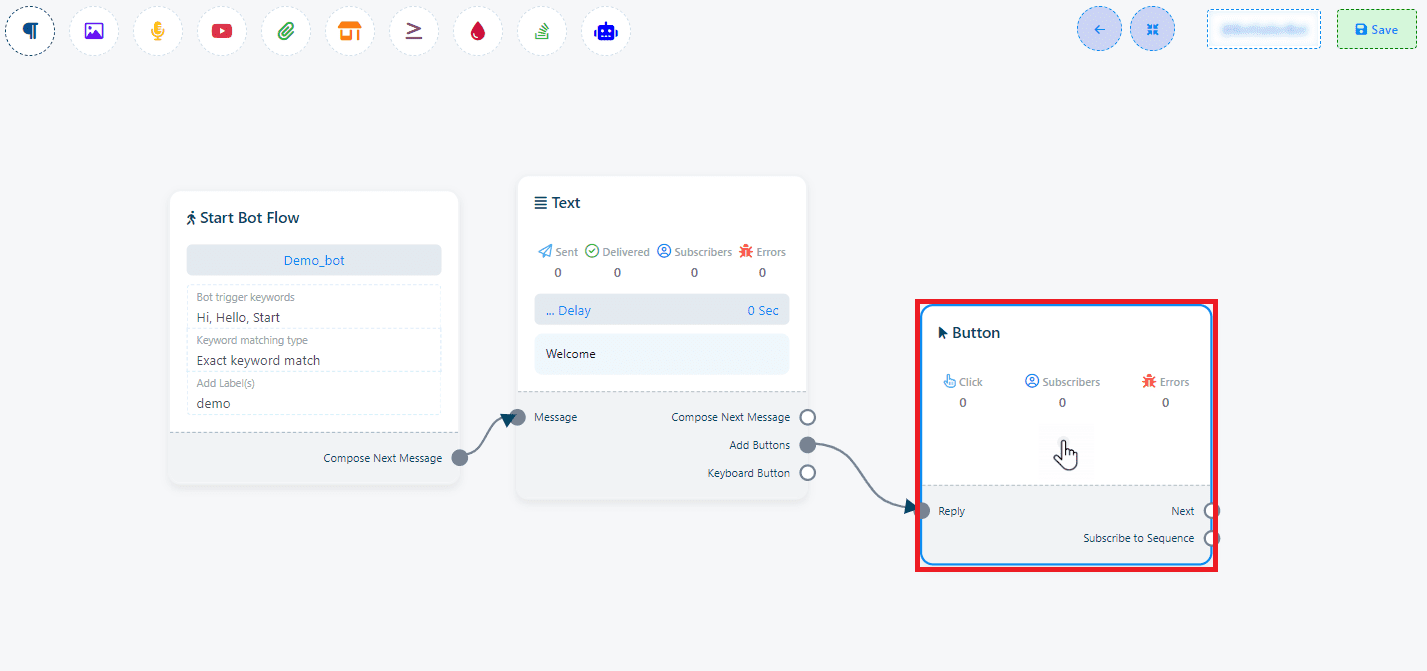
Note: The Button component is not directly accessible from the Top-menu but can be integrated into your bot flow through the methods described above.