In this article, you will learn how to send a broadcasting campaign to an uploaded list of contacts. The process is pretty simple: you must import subscribers to the Subscriber Manager by downloading and organizing a sample CSV file, uploading it, and assigning labels. Then, you have to create a Broadcast Message using the Visual Flow Builder, personalize it, and schedule the broadcast. Let’s see it in detail.
Targeting a list of contacts
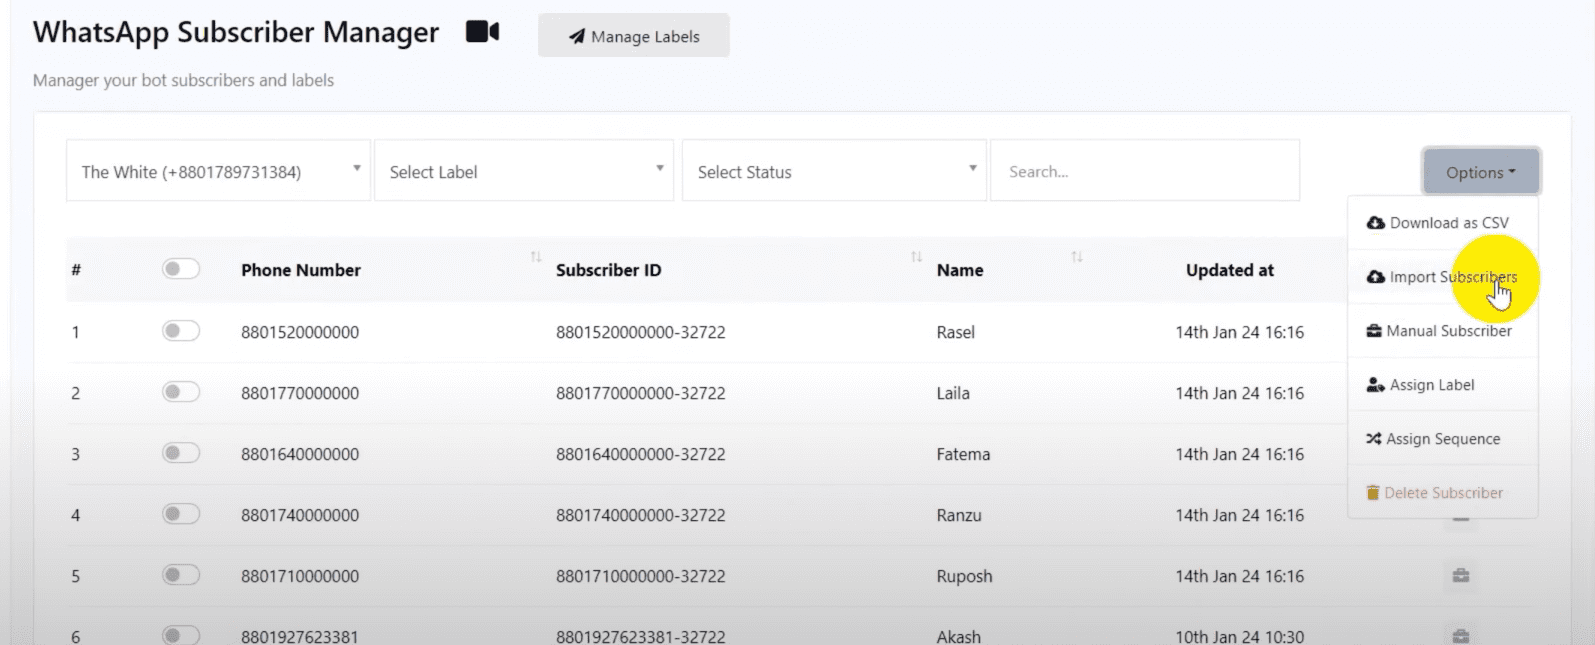
Navigate to the WhatsApp Subscriber Manager. Click on options and select “Import subscribers” from the dropdown menu.
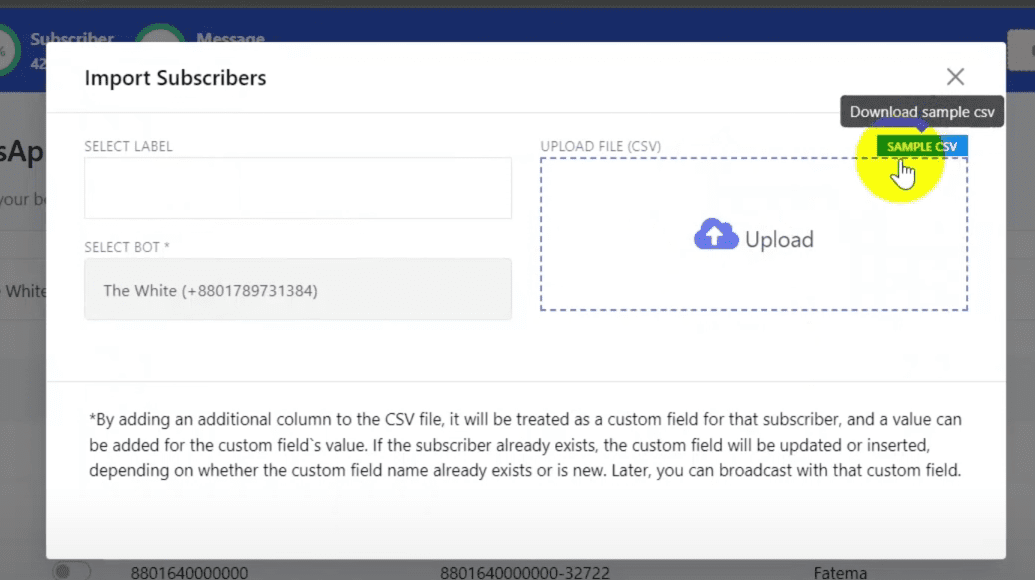
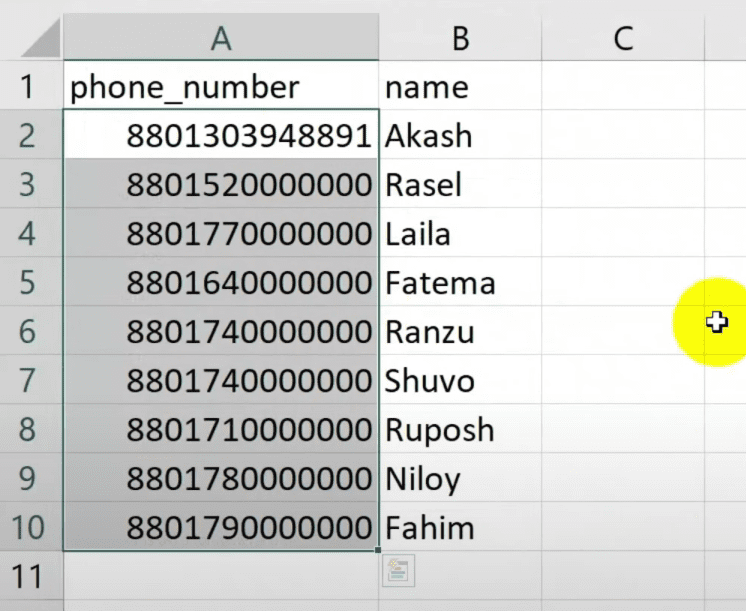
Click on “Sample CSV” to download a sample file for proper formatting. Open the downloaded file and organize your data. Ensure phone numbers are in regular format, not scientific format.
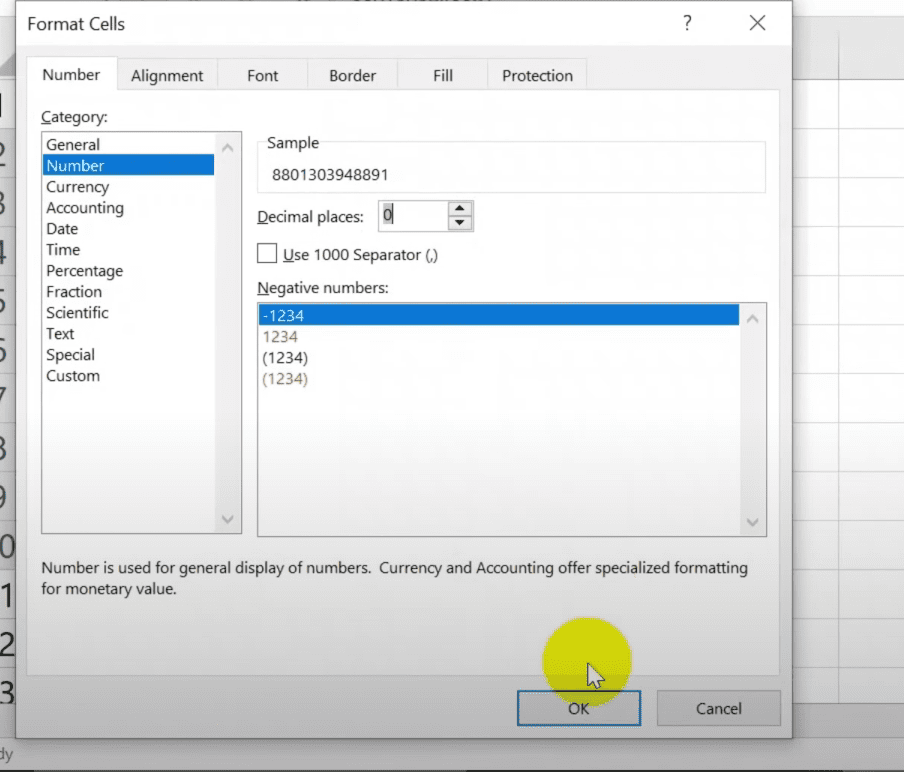
Configure the phone numbers. Change the cell format to numbers with zero decimal places to maintain proper phone number format.
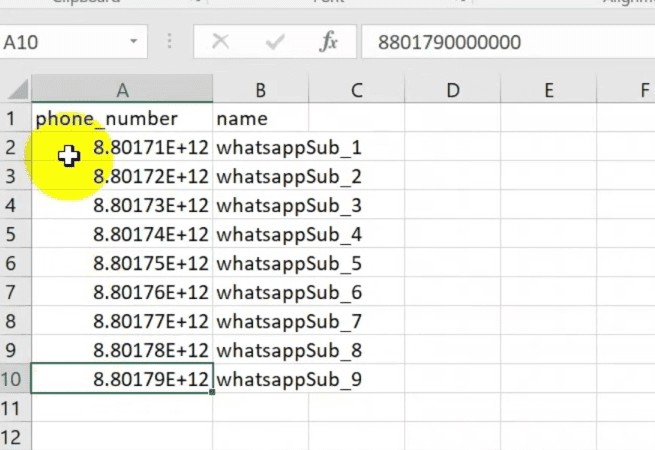
Input phone numbers with your country code (e.g., 880 for Bangladesh) but without the plus sign.
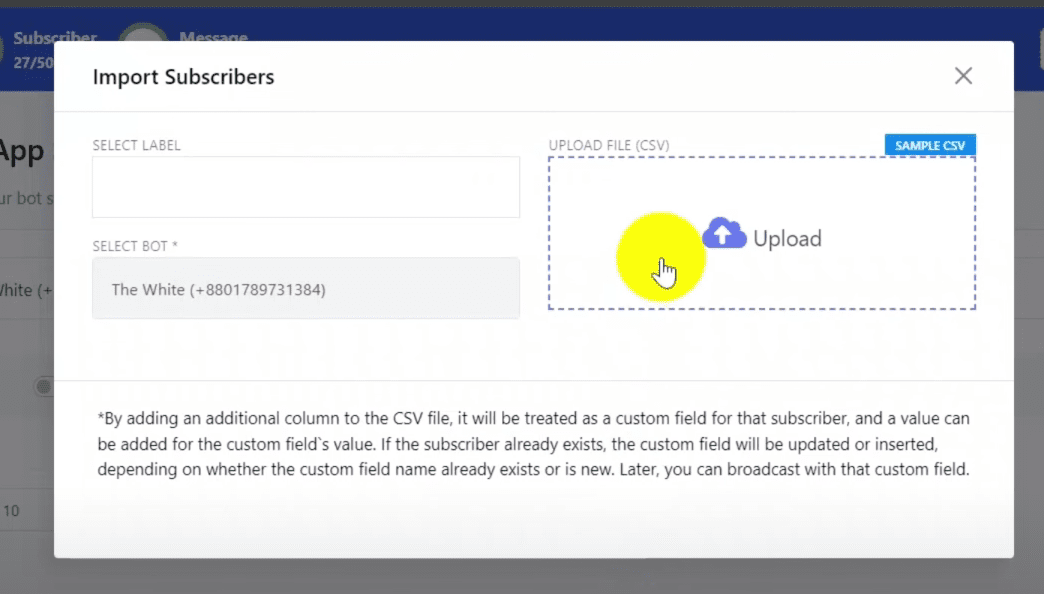
Import the Subscribers. Once the format is ready, save your file in CSV format. Return to BotCommerce and upload your CSV file.
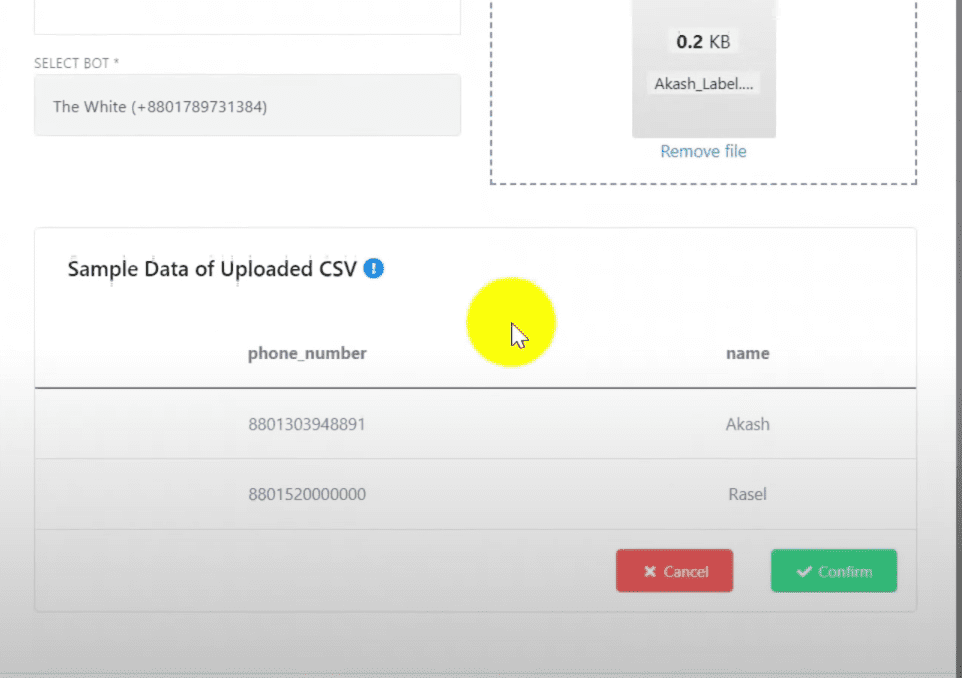
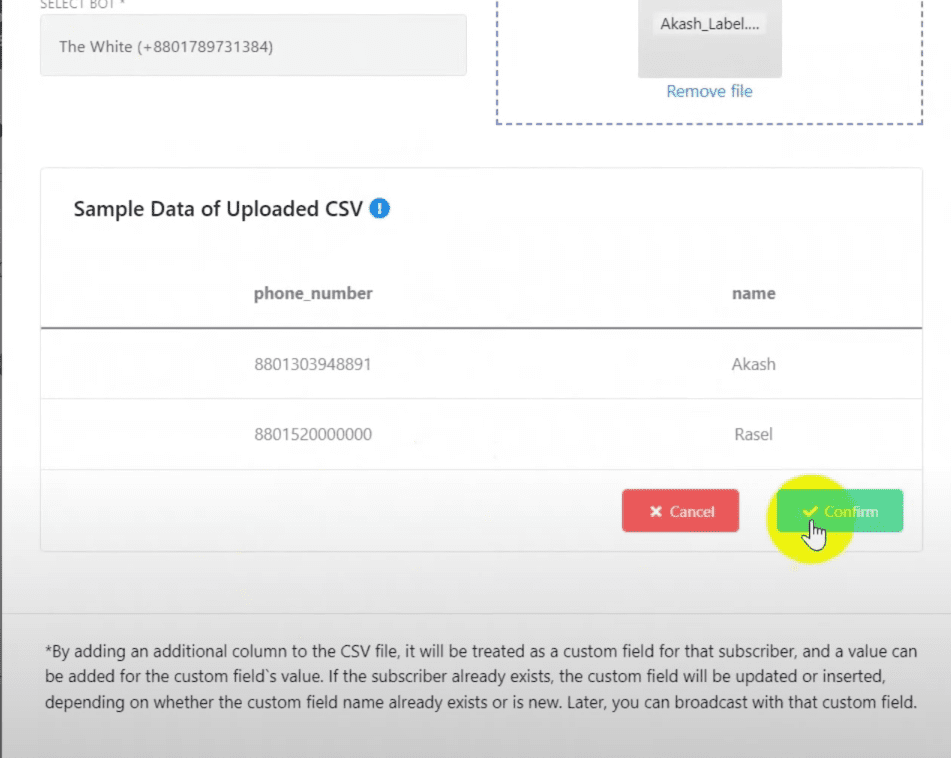
Verify that all subscriber information is correctly uploaded.
Assign labels to your imported subscribers.
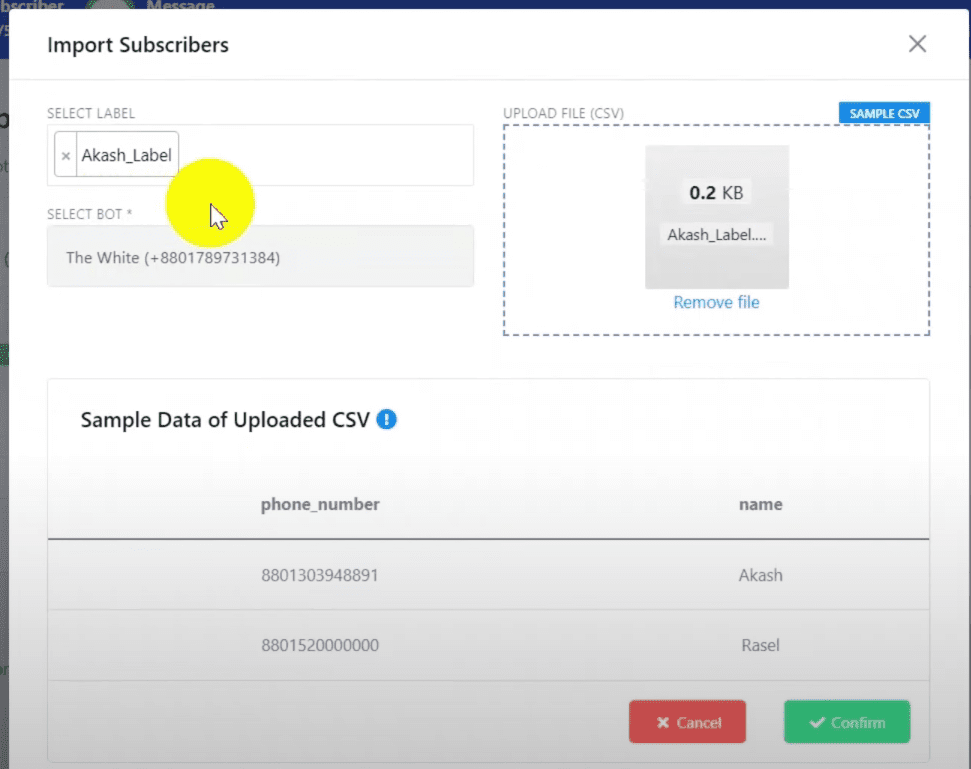
Select a bot to associate with these subscribers.

Click on “Confirm” to complete the import process.
Go to the broadcast section. Go to the WhatsApp menu and select “Broadcasting”. Select the bot account for which the broadcast campaign is to be created.

Hit the ‘Create’ button to set up a new broadcast campaign. If operating multiple bot accounts, ensure the correct WhatsApp bot account is selected from the dropdown menu.

Assign a distinct name to your campaign. Double-click “Start Bot Flow” and name the bot flow. This is for easy identification and tracking.
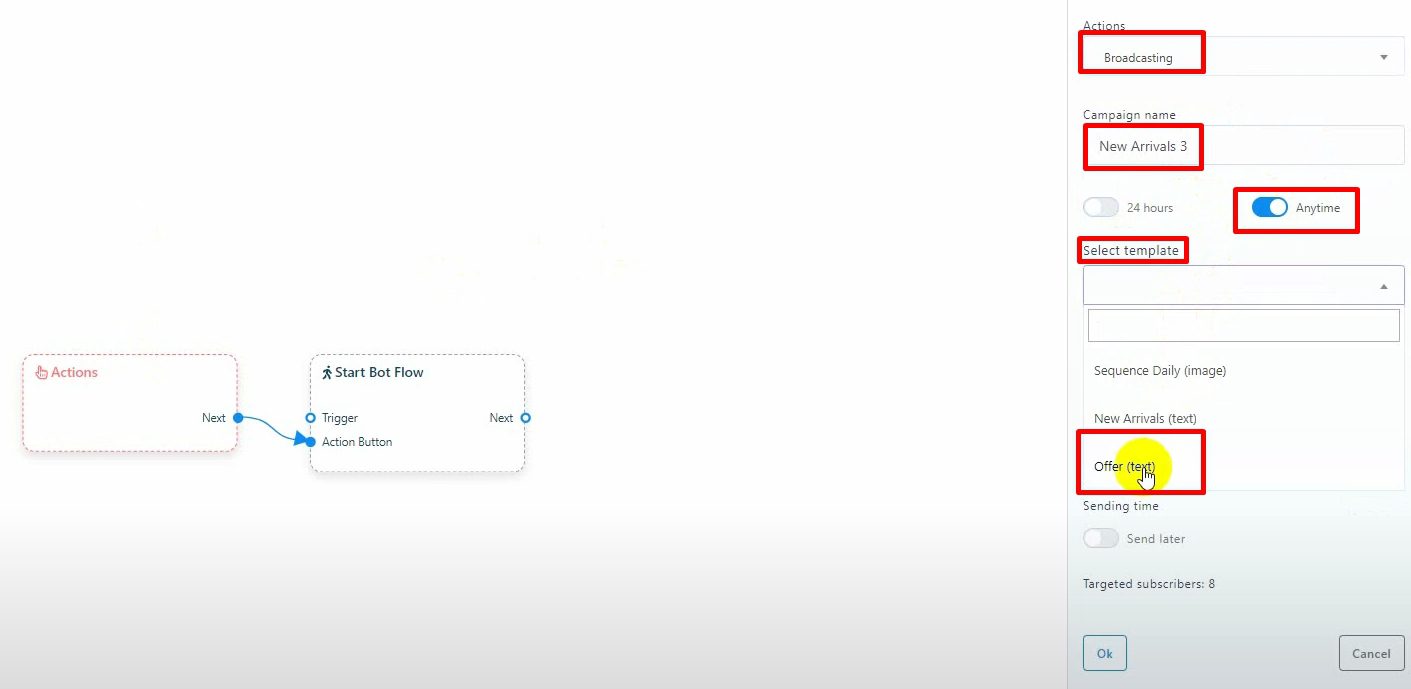
Select the audience. Choose between the 24 hours and Anytime options to define the campaign’s target audience:
- 24 hours: Targets subscribers active within the last 24 hours, allowing for a broad range of message types.
- Anytime: Utilizes pre-approved Message Templates for reaching out to all subscribers, regardless of their recent activity.

Refine your audience. Utilize Include the label ids you assigned to your imported subscribers to make sure you target them. You can also use the Exclude label ids to omit certain segments from your broadcast.
Configure the content. If opting for Anytime, select a message template and decide on the broadcast timing. You can learn how to create message templates here. Schedule your campaign by choosing a later time and specifying the time zone if necessary. If you are using variables in your template you will need to provide their content as well for this campaign.
For a 24-hour campaign, link your message to the Start Bot Flow. This message can encompass text, multimedia, interactive elements with buttons, or e-commerce messages, offering you complete creative freedom.

Finalize your broadcast message and campaign settings in the Visual Flow Builder. Then, click ‘Save’. Your campaign will be officially created upon this action.
Personalizing campaigns with variables from the contact list
Besides from the contact information, you can also upload additional data from your subscribers in the form of custom variables and use it to personalize the messages you are broadcasting.
Import Your Subscriber List. Go to WhatsApp Subscriber Manager in the BotCommerce dashboard. Select the WhatsApp account you want to use for broadcasting messages.

Initiate the import process. Click on Option and select Import Subscribers.

Download the sample CSV file provided by BotCommerce to see the format. Prepare your subscriber list with additional columns for custom data (e.g., payment due dates, amounts).

Optionally, add a single quote at the beginning of data for proper formatting, or change the cell format to text before saving.

Upload the CSV file. Verify the first two data entries displayed.

Assign a label to these subscribers. If left blank, the file name will be used as the label.
Import. Click on the Confirm button to finalize the import.

Create a Message Template. Navigate to Bot Manager and select the relevant WhatsApp account. Go to Message Template and click on the Create button.

Configure it. Name your template and select the appropriate Locale and Template Category.


Write your message body incorporating the custom fields you imported before as needed. They will act as placeholders that will be filled with each individual customer’s data for that field.

Save. Save the message template and check the status to ensure it’s been approved by WhatsApp.

Set Up the Broadcast. Click on Create to start a new broadcast. You’ll be redirected to the Visual Flow Builder. Name your campaign.

Choose the Anytime option and select the approved message template. In the Include Label ID, select the label used when uploading your subscriber list. Verify the target subscriber count.
Save. Click OK and then double-click on Start Bot Flow to name your bot flow. Finally, save the bot.

Send and Monitor. Your personalized WhatsApp messages will be sent to each subscriber on your list.

