Follow the next steps to broadcast messages to Telegram subscribers:
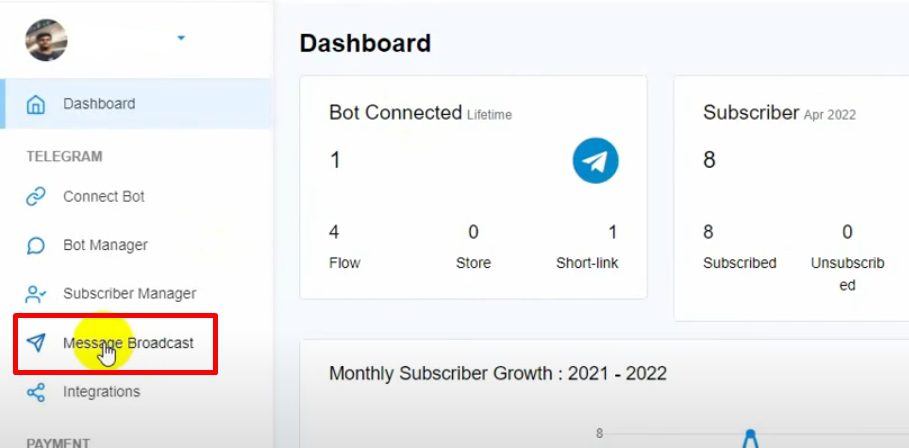
Access the Message Broadcast Feature:
-
- From the BotCommerce dashboard, navigate to “Message Broadcast.”

- From the BotCommerce dashboard, navigate to “Message Broadcast.”
-
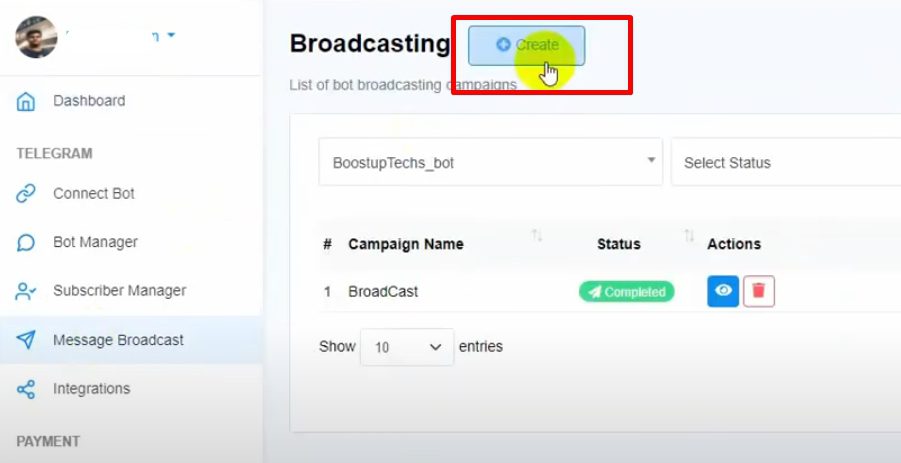
- Click on the “Create” button to start setting up your broadcast. This will open the Visual Flow Builder.


- Click on the “Create” button to start setting up your broadcast. This will open the Visual Flow Builder.
Configure the Broadcast Campaign:
-
- Name Your Campaign: Give your broadcast campaign a unique name to identify it later.

- Name Your Campaign: Give your broadcast campaign a unique name to identify it later.
-
- Segment Your Audience (Optional):
- Use “Include Label” and “Exclude Label” fields to target specific groups of subscribers.
- For instance, if you only want to broadcast to subscribers labeled as “Shortlink,” include that label here.
- The system will display the number of targeted subscribers based on your label selections.
- Use “Include Label” and “Exclude Label” fields to target specific groups of subscribers.
- Segment Your Audience (Optional):

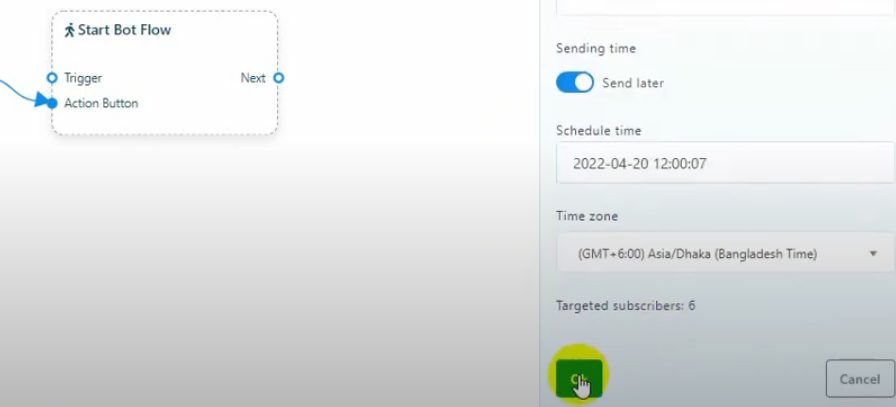
Set the Sending Time:
-
- Instant Broadcast: Choose this option if you want to send the message immediately.
- Schedule Broadcast: If you prefer to send the message at a later time, select the date and time, and choose the appropriate time zone.

Create the Broadcast Message:
-
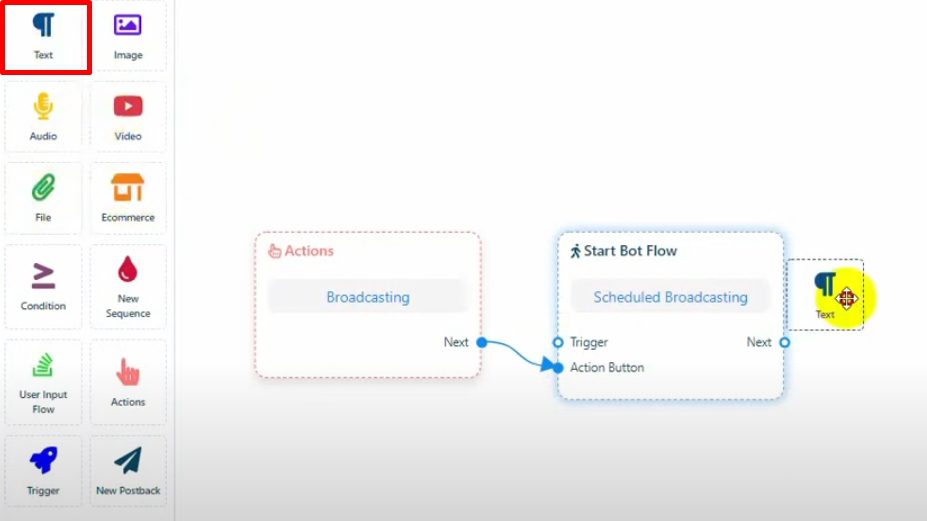
- Add a Message: Select the type of content you wish to broadcast—text, image, audio, video, file, or e-commerce.


- Add a Message: Select the type of content you wish to broadcast—text, image, audio, video, file, or e-commerce.

Design the Flow:
-
-
-
- For a simple text message, drag a “Text Reply” element and connect it to the “Start Bot Flow.”

- For a simple text message, drag a “Text Reply” element and connect it to the “Start Bot Flow.”
-
- Double-click on the text element to enter your message content.

- Double-click on the text element to enter your message content.
-
-
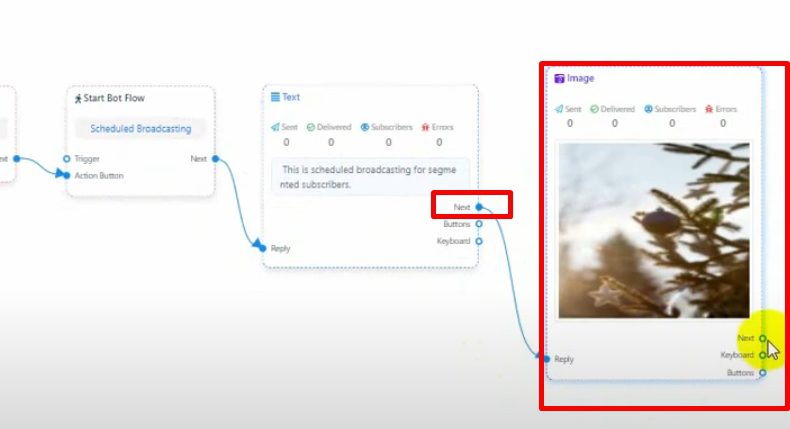
- Include Multiple Messages: You can add several messages to the broadcast, but note that Telegram introduces a slight delay between multiple messages, which could extend the time required for the campaign to complete.
-

Enhance Your Broadcast (Optional):
-
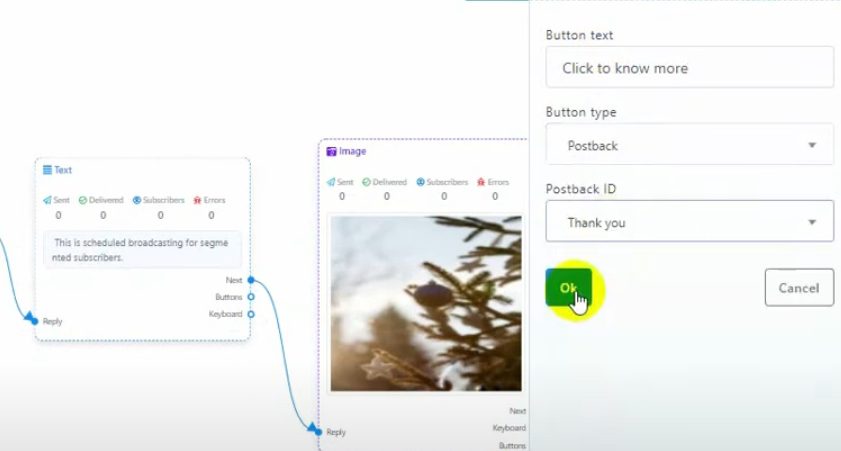
- Add Buttons: Enhance user interaction by adding buttons to your messages.
Set Button Actions: Name the buttons and choose their actions, such as linking to a post-back reply.
- Add Buttons: Enhance user interaction by adding buttons to your messages.
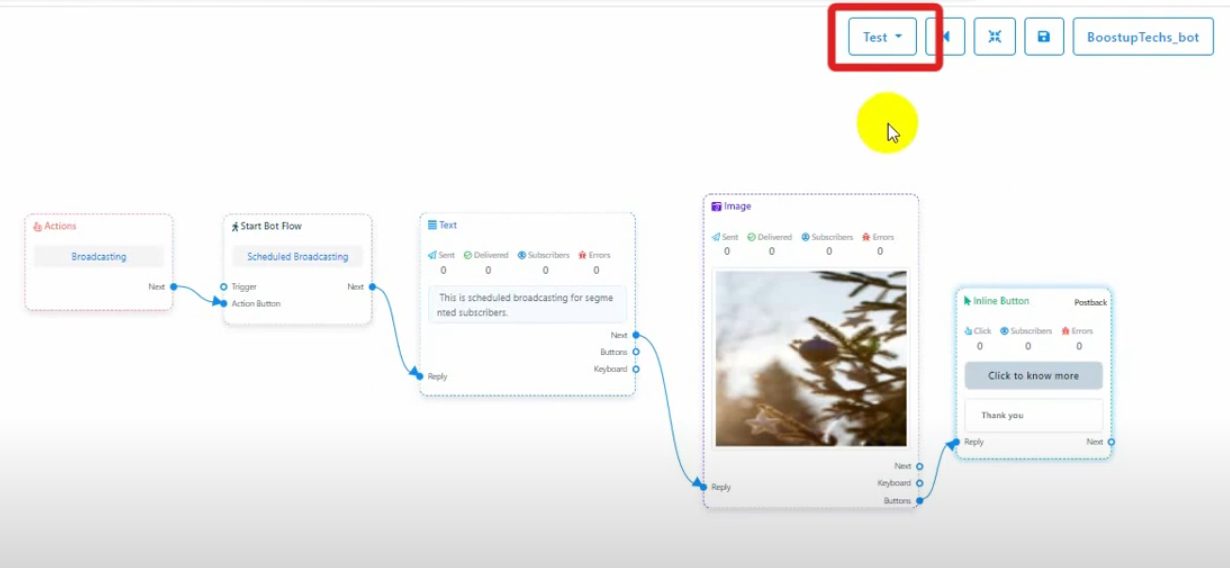
Test the Broadcast:
-
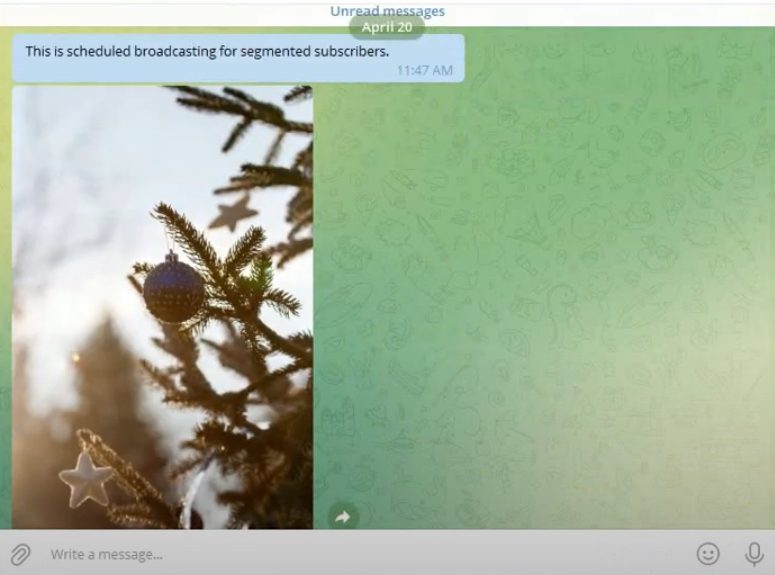
- Before sending the broadcast to your entire audience, use the “Test” button to preview the message.

- Before sending the broadcast to your entire audience, use the “Test” button to preview the message.
-
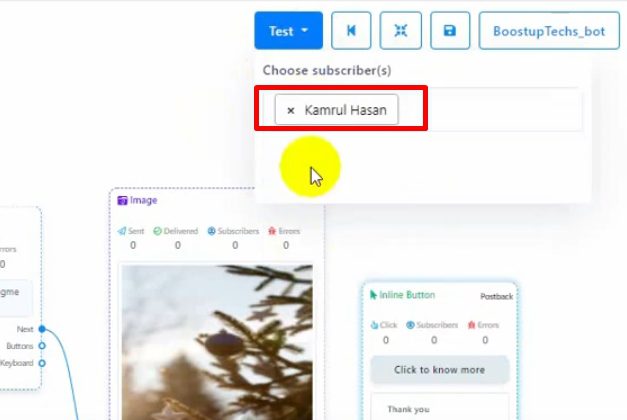
- Select one or two subscribers to receive the test message to ensure everything is working as expected.

- Select one or two subscribers to receive the test message to ensure everything is working as expected.
Save and Launch the Broadcast:
-
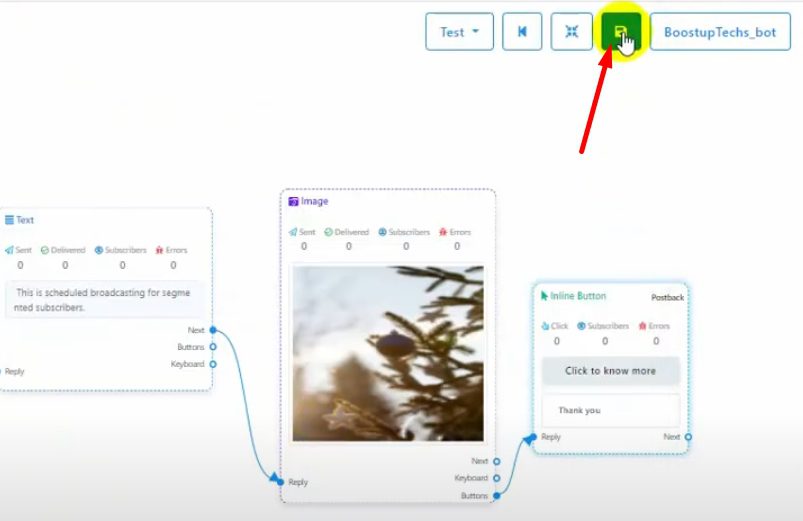
- Once satisfied, save the broadcast campaign.


- Once satisfied, save the broadcast campaign.
-
- Return to the dashboard to review the campaign status.

- Return to the dashboard to review the campaign status.
-
- If you scheduled the broadcast, it will be sent at the specified time.

- If you scheduled the broadcast, it will be sent at the specified time.

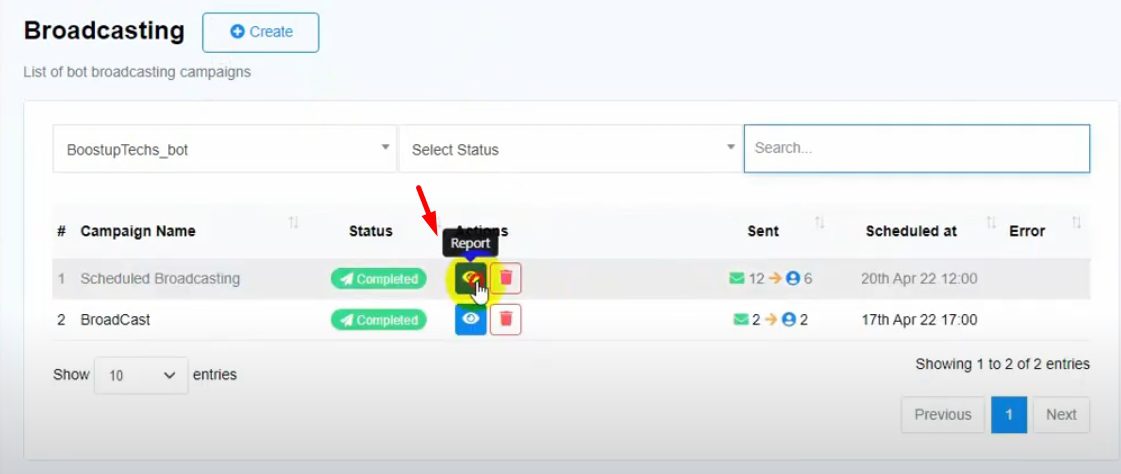
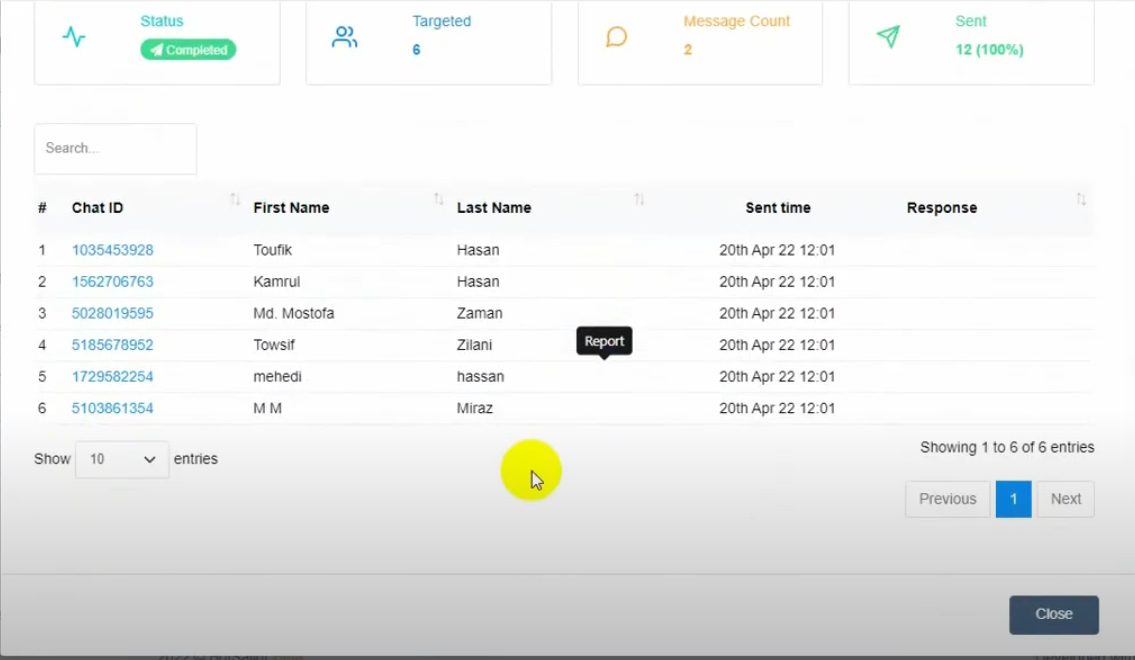
Review the Broadcast
-
- After the broadcast is sent, you can check the campaign in the dashboard to confirm its success.

- After the broadcast is sent, you can check the campaign in the dashboard to confirm its success.