1.- Access Your Dashboard. Go to your dashboard where you manage your online store.

Select the specific page you want to edit. This will take you to the statistics page associated with that particular page.

2.- Select the “Edit” Option. On the statistics page, find the “Edit” option located in the top right corner and click on it. Scroll down to the bottom of the page that will open and locate the “Open Hours” button.

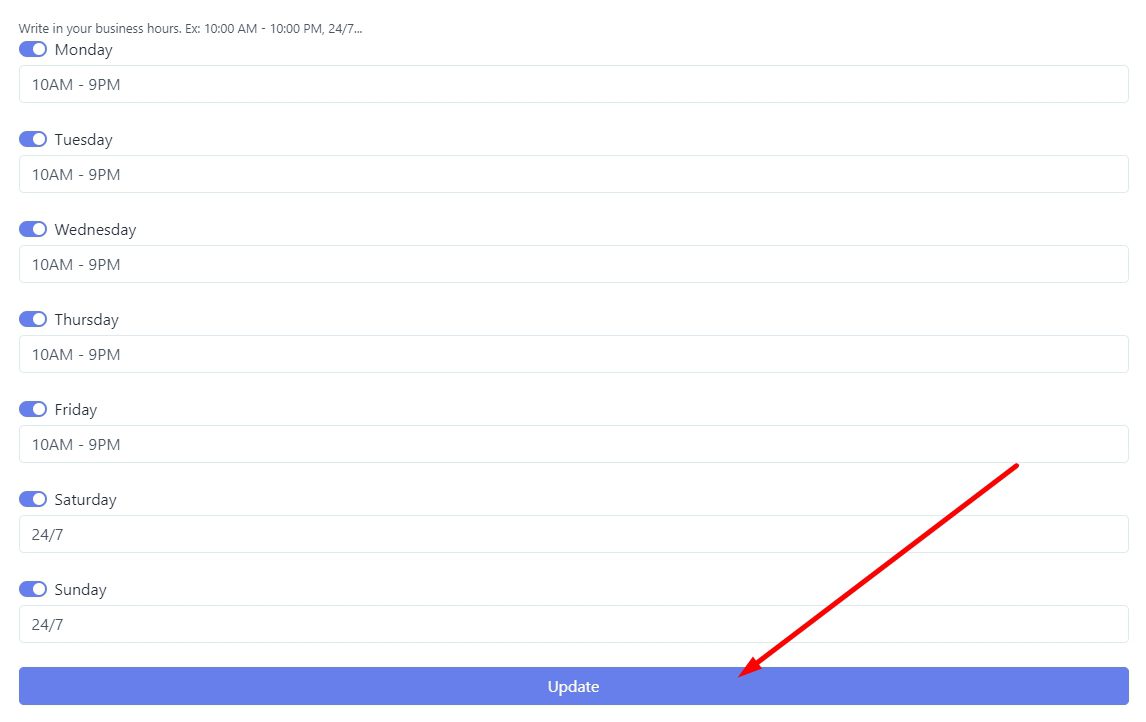
3.- Configure Your Working Hours. Clicking on the “Open Hours” button will display a list with the days of the week. For each day, you’ll have the option to input the opening and closing hours.

4.- Save Your Changes. Once you have set up all the working hours, make sure to click on “Update” to save the changes.

By following these steps, you will have successfully added your working hours to your page, allowing your customers to know your business hours. If you have any questions or need further assistance, feel free to contact us. We are here to help.

