If you’re part of the Planify X Reseller Program, you can request an n8n account with your own domain. This gives your clients access to a powerful automation platform as a value-added service, helping you scale your business and strengthen your chatbot offering.
What is n8n and what is it used for?
n8n is a workflow automation tool. Think of it as a “universal connector”: it allows you to integrate different apps and services so they work together automatically — without coding. With n8n, you and your clients can build automations like:
- Sending an email whenever a new lead enters your chatbot.
- Updating a database when someone makes a purchase.
- Posting to social media from a single workflow.
Through the Planify X Reseller Program, your clients get access to n8n under your own domain, making it feel like part of your platform.
How to Add Users to Your n8n Account
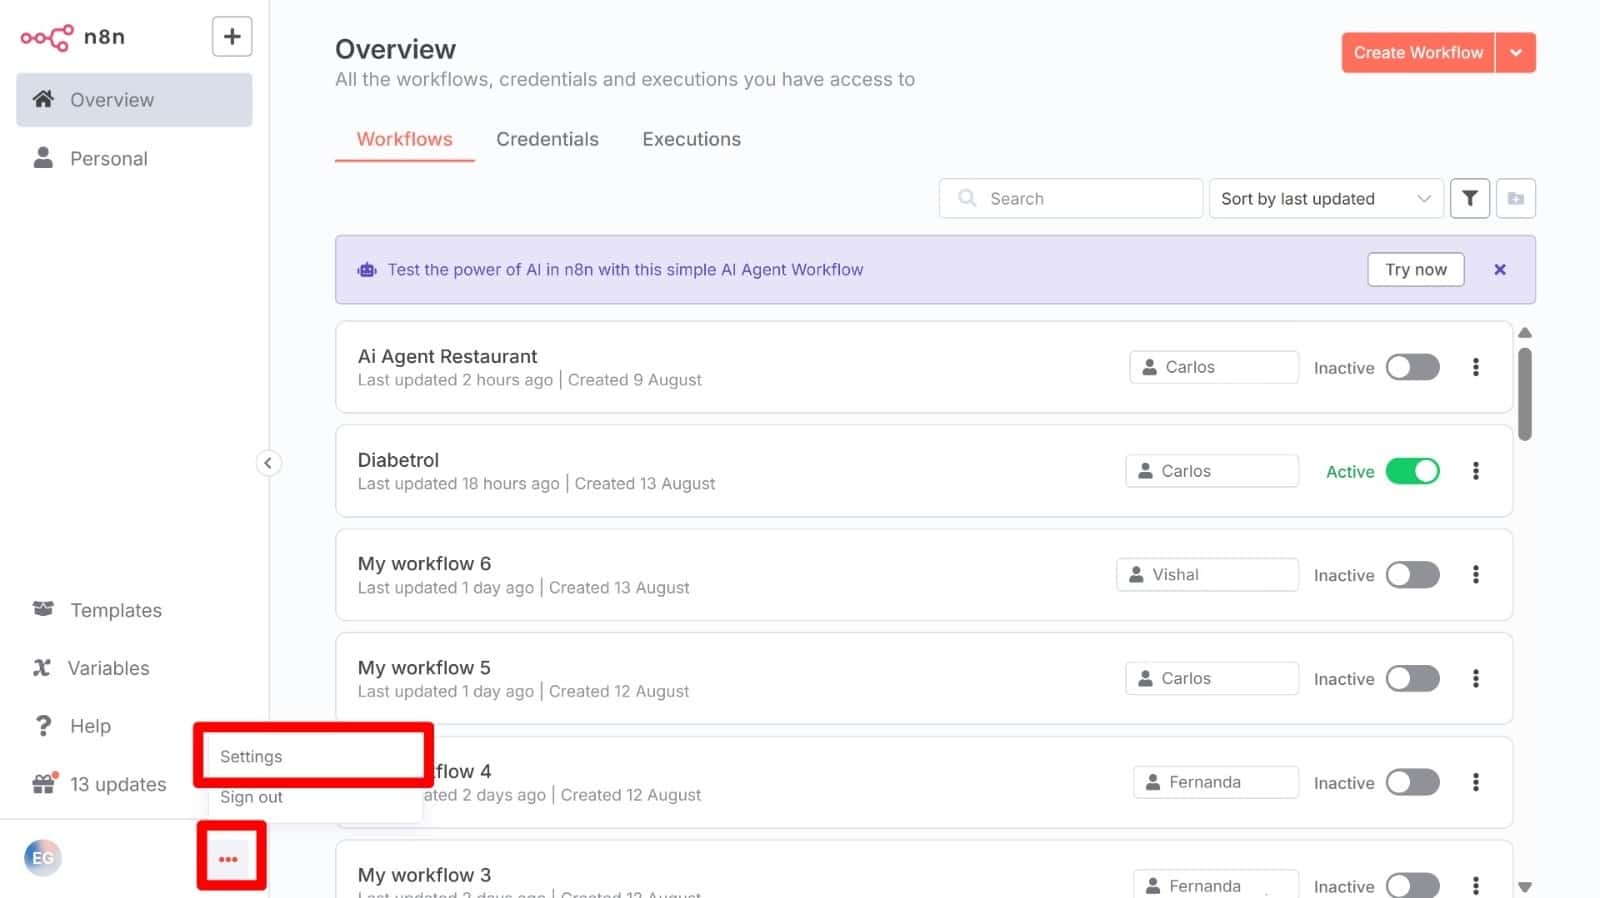
Enter your n8n account. Click on the three dot menu at the left right corner. Select settings.
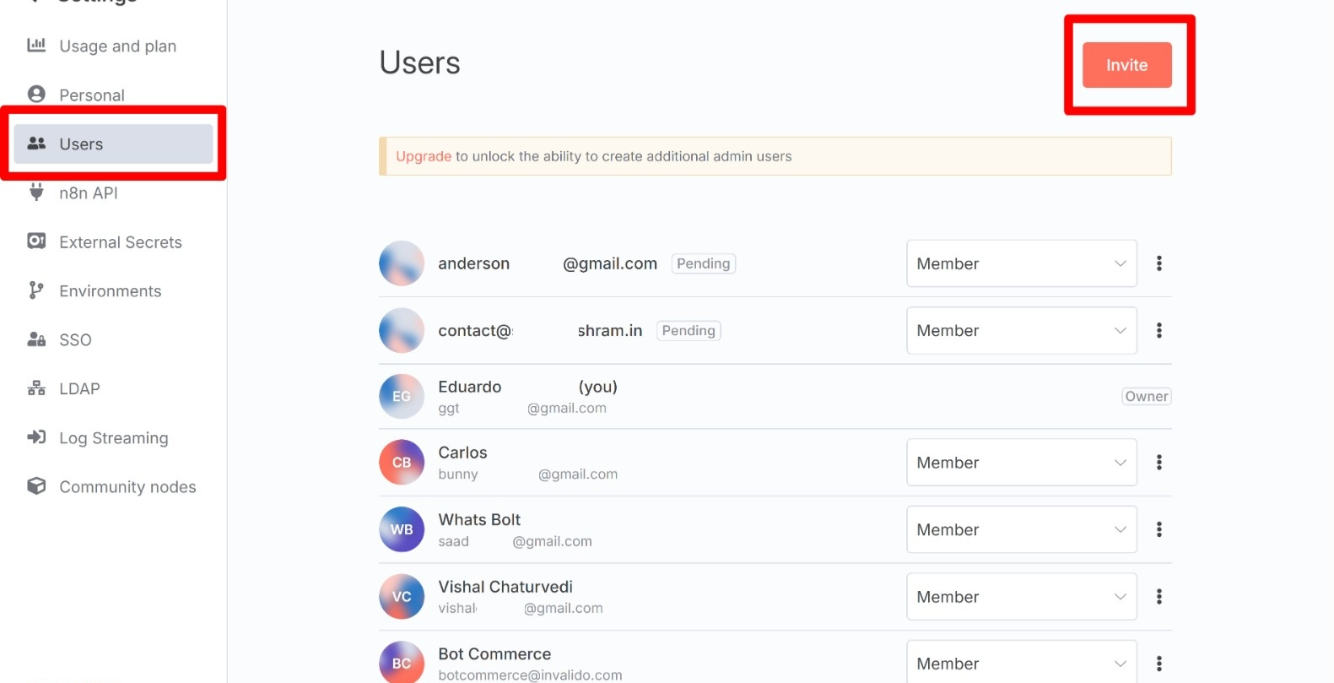
Go to the Users section on the left sidebar. Click on Invite.
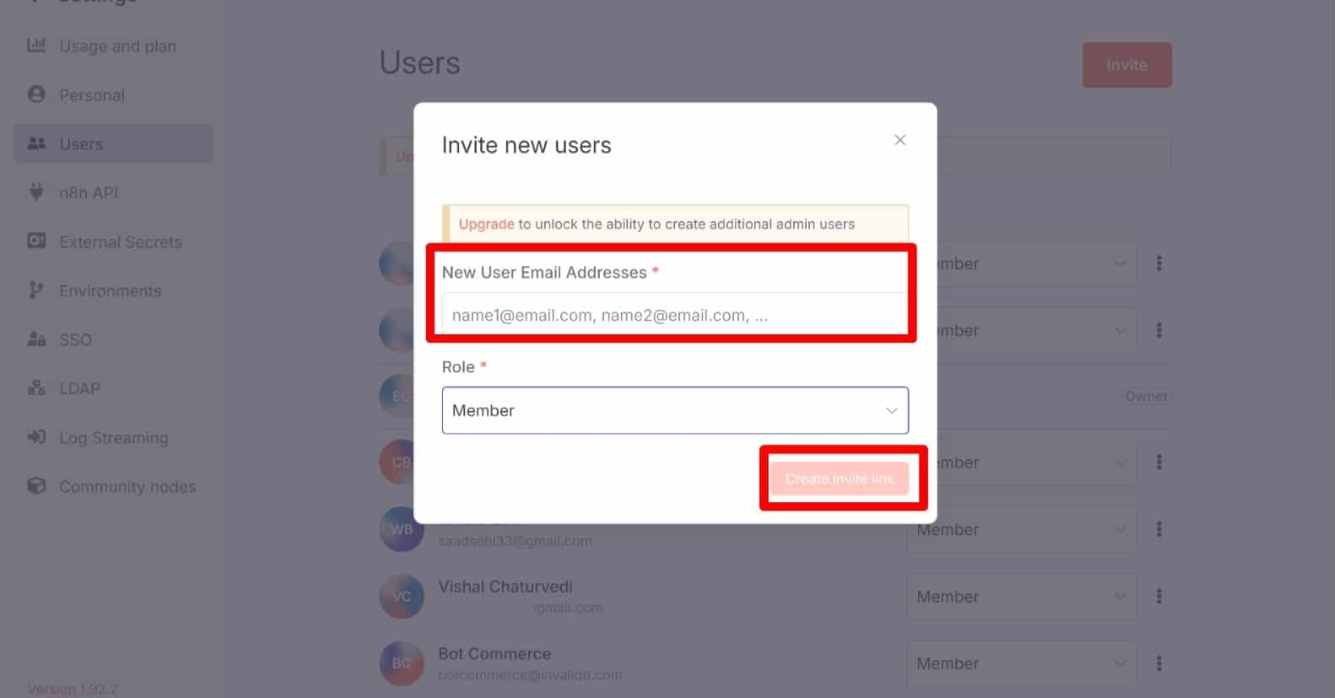
Add the email addresses of the users you want to invite. Separate them with commas. Select Member as their role. Send.
The invited users will receive an email with an invitation to join.
