To truly elevate the user experience, it’s essential to make your WhatsApp chatbot more interactive and responsive. One effective way to achieve this is by incorporating buttons. Buttons allow users to navigate through menus, make selections, and perform actions with just a tap, making the interaction more seamless and efficient. In this tutorial, we’ll explore how you can easily integrate them into your WhatsApp chatbot using our app, empowering you to create a more engaging and user-friendly experience.
Remember that this function is only available for accounts using the Official API Connection.
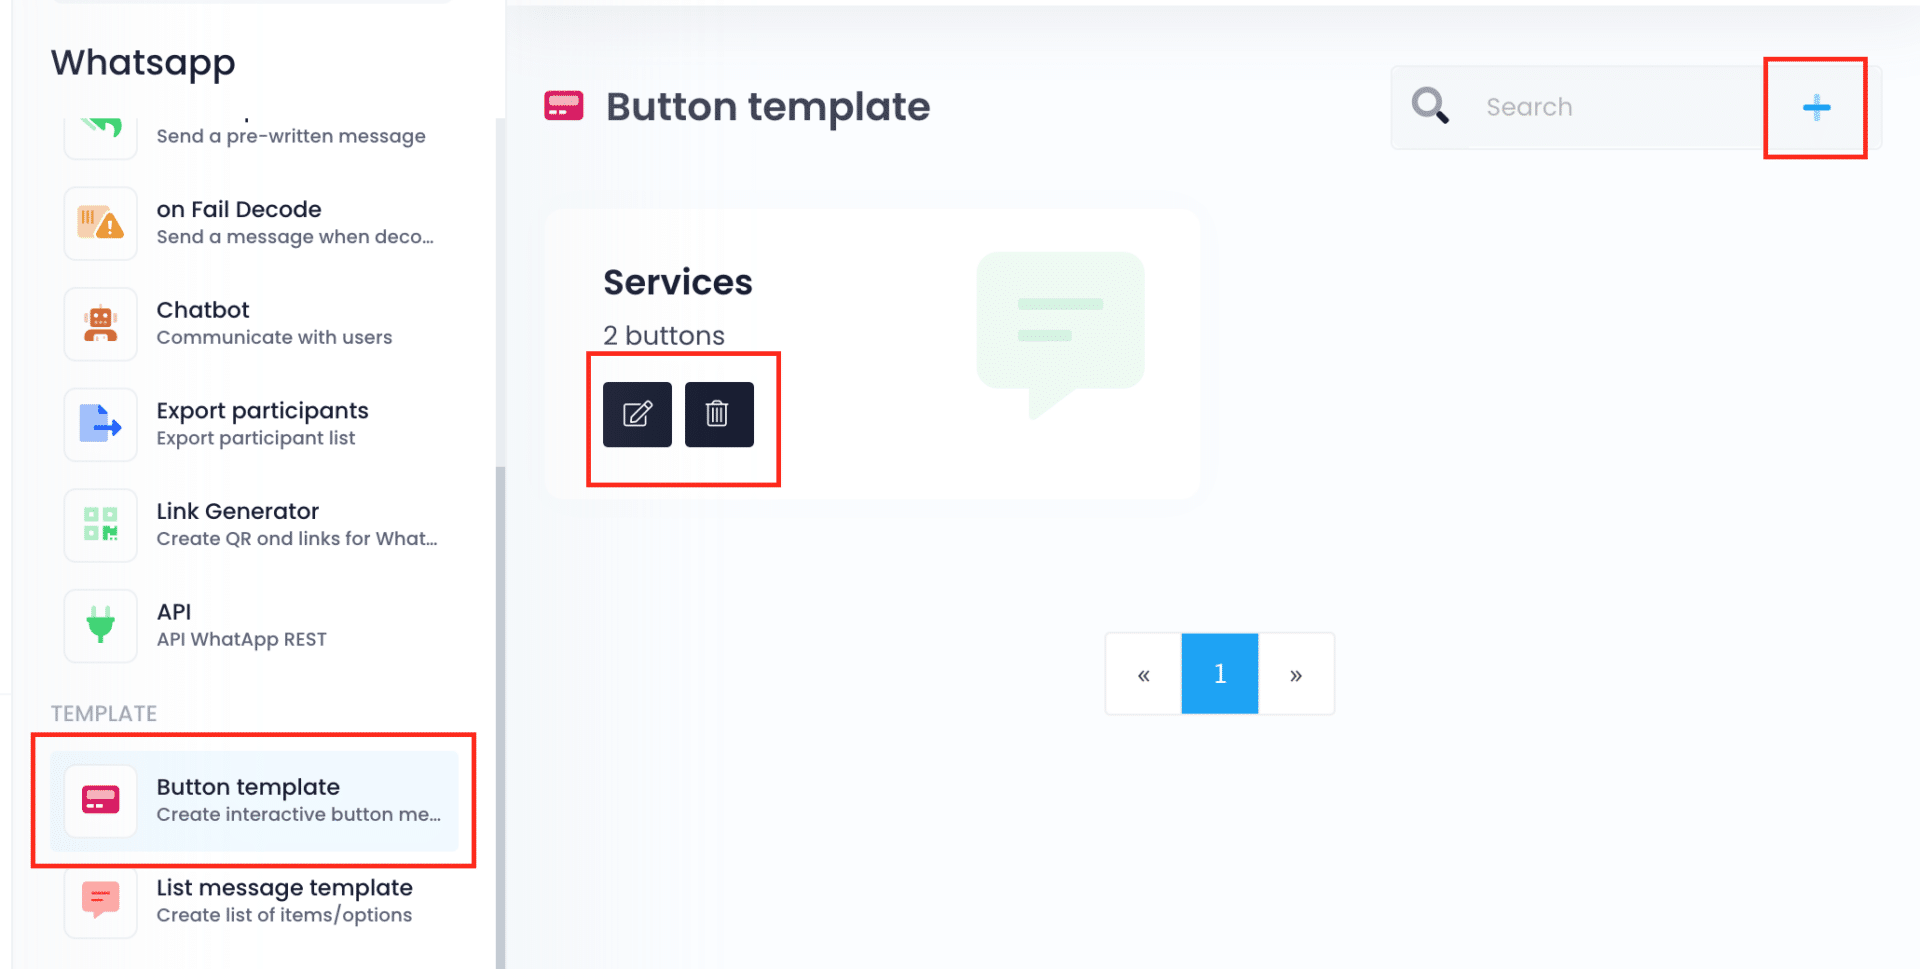
Creating a button template
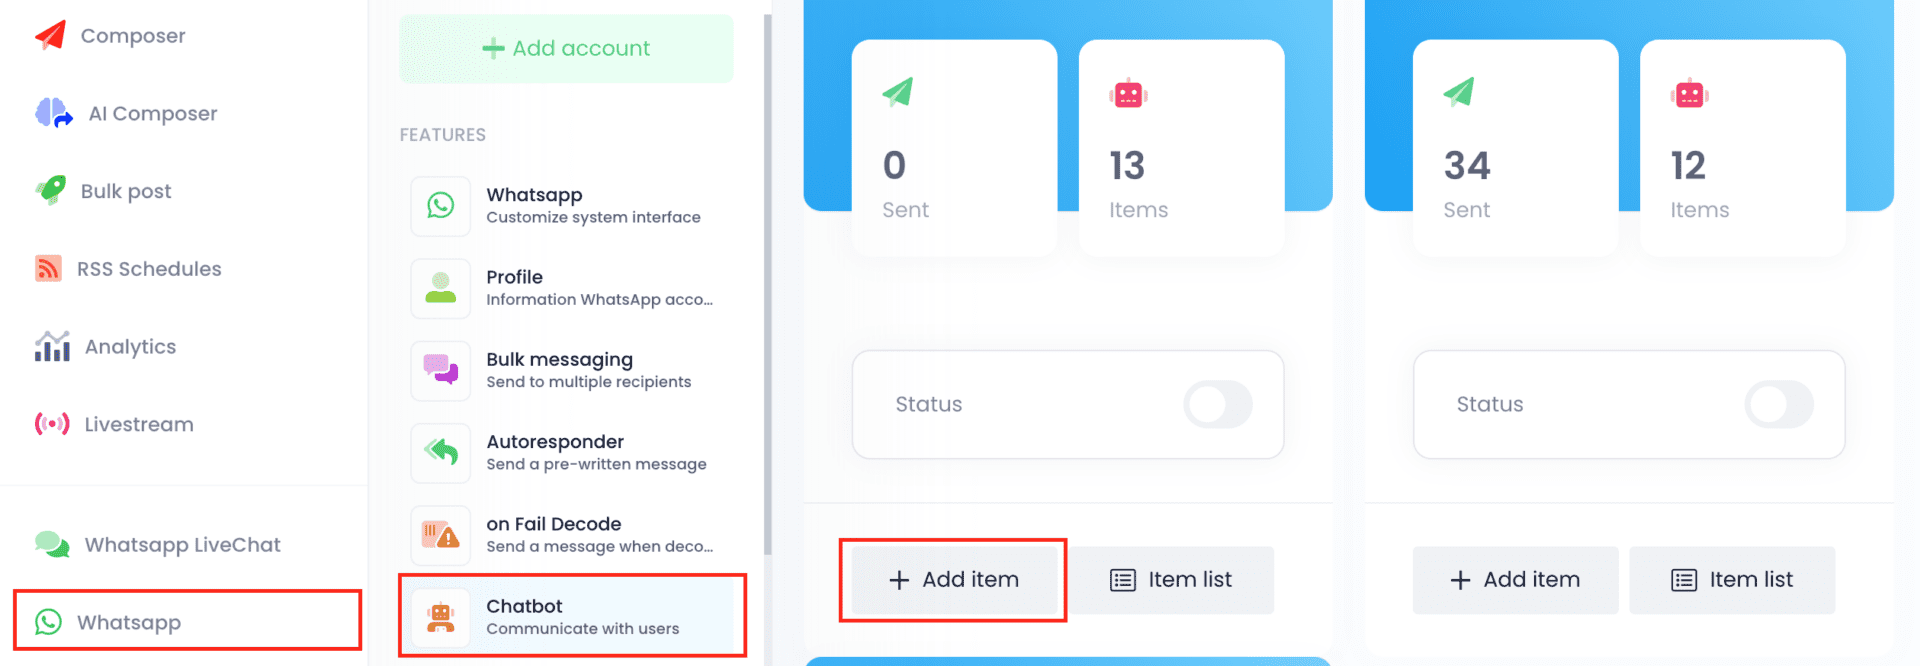
Open the app. Go to the WhatsApp section and click on Chatbot. Find the WhatsApp account where you wish to insert the buttons. Click on Add item.
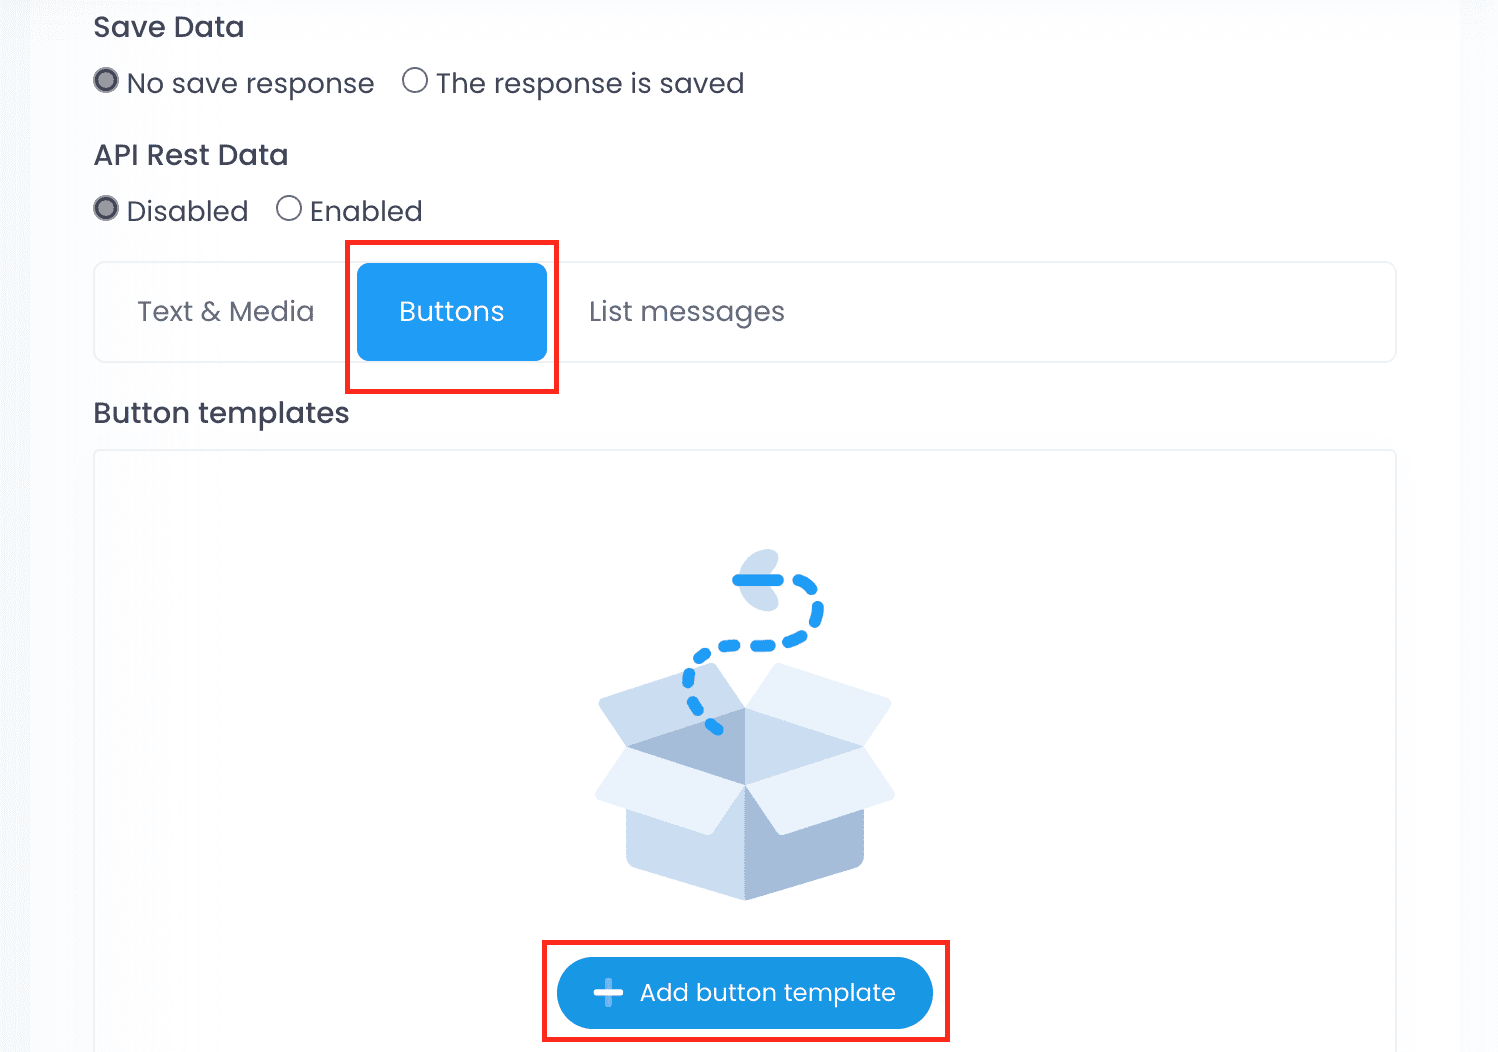
Scroll down. On the section below API Rest data, click on Buttons, and then on Add Button Template.
Configure the template. You will open a page called Button Template. On the first field, give your template a name to identify it. On the Main Description field, write the text message that your chatbot will send along with the buttons. Optionally, add an image to the message on the Main Image section and a footer for your message.

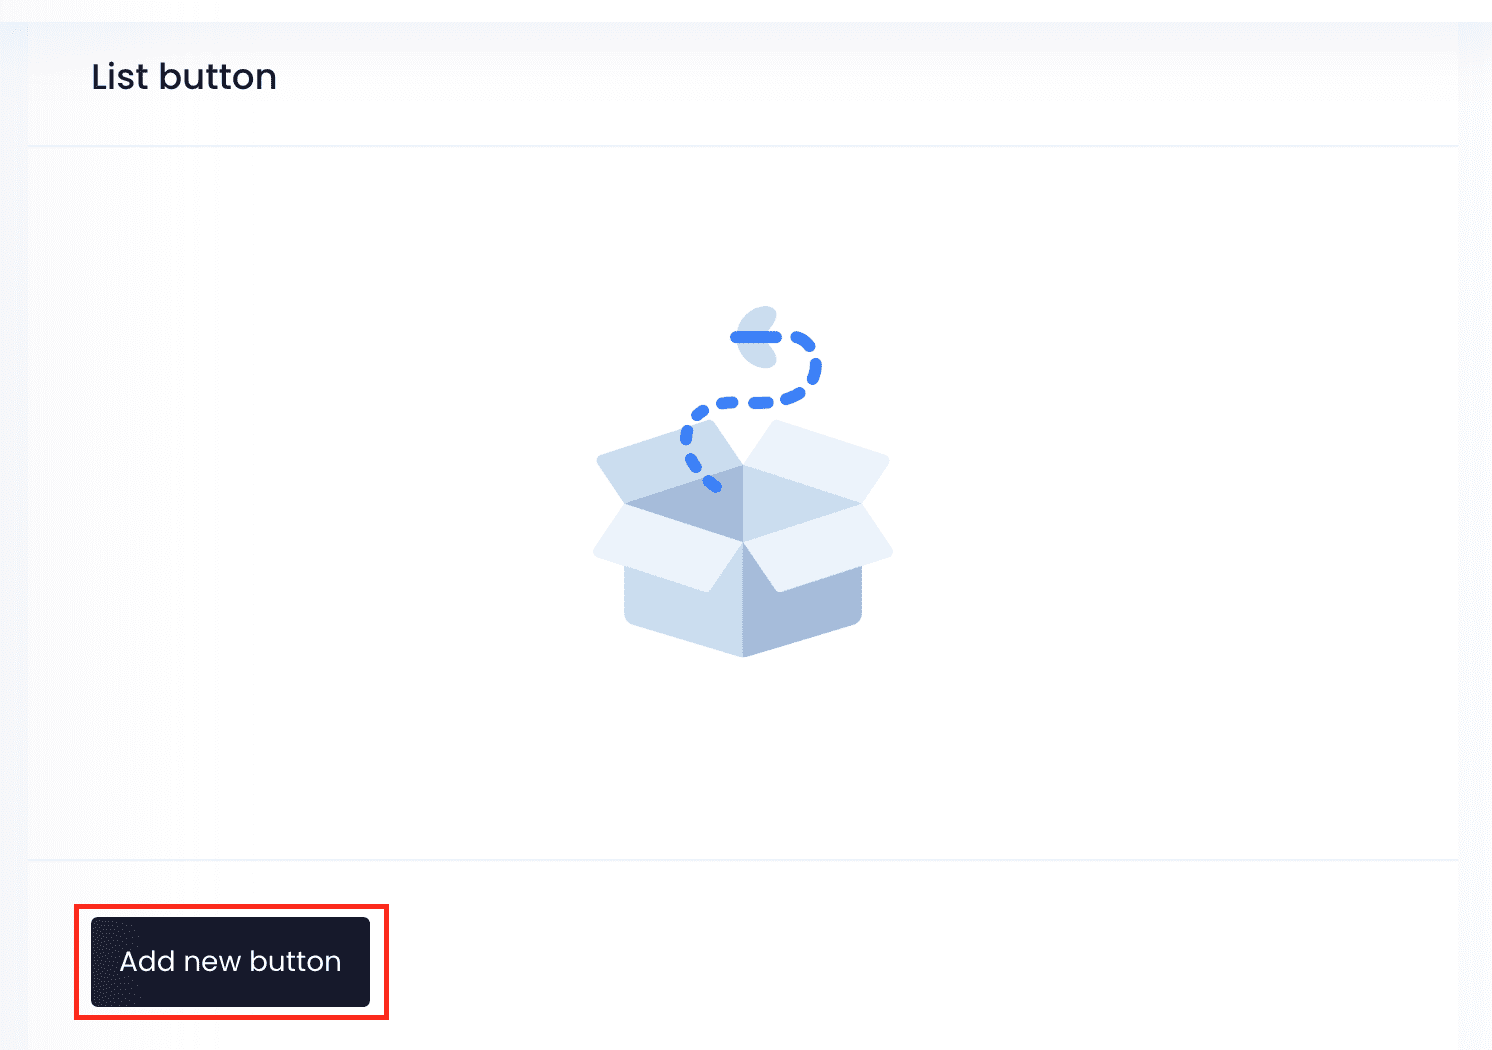
Create the buttons. Scroll down. On the List Button section, click on Add button to create your first button.
Select a button type. We have three kinds of buttons: Text Buttons, Link Buttons and Call To Action Buttons.
Text buttons
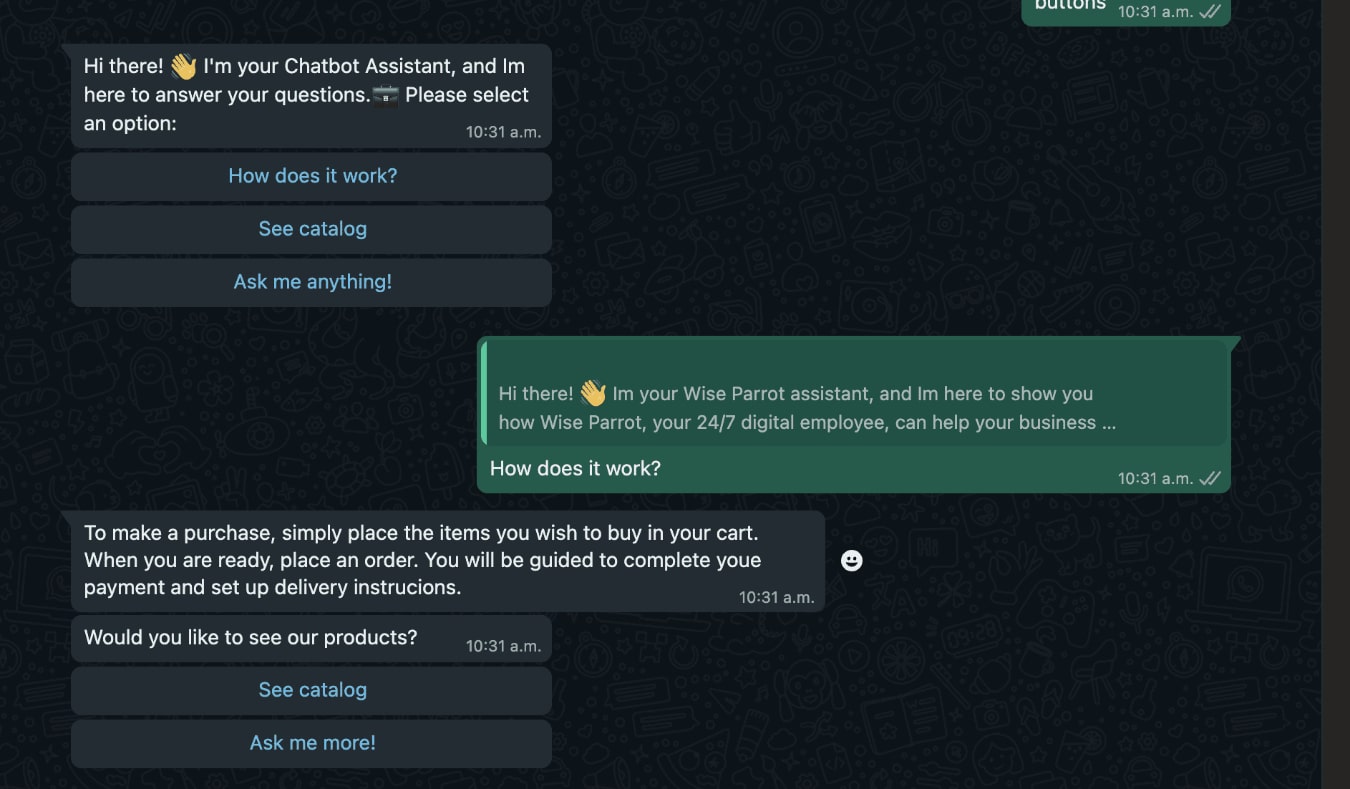
Text buttons are quick replies designed for user convenience. When users click a button, the word or short phrase in it is sent as a message reply. Keep the text within 20 characters (including spaces); otherwise, the button template won’t be sent.

You can use text buttons to create dynamic chatbots. Simply use the exact same text that was placed in the button as the Keyword that will trigger an item on your chatbot to keep the conversation going.
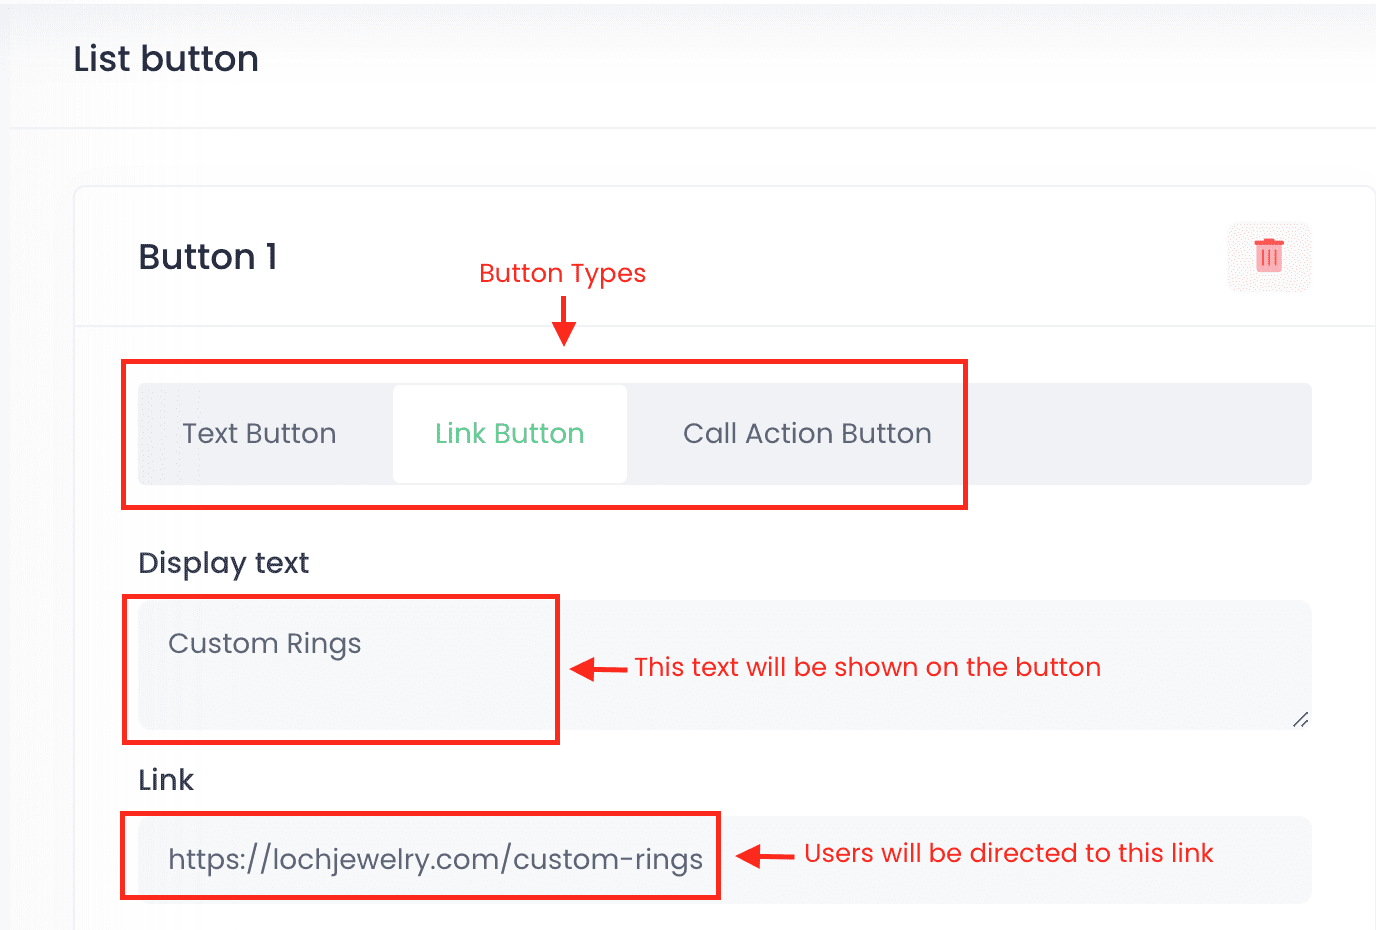
Link buttons (Coming soon)
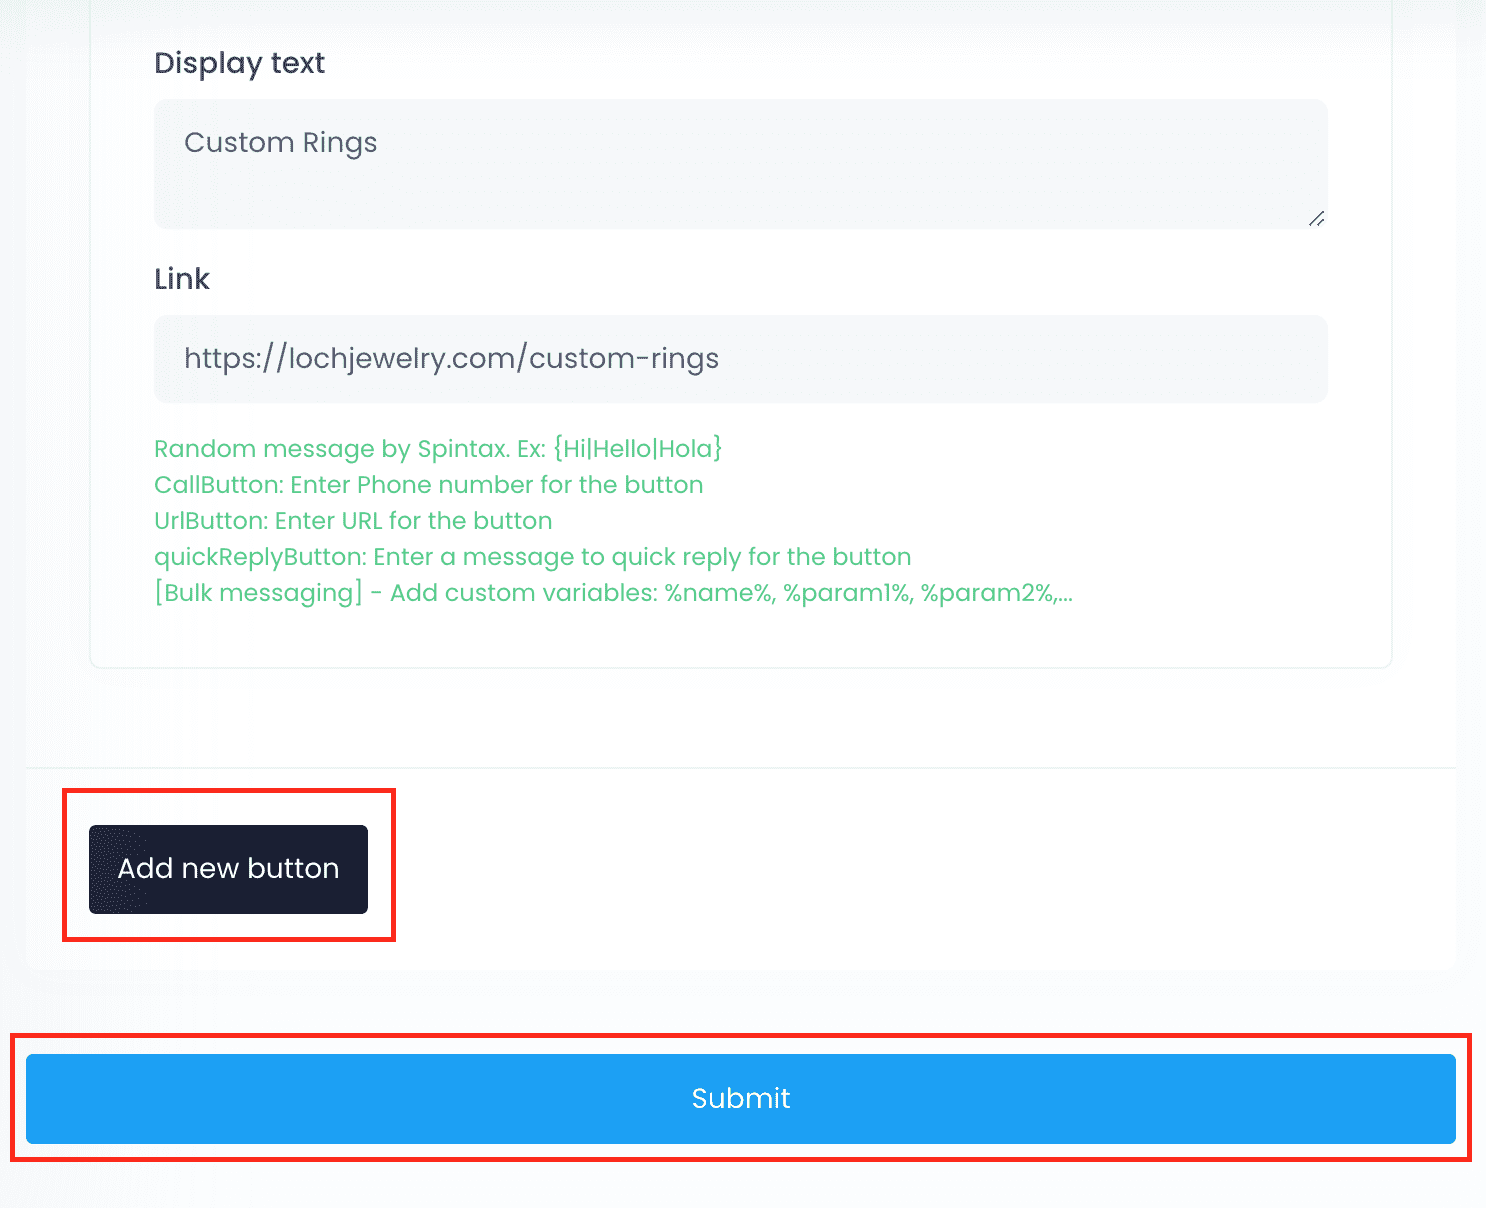
If you select Link Button as button type, users will be directed to the URL you provide. Write it on the Link Field. On the Display text Field, state the text that will be shown on the button. This function in currently in development, join our VIP channels for updates on its release.
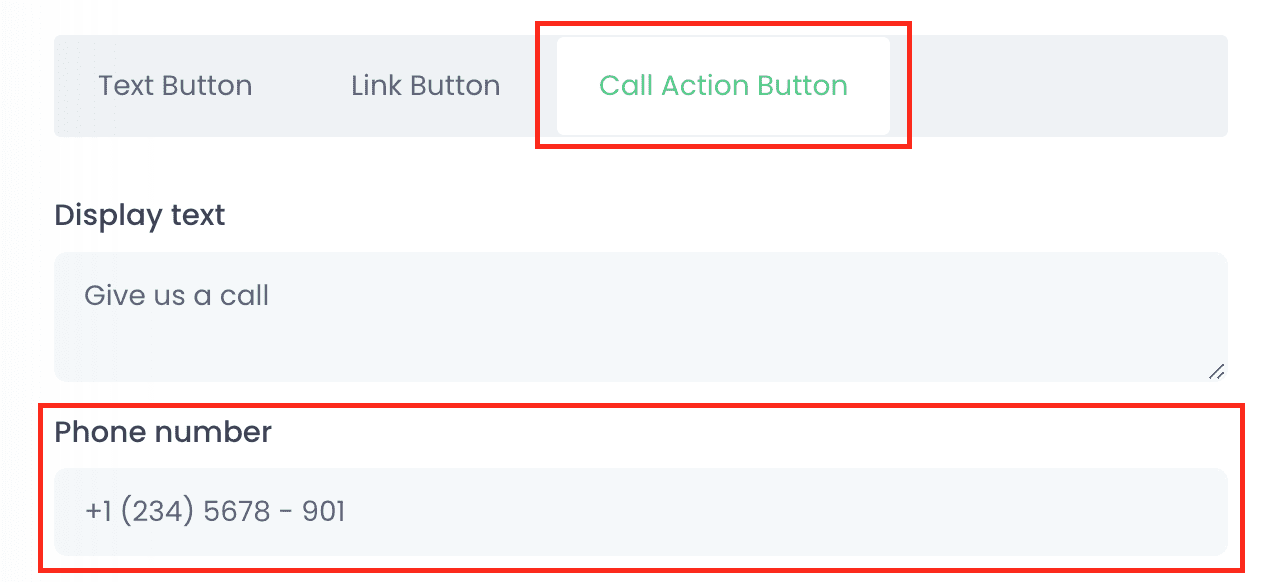
Call Button (Coming soon)
With a Call Button, users will automatically call the phone number you provide on the Phone Number Field. Make sure to include the country code. This function in currently in development, join our VIP channels for updates on its release.
Add more buttons. Click on the Add Button anytime to add more buttons. WhatsApp allows you to send up to three per message. When you are done creating your buttons, click on Submit to save your template.
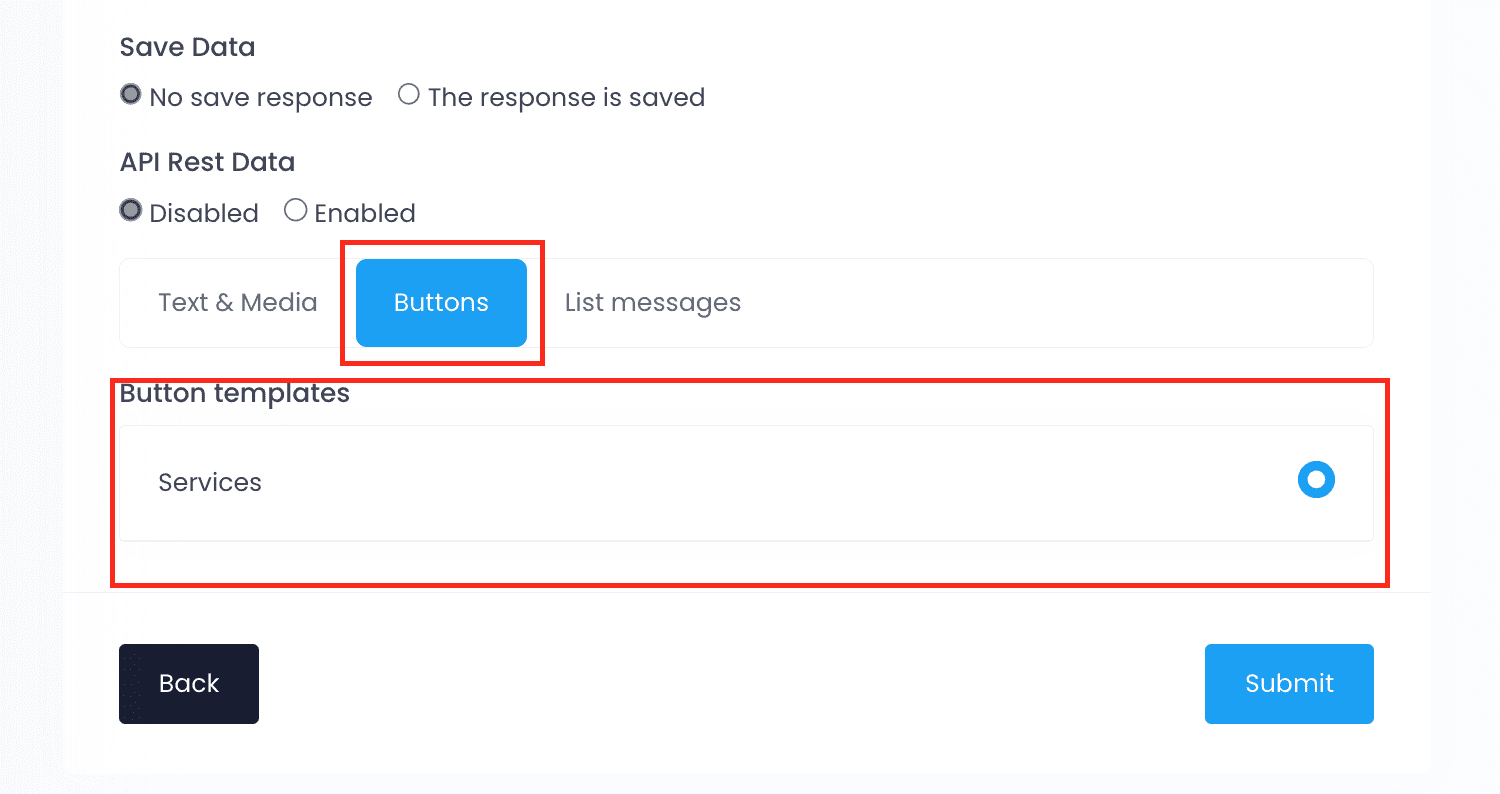
Edit your template. You can see, edit and delete the templates you have created on the Button Template section. You can also create new templates by clicking on the Add button at the top right corner. Once you have your templates ready, you can attach them to the items of your chatbot.
Adding your template to an item
Go back to the chatbot section. Once again, look for the number where you wish to add the buttons and click on Add item.

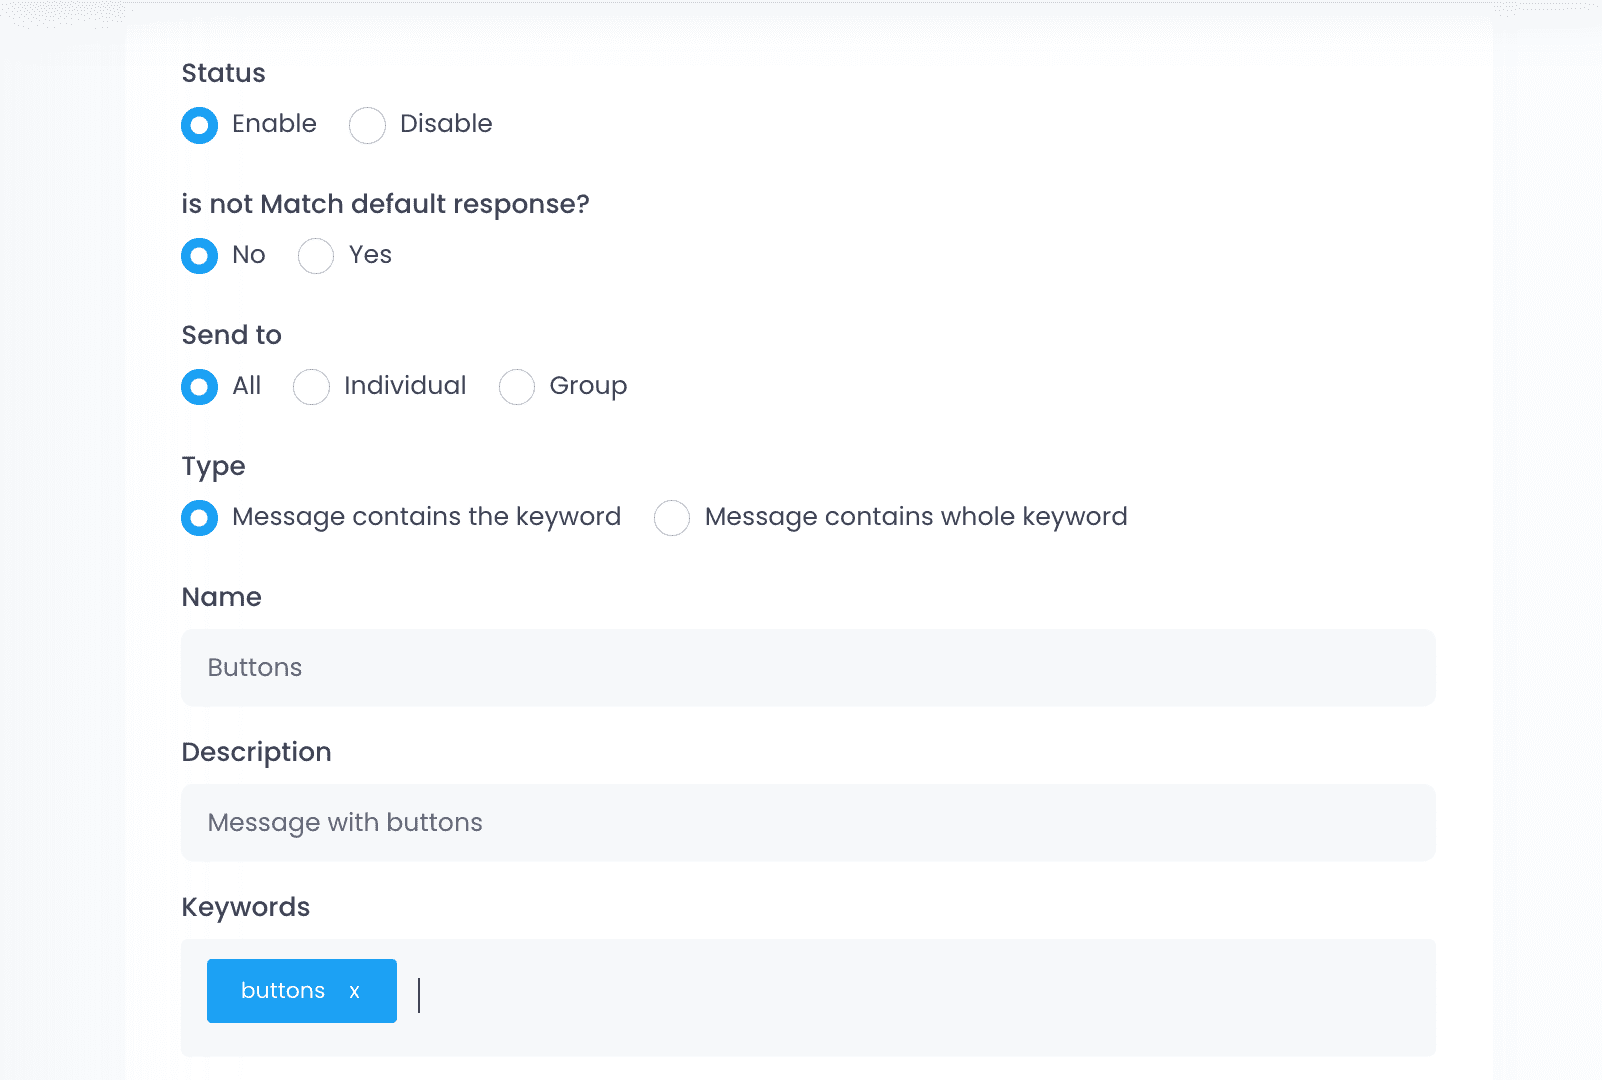
Configure the item. Give the item a name and a description to identify it. Add a keyword that will trigger the message with the buttons. For example, here we used ‘buttons’. Indicate if the message will be sent to individuals, groups, or both. Leave the rest of the settings as shown on the image.
Add the buttons template. On the section below API Rest, click on Buttons. Look for the template you created before and select it. Click on Submit to save. Done! When a user sends the indicated keyword, the message with the buttons will be sent.