Welcome to this tutorial! A Stream Subscribe Button on your website allows users to opt-in to receive messages in Messenger, facilitating follow-up communications like confirmations and updates. Please note that this plugin functions exclusively on HTTPS websites. Let’s get started!
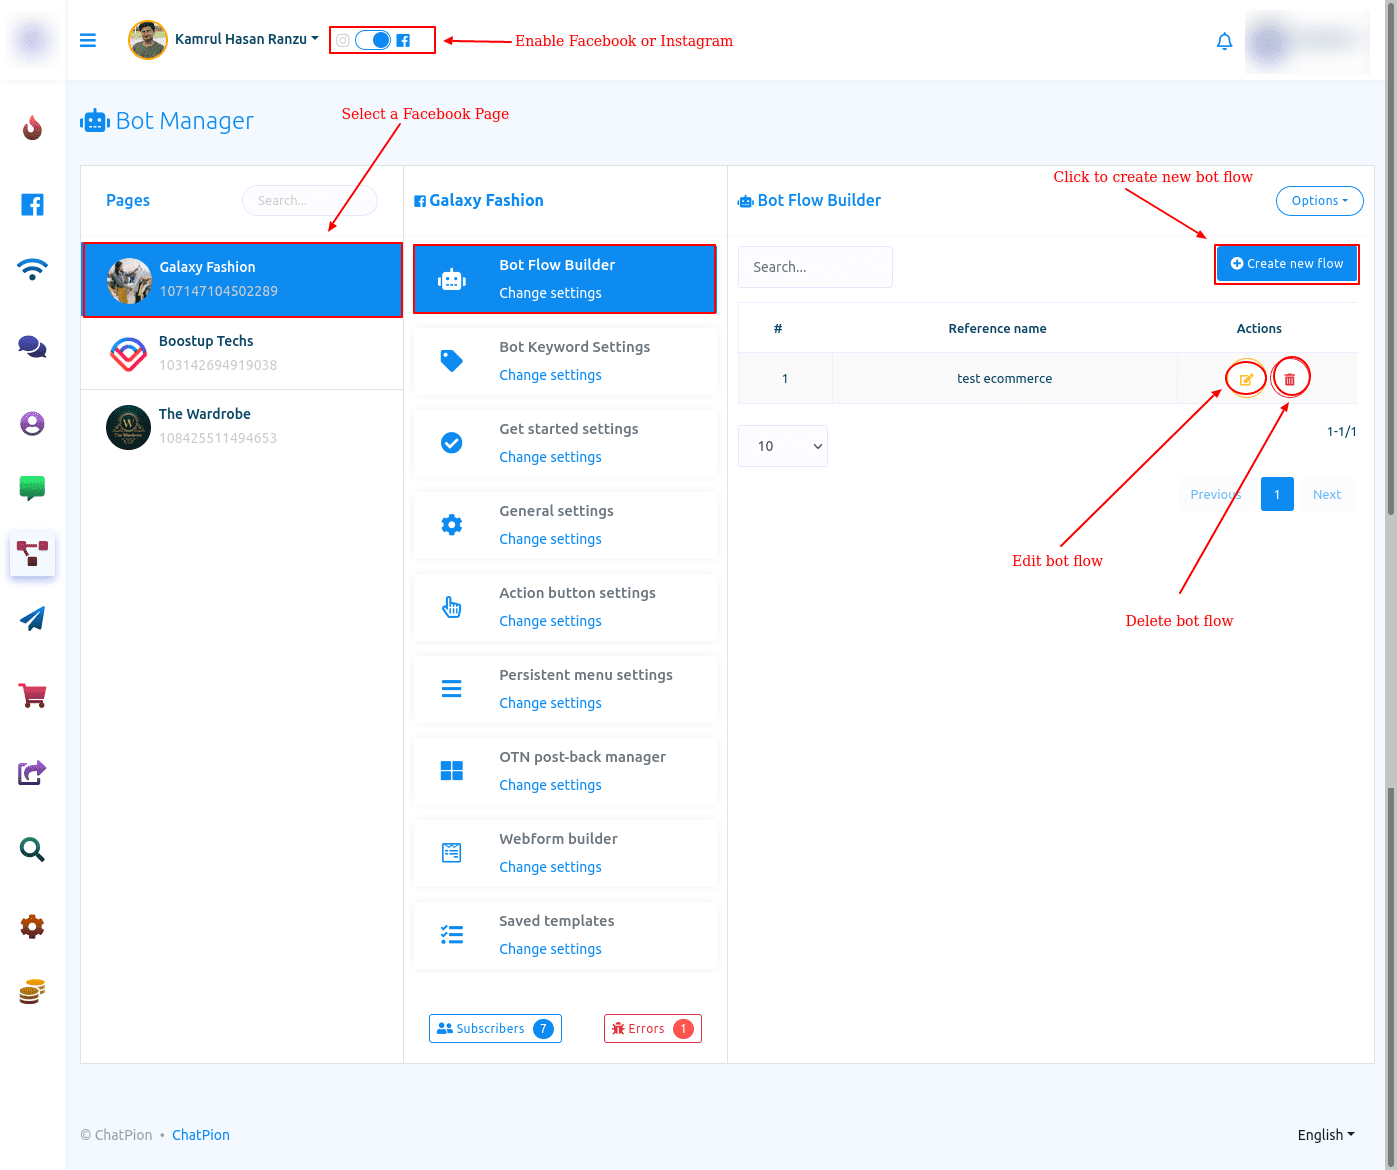
1. Go to the Bot Manager. Begin by navigating to the “Bot Manager” in the left-hand menu.
2. Open the Facebook Engagement Tools. Toggle the switch above to select “Facebook”. Now, select the specific Facebook account you’d like to integrate. Finally, in the menu, locate and click on “Messenger Engagement”.
3. Create using the Flowbuilder. Within the Checkbox plugin section, click on “Create using Flowbuilder”.
4. Select an Action Button. On the page that opens, choose the action button that you want to trigger with your button. For this tutorial, we’ll leave the Messenger interaction plugin selected to use this flow.
5. In Messenger Engagement Plugin, Select Checkbox Plugin. Make sure to choose “Checkbox Plugin” in the Messenger Engagement Plugin dropdown menu.
6. Write the URL. Specify the URL where you will be adding the button.
7. Customize the Button. Choose the preferred language for the button. Then, customize its Appearance: Set the color, size, and alignment of the button on your web page. Finally, decide whether you want the button to be center-aligned (choose “Yes”) or to the left.
8. Optional Thank You Message. If desired, add a thank you message and optionally, a button with an additional URL.
9. Enable Redirect (Optional). If you want to redirect the user directly to a URL without displaying a thank you message, toggle on the “Redirect to a web page” option upon successful registration.
10. Add Error Message. Provide an error message in case the subscription is not successful.
11. Set Referral (Optional). In the referral section, you can add a unique referral to track the people who clicked.
12. Add a Label (Optional). Finally, in the label section, you can put a label to the contacts that enter your chatbots through this button.
Once you’ve completed the configuration, click on “Ready”. Now that we’ve set this up, it’s time to configure the sequence of messages that your users will receive when they click the button.
13. Drag and Arrange Actions. For instance, you can add a new sequence. Refer to the corresponding tutorial for detailed instructions on how to assemble it. Don’t forget to save your settings by clicking on the disk icon.
14. Get the Embed Code. Select “Back” at the top right, then go back to “Messenger Engagement” and click on “Checkbox plugin” and then click “List”. By clicking “JS embed code”, you will find the embed code you created. Copy and paste it onto your website.
Congratulations! You’ve successfully added a Stream Subscribe Button to your website, enhancing user engagement. For more tutorials and information, be sure to visit our Tutorials section. Happy website customization!
