Mastering WhatsApp Subscriber Management for Effective Communication #
This tool is ingeniously crafted to help businesses, marketers, and organizations efficiently organize and engage with their WhatsApp contacts and subscriber base. By categorizing and managing your contacts, you can enhance personalization in your messages, schedule broadcasts strategically, and gain insights into your campaign’s performance, ensuring a robust connection with your audience.
#
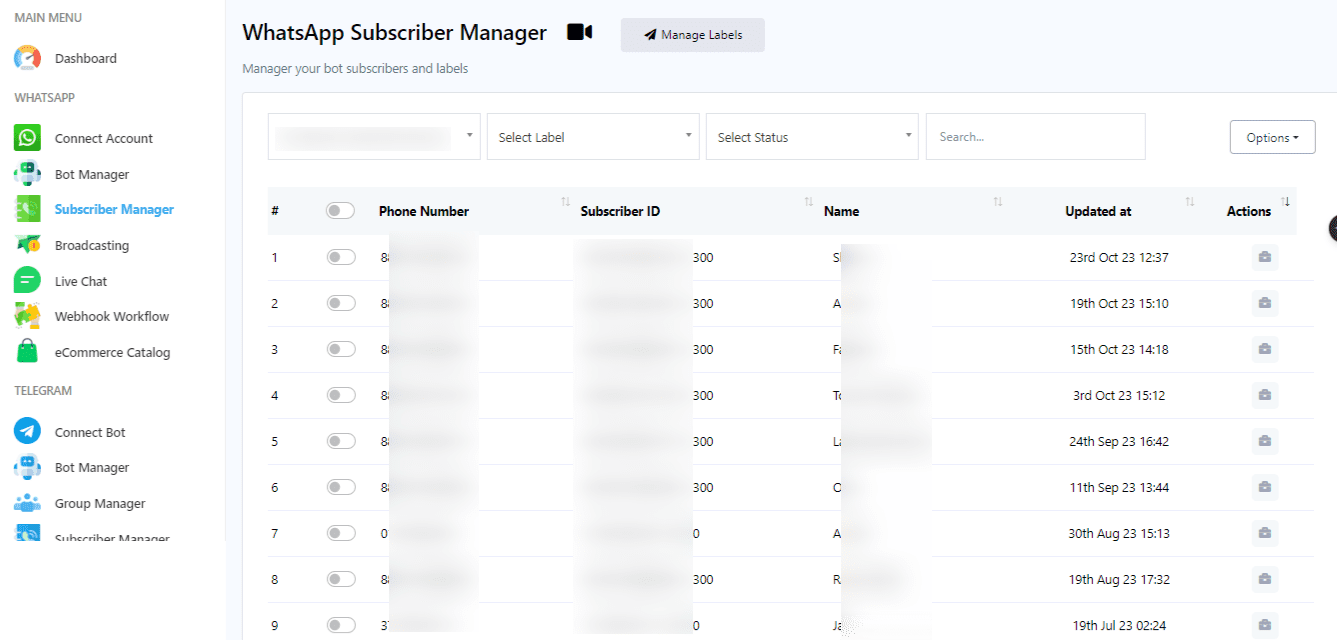
How to Access and Utilize the WhatsApp Subscriber Manager #
Navigating to Subscriber Manager
-
- To begin, access your dashboard and locate the ‘Subscriber Manager’ option within the left navigation menu. A simple click on this option will lead you to the Subscriber Manager interface.
By streamlining the management of your WhatsApp contacts and subscribers, the WhatsApp Subscriber Manager plays a pivotal role in optimizing your communication strategy. Its capabilities allow for more targeted and effective messaging campaigns, fostering stronger relationships and engagement with your WhatsApp audience.
Steps for Managing Labels in the WhatsApp Subscriber Manager #
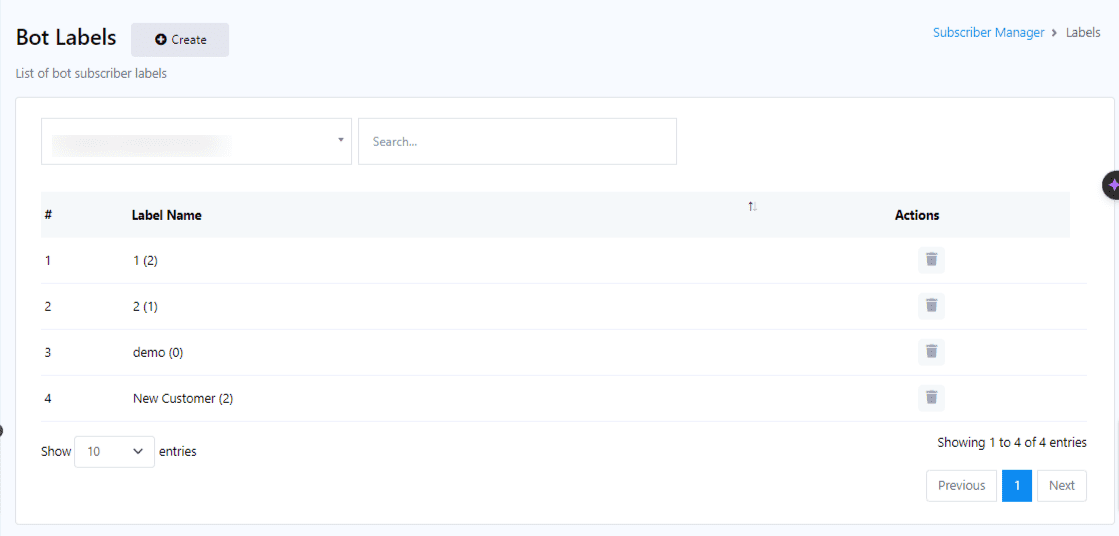
Managing Labels #
Accessing Label Management:
- Within the Subscriber Manager, locate and click on the
Manage Labelsfield. This action will navigate you to the label management section, where you can oversee your current labels and also introduce new ones.
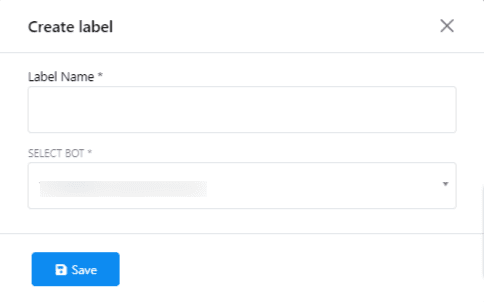
Creating a New Label:
- To initiate the creation of a new label, click on the
Createbutton found in the Label section. - A pop-up form will appear, prompting you to fill in two essential fields:
- Label Name: Here, type in your desired name for the new label, making it relevant to the segmentation you aim to achieve.
- Select Bot: Choose the specific bot account that the new label will be associated with, ensuring the label aligns with the correct messaging campaign.
- After filling out the form, click the
Savebutton to finalize the creation of your label. - A success notification will confirm the establishment of your new label, which will then be listed among your other labels.
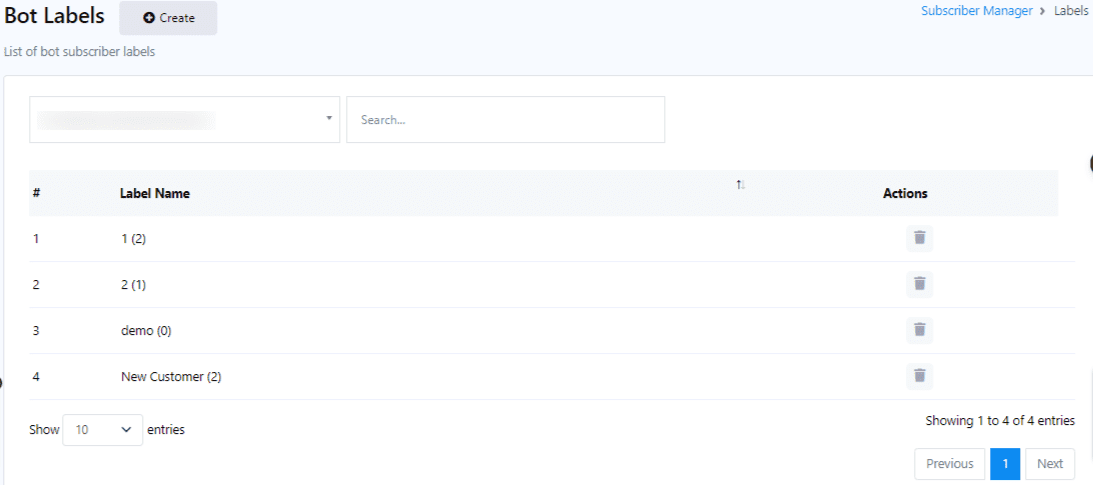
Deleting a Label #
- Should you need to remove a label, simply locate the label you wish to delete in your list of labels. Next to the label name, you will find an action button depicted by a Delete icon.
- Clicking on this Delete icon will remove the label from your list, thereby eliminating the associated segmentation from your subscriber management.
By adeptly managing labels within the WhatsApp Subscriber Manager, you not only streamline your subscriber list but also unlock targeted communication pathways. This strategy allows for the delivery of tailored messages, significantly boosting engagement and effectiveness of your WhatsApp campaigns.
Search for Subscribers #
- Enhance your management efficiency by utilizing the search bar and various filter options available on the Subscriber Manager page. This feature allows for quick identification and access to subscriber details, streamlining your engagement and campaign customization processes.
Leveraging labels within the WhatsApp Subscriber Manager not only simplifies your subscriber organization but also empowers your messaging campaigns with heightened personalization and relevance. By following these straightforward steps, you can ensure your communications are thoughtfully tailored, fostering stronger connections with your WhatsApp audience.
How to Export Your WhatsApp Subscribers as a CSV File #
Whether you’re transitioning between campaigns, analyzing your audience, or backing up your contacts, exporting your subscriber list as a CSV file is a straightforward process that enhances your operational flexibility. Here’s how to easily export your WhatsApp subscribers for use in various applications or another WhatsApp bot account.
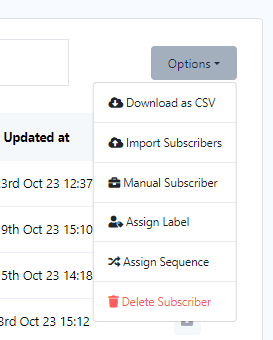
- Accessing Export Options:
- Within your WhatsApp Subscriber Manager, locate the menu that houses various management options. Here, you will find the ‘Download as CSV’ feature, designed to facilitate the export of your subscriber data.
- Exporting Your List:
- Click on the
Download as CSVoption. This action initiates the process of compiling your subscriber list into a universally compatible CSV (Comma Separated Values) format. The CSV file format is widely recognized for its versatility and simplicity, making it ideal for data analysis, storage, or migration purposes.
- Click on the
- Utilizing Your CSV File:
- Once the export is complete, you’ll receive a CSV file containing your WhatsApp subscriber list. This file can then be easily imported into another WhatsApp bot account or used in various applications for further analysis, marketing strategies, or archival purposes.
Exporting your subscriber list as a CSV file not only offers a snapshot of your current audience but also provides a tangible asset that can be leveraged across different platforms and campaigns. By utilizing this feature, you ensure that your subscriber management practices are both efficient and adaptable, ready to meet the ever-evolving demands of digital communication and marketing strategies.
How to Import Subscribers into Your WhatsApp Bot Account #
In the dynamic world of digital marketing and communication, the ability to quickly adapt and expand your audience is key. Importing subscribers into your WhatsApp bot account allows you to seamlessly integrate new contacts, ensuring that your messaging campaigns continue to grow and resonate with a broader audience.
1. Accessing Import Options:
Start by navigating to the Subscriber Manager within your WhatsApp bot platform. Here, look for the ‘Import Subscribers’ option in the menu. This selection is your gateway to expanding your subscriber list with new contacts.
2. Initiating the Import Process:
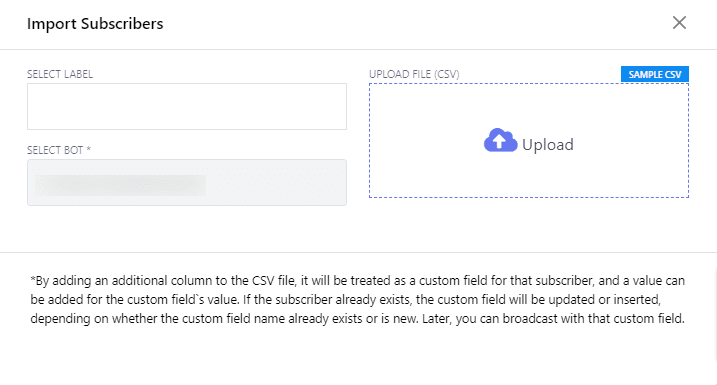
Upon selecting ‘Import Subscribers’, a modal form titled ‘Import Subscribers’ will emerge on your screen. This form is designed to guide you through the import process with ease and precision.
3. Configuring Import Settings:
The form presents two critical fields that need your attention:
Select Bot: Choose the bot account into which you wish to import subscribers. This step ensures that the new contacts are integrated into the correct messaging campaign or communication flow.
Select Label: Optionally, you can assign labels to your incoming subscribers. This is particularly useful for segmenting your contacts based on specific criteria, interests, or engagement levels, enhancing the personalization of future communications.
Uploading Subscriber Data #
With your settings configured, proceed to upload your subscriber data by clicking on the ‘Upload’ button. This action will import the subscribers into your selected bot account, associating them with any labels you’ve chosen.
Importing subscribers into your WhatsApp bot account not only broadens your audience base but also opens up new avenues for engagement and interaction. By meticulously following these steps, you can ensure a smooth and efficient process, allowing you to focus on crafting compelling messages and campaigns that resonate with your newly expanded audience. With this enhanced reach, your potential for impact and conversion on WhatsApp is significantly amplified.
How to Manually Add Subscribers to Your WhatsApp Bot #
In the realm of WhatsApp marketing and communication, flexibility in managing your subscriber list is essential. Adding subscribers manually is a straightforward process that allows you to tailor your audience with precision. Whether you’re incorporating contacts from offline interactions or integrating users who’ve given consent outside of your digital funnel, this guide simplifies the process of manual subscriber addition.
- Initiating Manual Addition:
- Within your WhatsApp management platform, locate and select the ‘Manual Subscribers’ option from the available menu choices. This selection prepares the system for the manual entry of subscriber details.
- Filling in Subscriber Information:
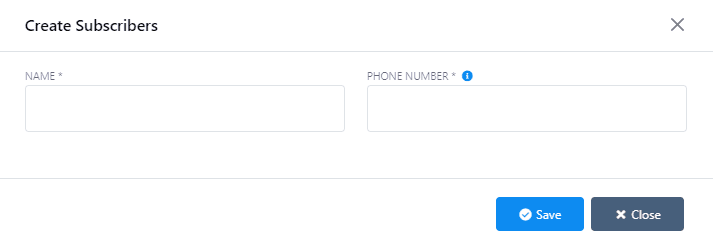
- Upon selection, the ‘Create Subscribers’ modal form will be displayed. This form is your entry point for adding new subscribers, requiring just a few pieces of key information:
- Name: Here, input the subscriber’s name. This could be a first name alone or a full name, depending on your preference and the level of personalization you aim for in your communications.
- Phone Number: Enter the subscriber’s phone number. Ensure this number is accurate and includes the appropriate country code, as it’s crucial for WhatsApp messaging.
- Upon selection, the ‘Create Subscribers’ modal form will be displayed. This form is your entry point for adding new subscribers, requiring just a few pieces of key information:
- Saving the Subscriber:
- With the subscriber’s name and phone number correctly filled out, click the ‘Save’ button to finalize the addition. This action integrates the new subscriber into your WhatsApp bot’s contact list.
- Confirmation of Success:
- After saving, you’ll receive a message confirming the successful addition of the subscriber. This notification serves as an assurance that the contact has been properly incorporated into your subscriber list, ready to receive your WhatsApp communications.
Adding subscribers manually is an invaluable feature for businesses seeking to maintain a comprehensive and up-to-date subscriber list on WhatsApp. By following these simple steps, you ensure that every valuable contact is included in your messaging campaigns, enhancing the reach and effectiveness of your communication efforts.
How to Assign Sequences to Your WhatsApp Subscribers #
In the dynamic environment of WhatsApp communication, assigning sequences to your subscribers is a strategic approach to maintaining engagement and delivering value over time. Sequences, or automated series of messages, are designed to guide your subscribers through a journey, whether it’s educational content, promotional information, or interactive communications.
1. Selecting Your Subscribers:
Navigate to your WhatsApp Subscriber Manager where your subscriber list is displayed. From here, you can easily browse or search to find the subscribers you wish to target with a specific sequence.
2. Choosing the Sequence:
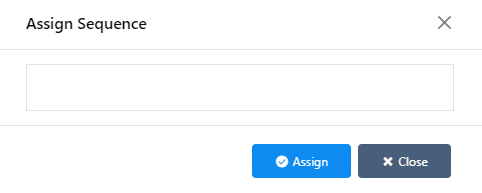
With your subscribers selected, look for the ‘Assign Sequence’ option. This feature allows you to link your chosen subscribers to a predefined sequence of messages that you’ve created within your WhatsApp bot platform.
3. Assigning the Sequence:
Click on the Assign Sequence option. You may be prompted to select from a list of available sequences that you have previously set up. Choose the sequence that best fits the needs or interests of the selected subscribers.
4. Confirmation and Activation:
Once you’ve made your selection, confirm the assignment of the sequence to your chosen subscribers. This action initiates the automated sending of the sequence messages according to the schedule you’ve defined.
Assigning sequences to your subscribers allows you to automate part of your communication strategy, ensuring consistent engagement without the need for manual intervention for each message. Whether you’re nurturing leads, providing customer support, or sharing updates, sequences can help you deliver timely and relevant content to enhance subscriber satisfaction and drive desired actions.
By following these steps, you can effectively leverage the power of sequences within your WhatsApp bot strategy, fostering deeper connections and delivering personalized experiences to your audience.
How to Delete Subscribers from Your WhatsApp Bot Account #
Maintaining an updated and relevant subscriber list is crucial for the effectiveness of your WhatsApp communication strategies. Over time, you might find the need to remove certain subscribers from your list, whether it’s due to outdated information, unengaged contacts, or upon the subscribers’ requests.

1. Selecting Subscribers for Deletion:
Begin by accessing your WhatsApp Subscriber Manager, where your entire list of subscribers is displayed. From here, carefully select the subscribers you wish to remove from your list. This selection process is critical to ensure you only delete the intended contacts.
2. Initiating the Deletion Process:
With the subscribers selected, locate and click on the Delete Subscriber option. This action prompts the platform to prepare for the removal of the chosen contacts from your subscriber list.
3. Confirming Subscriber Deletion:
Upon clicking Delete Subscriber, a warning dialog will appear on your screen. This dialog serves as a final check, offering Delete and Cancel buttons to either proceed with or abort the deletion process.
Carefully review your decision. If you are sure about removing the selected subscribers, click on the Delete button. If you have any doubts or wish to review your selection, click Cancel to halt the process.
4. Completion and Confirmation:
After confirming the deletion by clicking the Delete button, the system will remove the selected subscribers from your list. A successful message will then appear, indicating that the subscribers have been successfully deleted.
Deleting subscribers is a necessary aspect of managing your WhatsApp bot account, helping to ensure that your messaging campaigns remain relevant and engaging to your active audience. By following these steps, you can confidently manage your subscriber list, keeping it clean and focused on those who truly value and engage with your content.