1.- Access Your Dashboard. Navigate to your dashboard where you manage your online store. Here, you’ll find a list of all your active pages.
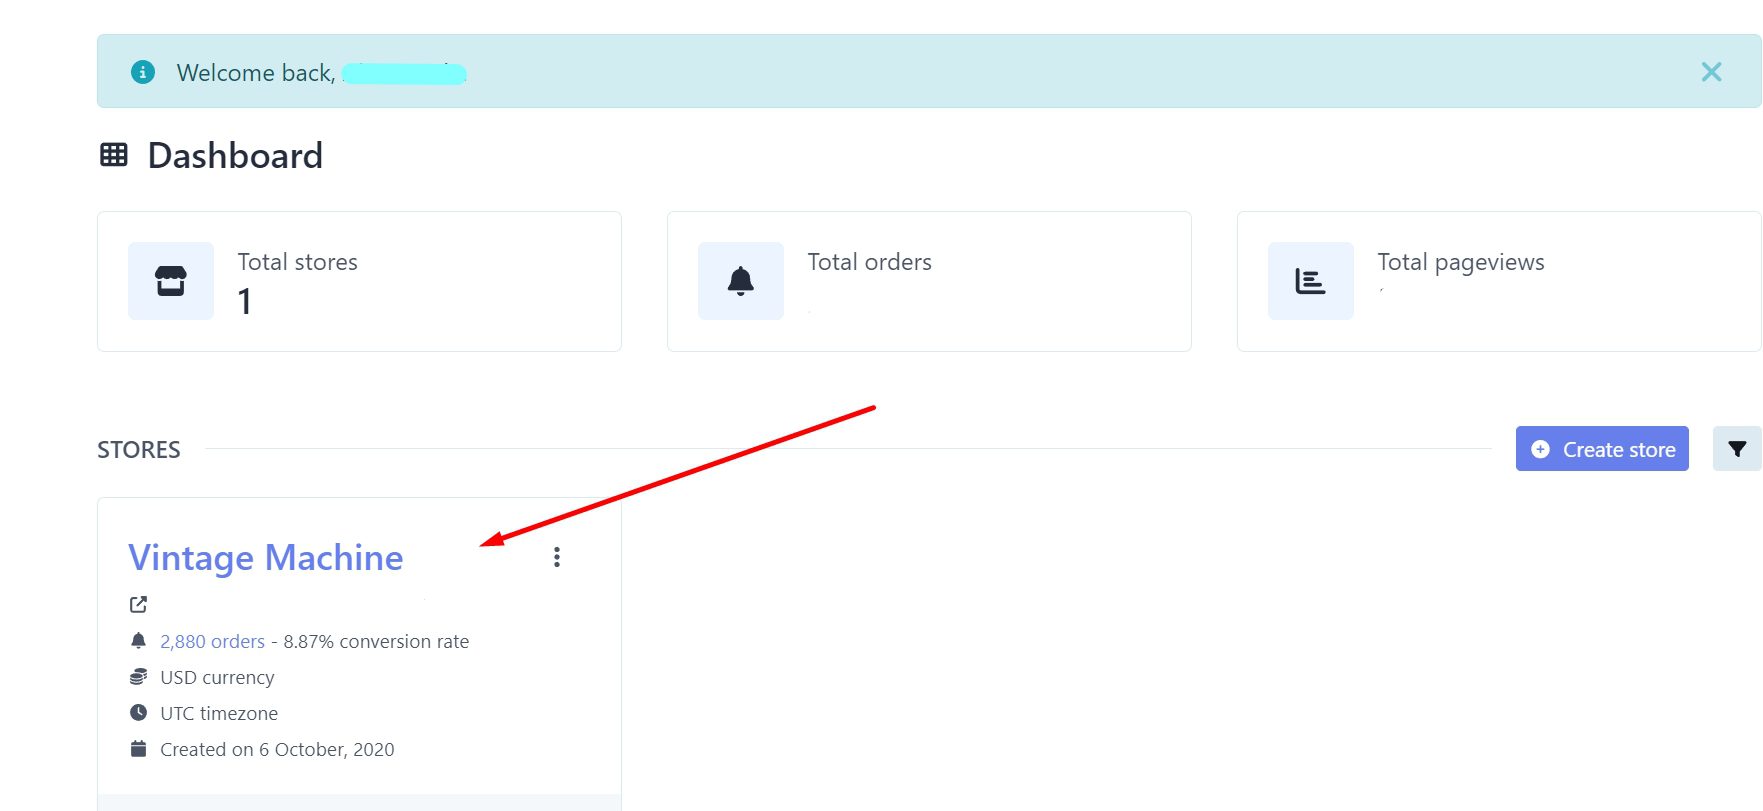
2.- Select the Page to Enable or Disable. Locate the specific page you wish to activate or deactivate. Once selected, this will take you to the statistics page associated with that particular page.
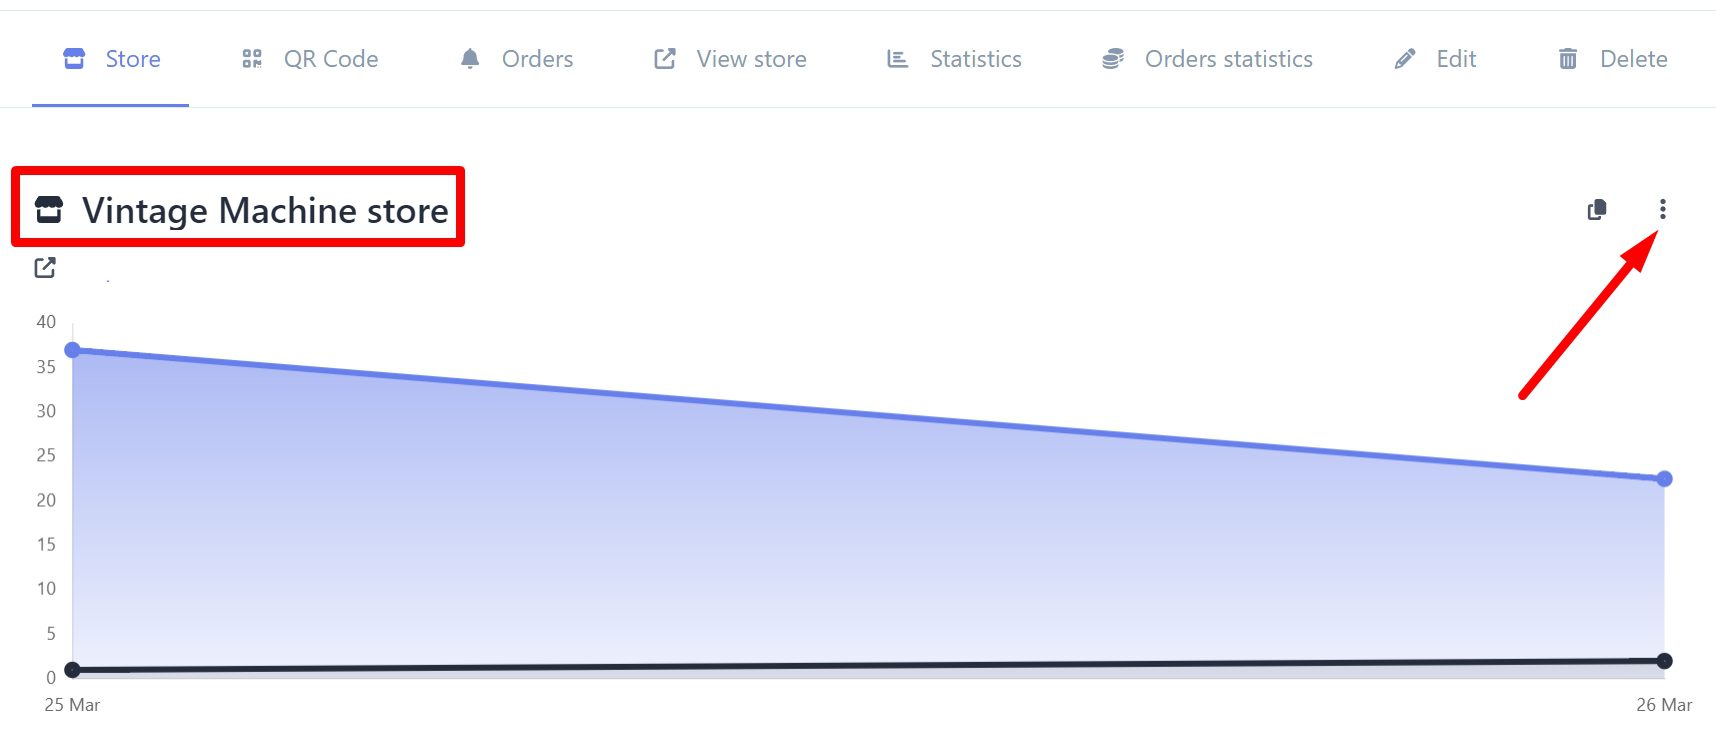
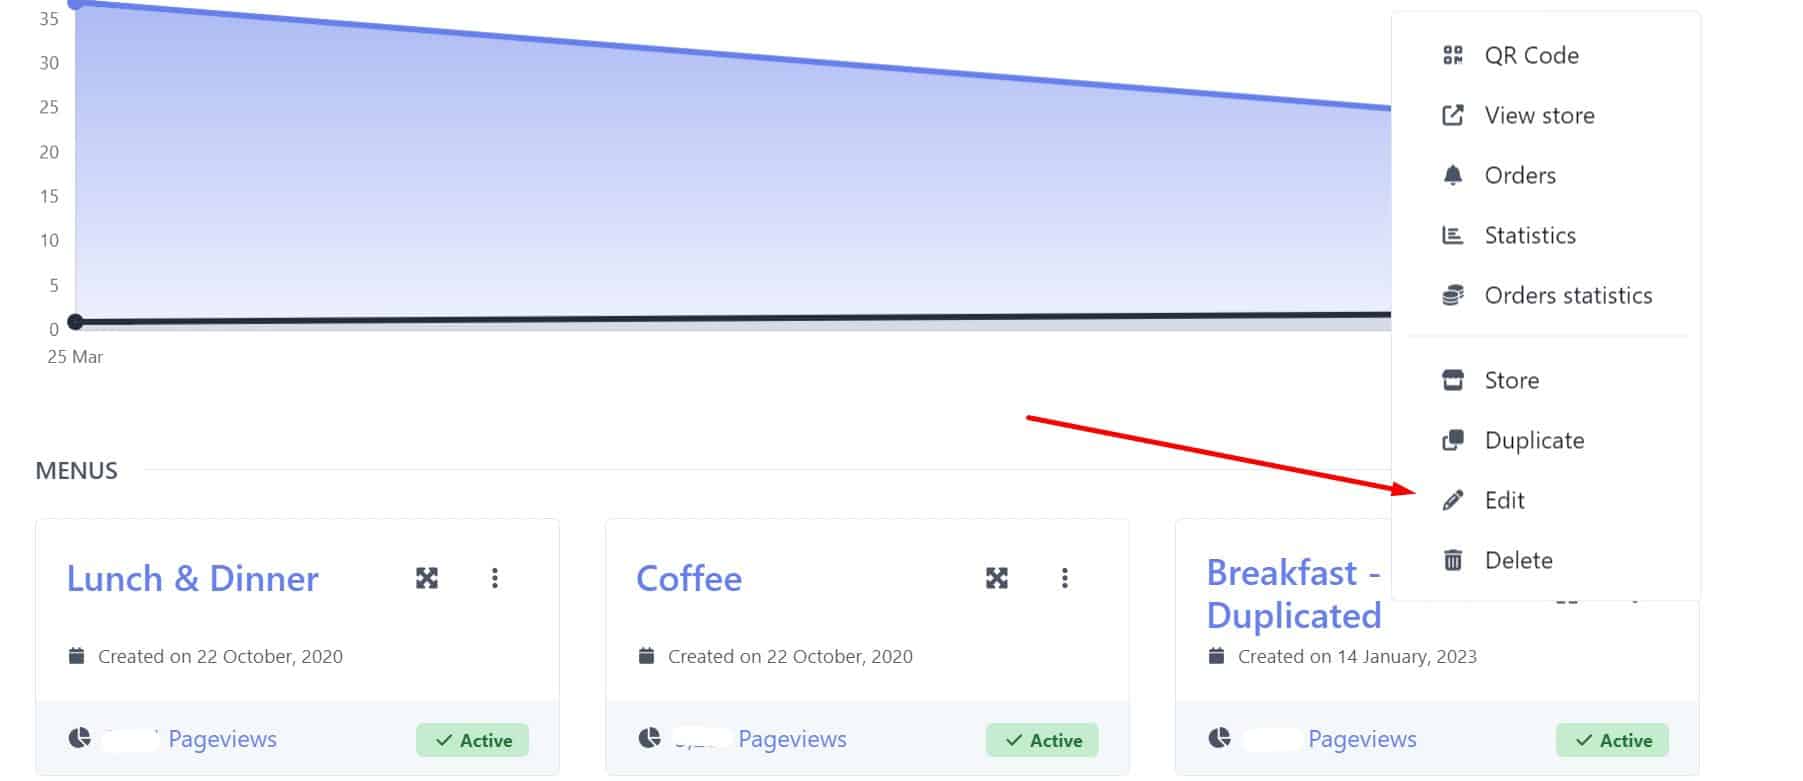
3.- Access the Editing Options. On the statistics page, look for the three dots located in the top right corner of the screen. Click on them to display a menu. From the dropdown menu, click on the option labeled “Edit”. This will take you to a page where you can make changes to your online store settings.
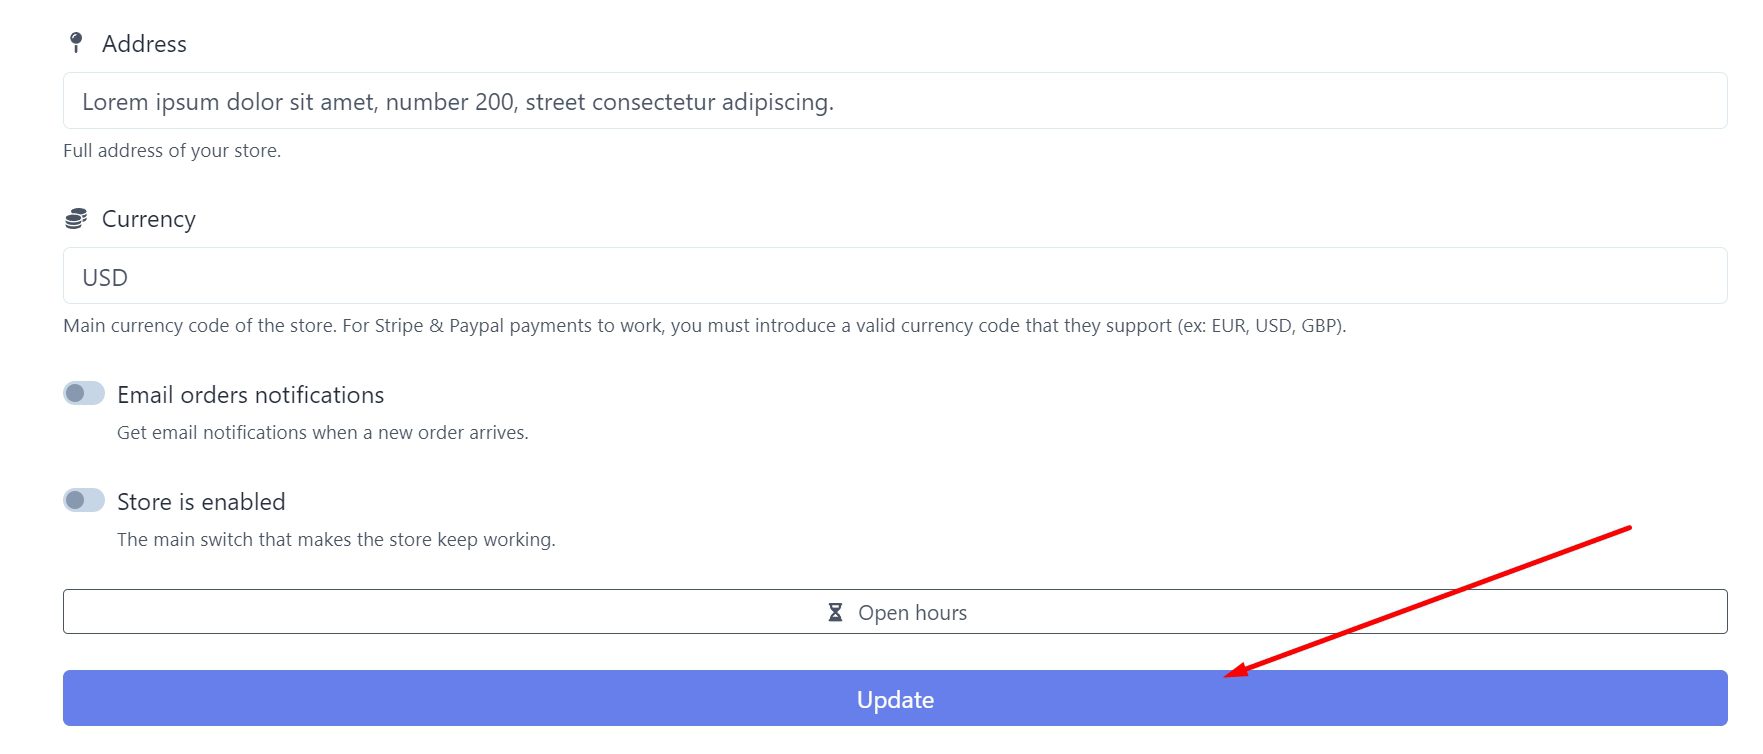
4.- Find the Enable or Disable Store Setting. Scroll down until you find the section that indicates “Store is enabled”. Here is where you can enable or disable your online store.
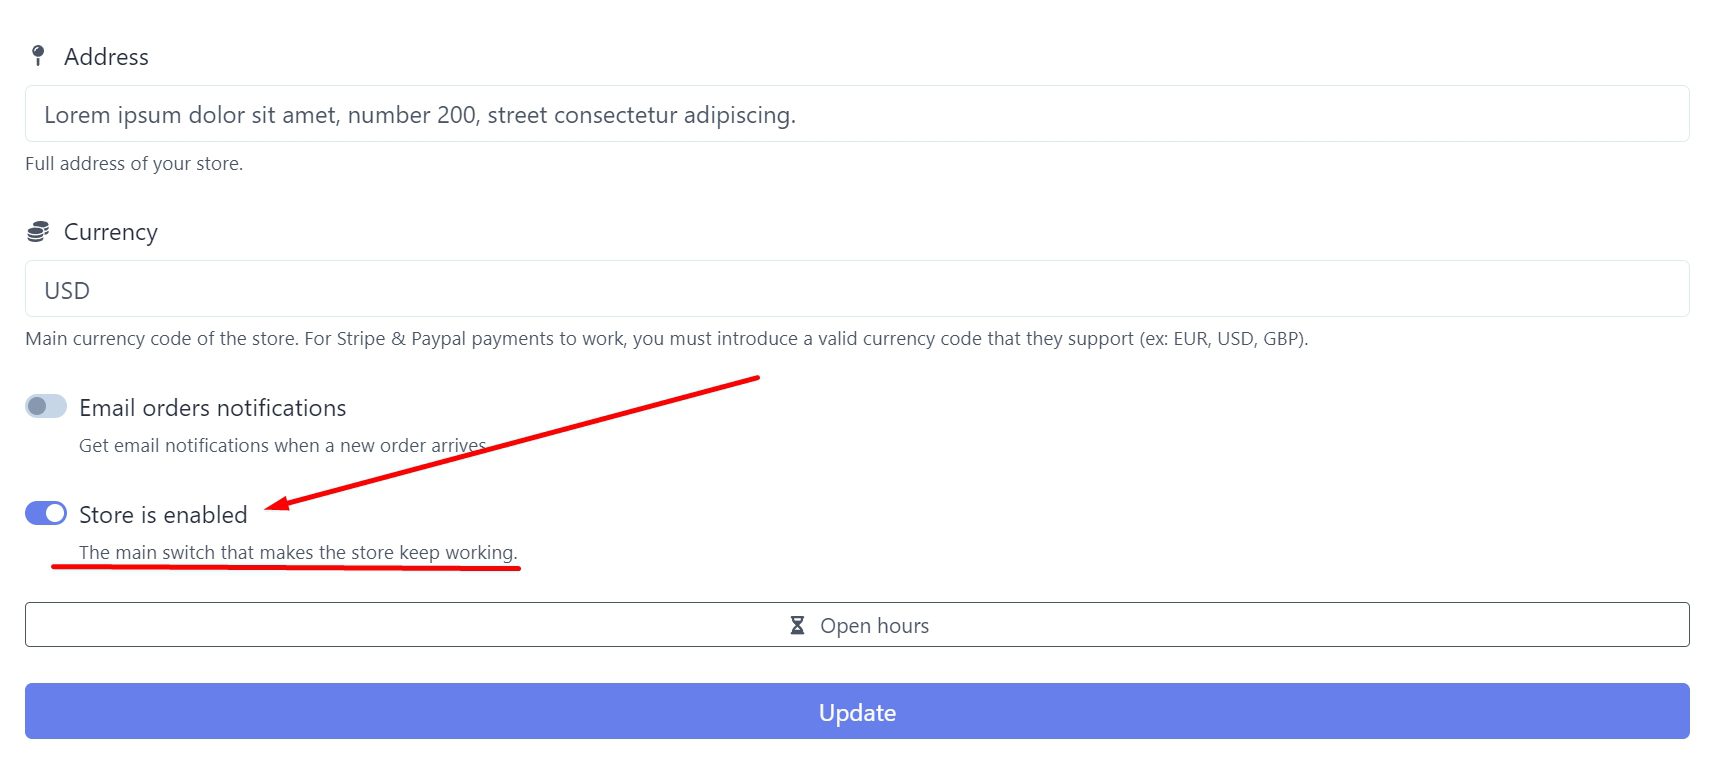
5.- Activate or Deactivate Your Store. Click on the corresponding button to activate or deactivate your store as needed. Make sure the status reflects your current intentions.
6.- Save Changes. Once you’ve made the desired changes, be sure to click the “Update” button to save your settings. This will ensure that the changes are applied correctly.
And there you have it! You’ve completed the process to enable or disable your online store. Now you can perform this process on any page of your platform as needed.
