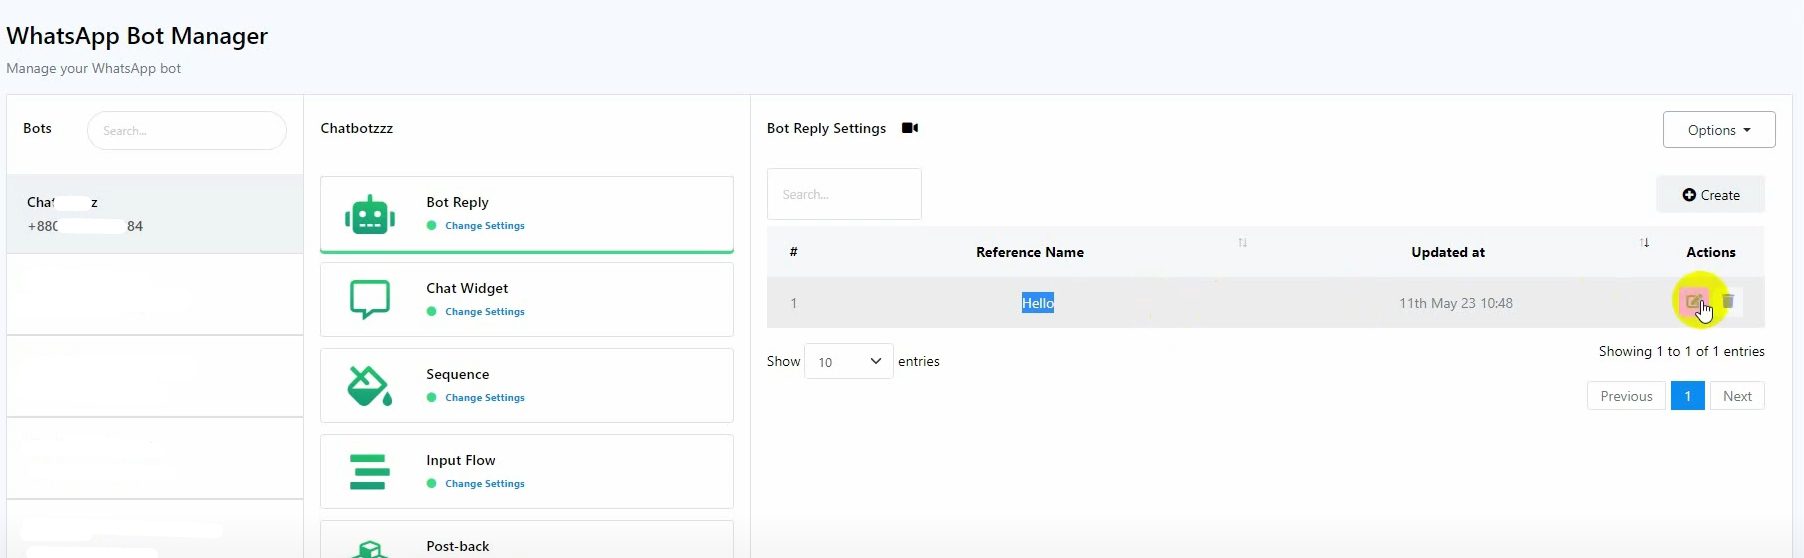
This is a step-by-step guide to collect data using user input flow and custom fields on WhatsApp:
1. Setting Up the User Input Flow #
- Create a Simple Chatbot:
- Start with a basic chatbot that you’ve created before.
- Add User Input Flow:
- Edit the existing bot and include a user input flow.
- Drag the user input flow from the dock menu and drop it on the canvas.
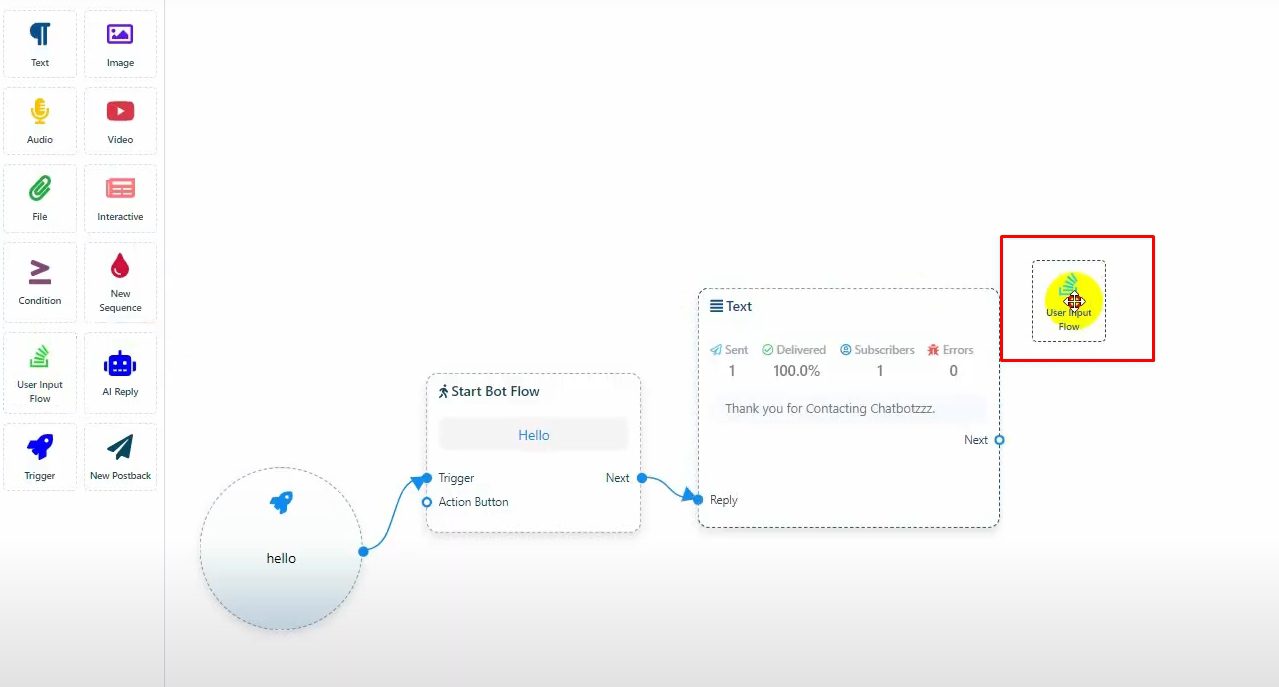
-
- Connect it with the previous reply and double-click on it to open the configuration.
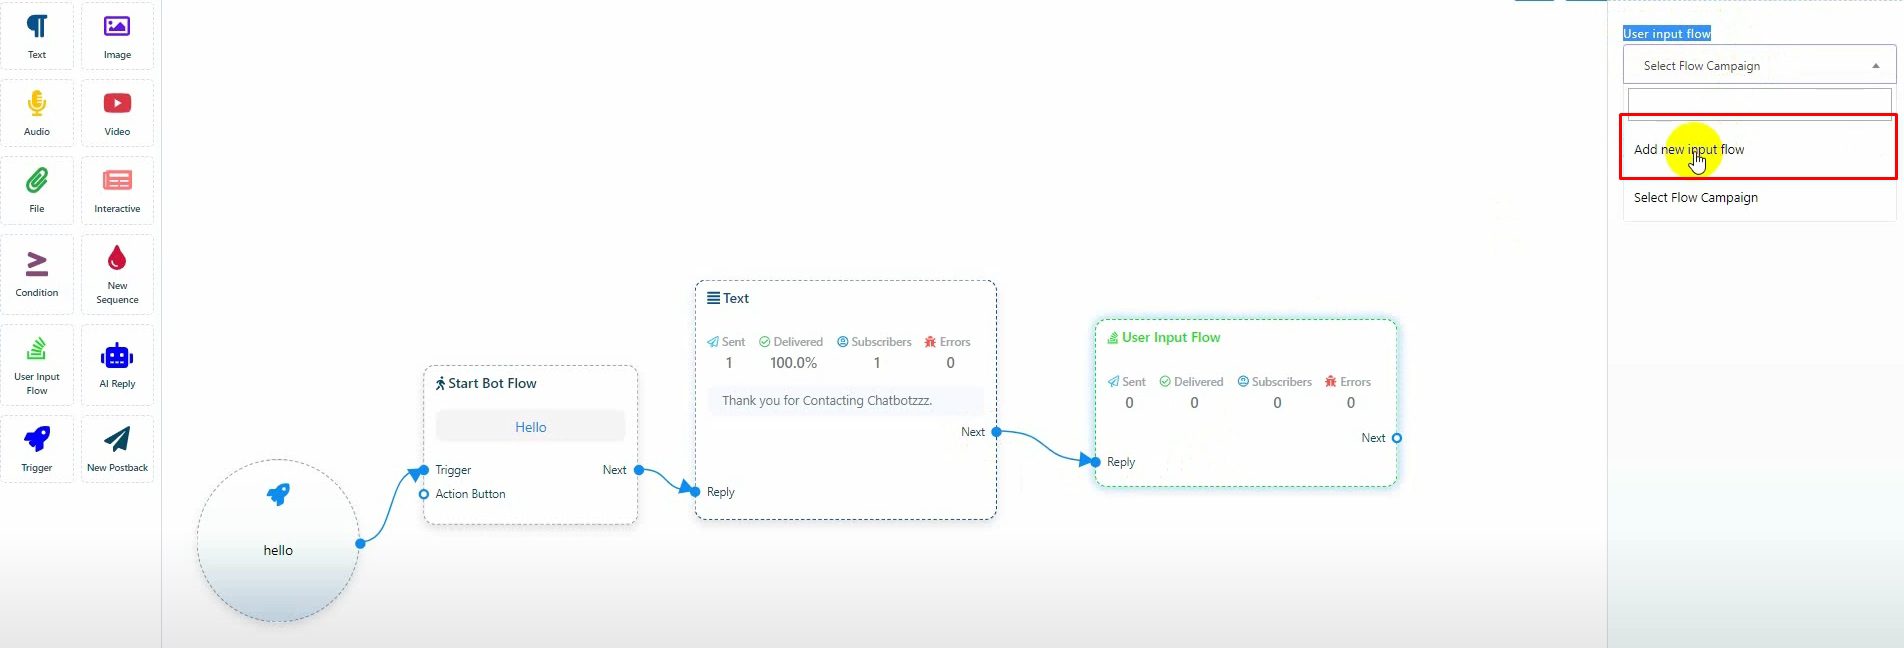
2. Creating a New Input Flow #
- Add New Input Flow:
- Select “Add New Input Flow” to create a new user input flow.
-
- Name the input flow and click “OK.”
- Configure the First Question:
- Double-click the newly added question to configure it.
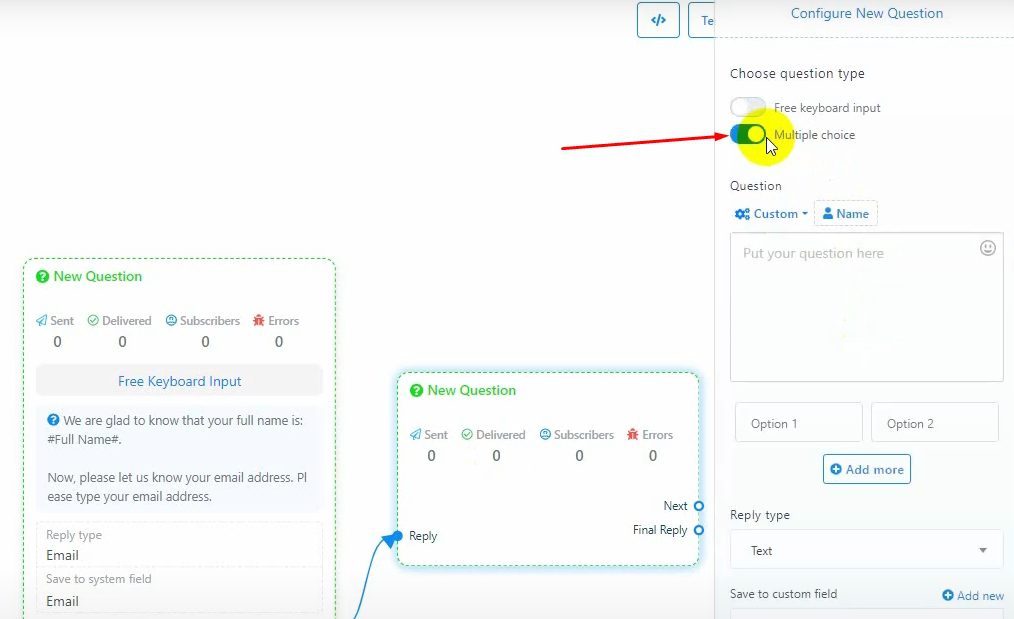
- Choose between “Free Keyboard Input” and “Multiple Choice.”
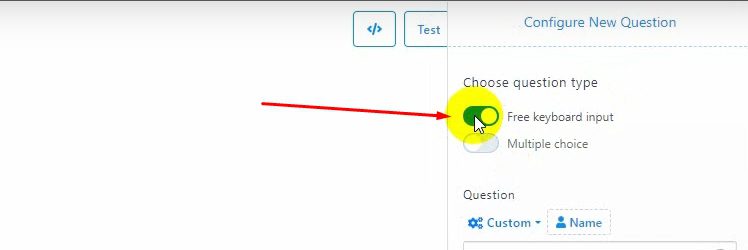
-
- For this tutorial, select “Free Keyboard Input.”
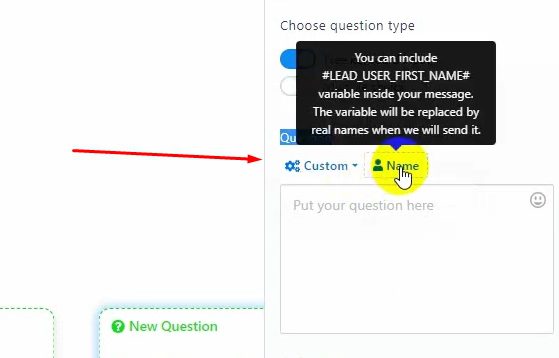
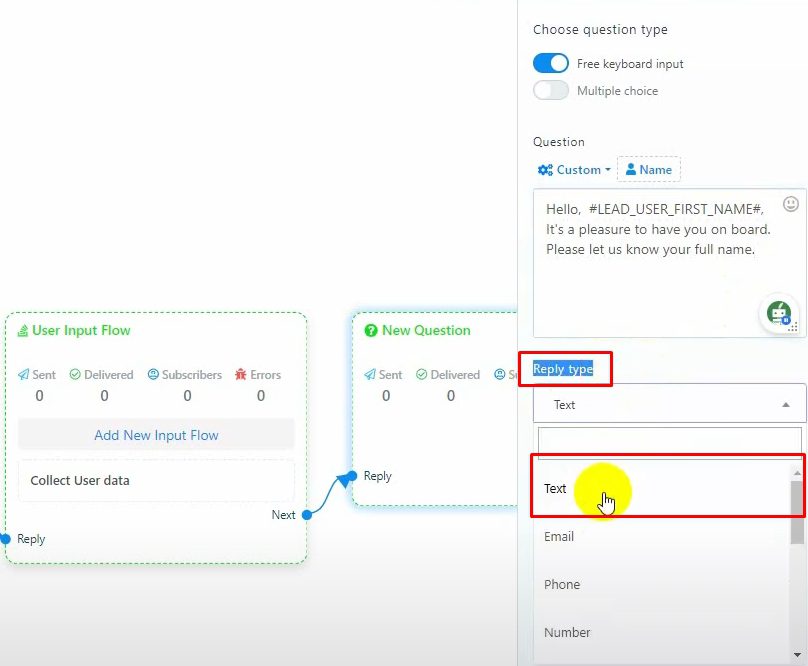
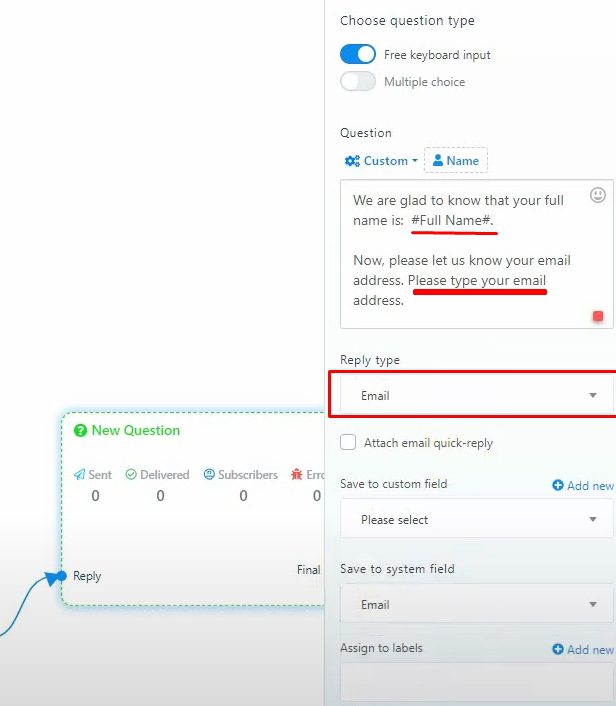
- Write the Question:
- Enter the question in the question field.Use a custom field and the user’s name in the question.
-
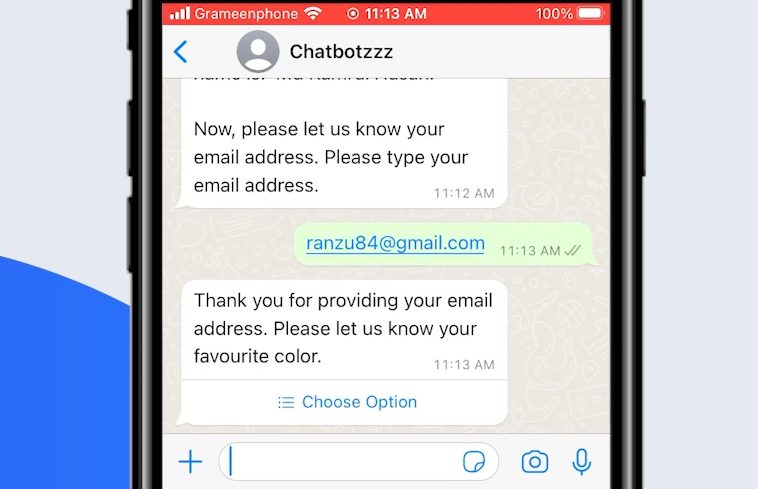
- For example, ask for the user’s full name and select the reply type as text.
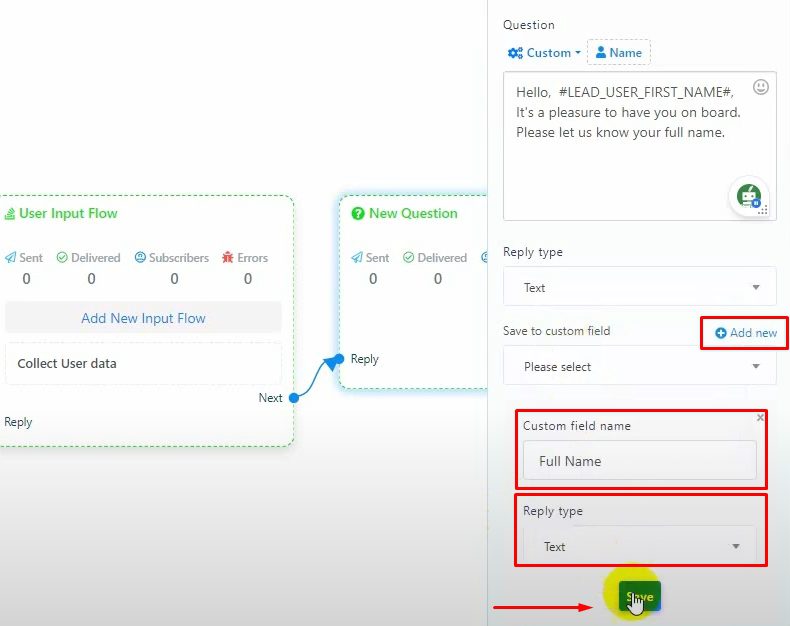
- Save Answer Data:
- Save the answer data in a custom field or a system field (e.g., email, phone, birthday).
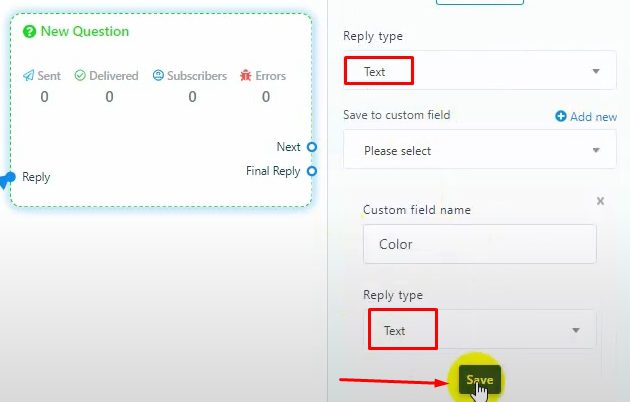
- To create a new custom field, click “Add New,” name the field, select the type, and save it.
- Select the custom field from the dropdown list.

- Optional Settings:
- Assign a label to the user if needed.
- Optionally, assign a sequence message (not used in this instance).
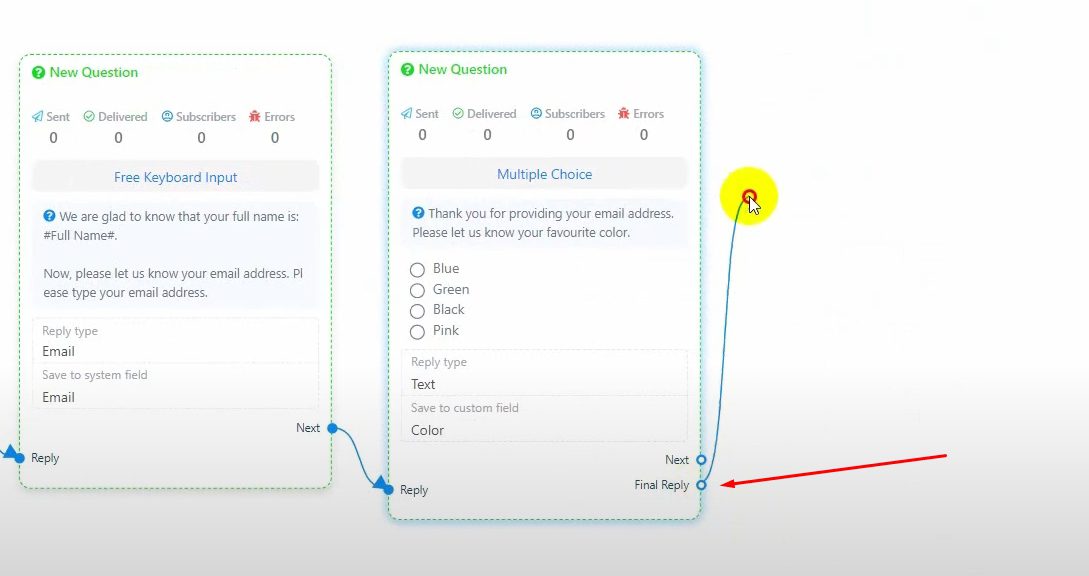
3. Adding More Questions #
- Collect User’s Email Address:
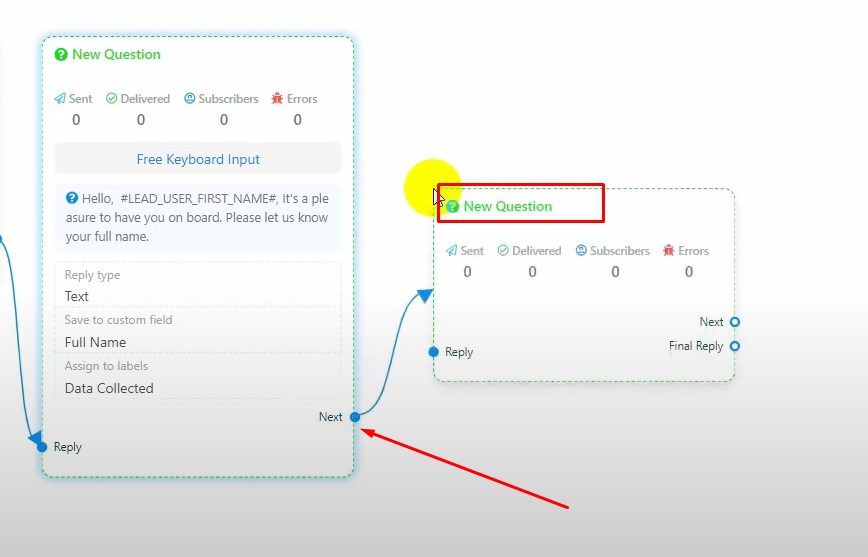
- Drag the connector from the next socket to add another question.

- Address the user by their full name using the previously saved custom field.
- Drag the connector from the next socket to add another question.
-
- Save this data to the system field.
- Multiple Choice Questions:
- Add another question with multiple choice options.
-
- Type the question and add the options for the answer.
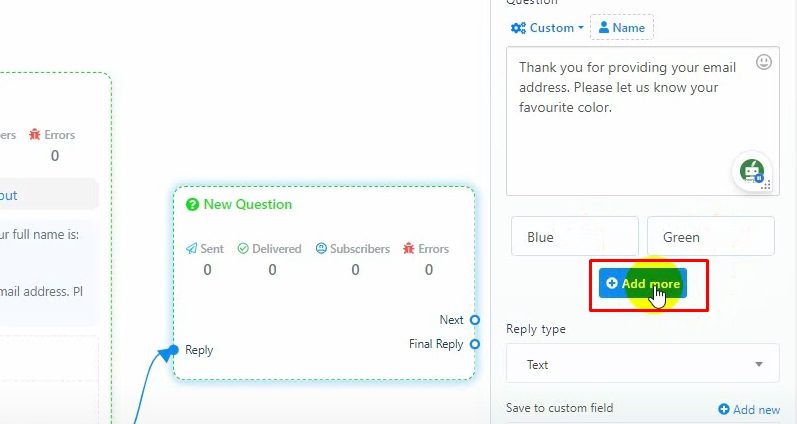
-
- Click “Add More” to include additional options.
- Select the reply type and custom field to save the data.
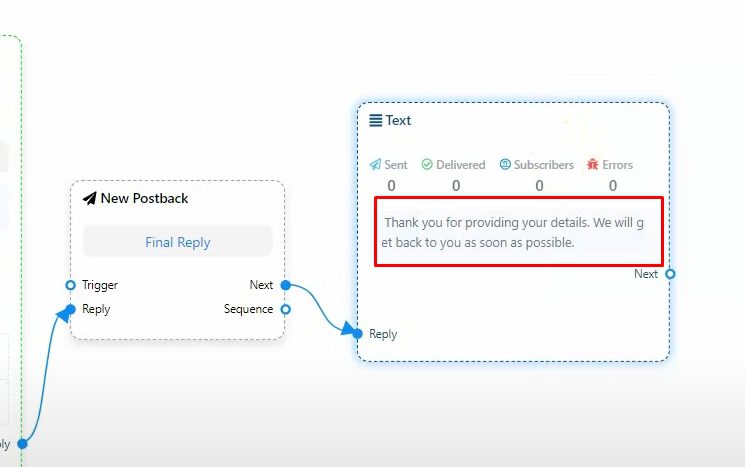
4. Finalizing the User Input Flow #
- Add a Final Reply:
- Drag a connector from the final reply and leave the cursor.
-
- Name the new post back and add a reply to it.
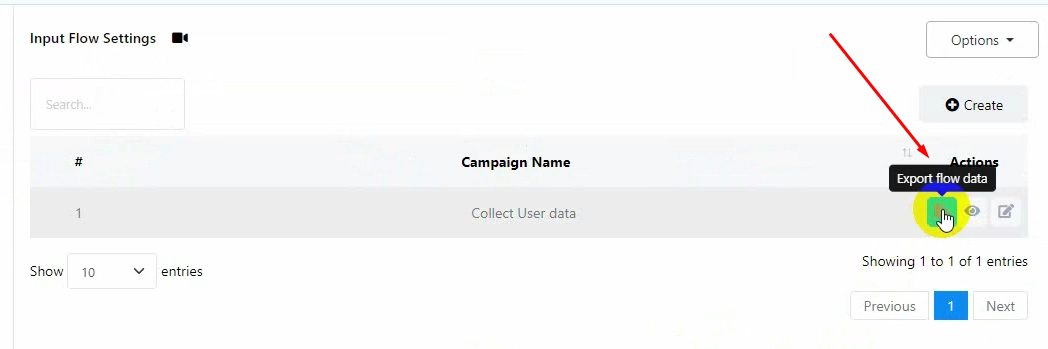
5. Exporting and Viewing Data #
- Export Data:
- From the bot manager, go to the user input flow.

- Click “Export Flow Data” to export the data to a CSV file.

- From the bot manager, go to the user input flow.
- View Reports:
- You can also see the user input flow data from the subscriber manager.

Go to the Subscriber Manager, click on the actions of the subscriber, and select the input flow.


By following these steps, you can effectively use the user input flow and custom fields on your WhatsApp chatbot with BotCommerce.